Skip table of contents

[ENG] Asset Transfer

Screen Name

Asset Transfer

Login – Asset Management – Asset Transfer

Summary

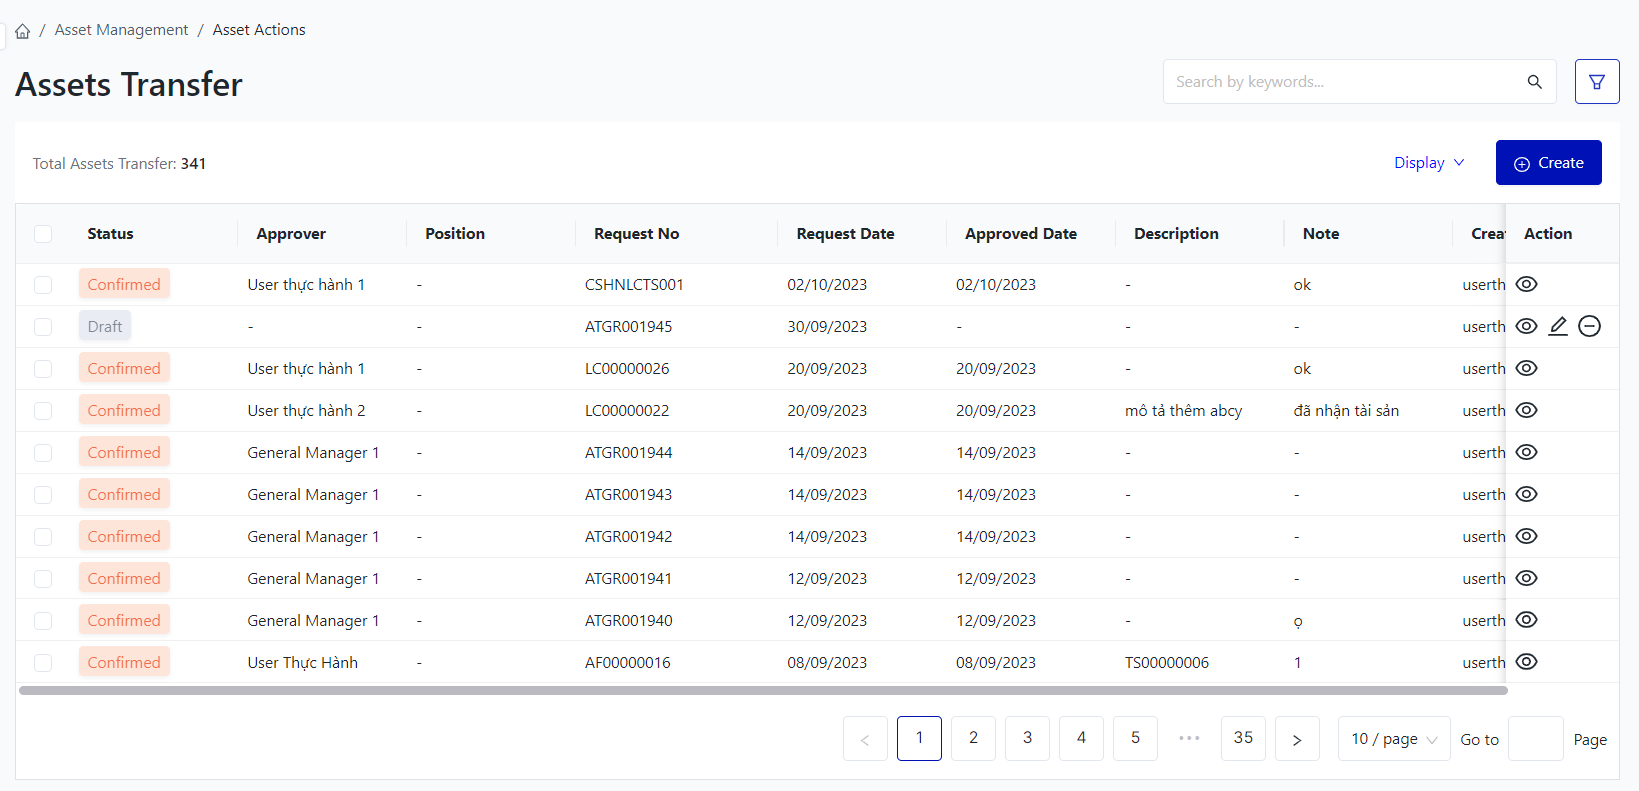
The screen manages the entire list of asset transfer of the facility

Screen

Fields Description

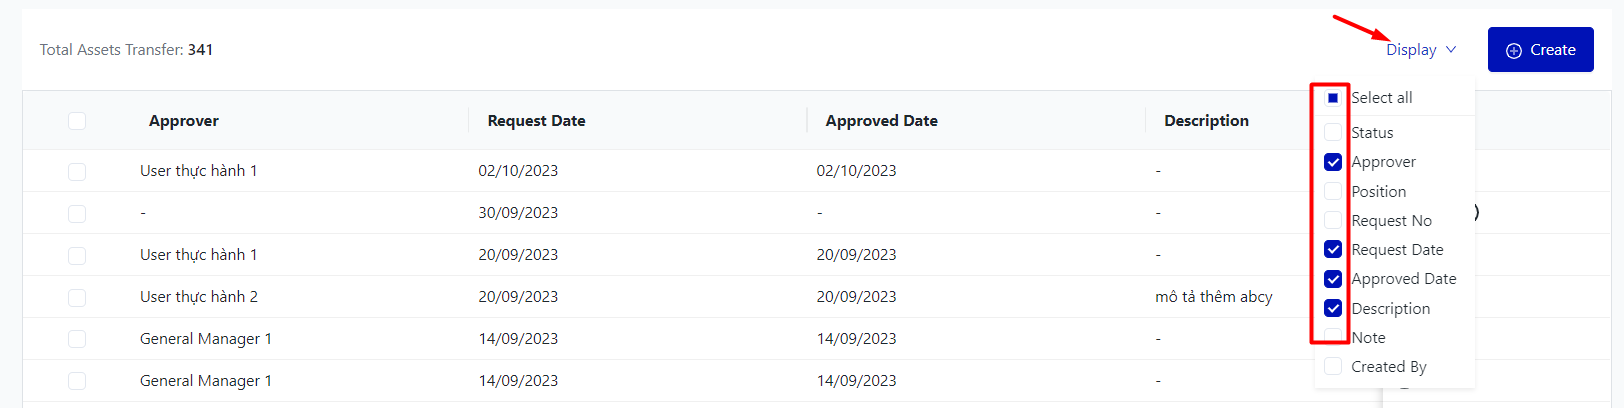
I. Filter and search asset transfer

  • Search by keywords: Users enter search information in the search box, supporting search by Request No

  • Stauts: Asset transfer requests have the following statuses:

    • Draft: users can edit information or delete the request when the asset transfer request is in the draft state

    • Submitted: users cannot edit it but can choose to approve or reject it

    • Approved: When the request is approved

    • Rejected: If it is rejected, the approver or the receiver can reject it and the user can edit the information and then resubmit it

    • Confirmed: the receiver confirms the request, and the request status changes to confirmed. When the request is in this state, the assets will be transferred according to the information in the request

  • From date - to date: the time range of creating the request

  • Asset name: select the assets that have been created in the request.

  • Create by: select the name of the request creator.

  • Approved by: select the name of the approver/receiver.

  • Clear all: delete all the previously selected filter conditions.

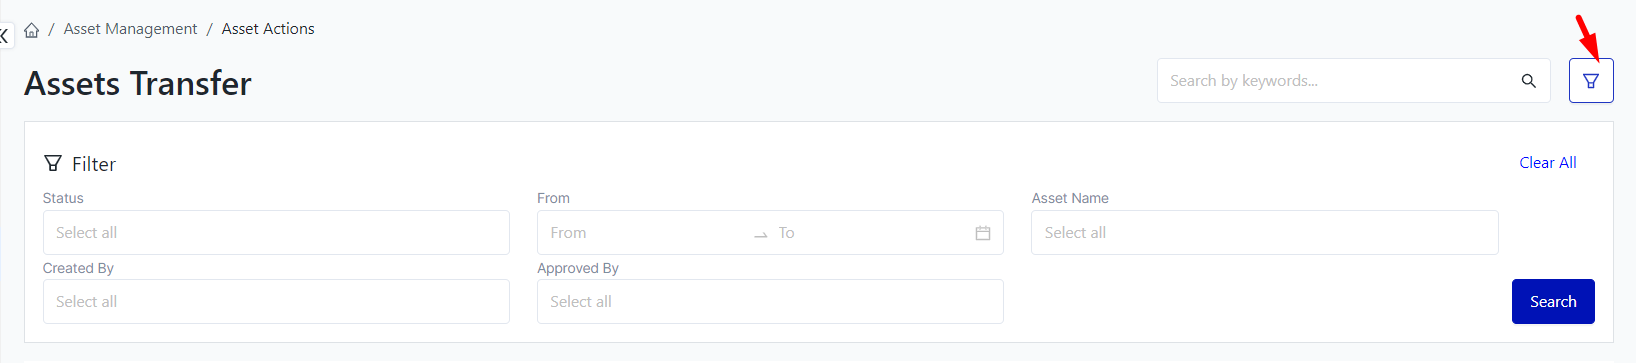
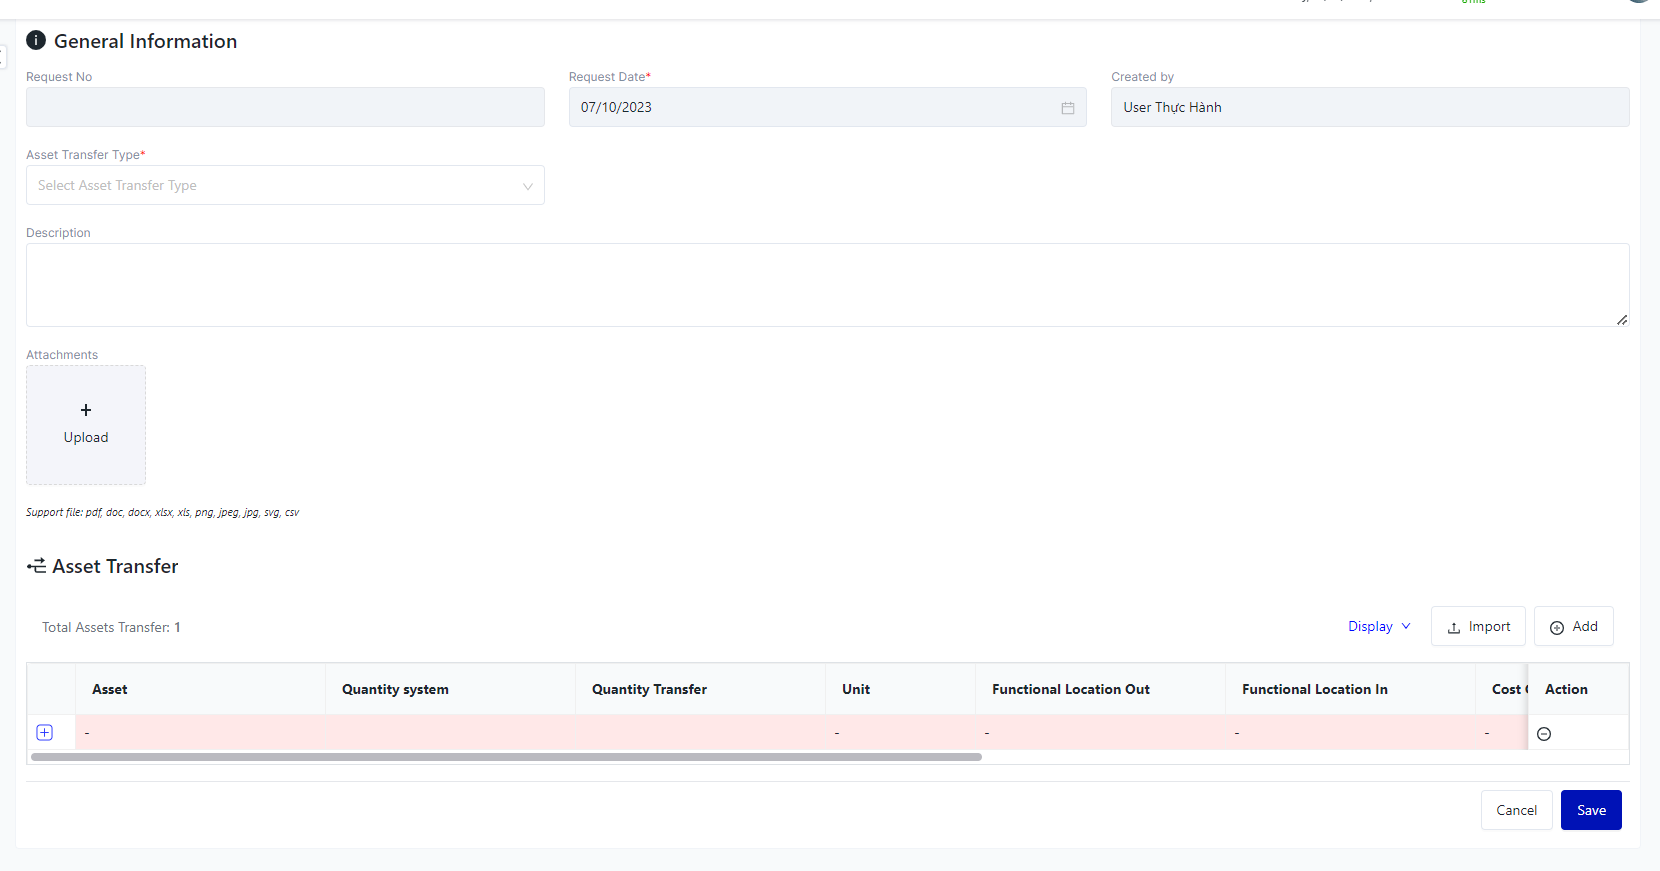
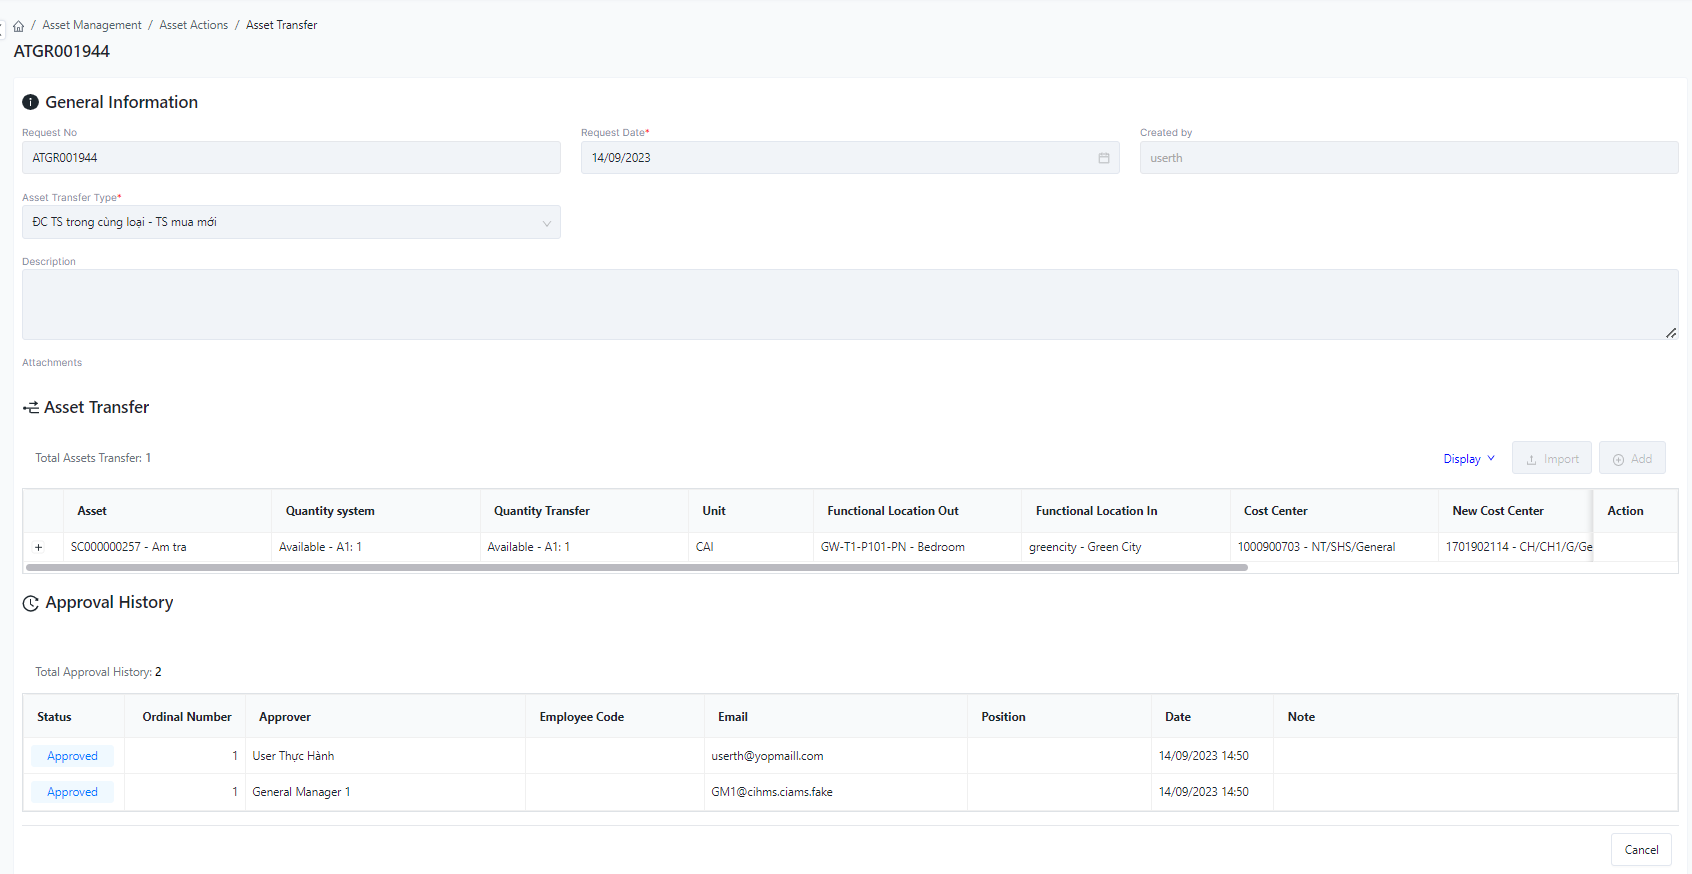
II. The fields for asset transfer

  • Click on "Display" to tick the fields of information that the user wants to show

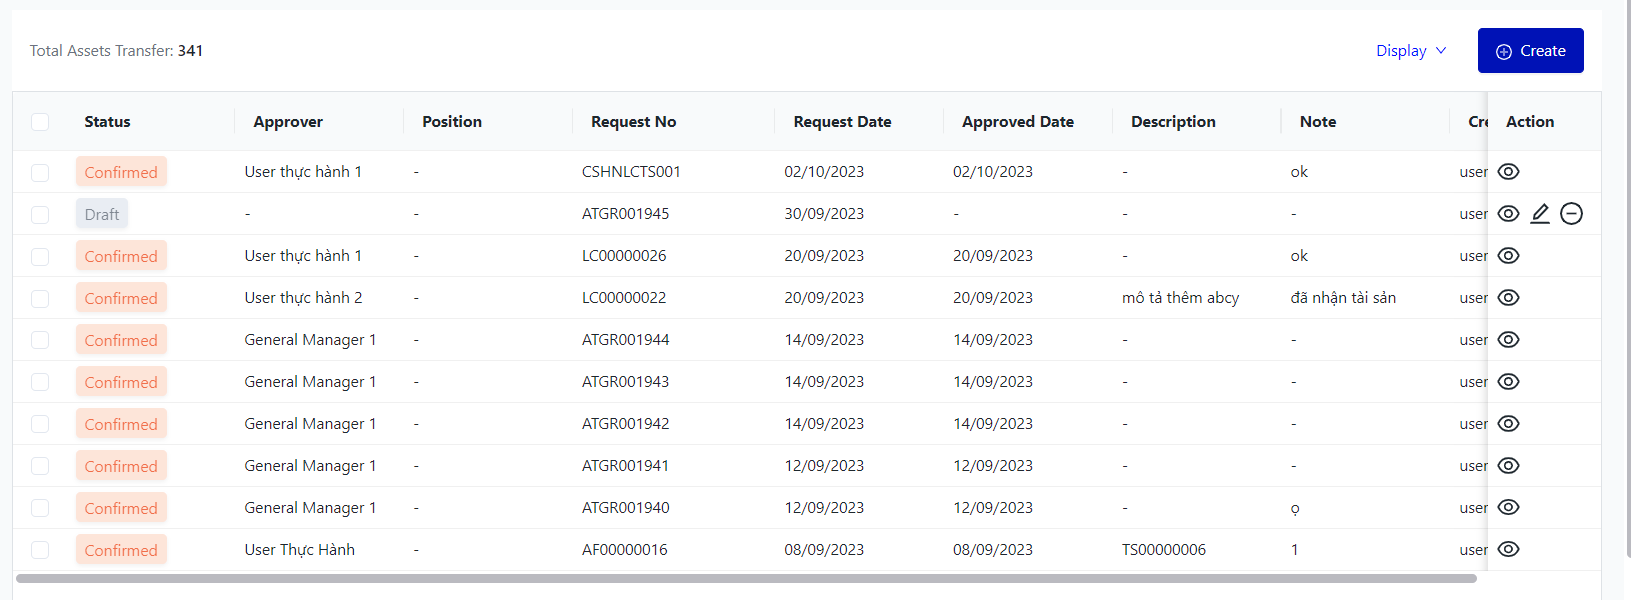
III. The main functions
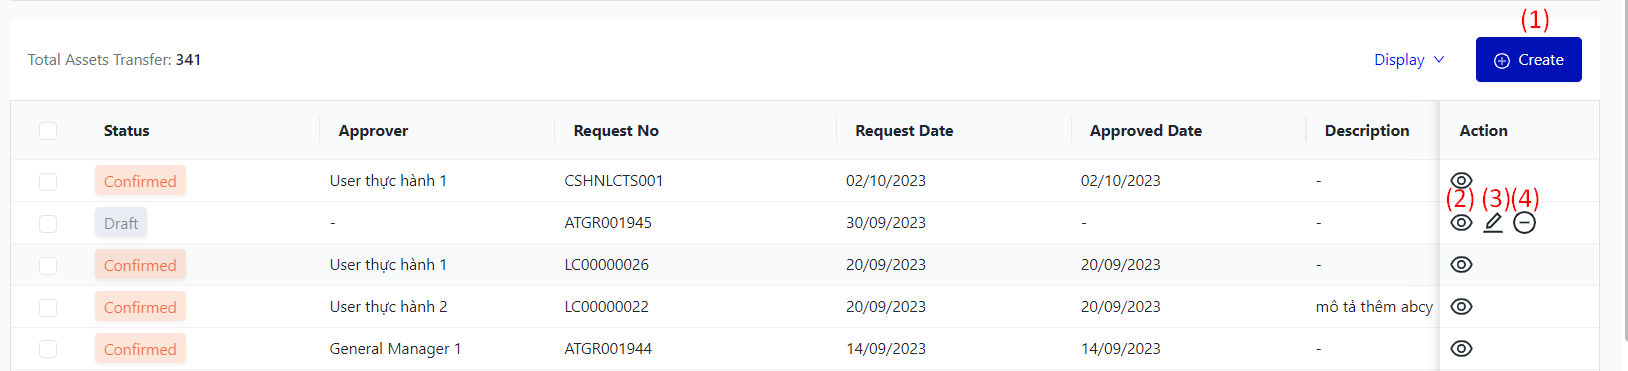
  • (1) Create an asset transfer request: users can transfer one or multiple assets to another area/department/facility

    • Request No: The system will automatically generate a request code after the user update and save the request.

    • Request date: The date the user creates the request.

    • Created by: The system automatically fills in the information of the user who logs into the system

    • Description: The user enters information related to the transferred assets.

    • Attachments: Attach images, excel format, PDF, etc. related to the asset transfer.

    • Asset Transfer: Includes all information related to the assets, the functional location out, the functional location in and the cost center of the functional location in. Users need to enter and fill in all fields marked with an asterisk.

    • After filling in all the necessary information, the user selects update to save the request

    • Once the request is saved, the user can select the draft request that needs to be approved from the request list screen. Then, the user can select “More actions” and request approval to proceed with selecting the approver and receiver.

  • (2) View details of asset transfer request

    • Asset transfer: Information on the code and name of the transferred asset

    • System quantity: The current quantity of that asset in the system

    • Transferred quantity: The quantity transferred to the new area

    • Unit: The unit of the transferred asset

    • Functional Location Out: The current area of the asset

    • Functional Location In: The area after the asset transfer is completed

    • Cost center: The current cost center of the asset

    • New cost center: The cost center after the asset transfer

    • New Resource: The recipient after the asset is transferred to the receiving area

    • Note: Additional notes if any.

  • (3) Edit asset transfer request

    • The transfer request can be edited if it is in draft status or has been rejected.

    • The information fields that can be edited are the same as those in the create new transfer request section.

  • (4) Delete asset transfer request

    • The transfer request can only be deleted when it is in draft status.

Remarks

N/A

JavaScript errors detected

Please note, these errors can depend on your browser setup.

If this problem persists, please contact our support.