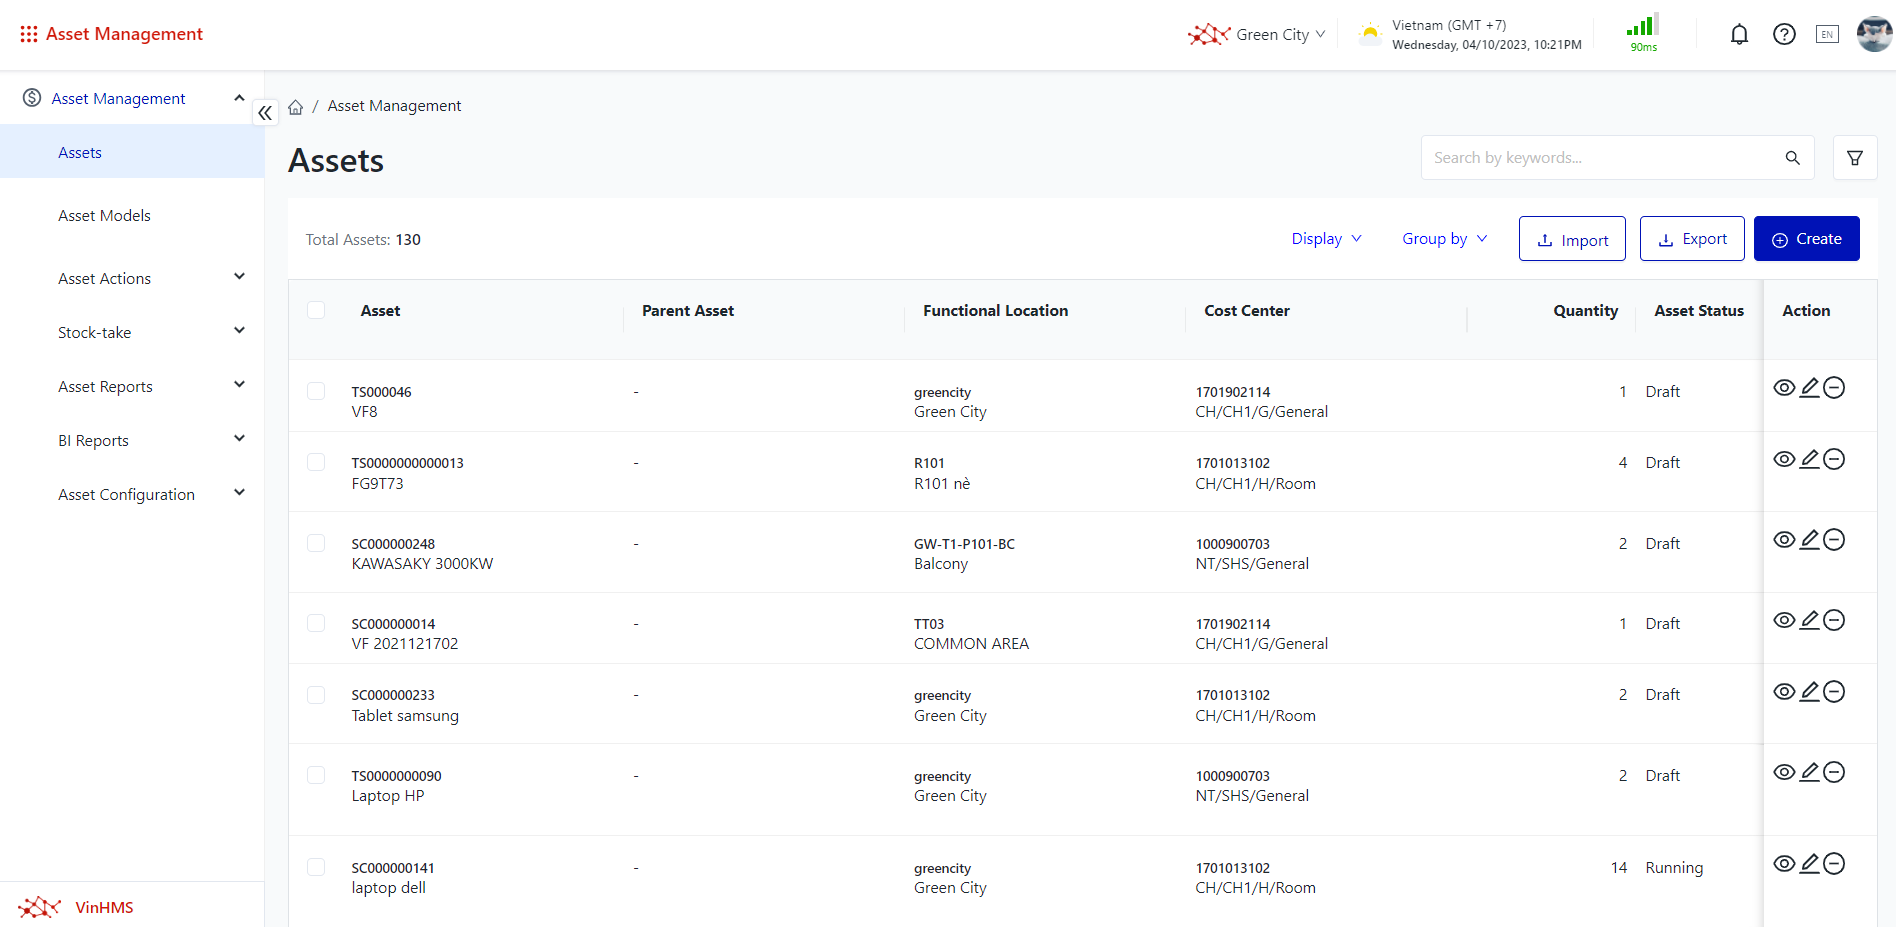
The screen manages the entire list of asset information of the facility
Screen
Fields Description
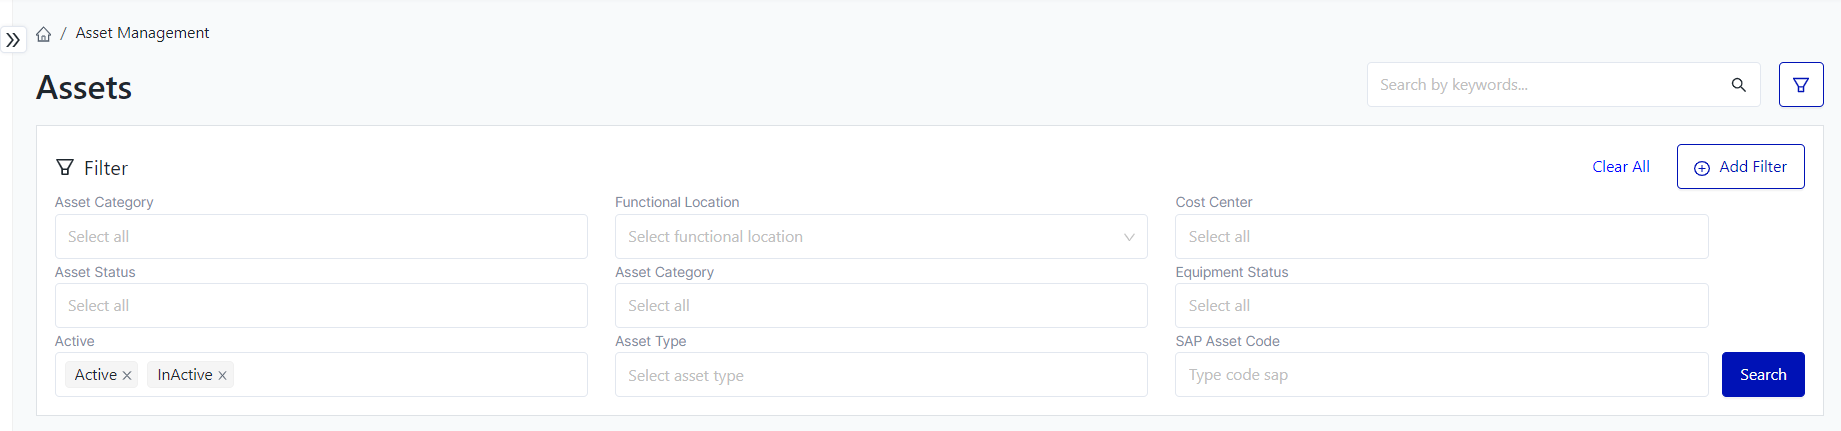
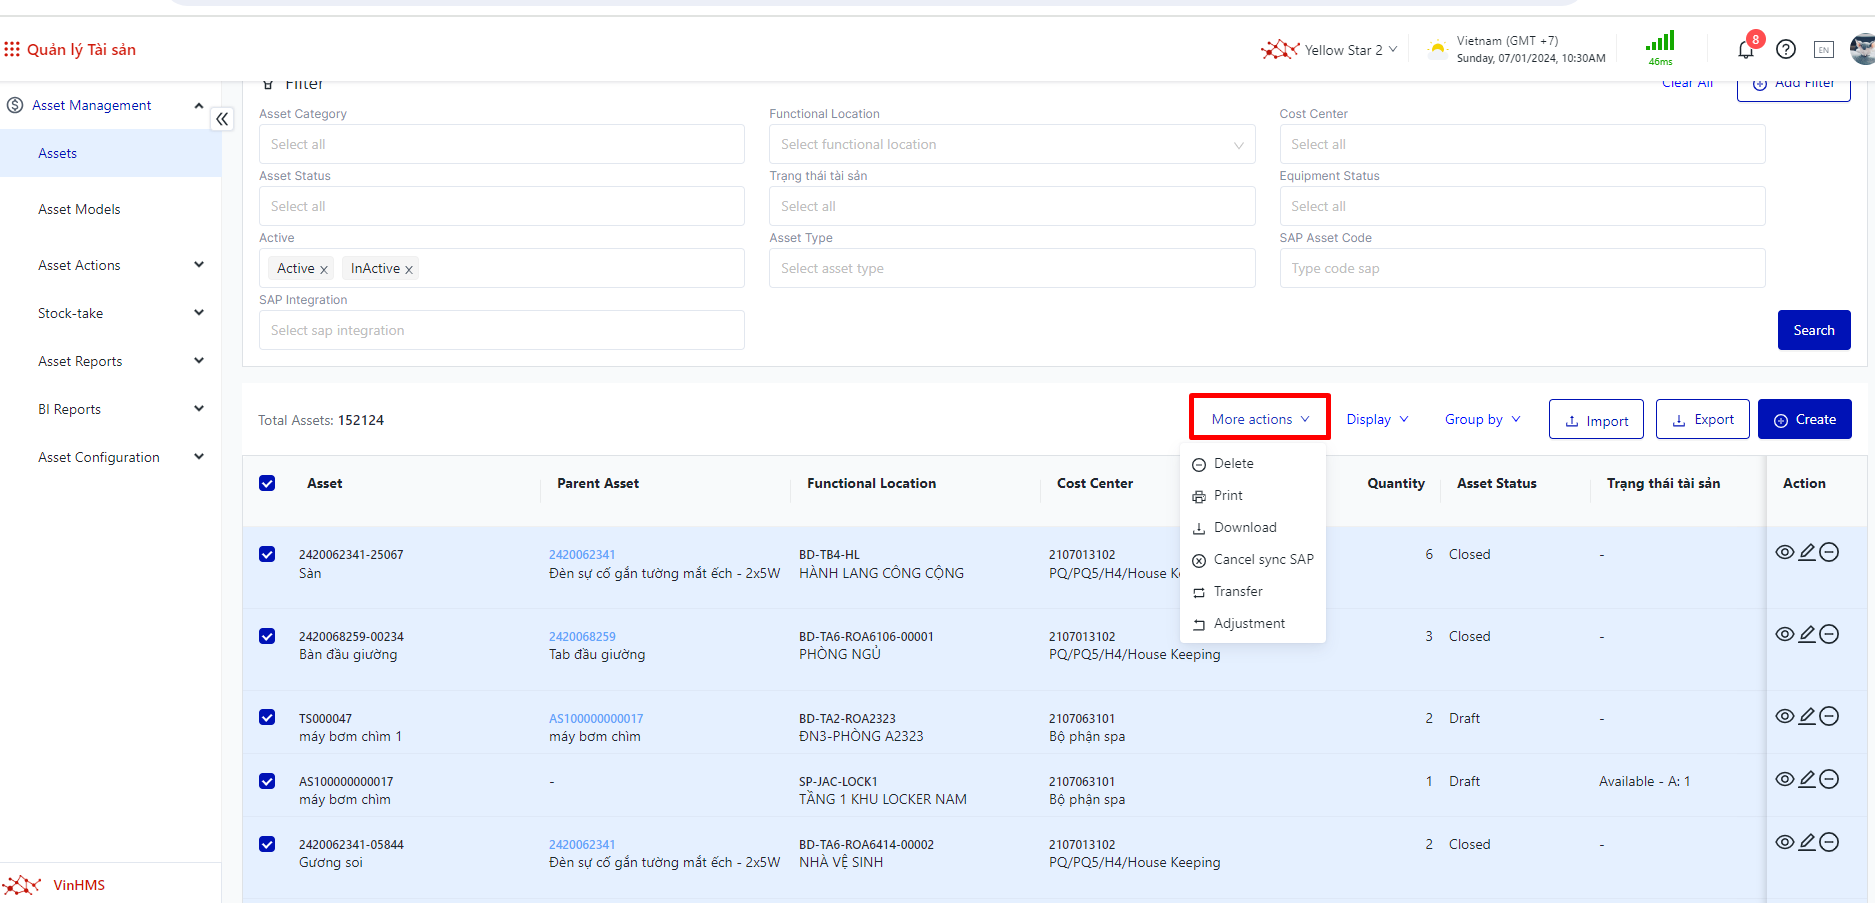
I. Filter and search assets
Search: Users enter search information in the search box, supporting search by "Asset code" or "Asset name".
Asset Category
Functional Location: Contains that asset
Asset Status: Draft/ Running/ On hold/ Close
Active: Active/ Inactive
Clear all: Helps to delete all previously searched filter conditions
Add filter: In addition to the default filter conditions, users can add other filter conditions for more convenient asset searching.
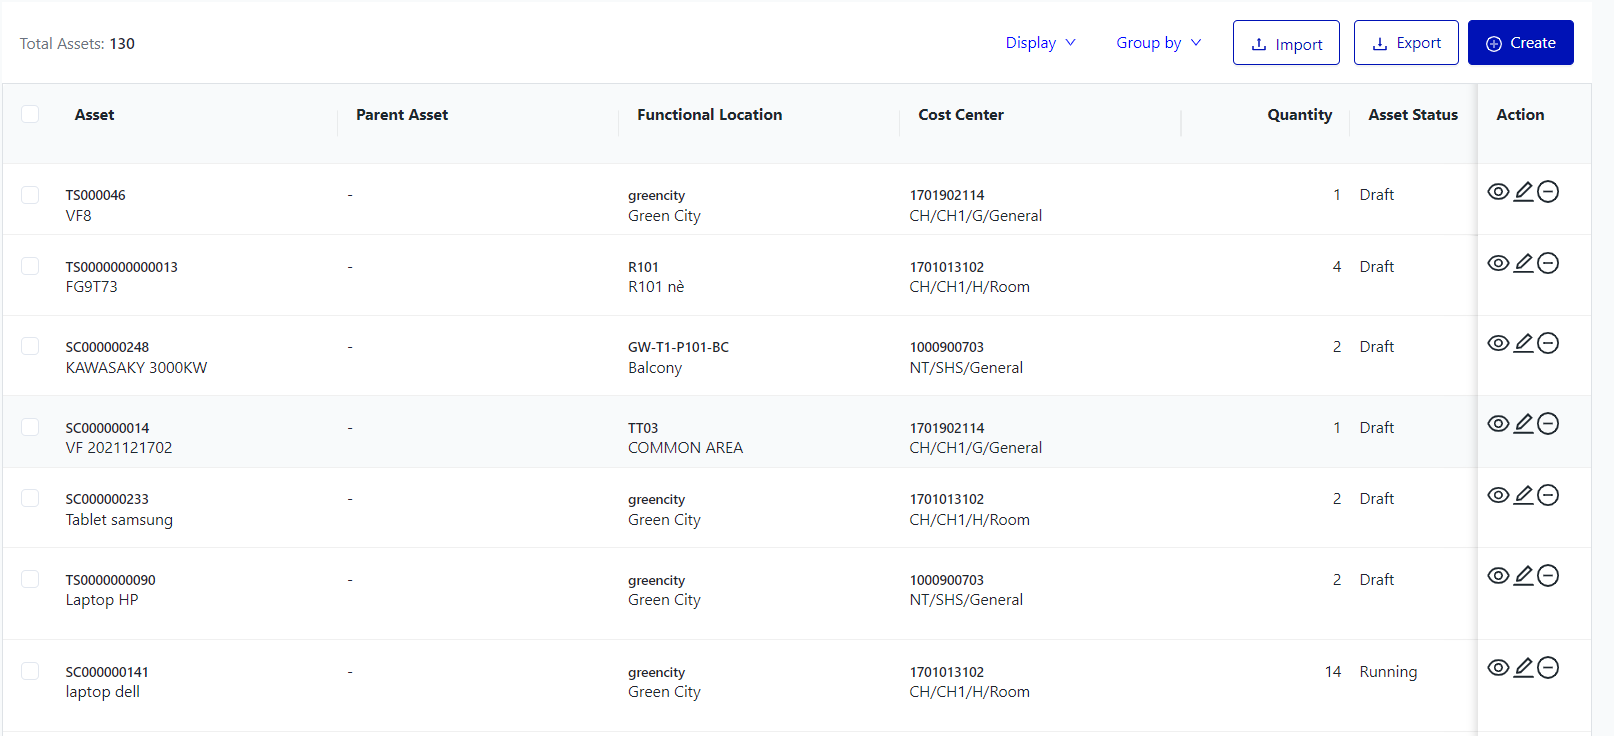
II. The fields for asset information
Click on "Display" to tick the fields of information that the user wants to show
Click on "Group by" to view assets by asset groups
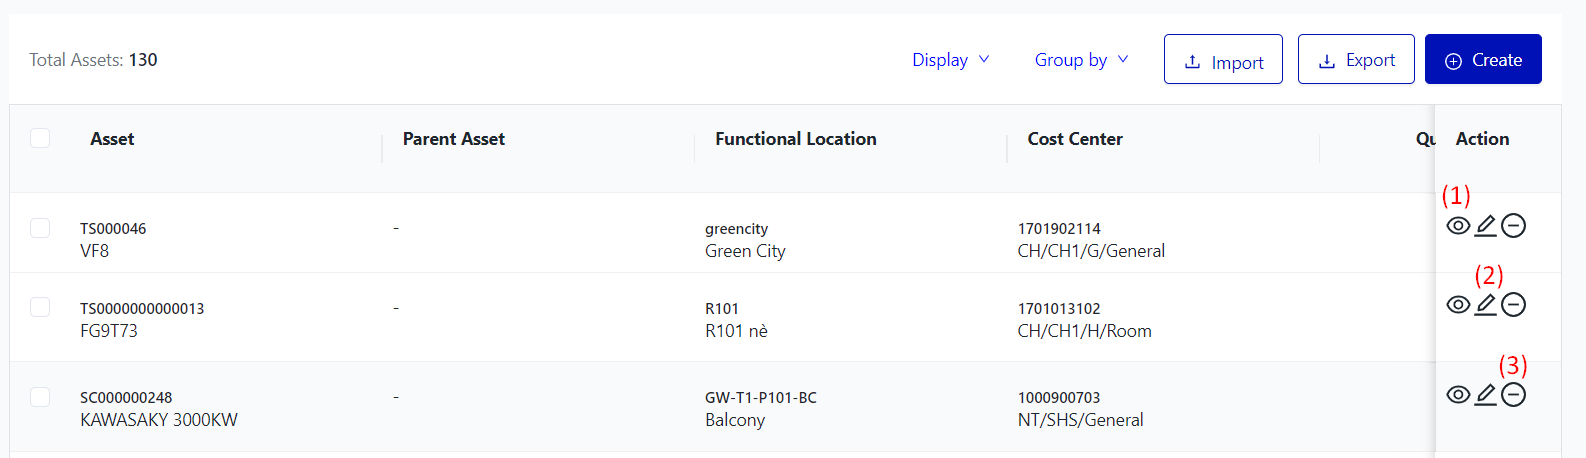
III. The main functions of an asset management system
(1) View detail: To view detailed information about an asset
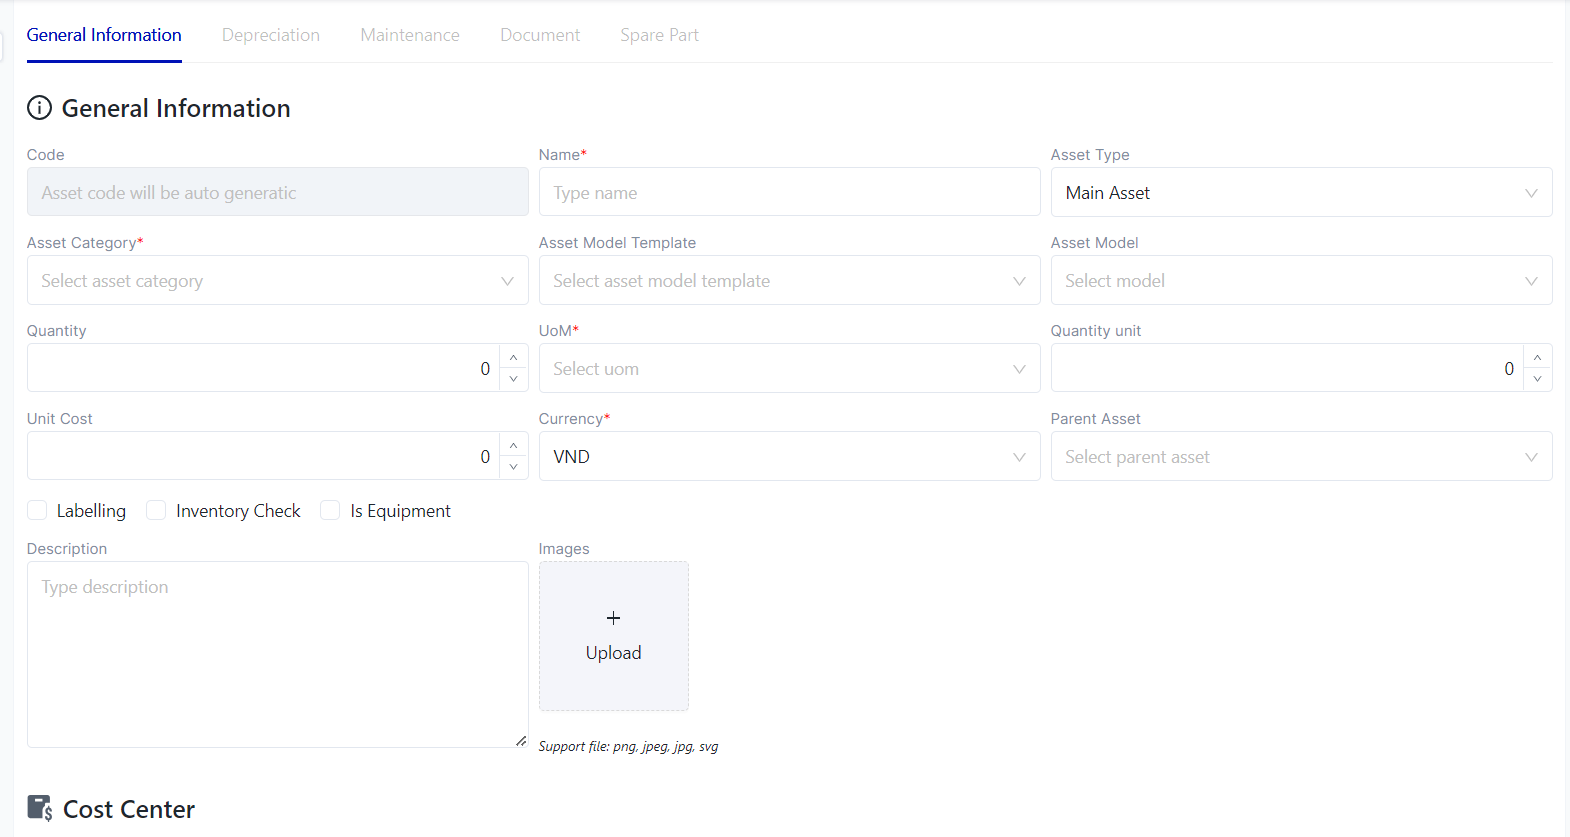
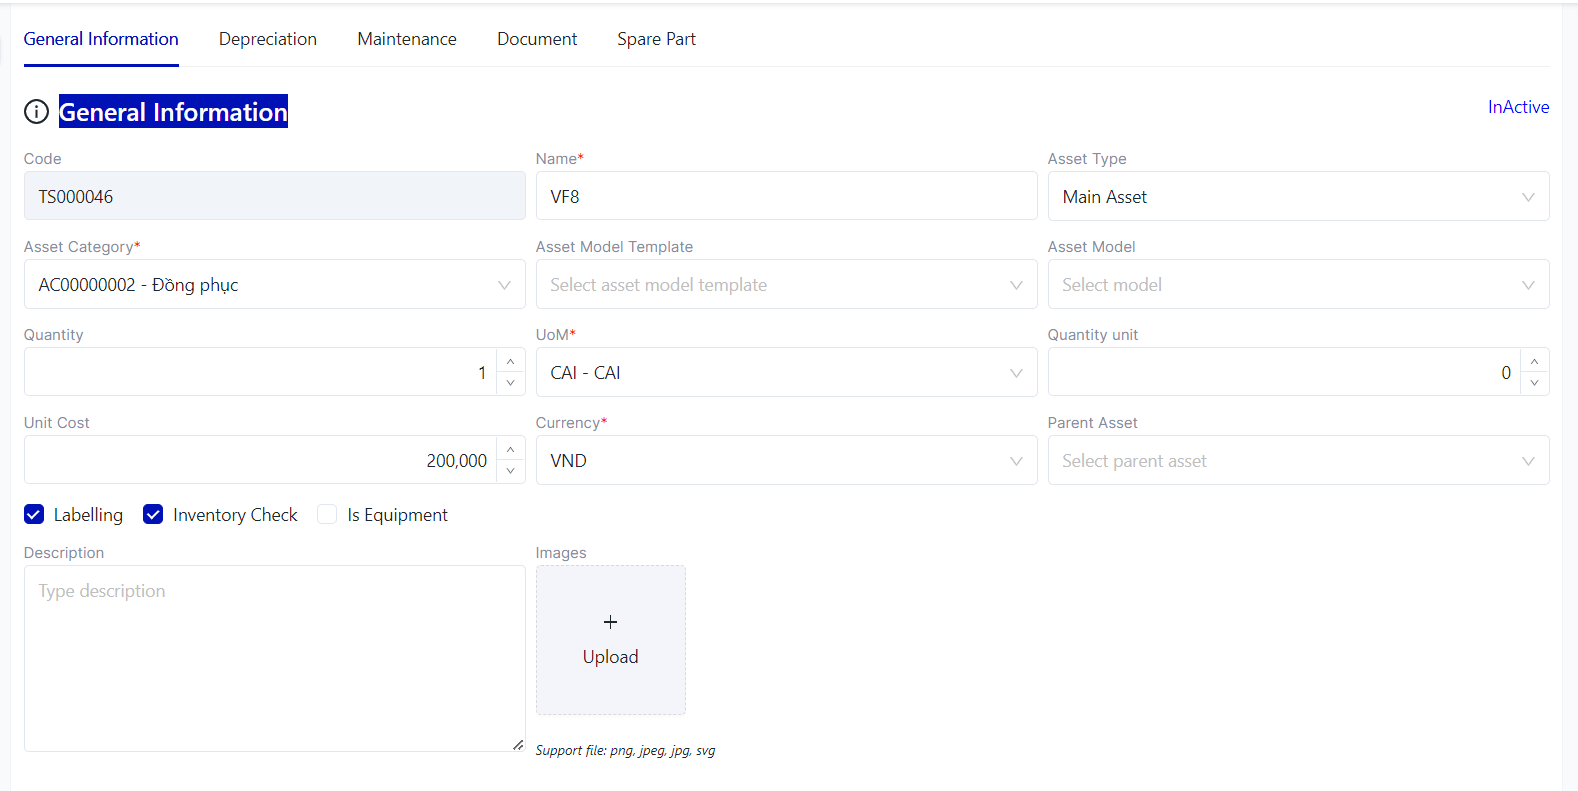
General Information: To view general information of an asset
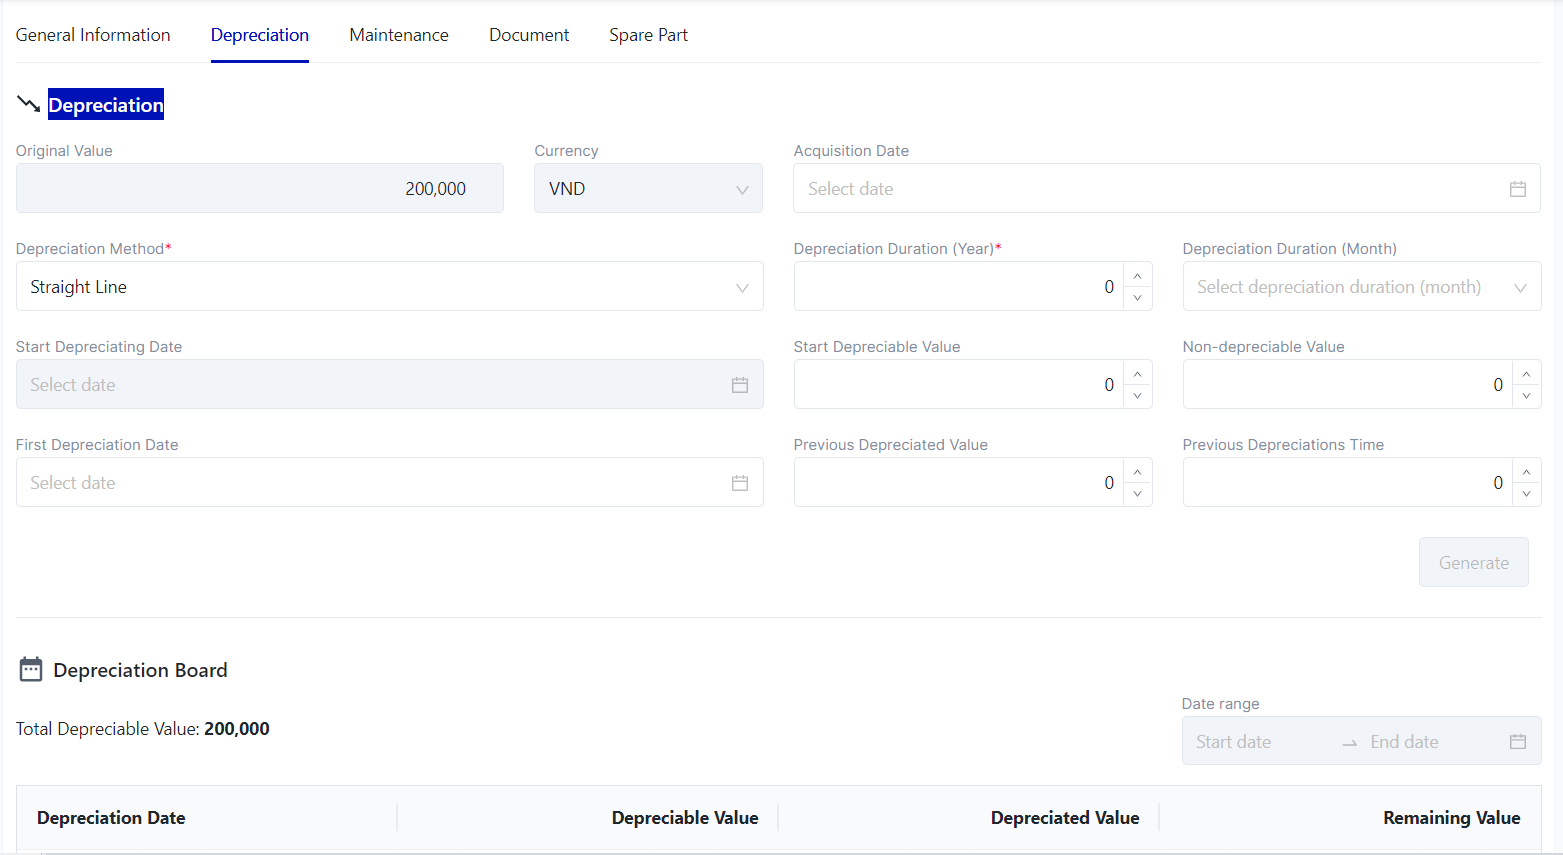
Depreciation Information: To view detailed information about the depreciation of an asset
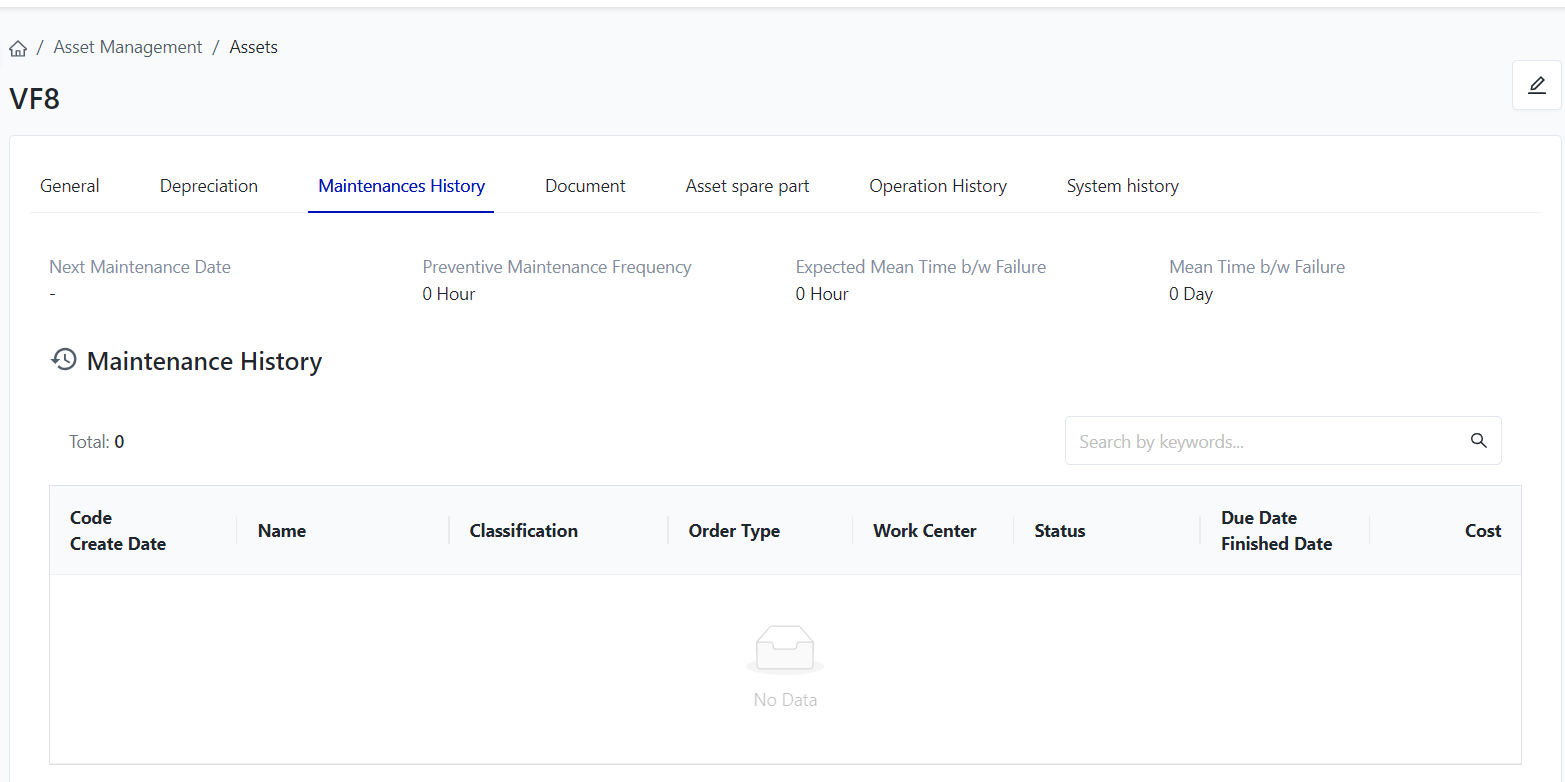
Maintenance: To view detailed information about the maintenance and repair history of an asset
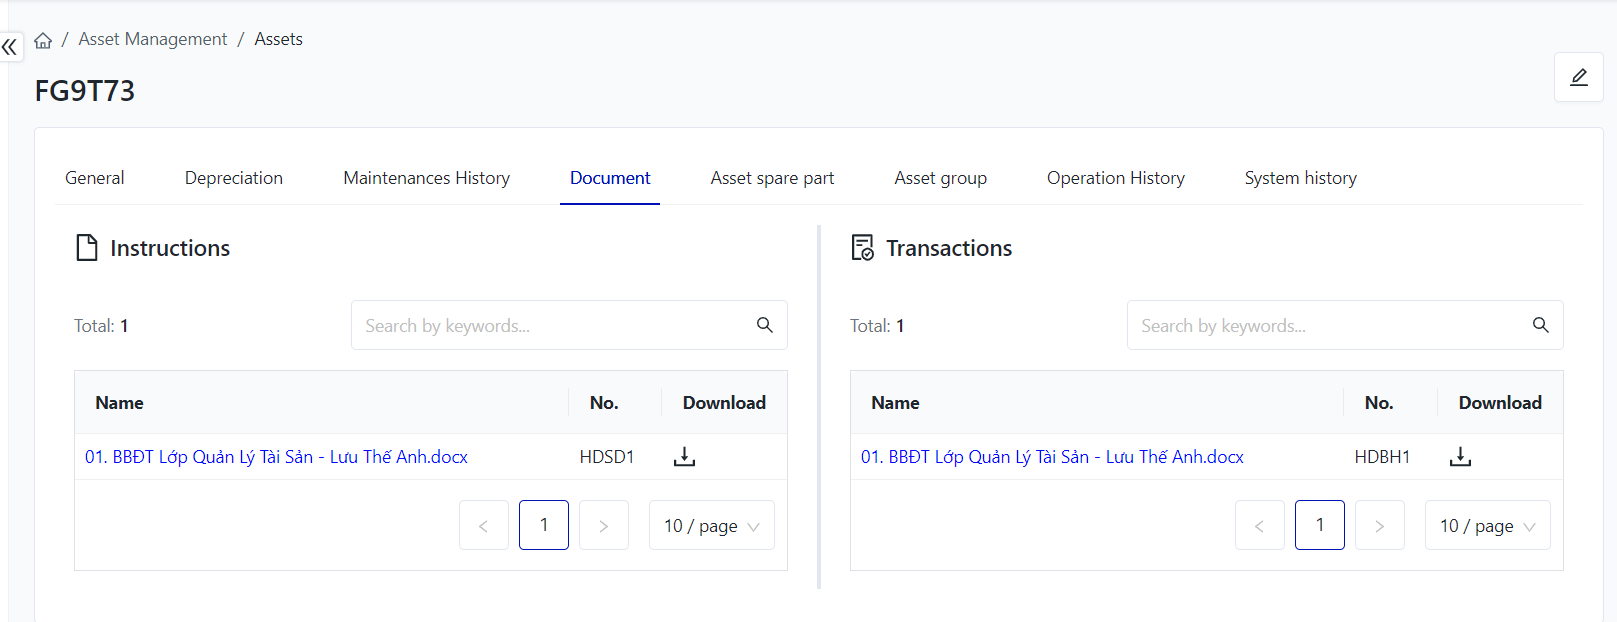
Document: Toview detailed information about the usage instructions and purchase contract of an asset
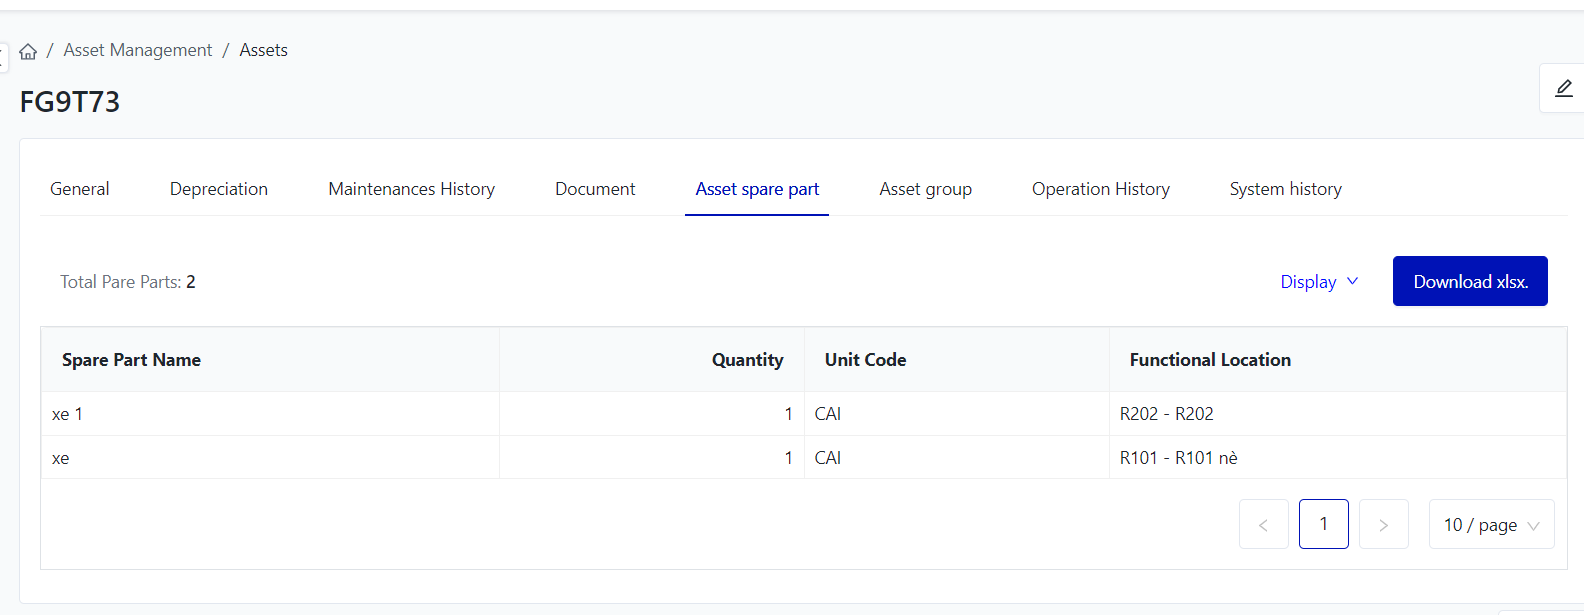
Asset spare part: To view detailed information about the components that come with an asset
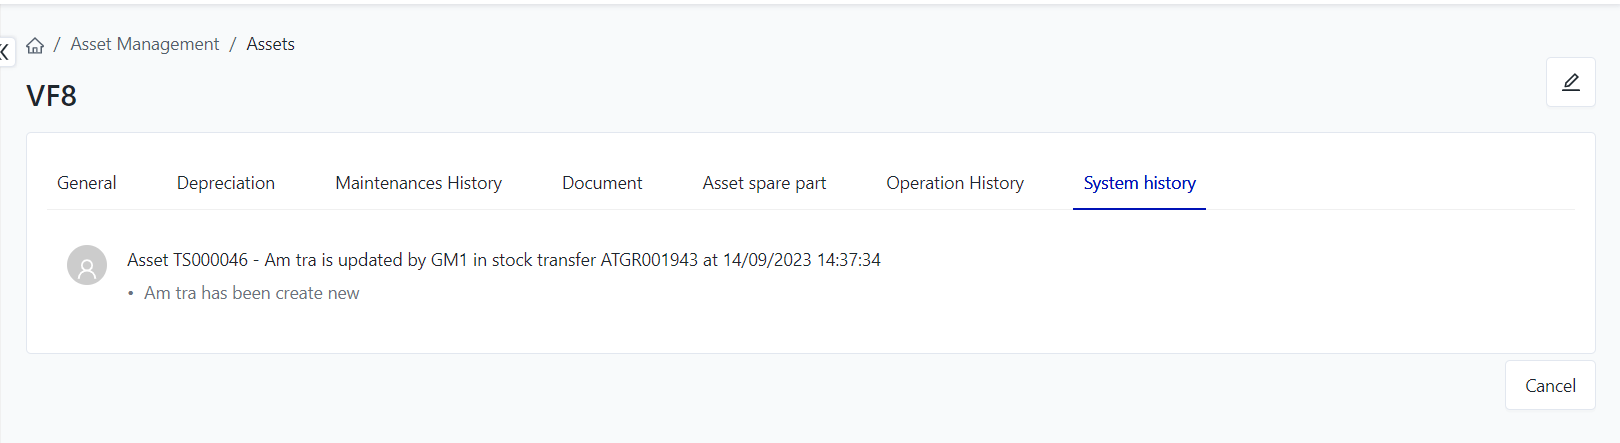
System history: To view detailed information about the activity history of an asset
(2) Edit: To edit an asset, users can edit the asset name, description, upload images, and asset status...
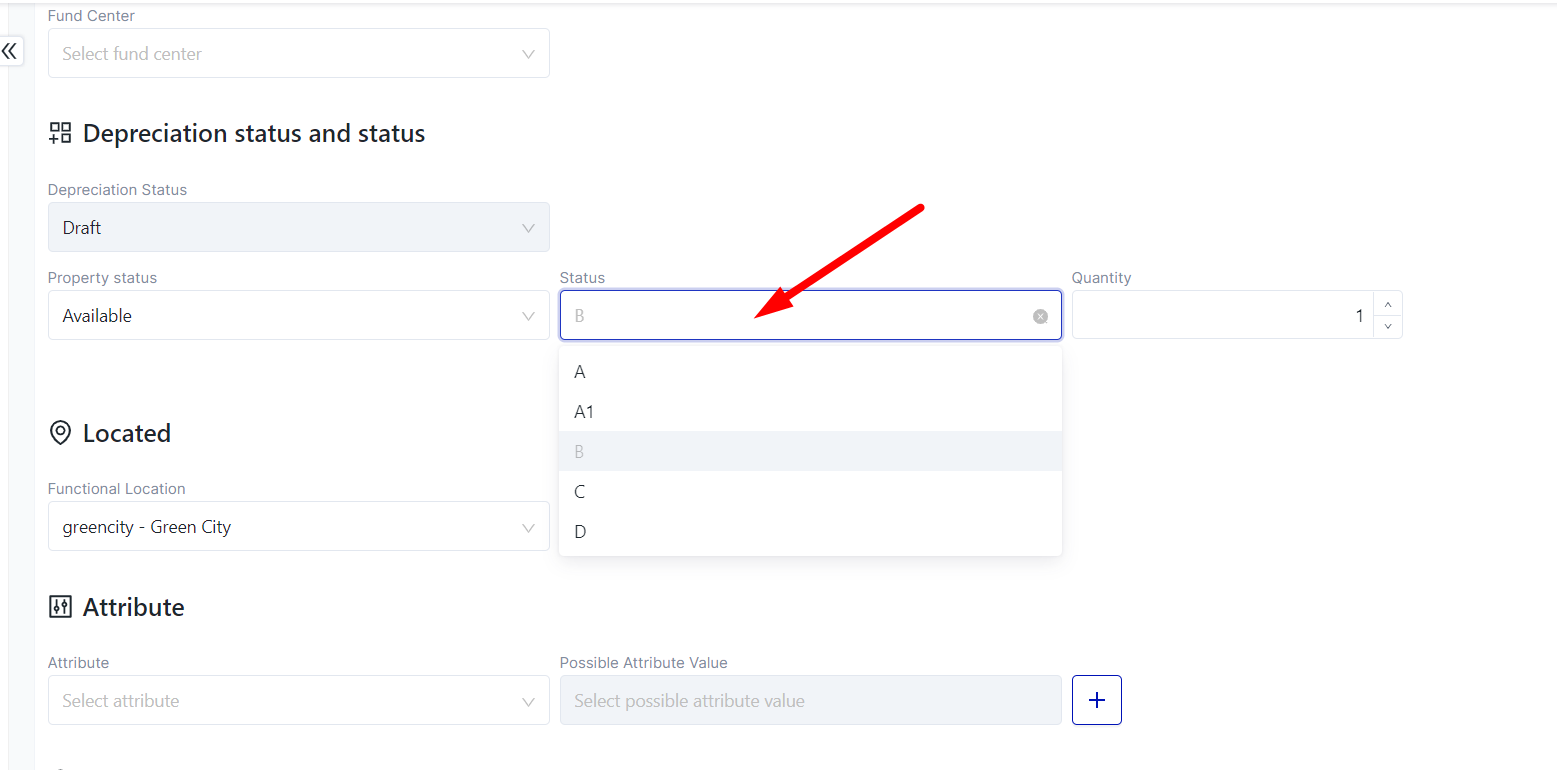
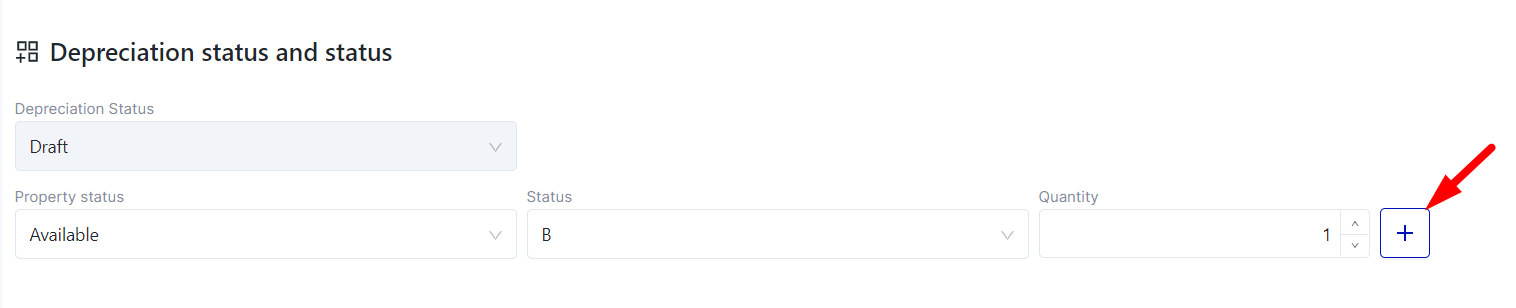
To adjust the asset status, users can directly select the status they want to change to adjust it
If an asset needs to change multiple different statuses, for example, the current status is 3 types of A but the user wants to change it to 2 types of A and 1 type of D, the user only needs to decrease the number of type A to 2, and then the system will display a plus sign to add the next status line.
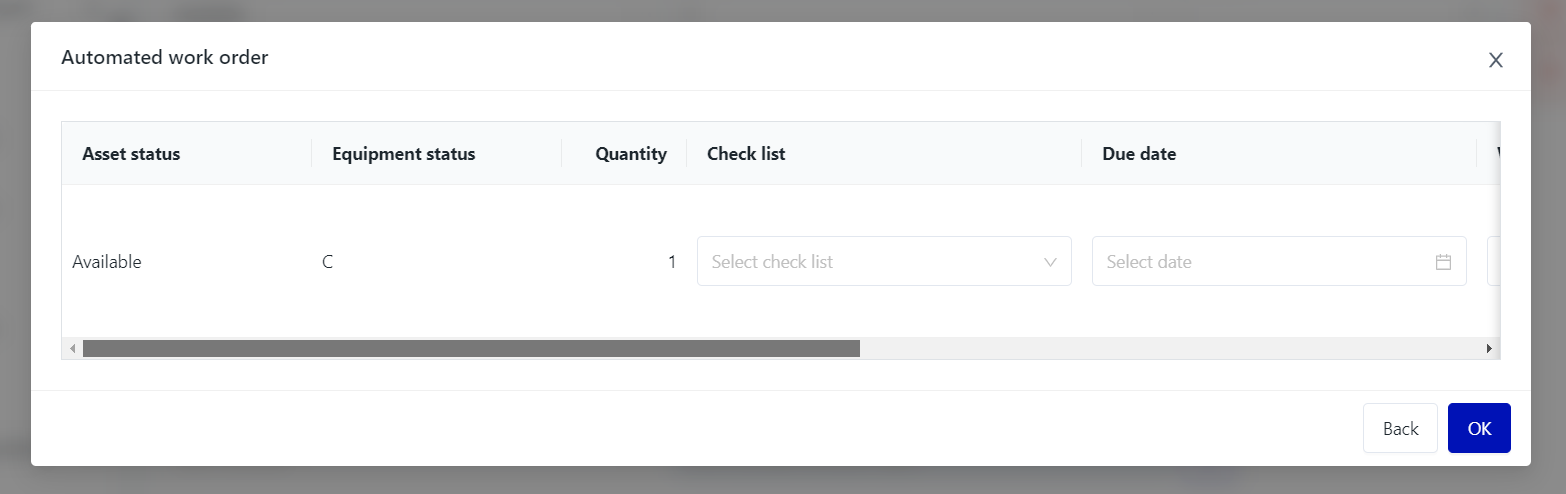
For damaged statuses (B, C, D), the system will display a notification to create a automated work order:
If "cancel" is selected, the system will not automatically create a work order.
If "continue" is selected, the system will display a screen to enter information.
Users will fill in the following information: check list, Due date, work center, priority and image (if available). Then, they will select "OK" for the system to save the information.
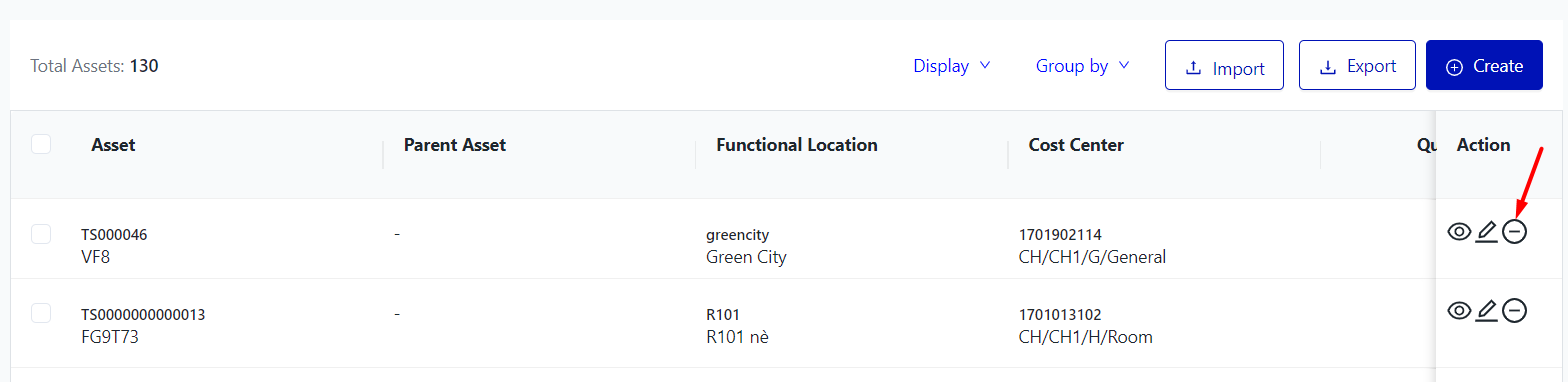
(3) Delete: If the asset is not in the inventory session, the inventory report has not been closed, or the asset is being repaired in a work order or is in an adjustment/transfer asset document being processed, the user can delete the asset.
How to delete an asset:
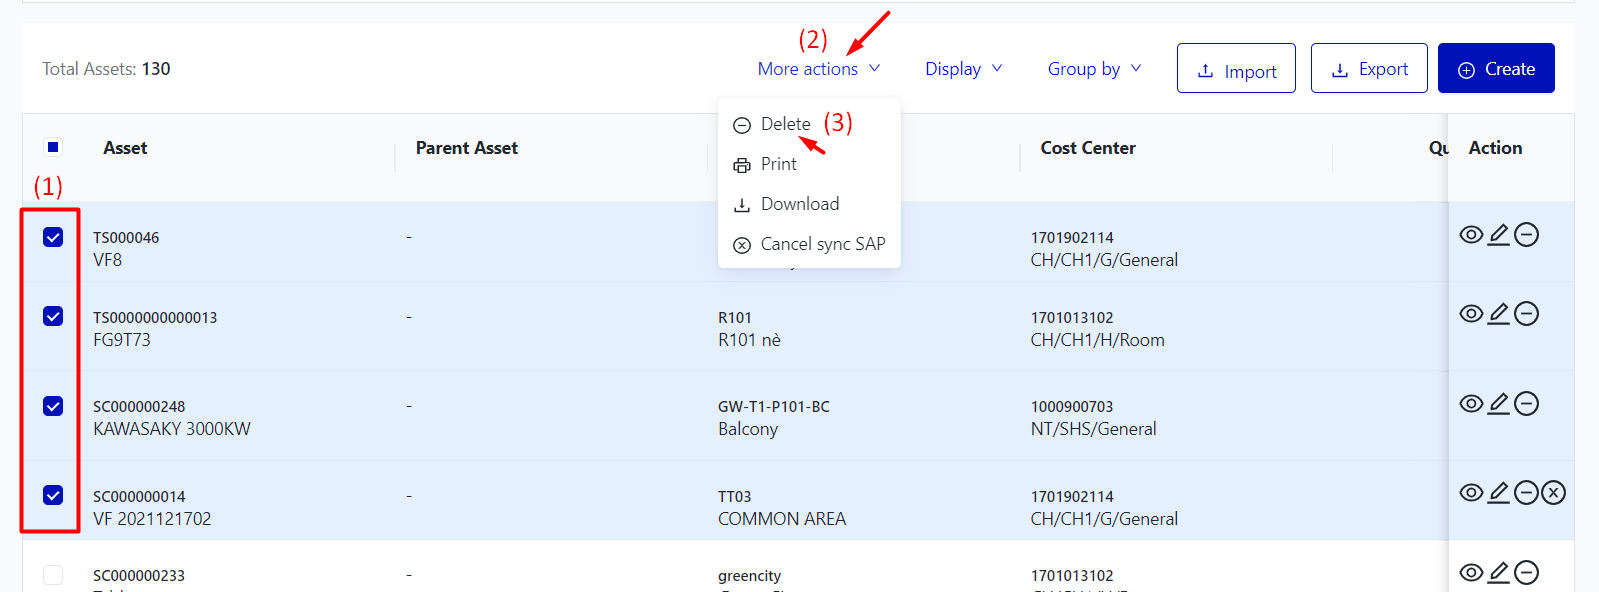
To delete multiple assets at once, users can follow these steps:
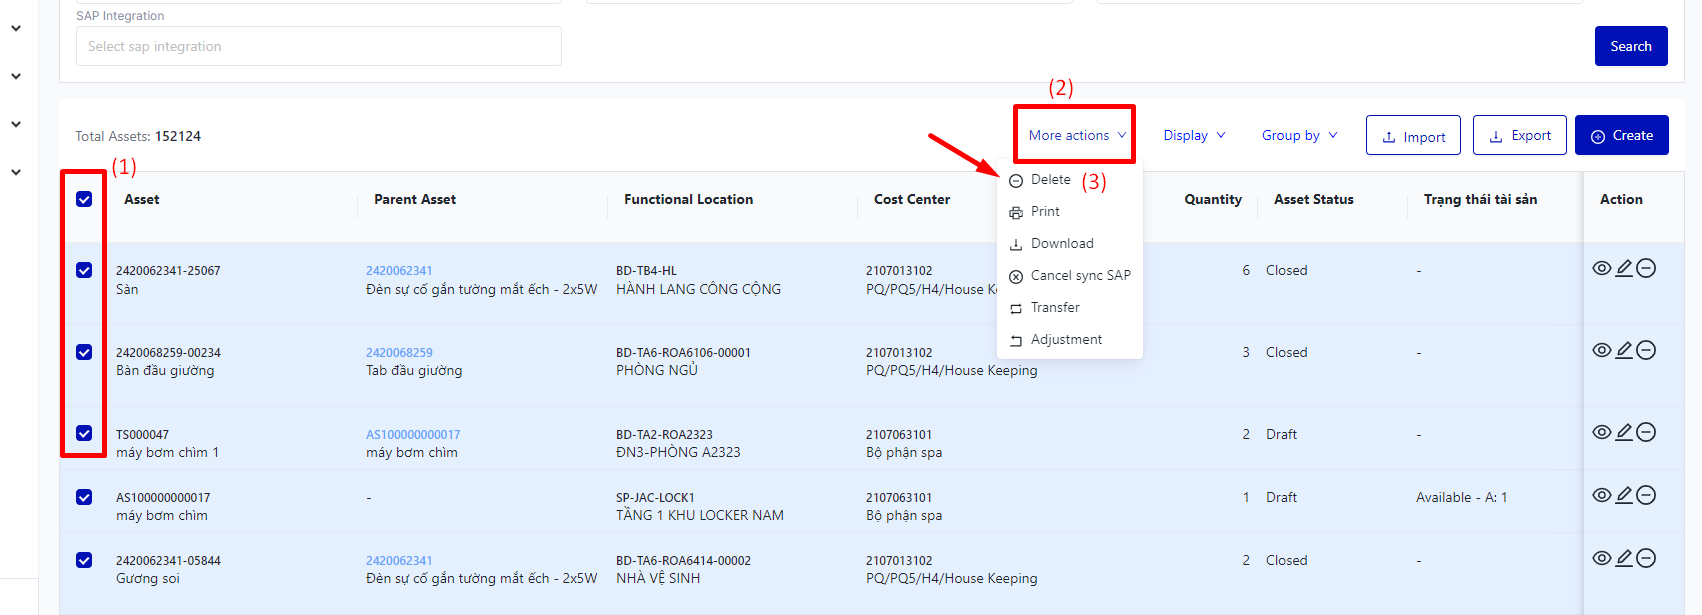
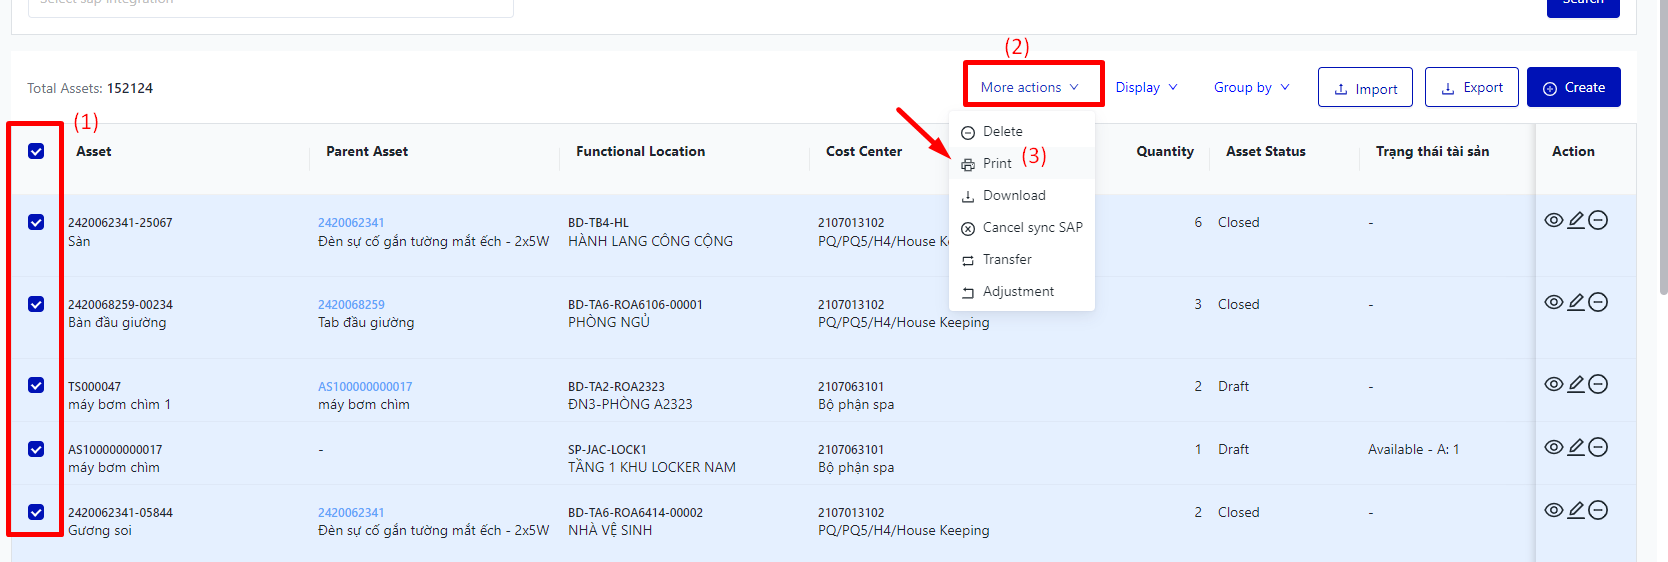
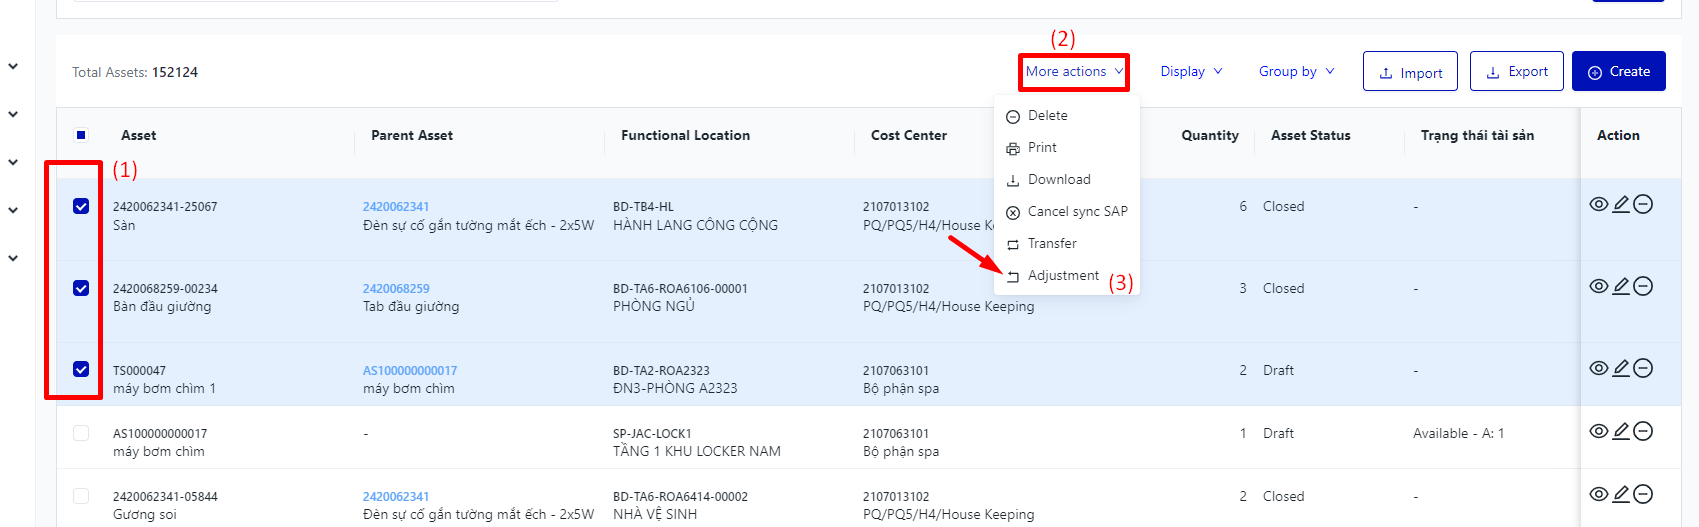
(1) Select the assets that need to be deleted.
(2) Click on the "More actions"
(3) Click on the "Delete" button.
(4) Import:
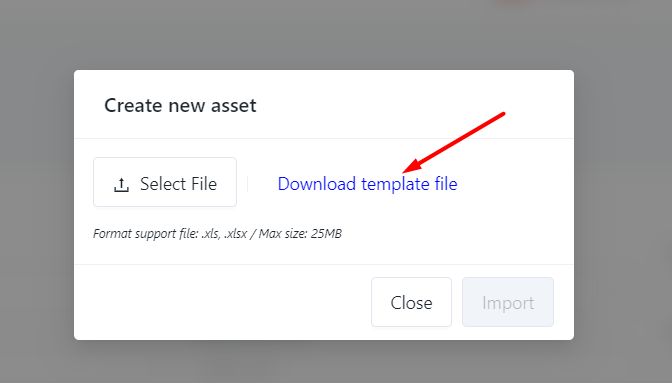
Create new asset: To upload a new file to create multiple assets, users can follow these steps:
On the asset screen, select "Import".
Click "Download Template file" to download the import file template.
Fill out all the required fields marked in red on the template file.
Click "Select File" to browse for and choose your import file.
Click "Import" to import the file into the system.
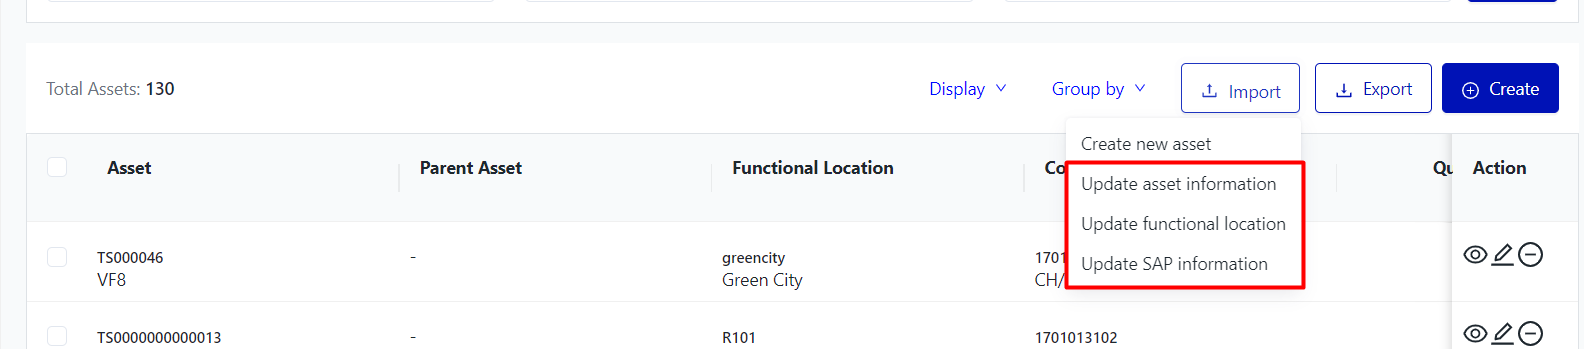
To upload a file to update asset information, update functional location, and update SAP information, follow these steps:
Use the upload feature depending on the purpose of the update.
Click "Download Template file" to download the import file template.
Fill out all the required fields marked in red on the template file.
Click "Select File" to browse for and choose your import file.
Click "Import" to import the file into the system.
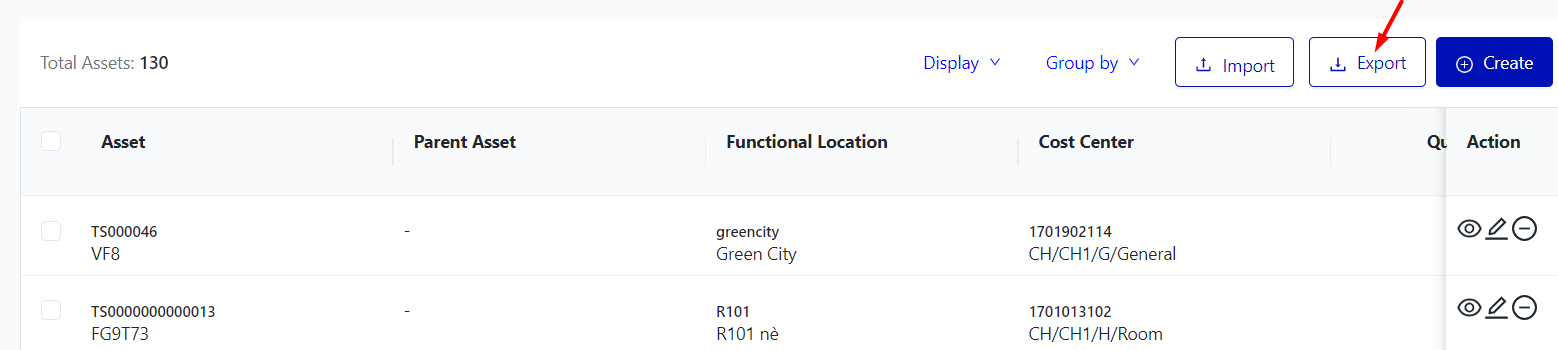
(5) Export: To download asset files, users can use the download feature to export all detailed asset information in an Excel file format. The system will send the file to the user's email address and also send the file to the notification bar.
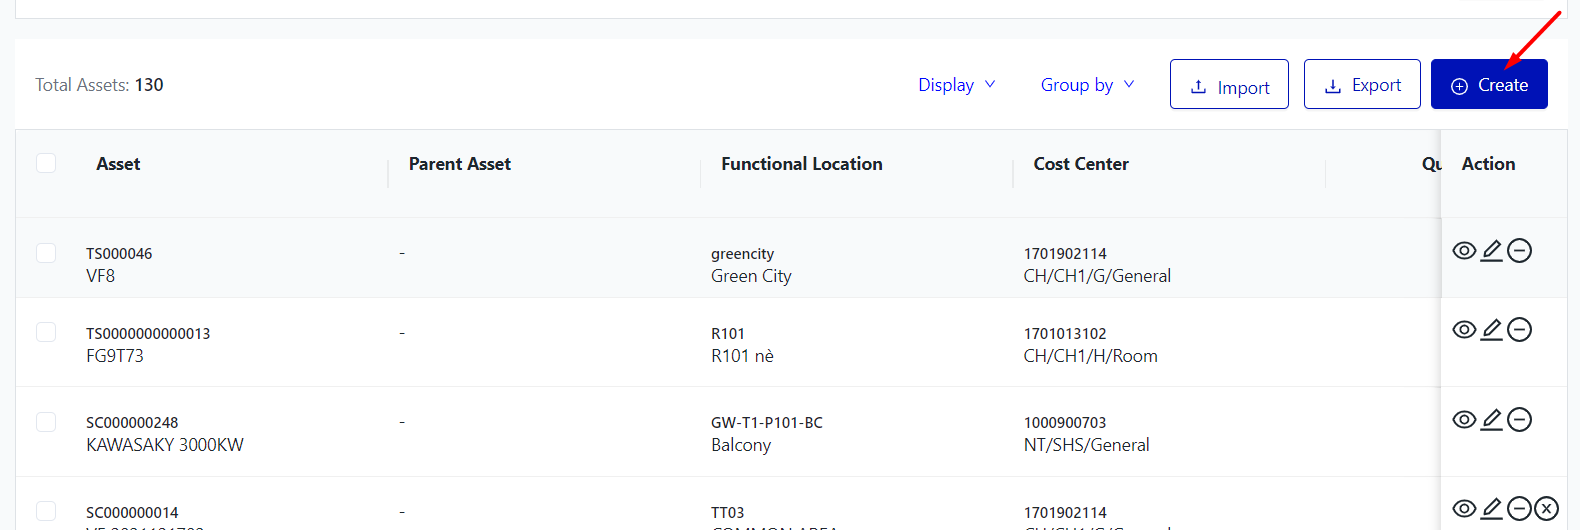
(6) Create: To create a new asset, follow these steps:
On the asset list screen, select "Create" from the Content menu.
Fill out all the required fields marked with an asterisk.
Click "Save" to create the new asset.
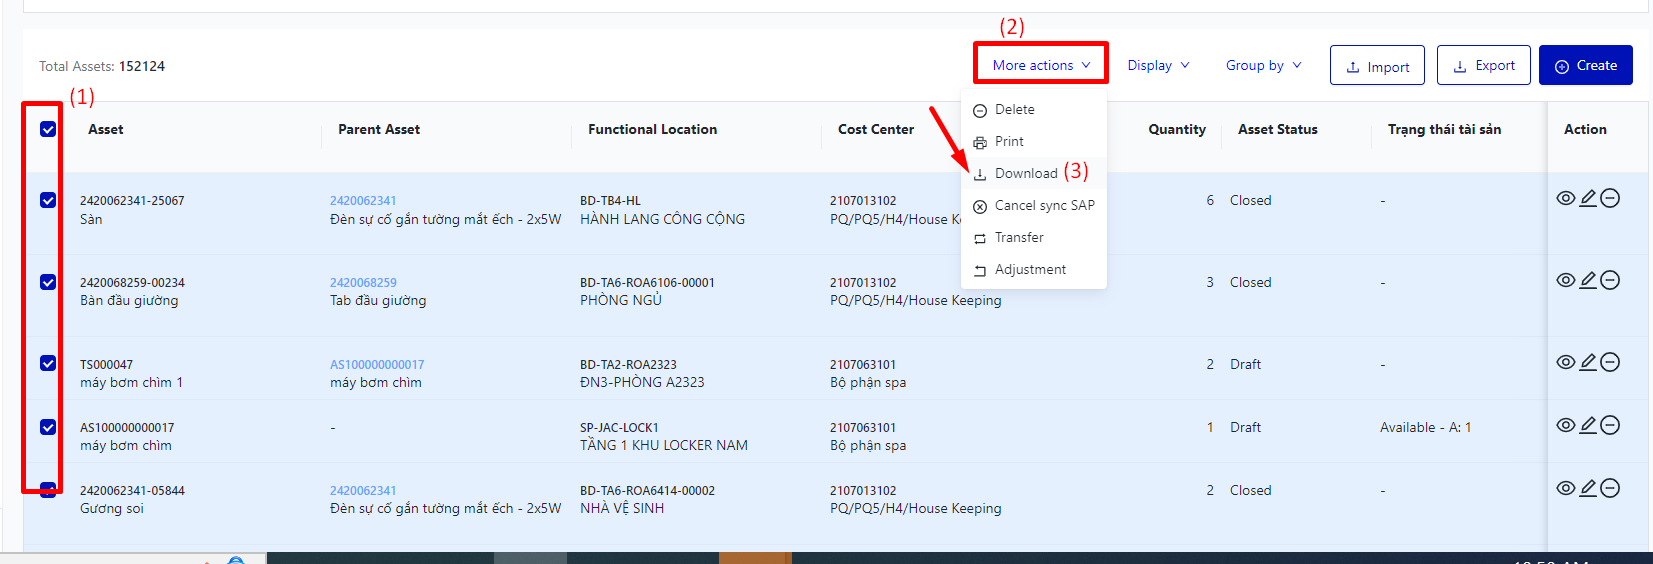
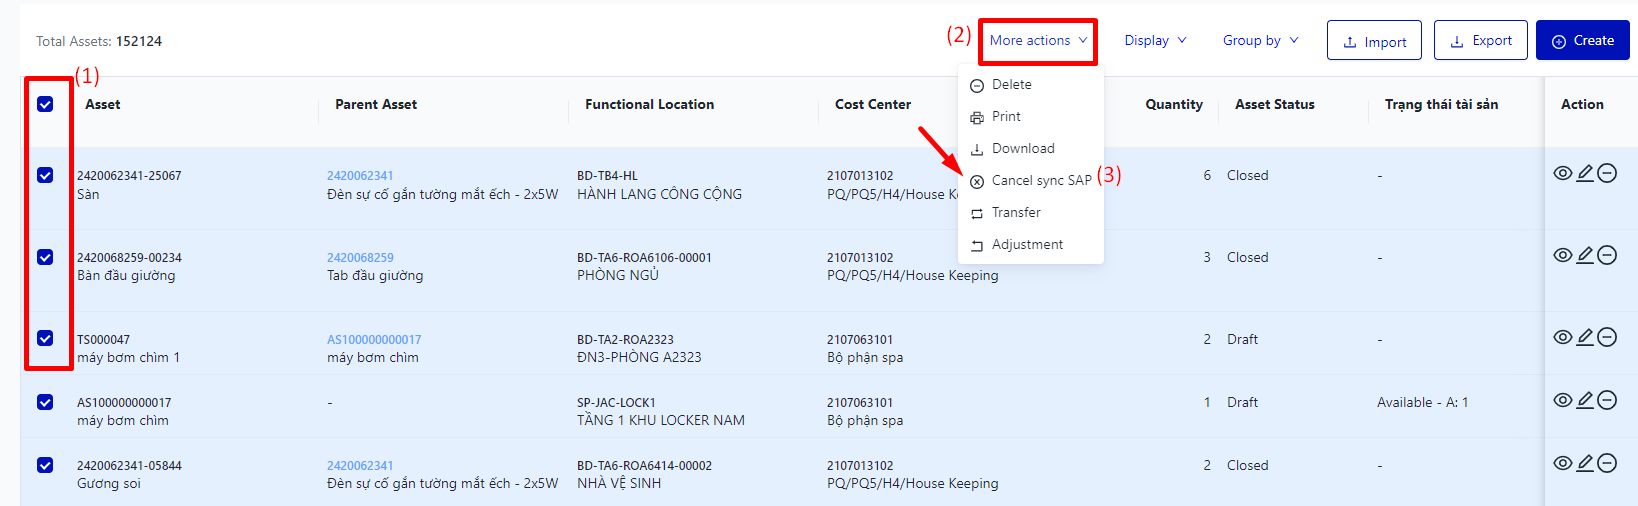
More Action: Select the assets will display “More Action” user can:
Delete: To delete multiple assets at once
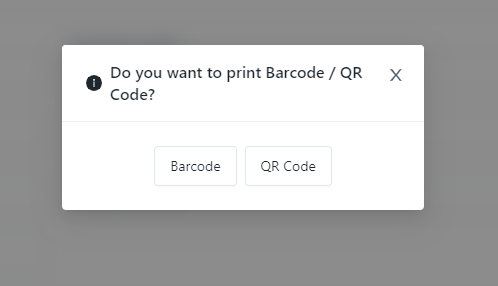
Print Barcode/QR Code:
Download: To download asset files, users can use the download feature to export all detailed asset information in an Excel file format. The system will send the file to the user's email address and also send the file to the notification bar.
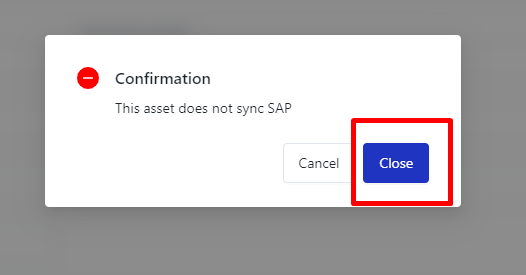
Cancel sync SAP: Select the assets that need to be cancel sync SAP → Click on the More actions → Click on the Cancel sync SAP → Click on Close
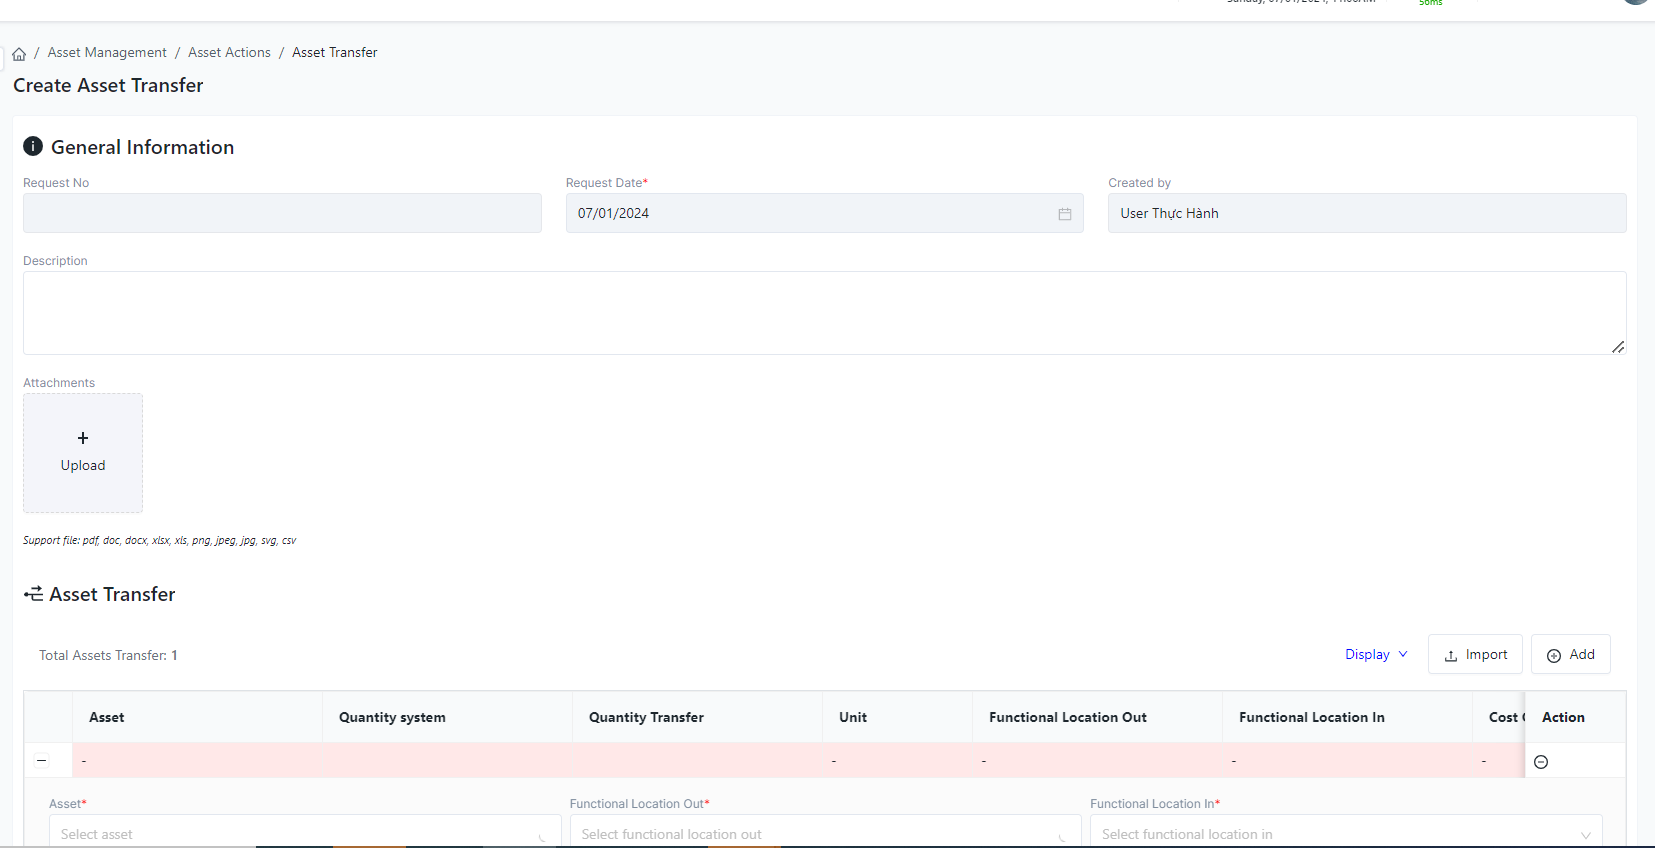
Transfer: users can transfer one or multiple assets to another area/department/facility
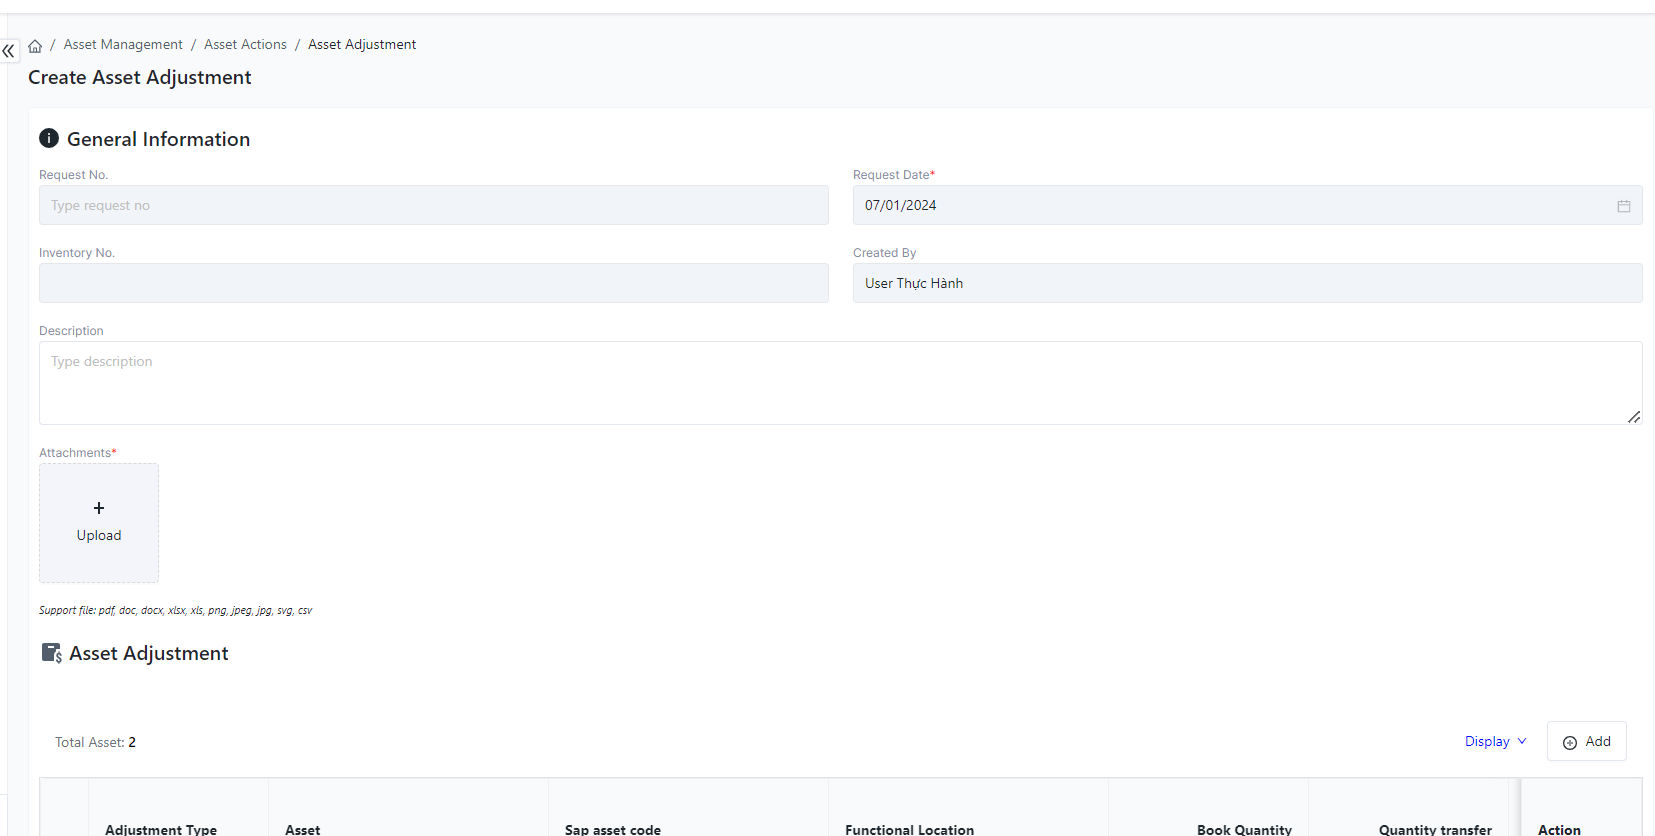
Adjustment: to adjust the increase/decrease of one or more assets.
Remarks
N/A
JavaScript errors detected
Please note, these errors can depend on your browser setup.
If this problem persists, please contact our support.