[ENG] Energy Recording Plan

Screen Name

Energy Recording Plan

Login – Energy Management – Energy Recording – Energy Recording Plan

Summary

Recording energy consumption is planned by creating a list of devices that need to be recorded in a SharePoint list. Then, a mobile app is used to scan the barcode on each meter to record the electricity/water usage. The app will automatically record the energy consumption data for each device.

1. Create Energy Recording Plan

Step 1: Create a new Energy Recording Plan
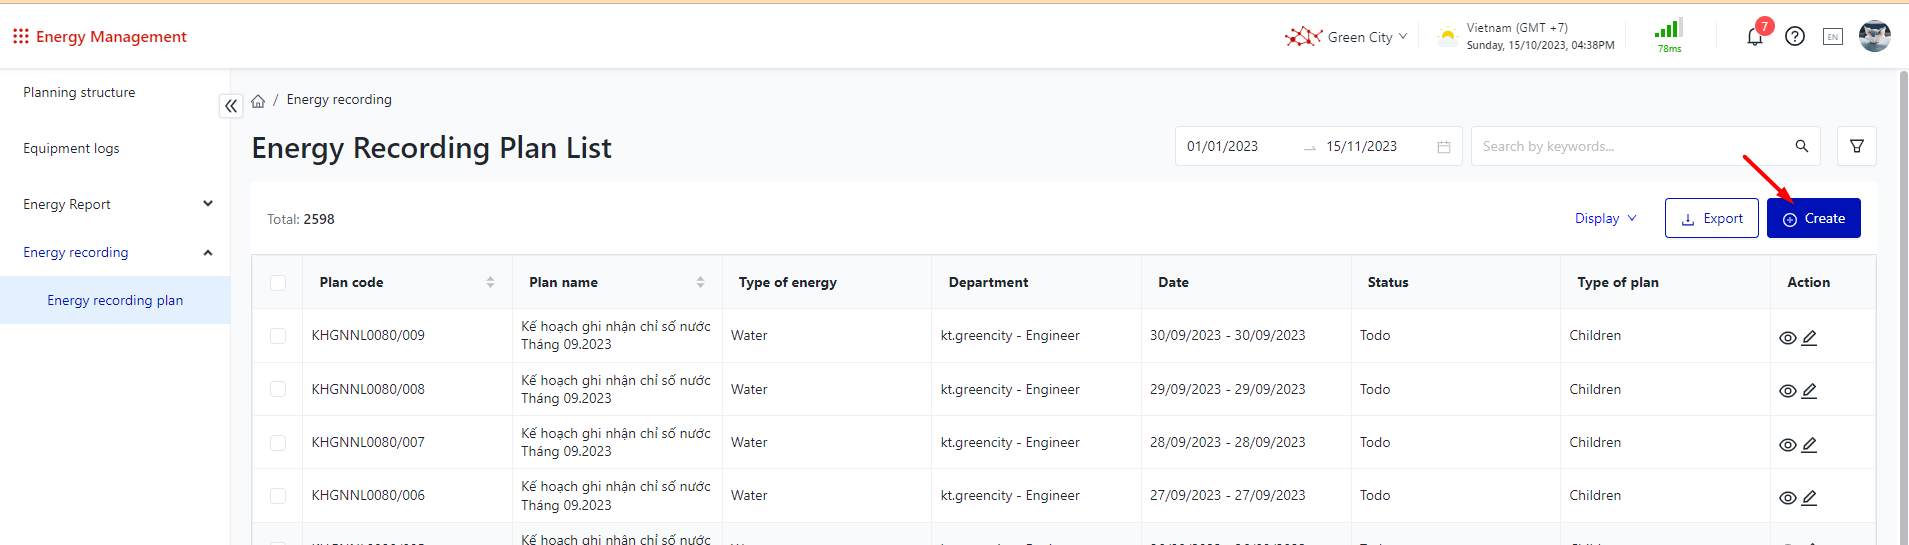
image-20231015-093838.png

Step 2: Fill in the following information:
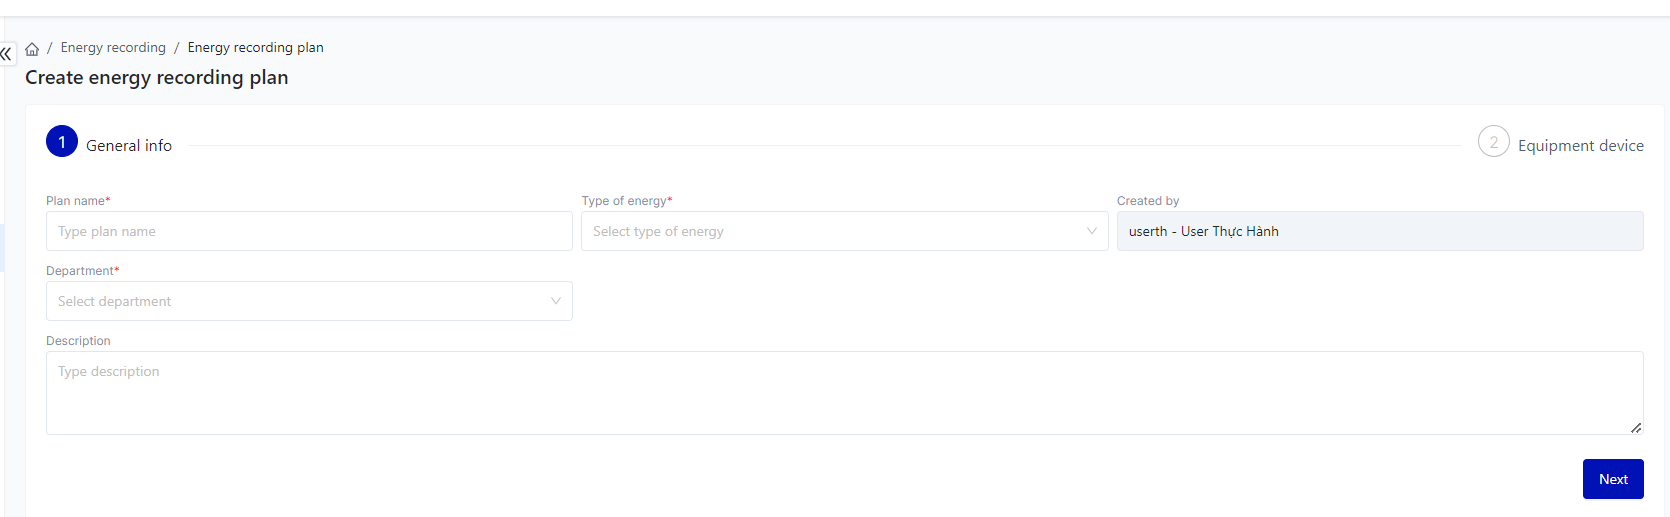
  • Plan name: required

  • Type of energy: required (electricity/water)

  • Department: required

  • Description: optional

image-20231015-093904.png

Step 3: Select the list of devices to be recorded, then click "Confirm the list of devices" and then click "Next".
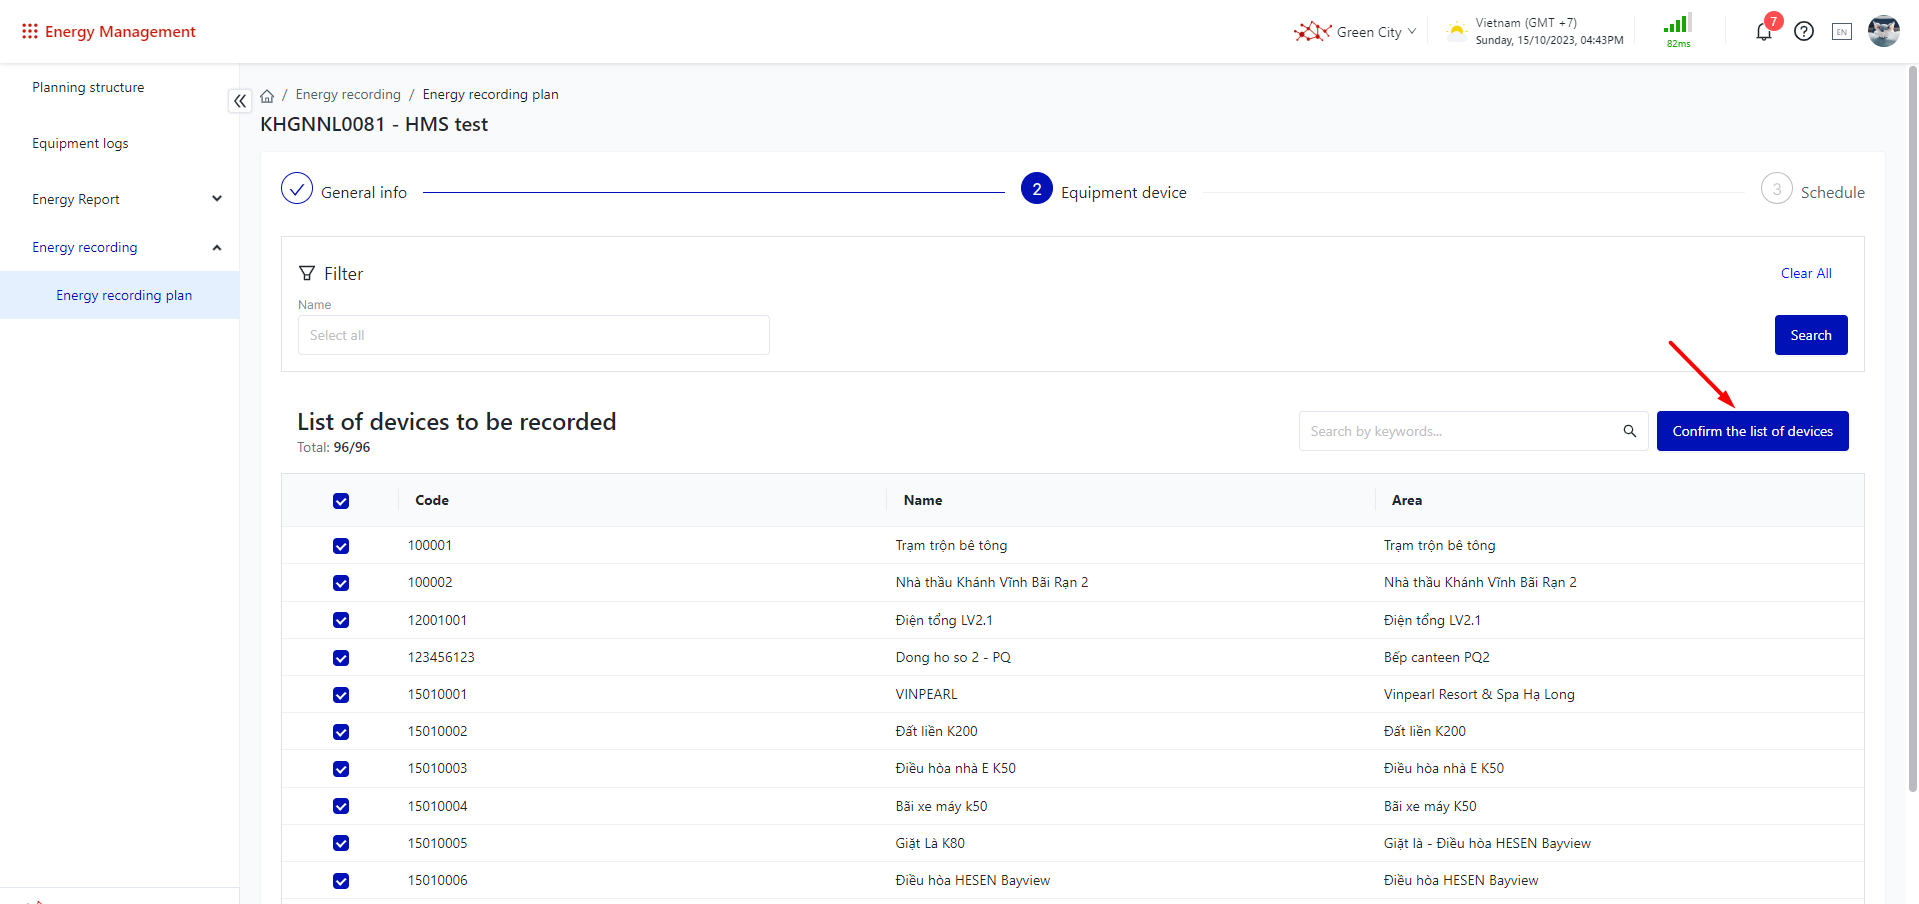
image-20231015-094332.png


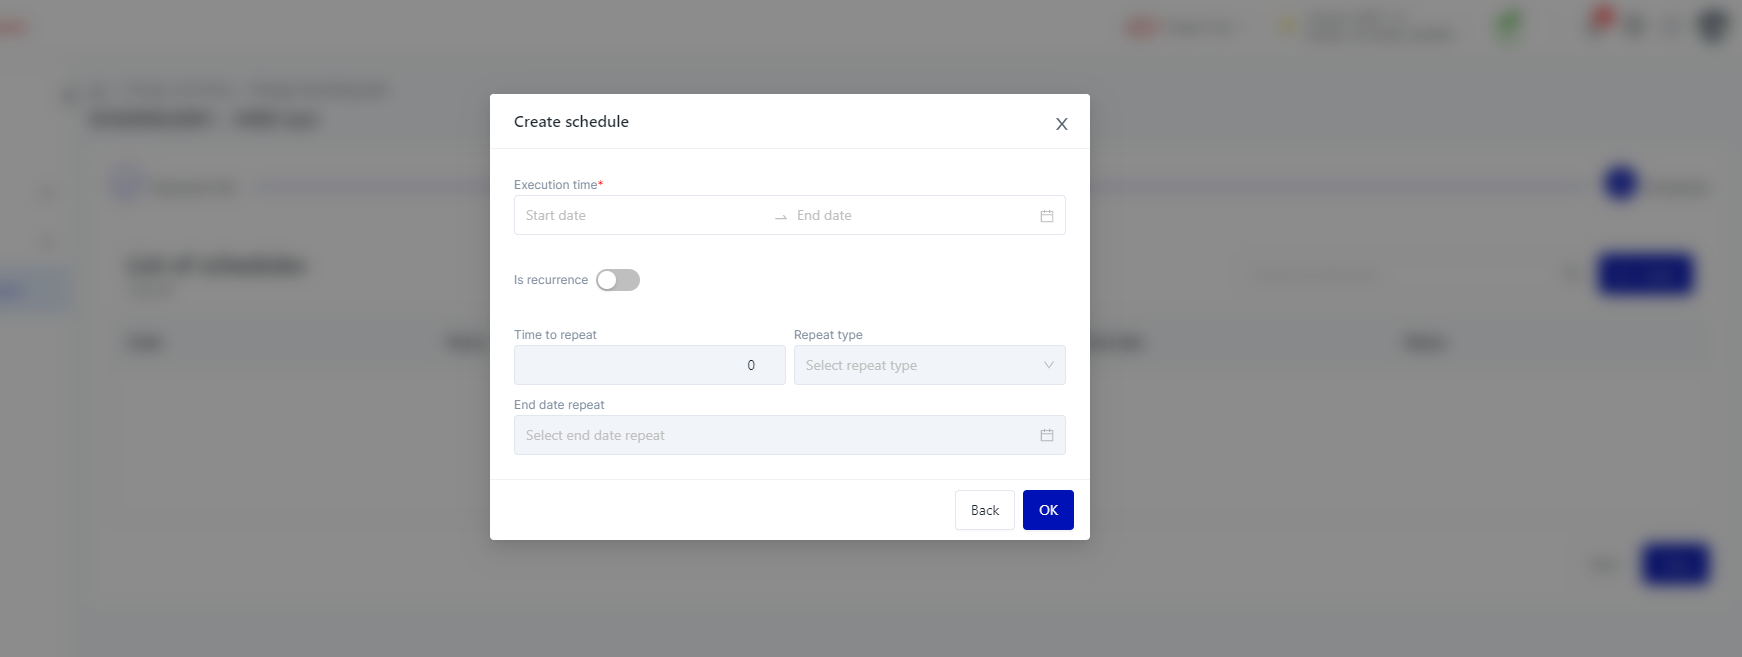
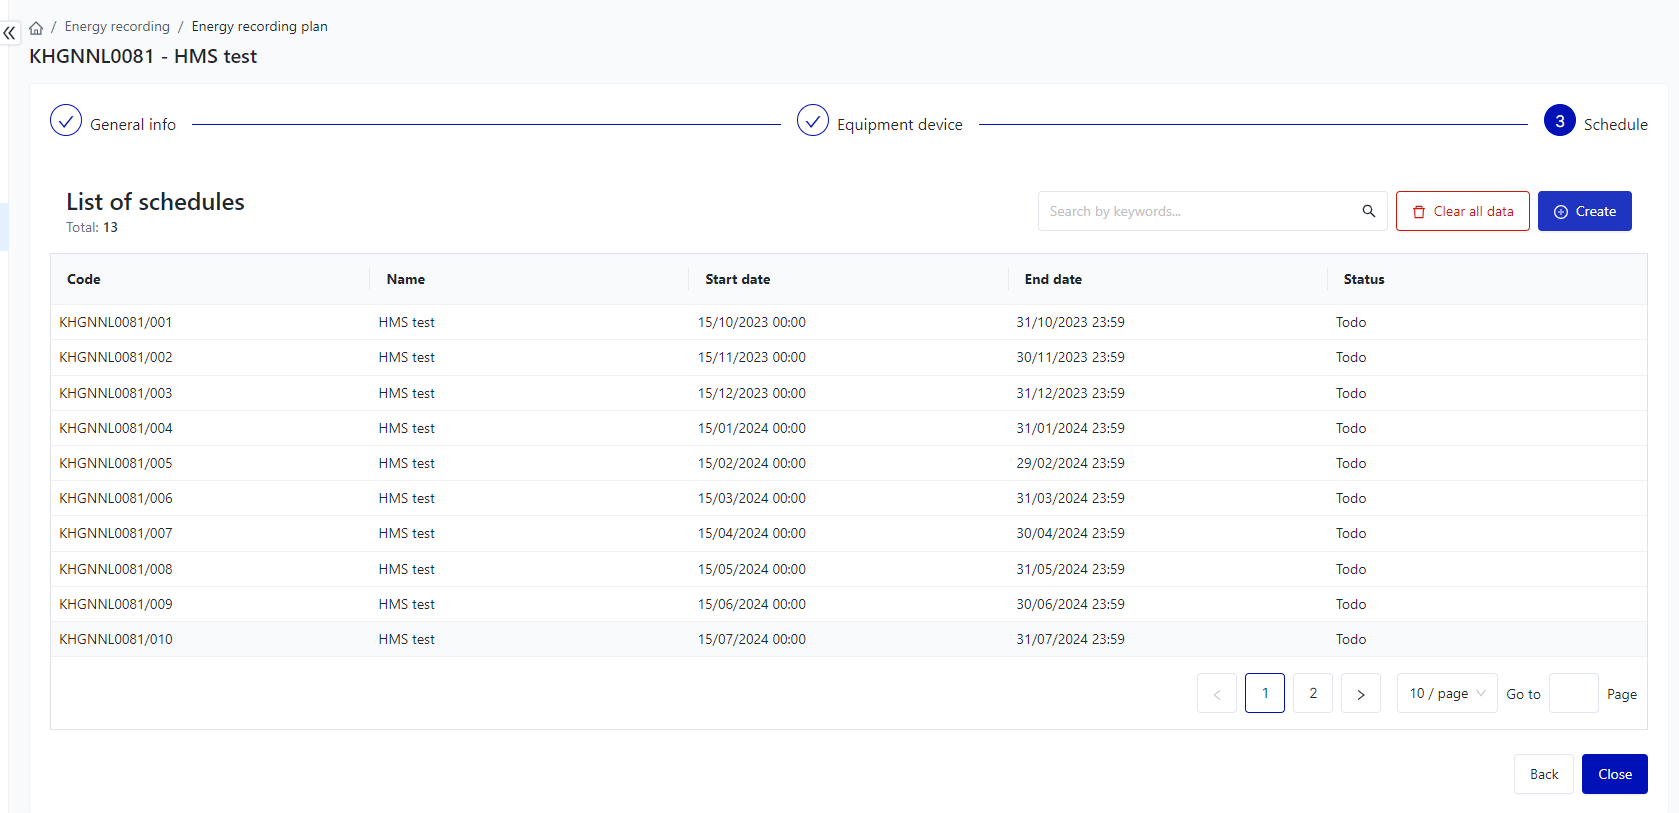
Step 4: Create a schedule:

  • Execution time: required

  • Is recurrence: the user can choose to repeat daily/weekly/monthly with a frequency of x (times). When toggling the repeat option, the following required information needs to be entered:

    • Time to repeat: x (times)

    • Repeat type: day/month/year

    • End date repeat

  • Click "OK" to complete the schedule creation.

image-20231015-094449.png
image-20231015-094647.png

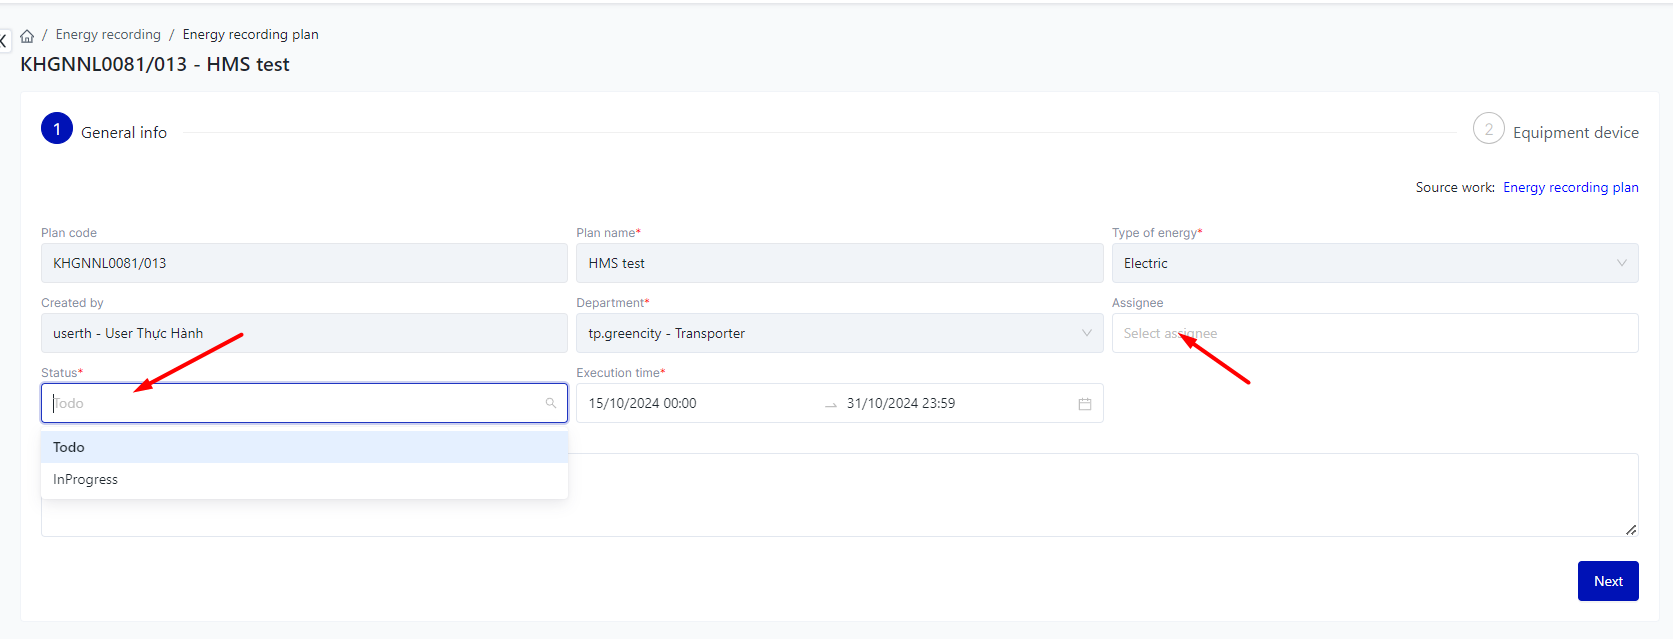
Step 5: Add assignee and change the execution schedule status:
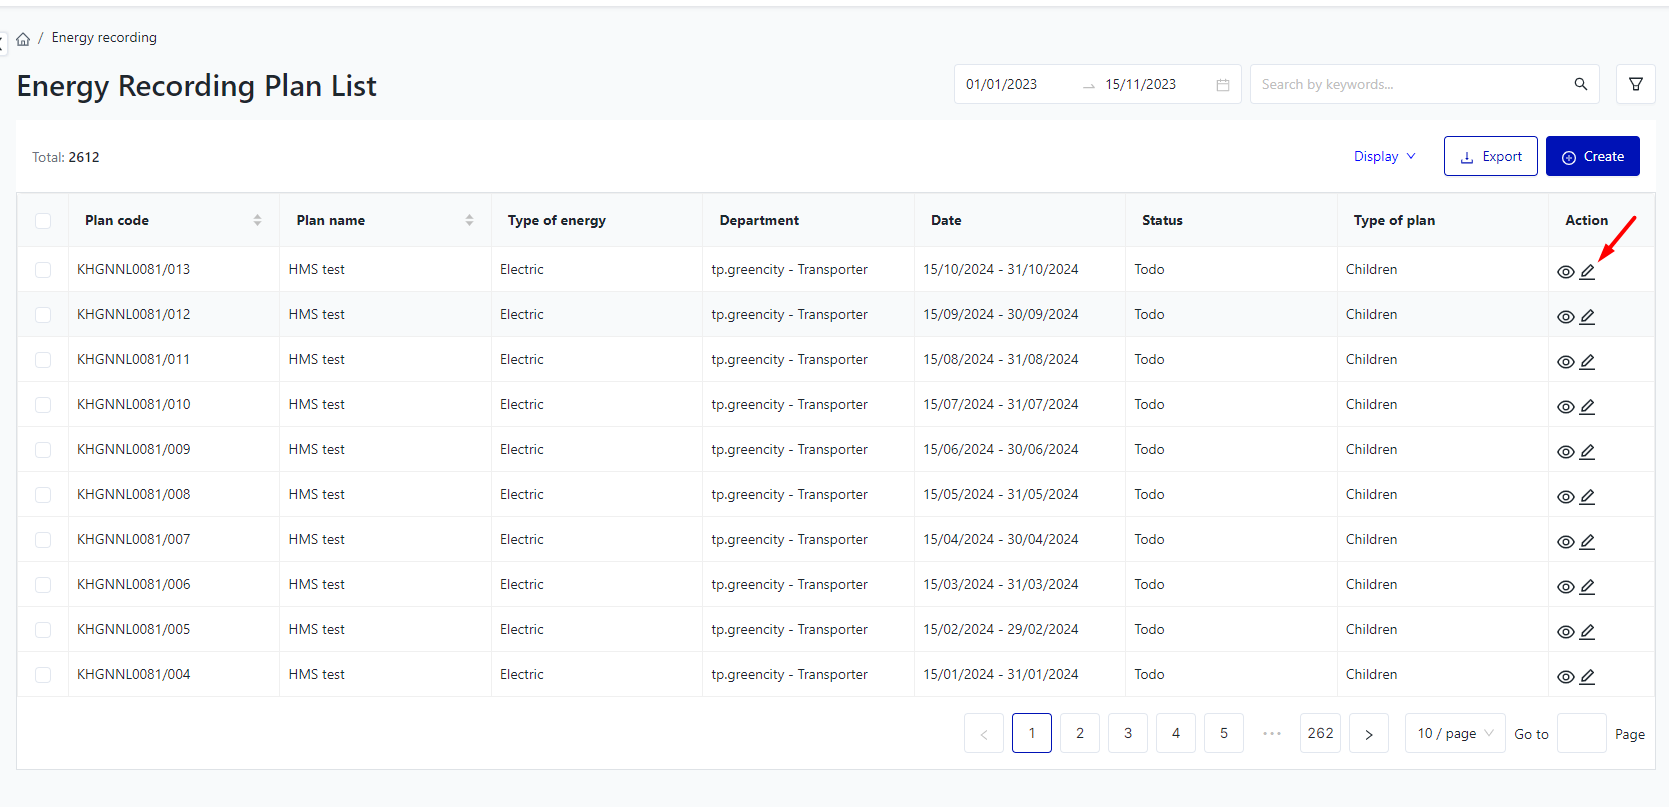
  • Select "Edit current schedule" in the plan list.

  • Enter the assignee information.

  • Change the execution plan status to "In progress" when ready to proceed with recording.

image-20231015-094940.png


image-20231015-095132.png

2. Record energy consumption using a mobile app

To record energy consumption using a mobile app and QR code scanning, you can follow these steps:

Unknown Attachment

  1. Select the pending execution schedules in the "To do/In-progress" section.

  2. Use the mobile app to scan the QR code on each meter to record the electricity/water usage.

  3. Enter the consumption data for P delivery and P reception.

  4. Click "Update information".

  5. Click "Close execution schedule" after reviewing the recorded data in the "Completed" tab. Users can adjust the information before confirming the closing of the execution schedule.

  6. Review the information in the "Closed" section.

--

For execution schedules that are set in the future and have a status of "Not executed", they will be displayed in the "Not open yet" section and the recorded information can only be viewed. Users will be able to make adjustments when the status changes to "In progress".
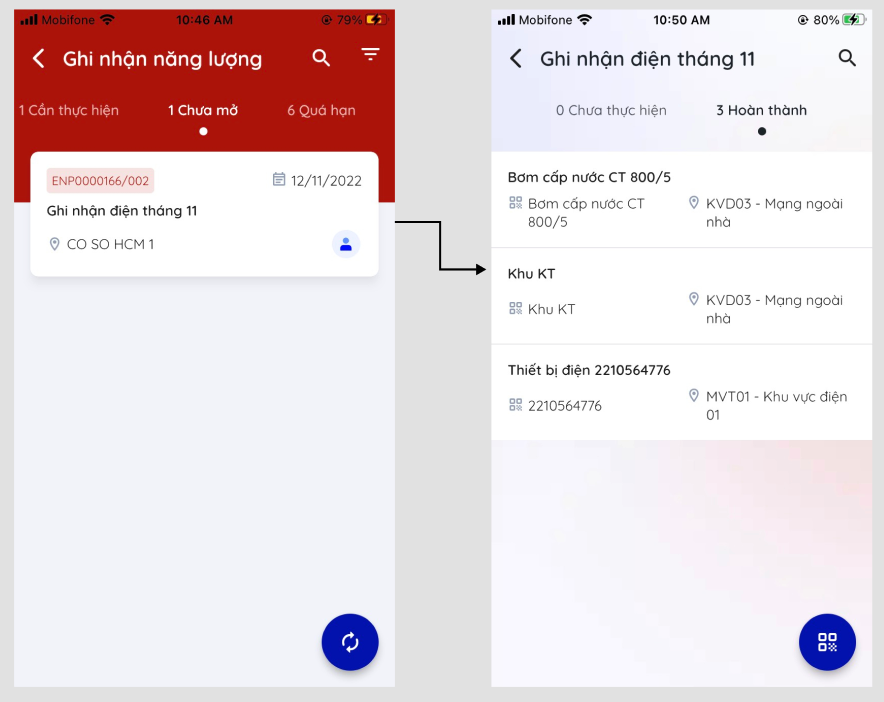
image-20221108-043457.png