[ENG] User Guide Work Orders Schedules
Screen Name |
|---|
Work Orders Schedules |
Open Link |
Log in → Plant Maintenance → Work Orders Schedules |
Summary |
Create Work Orders Schedules and a plan implementation timeline |
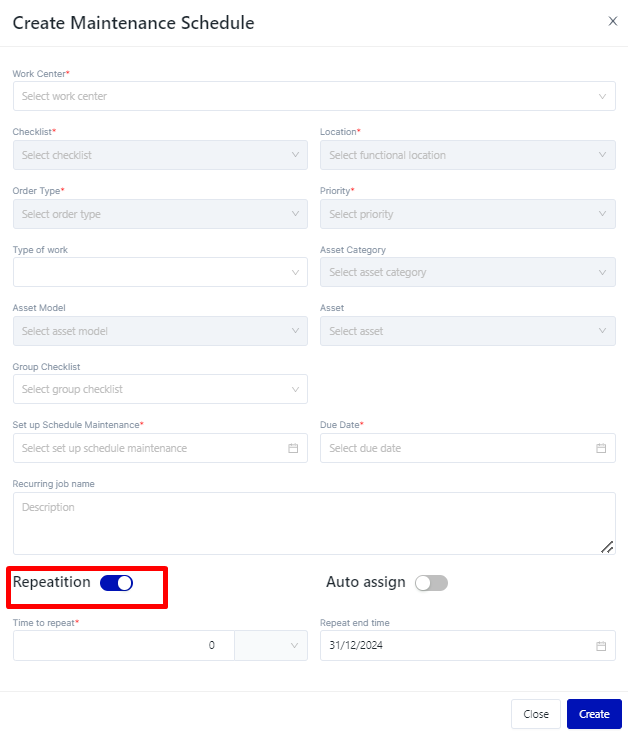
Create Work Orders Schedules |
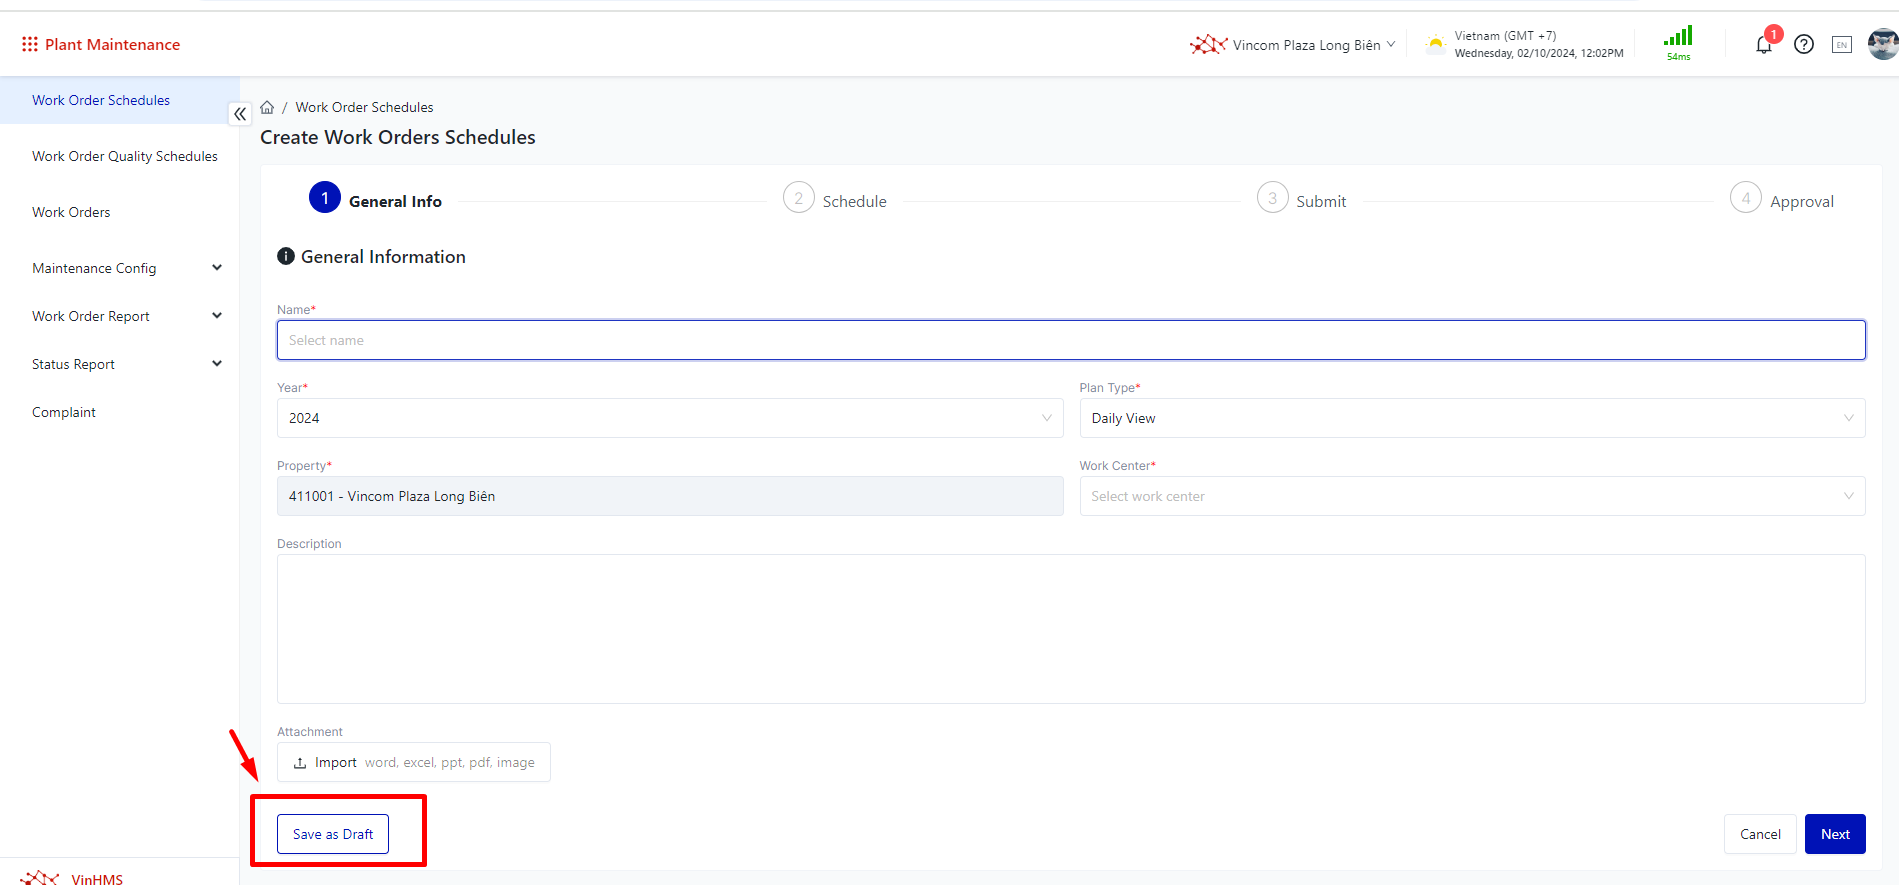
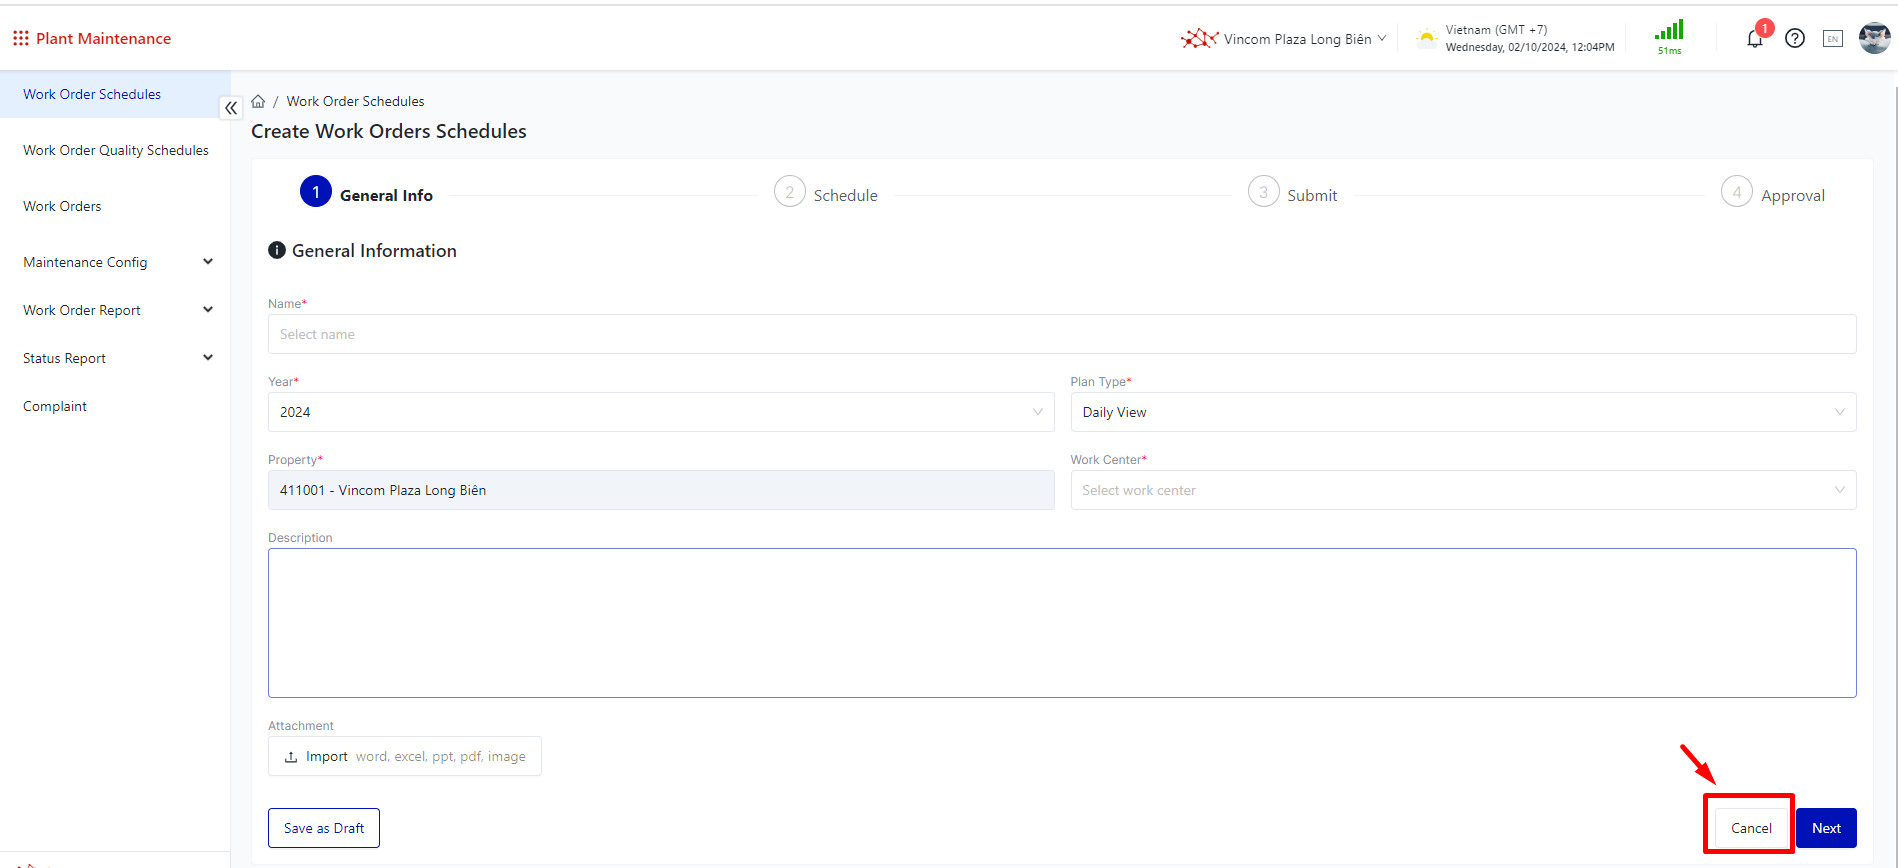
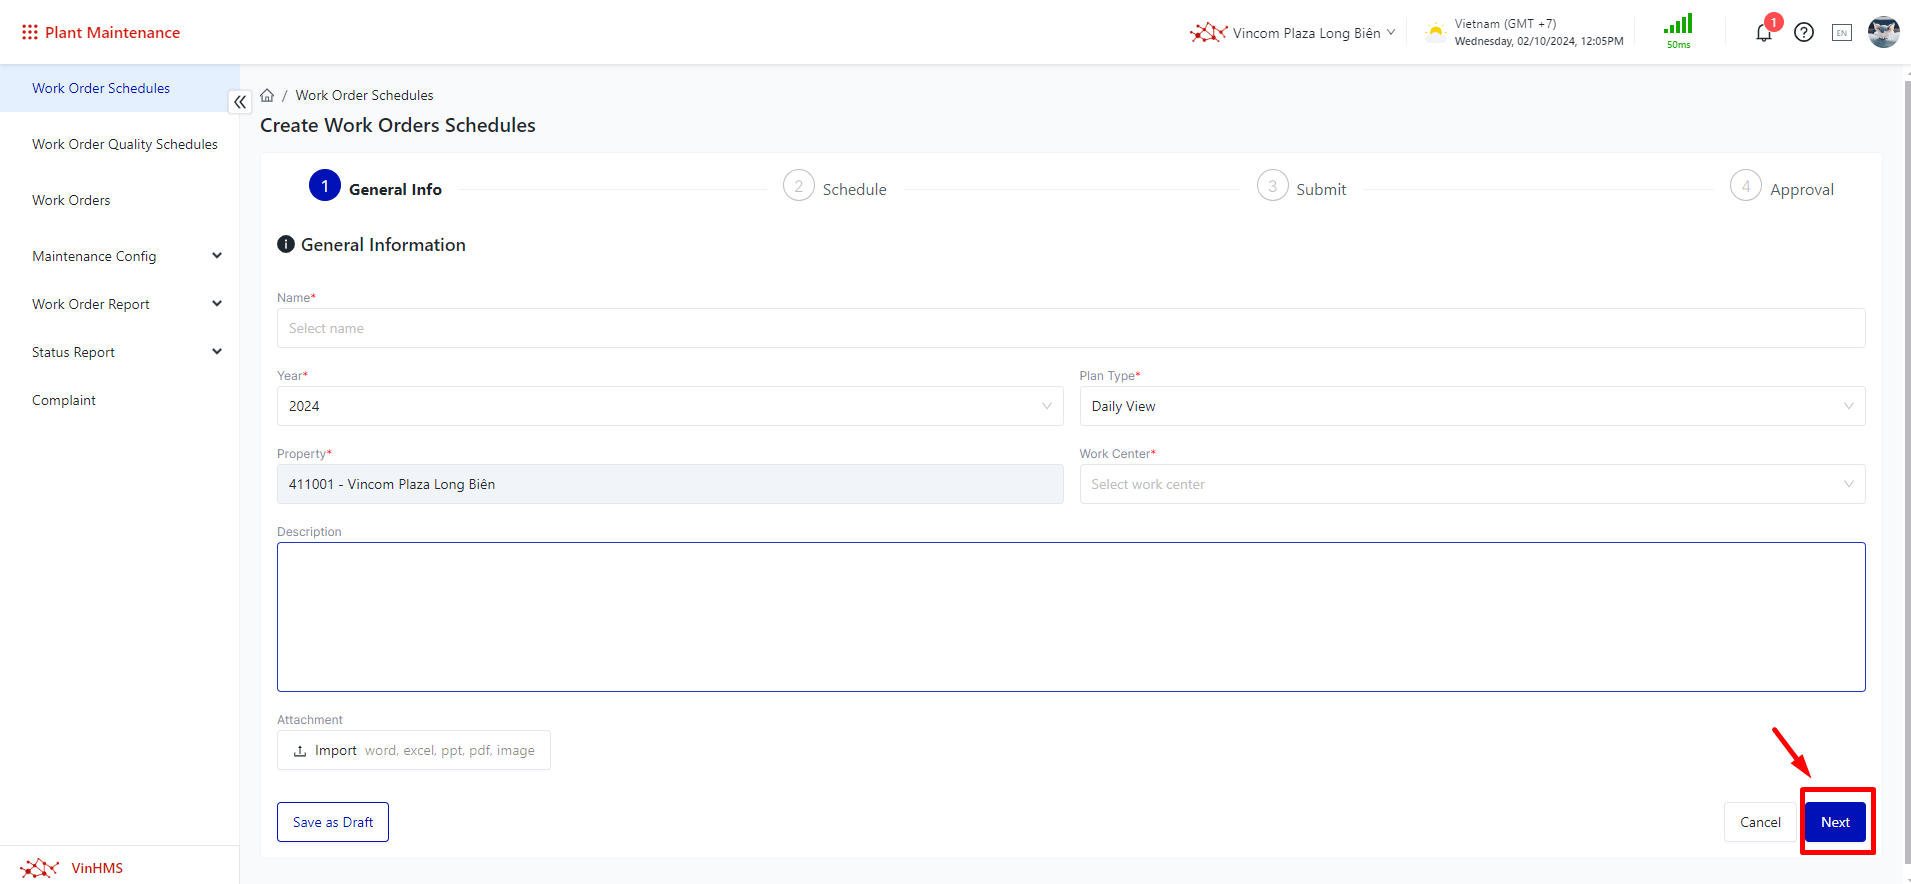
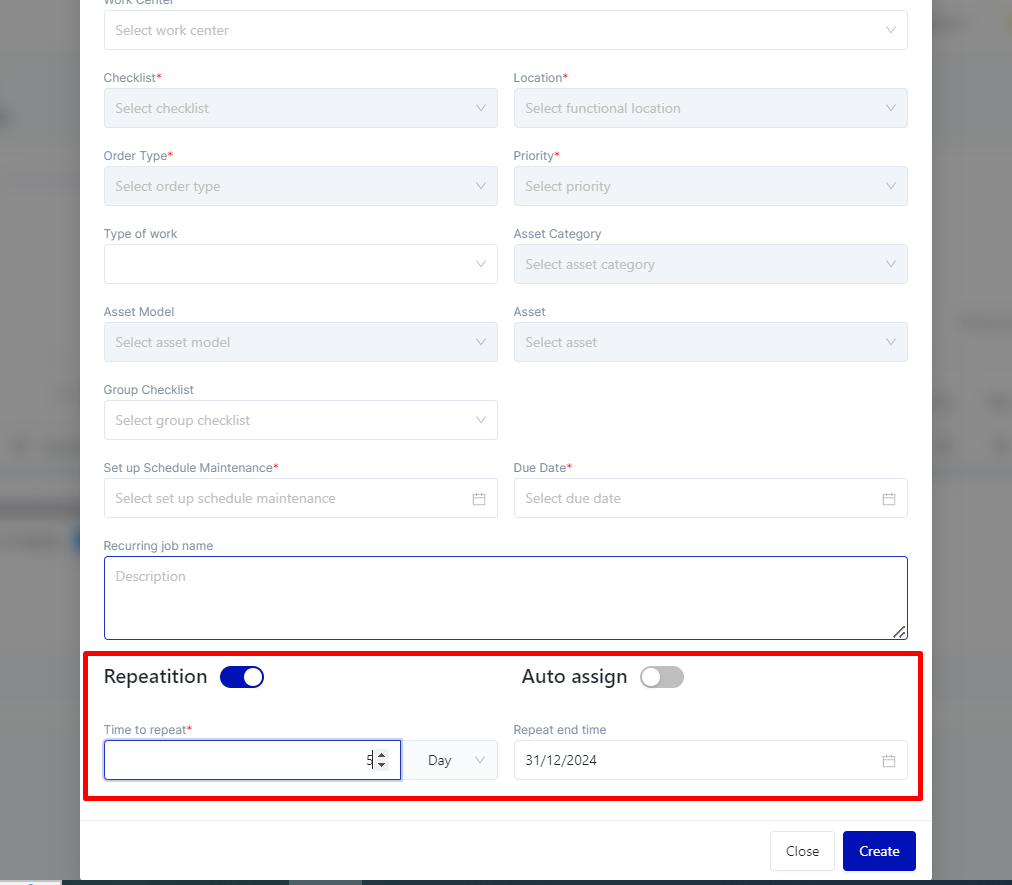
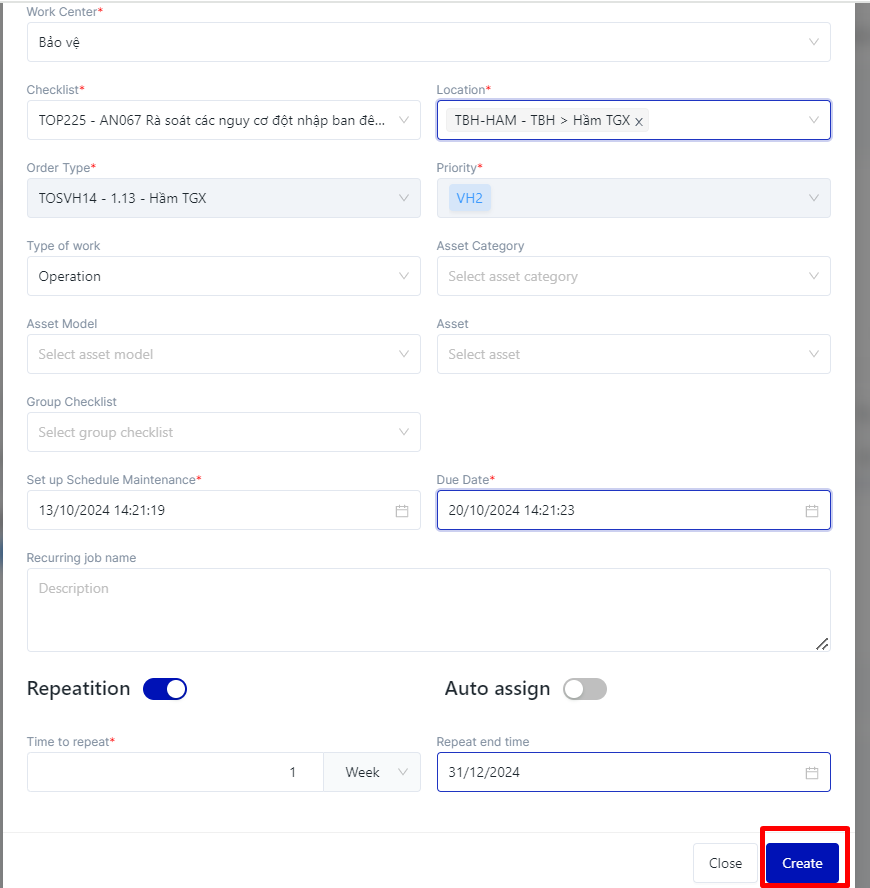
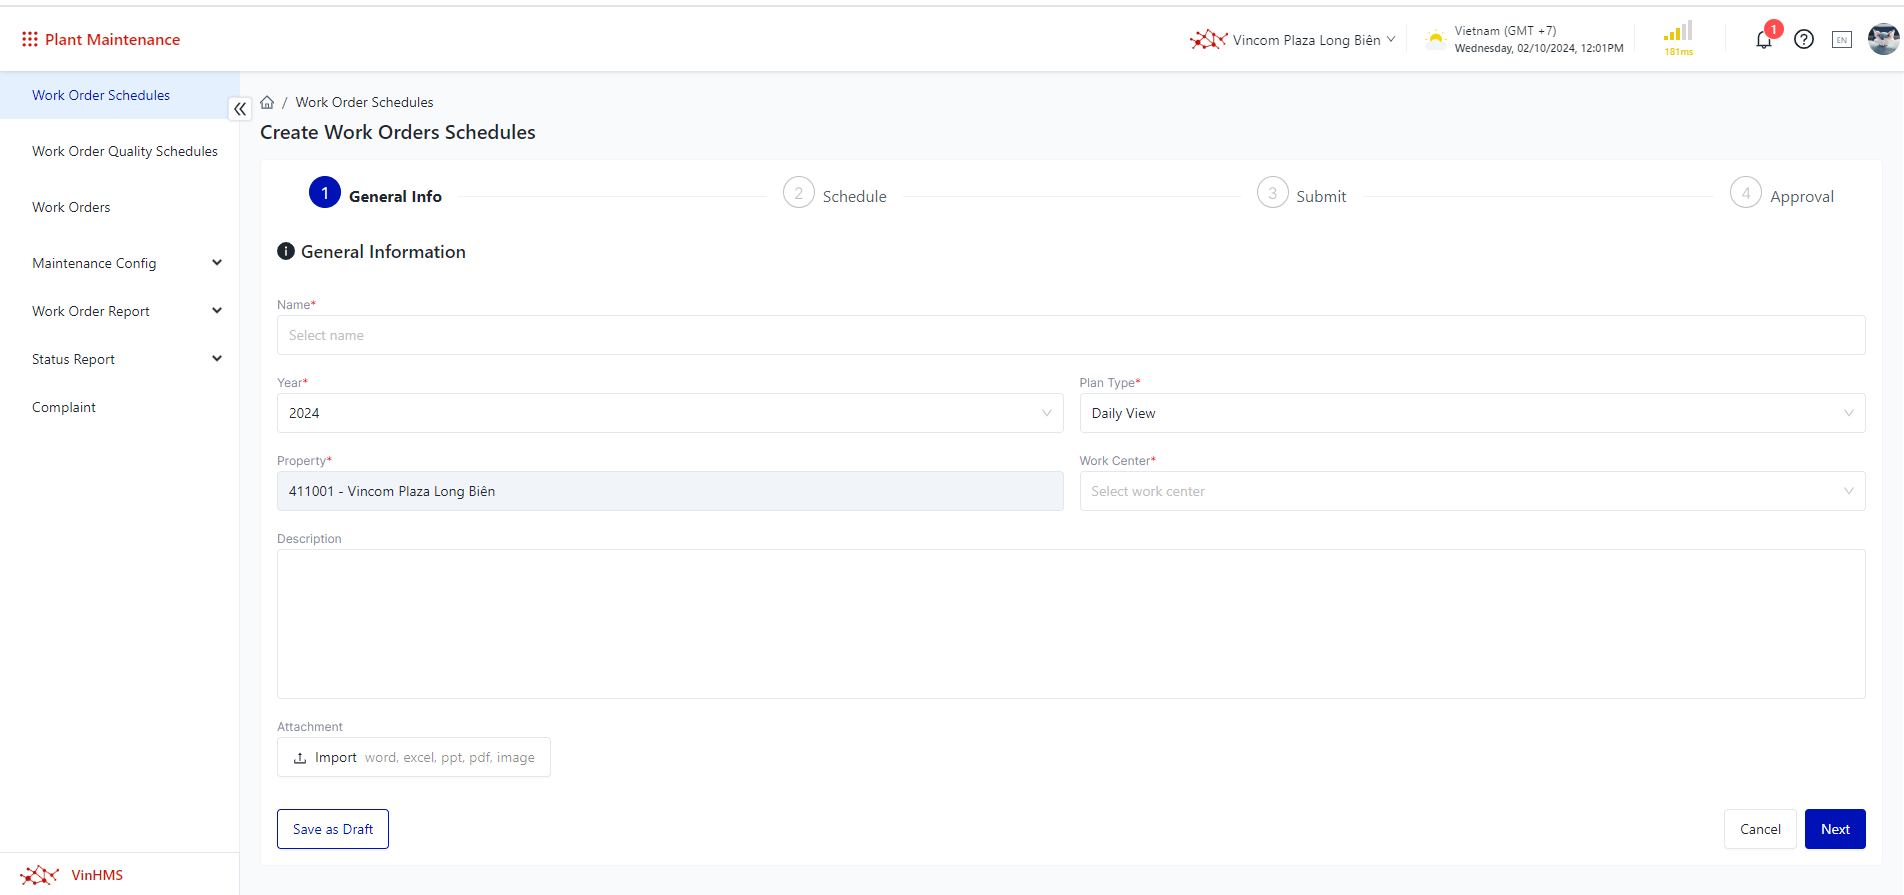
Step 1: Create Work Orders Schedules 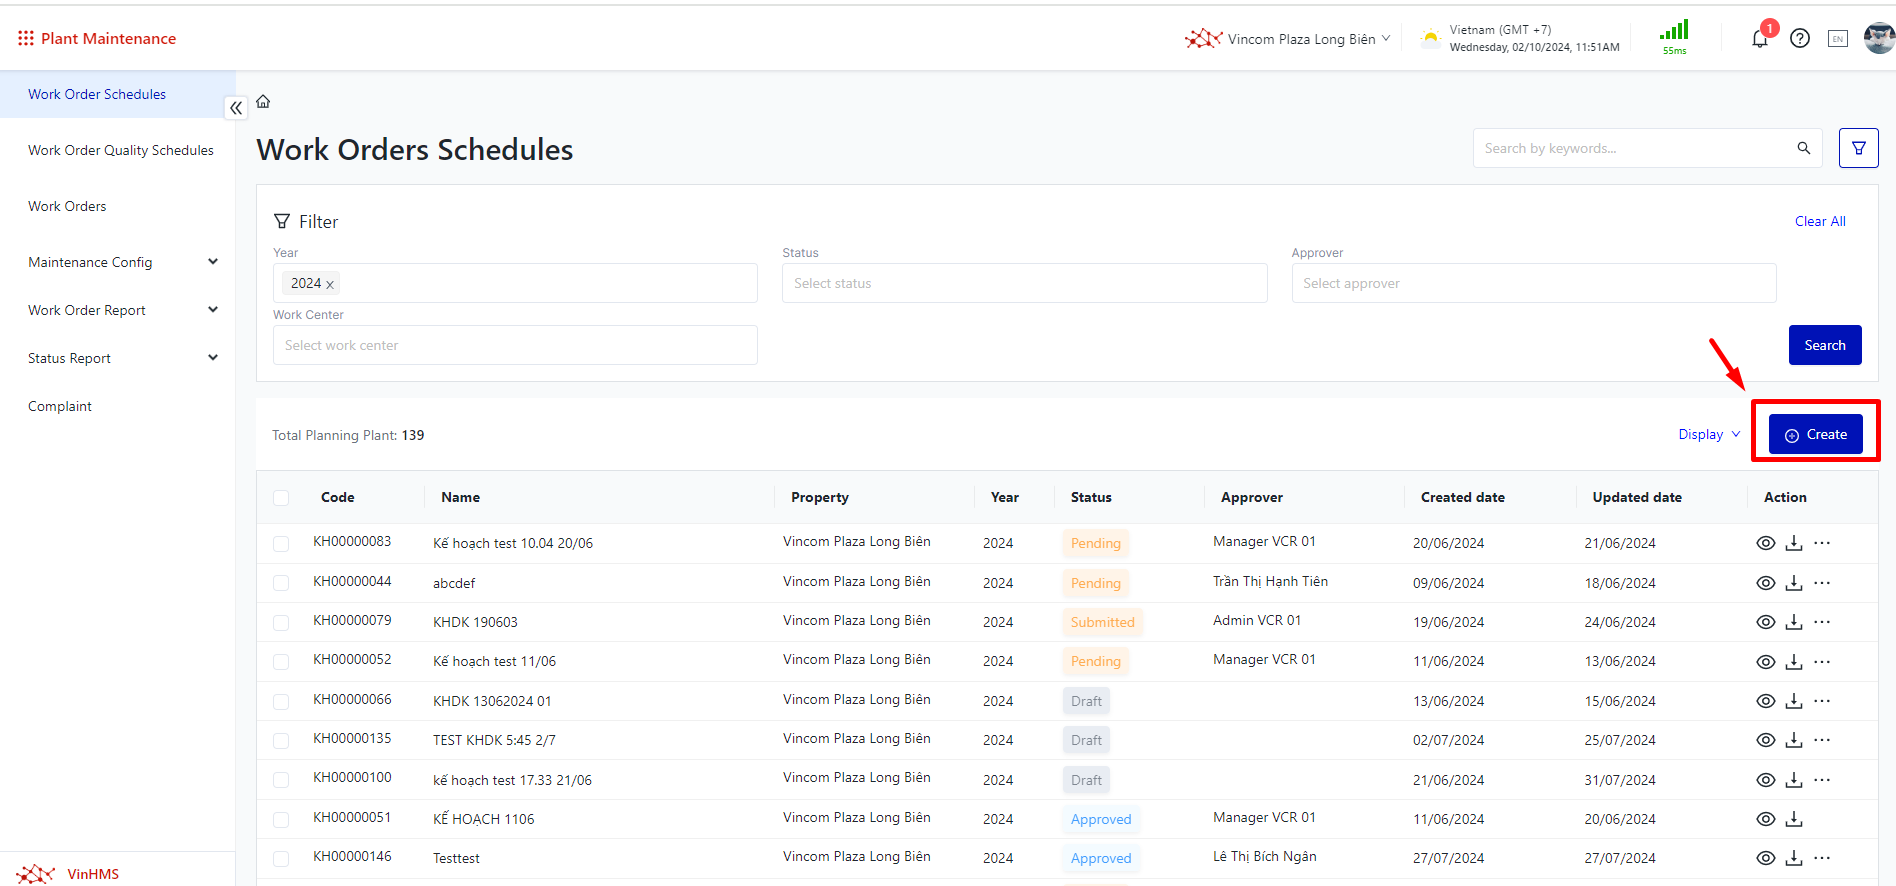 Step 2: Fill in the information
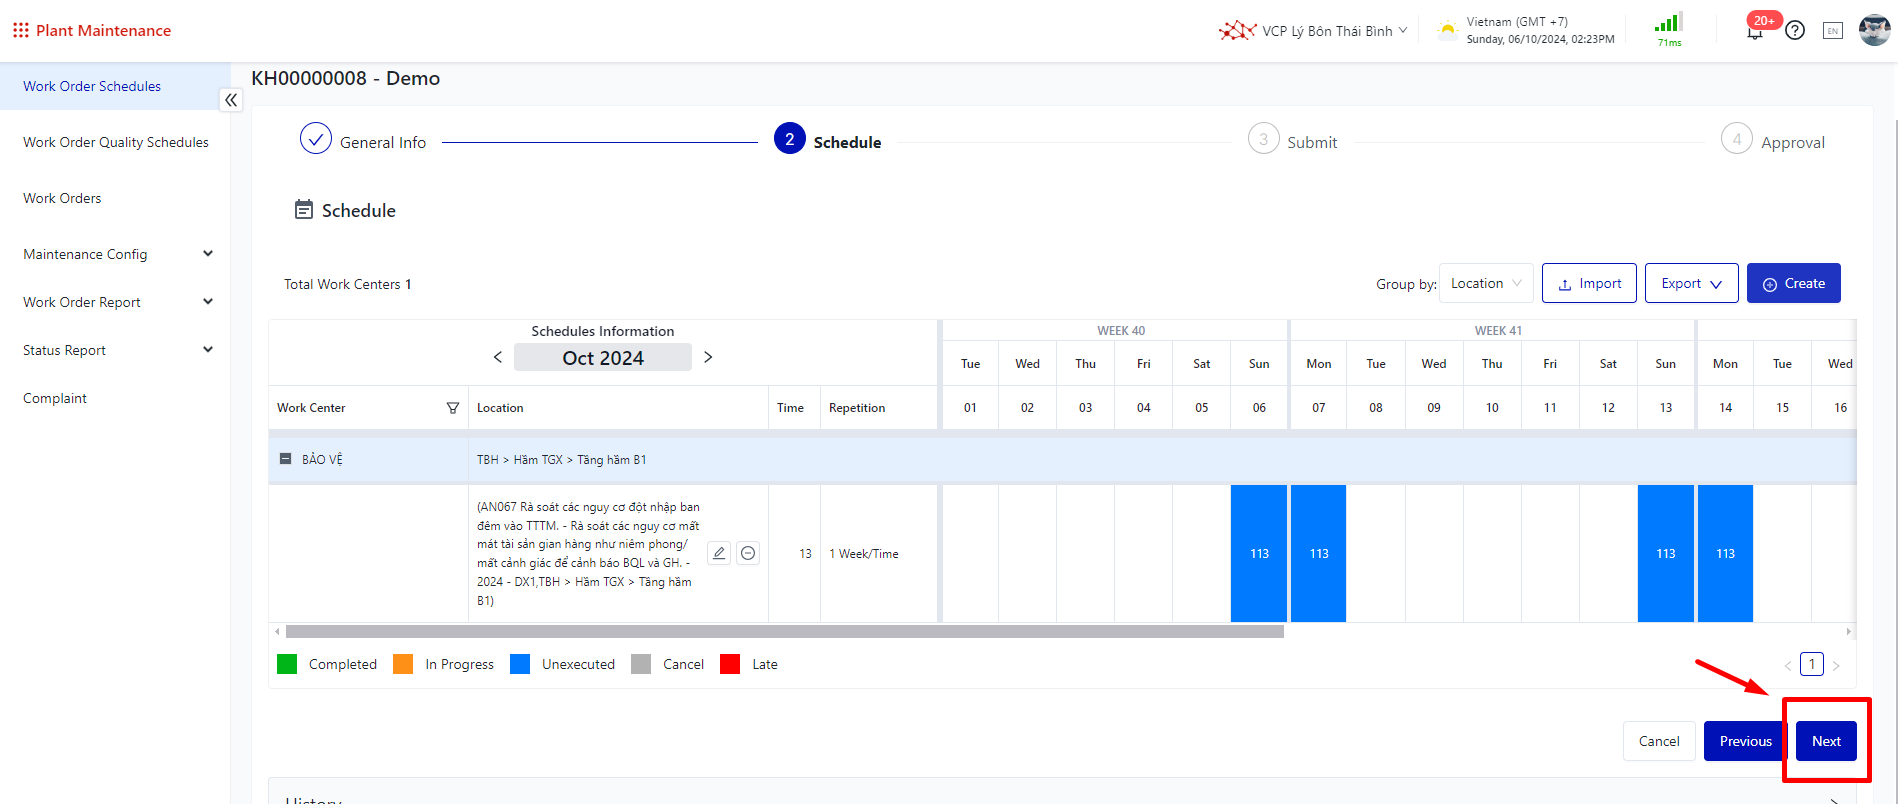
Step 3: Create Implementation Schedule 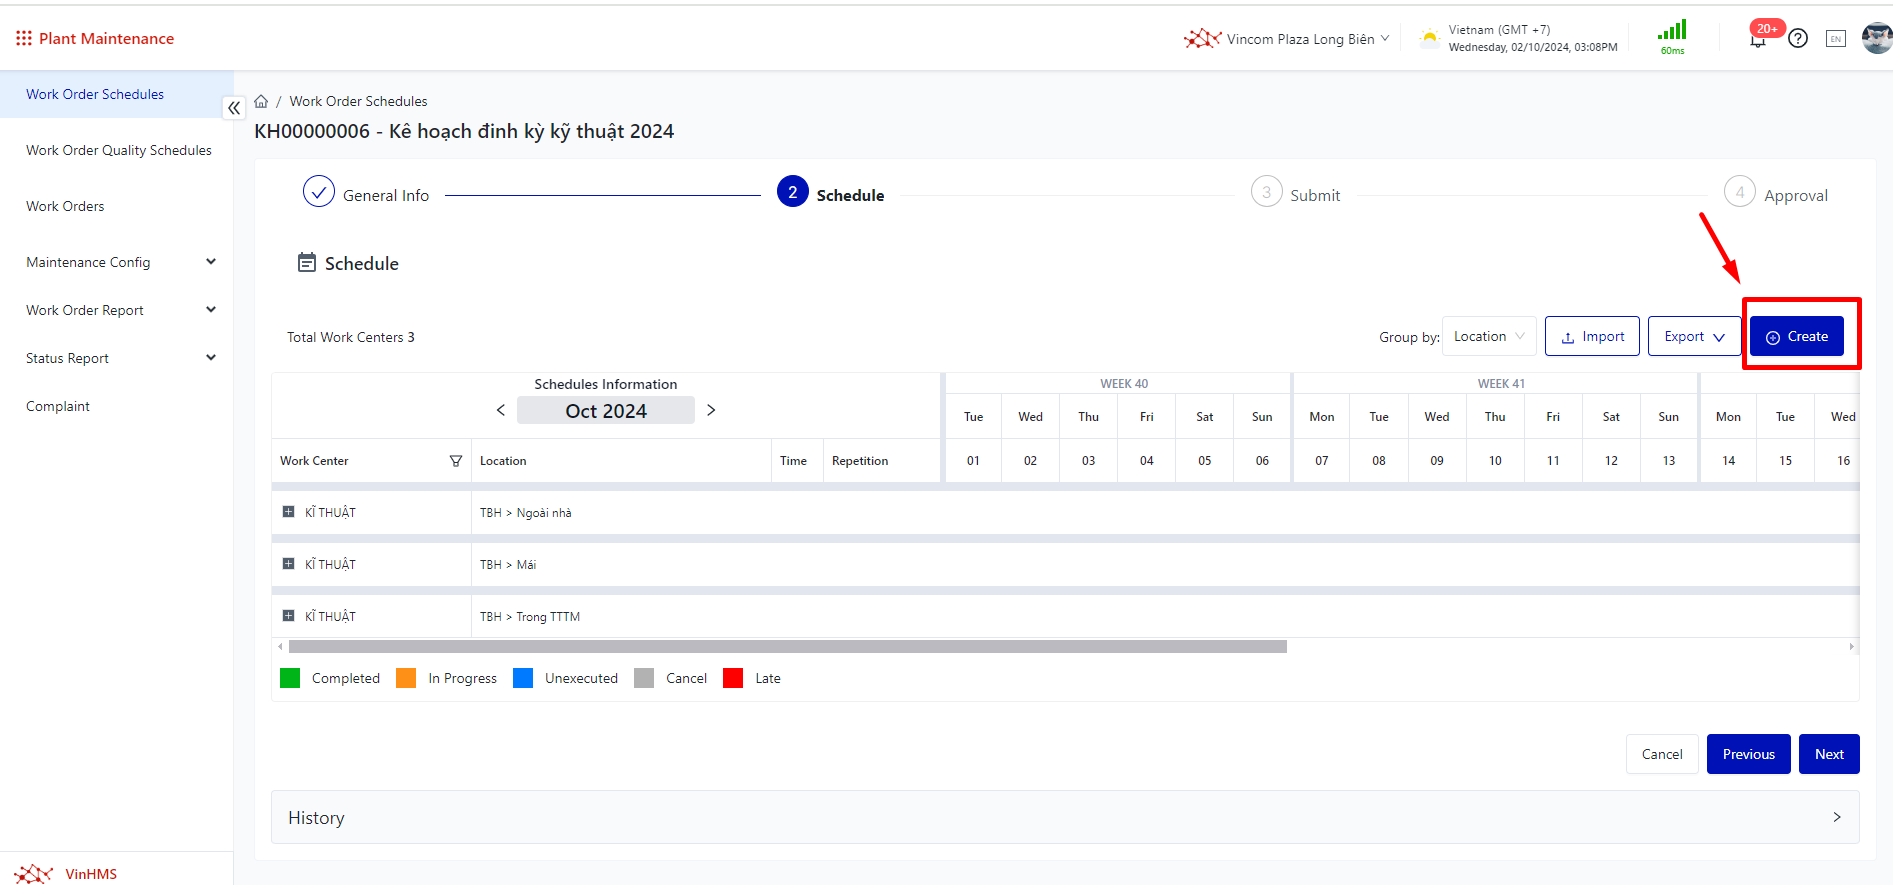
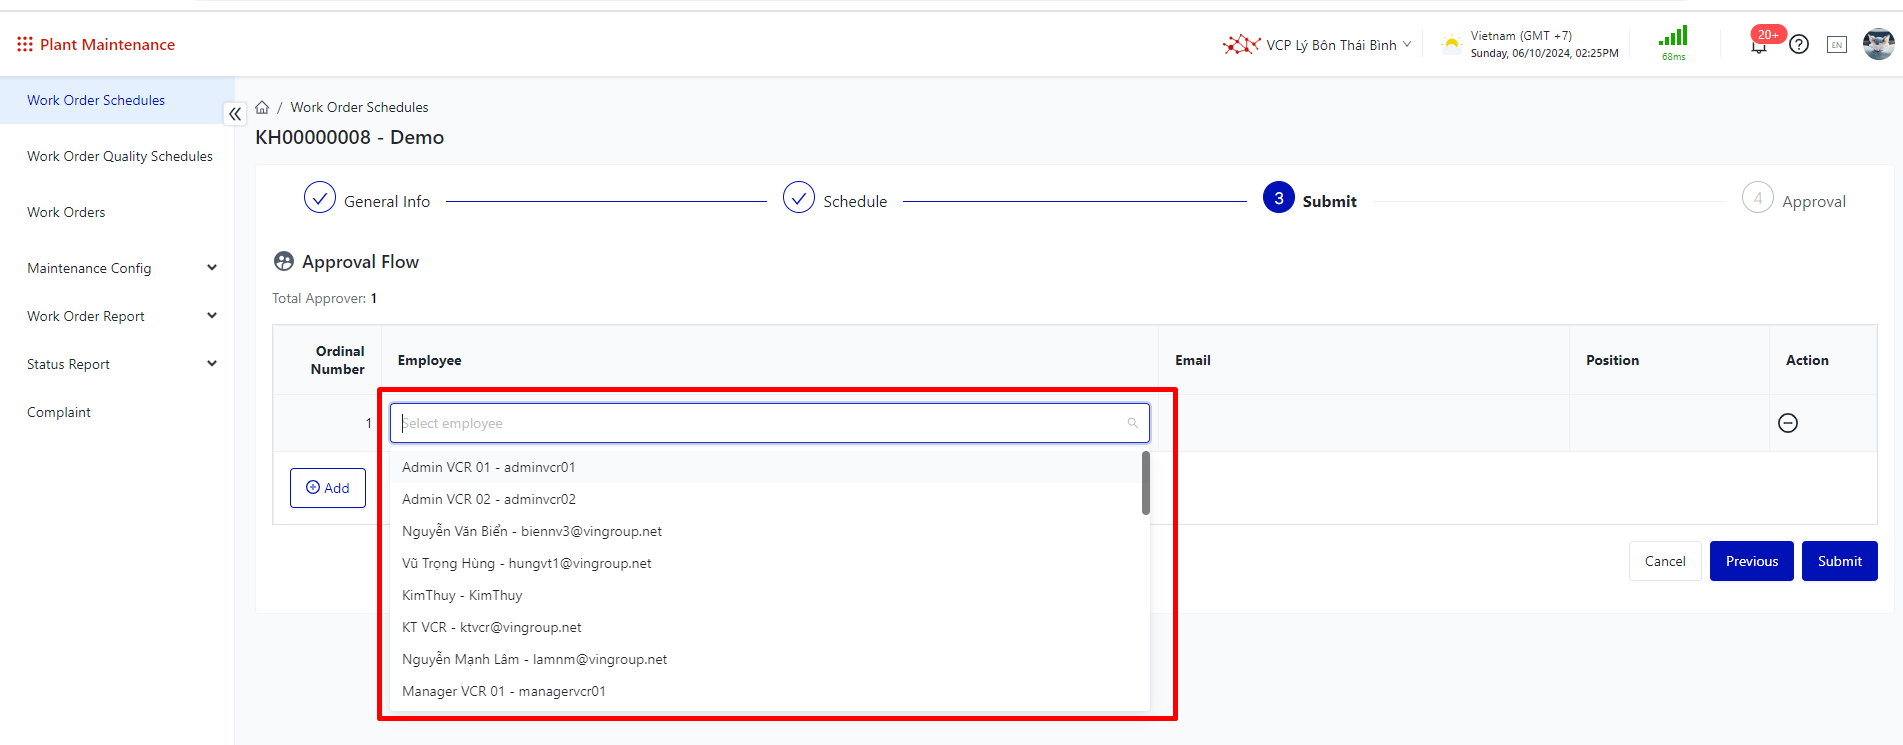
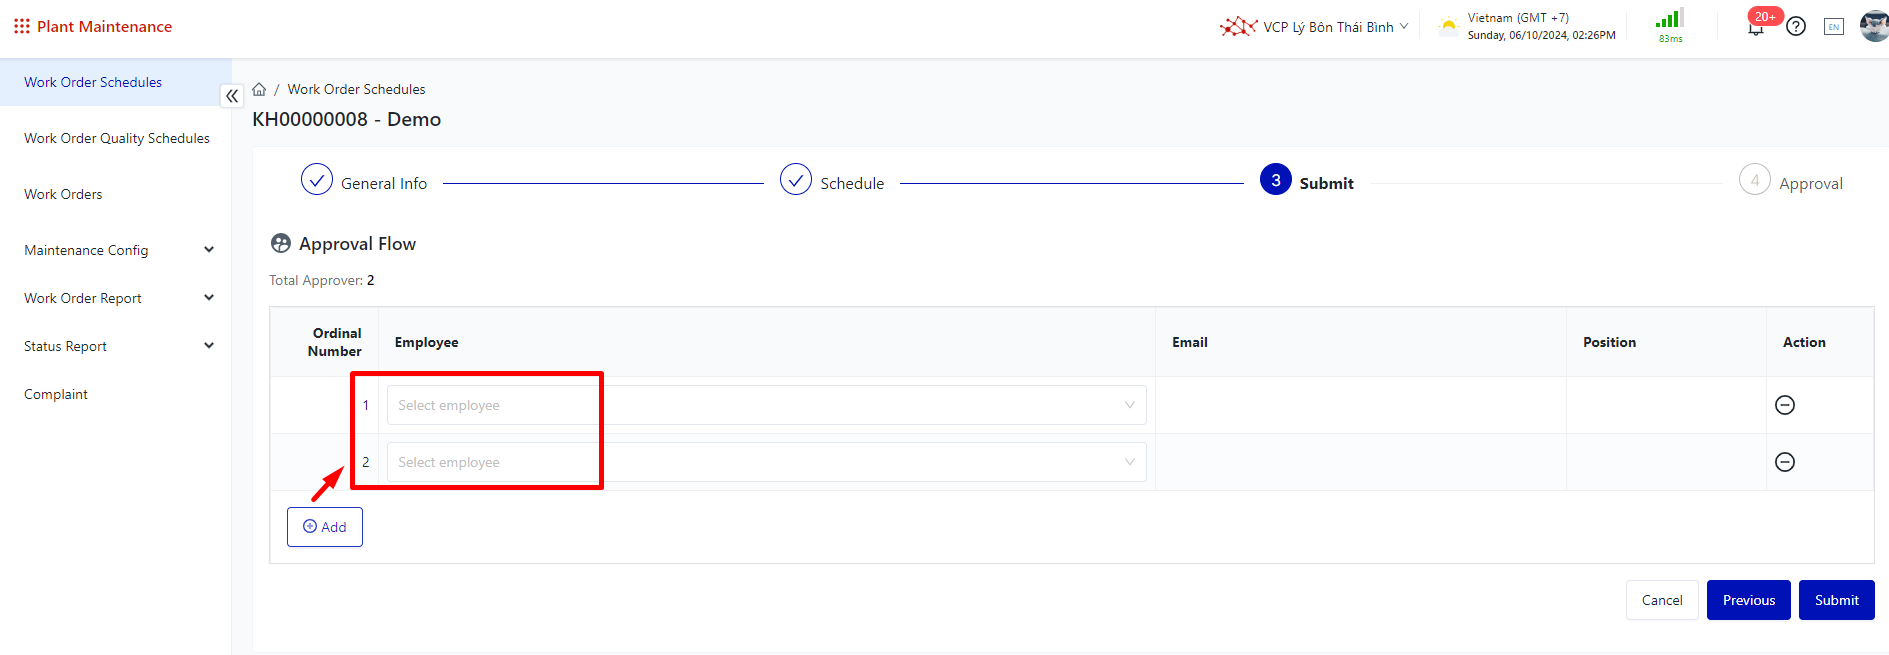
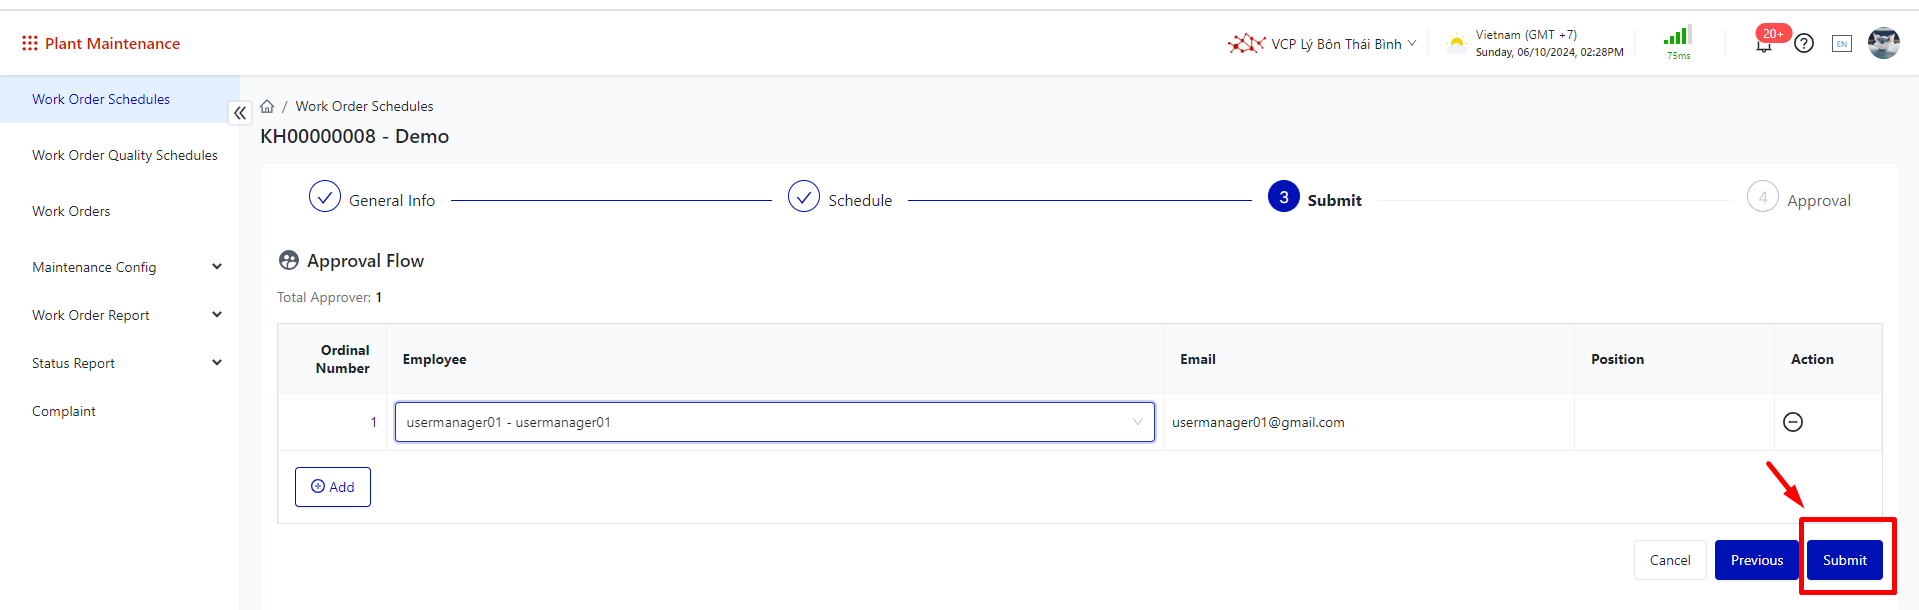
Step 4: Add Approvers
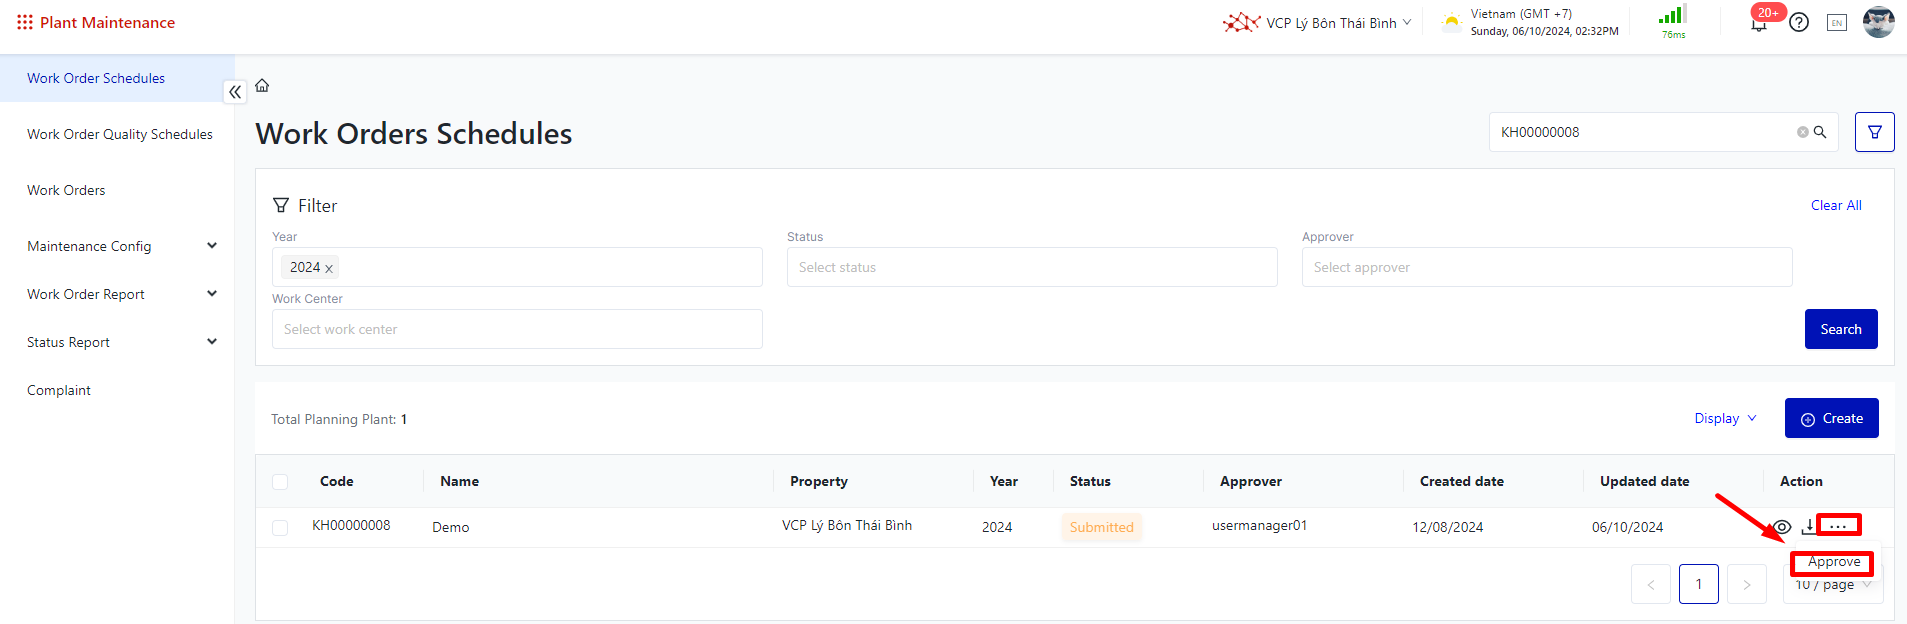
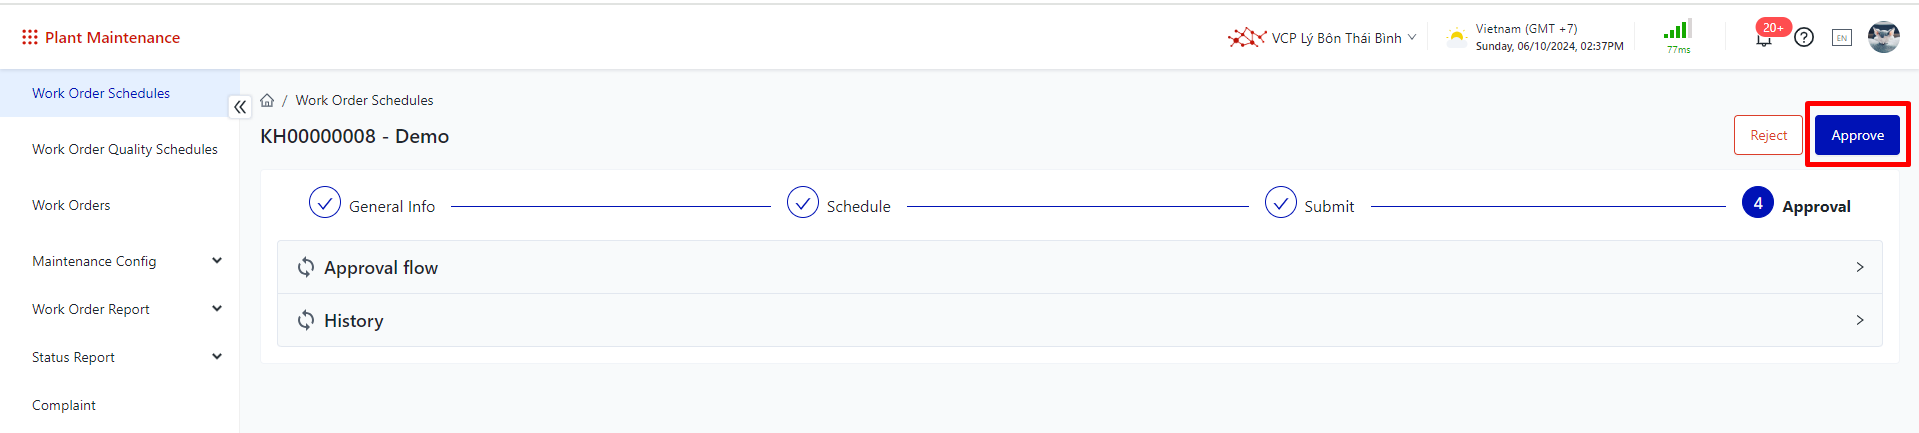
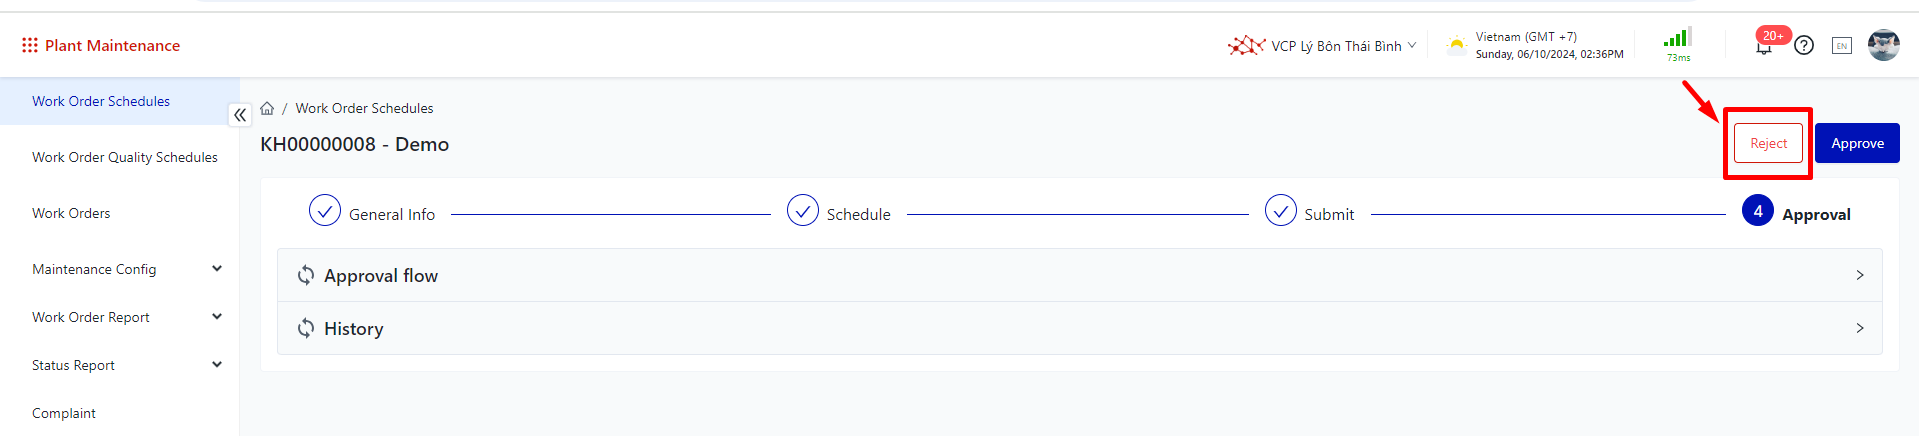
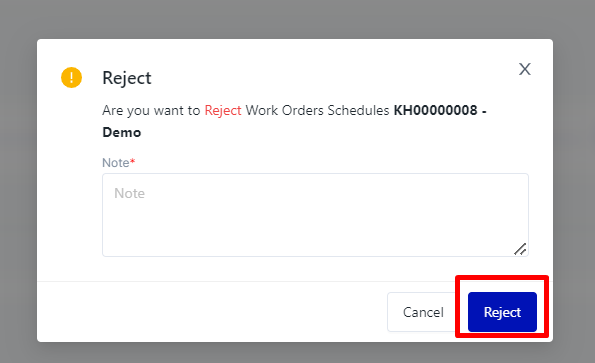
Step 5: Approver the Work Order Schedules
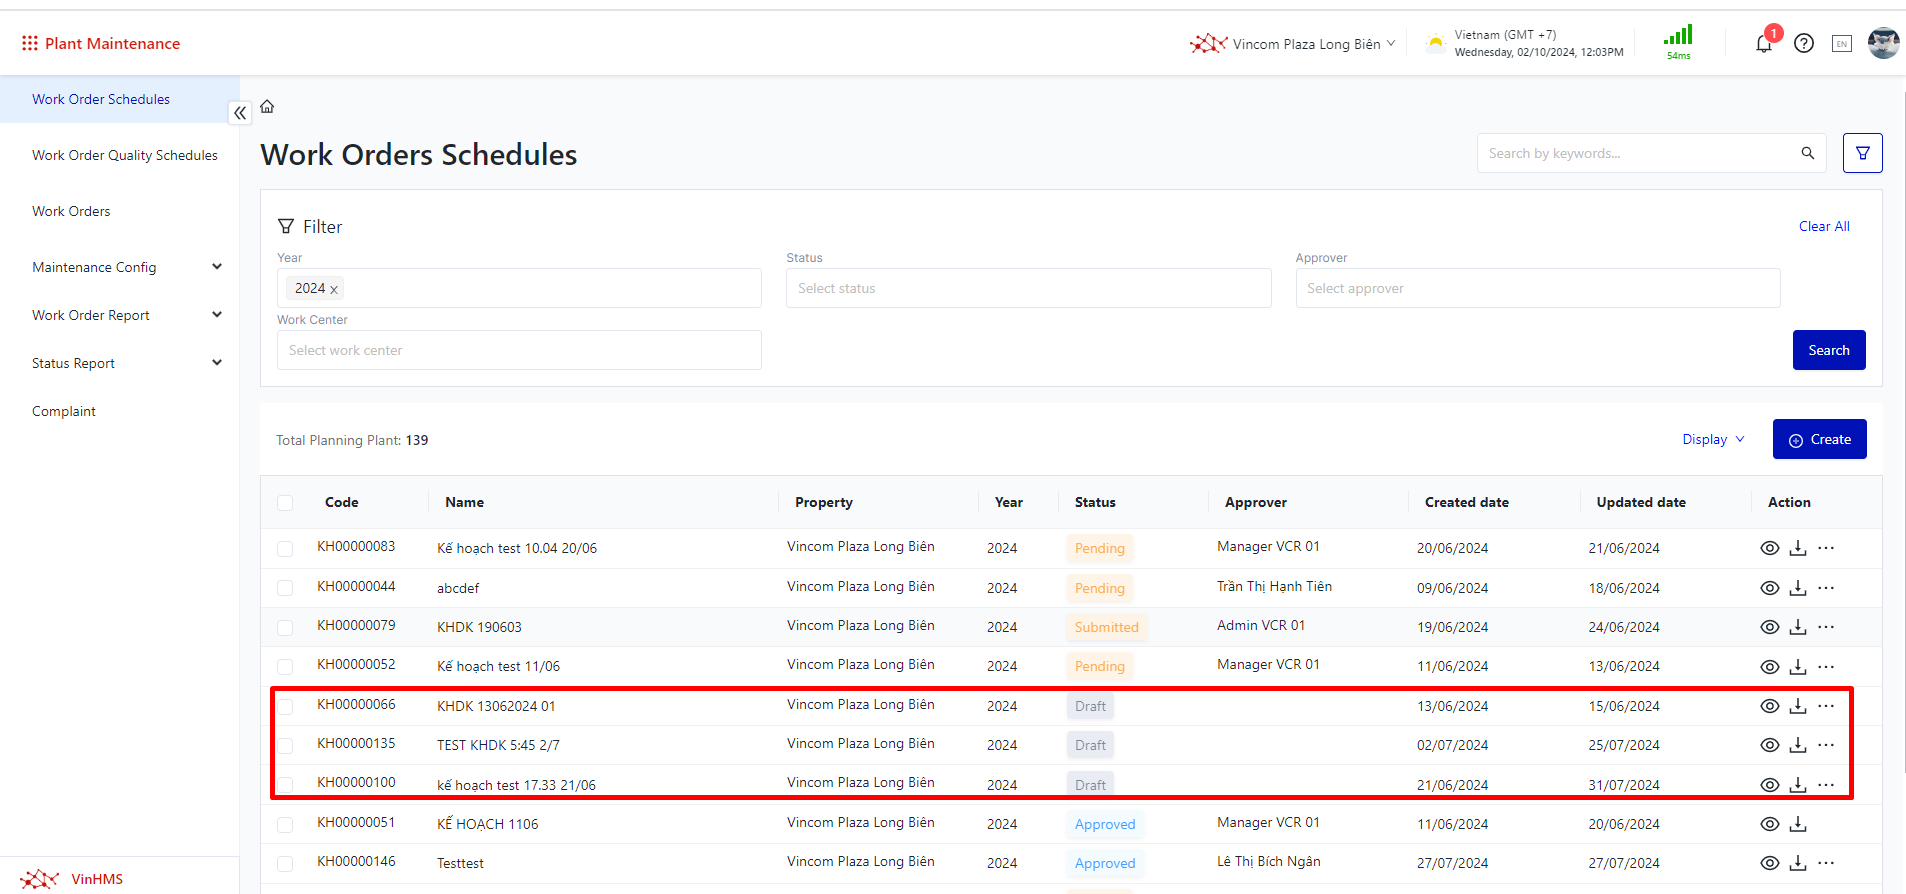
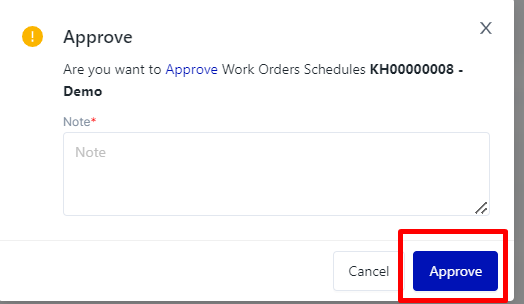 => Generate a Work Orders in the Work Oder Schedules 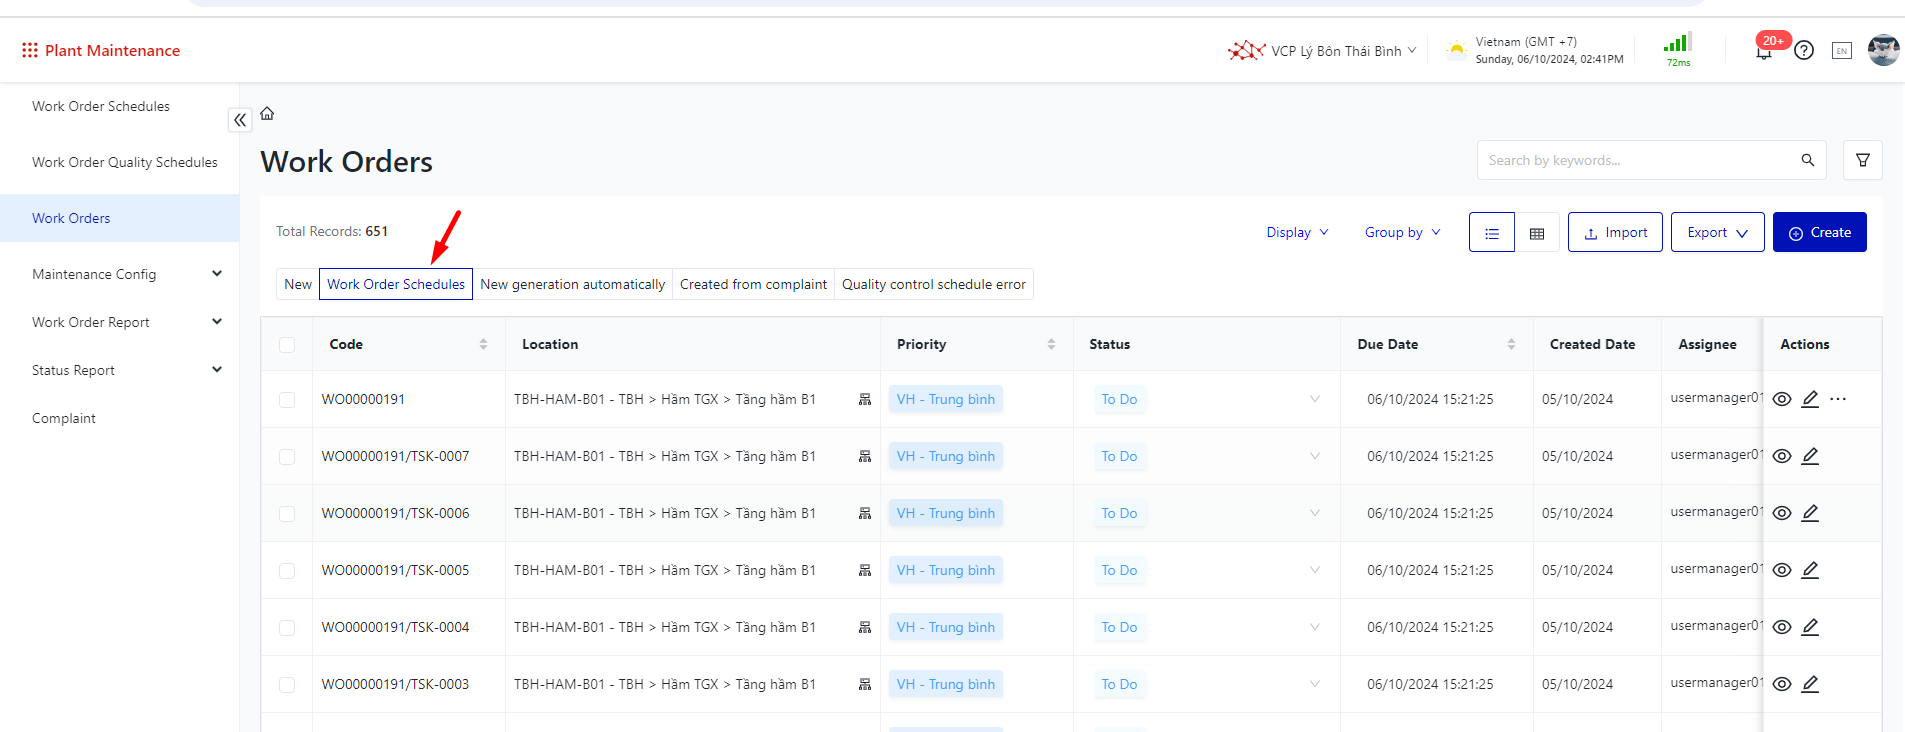 |