Skip table of contents

[ENG] Work Orders Quality Schedules

Screen Name

Work Orders Quality Schdules

Login → Plant Maintenance → Work Orders Quality Schdules

Summary


1. Create Work Orders Quality Schdules

Step 1: Create work orders quality schdules

image-20240918-034430.png


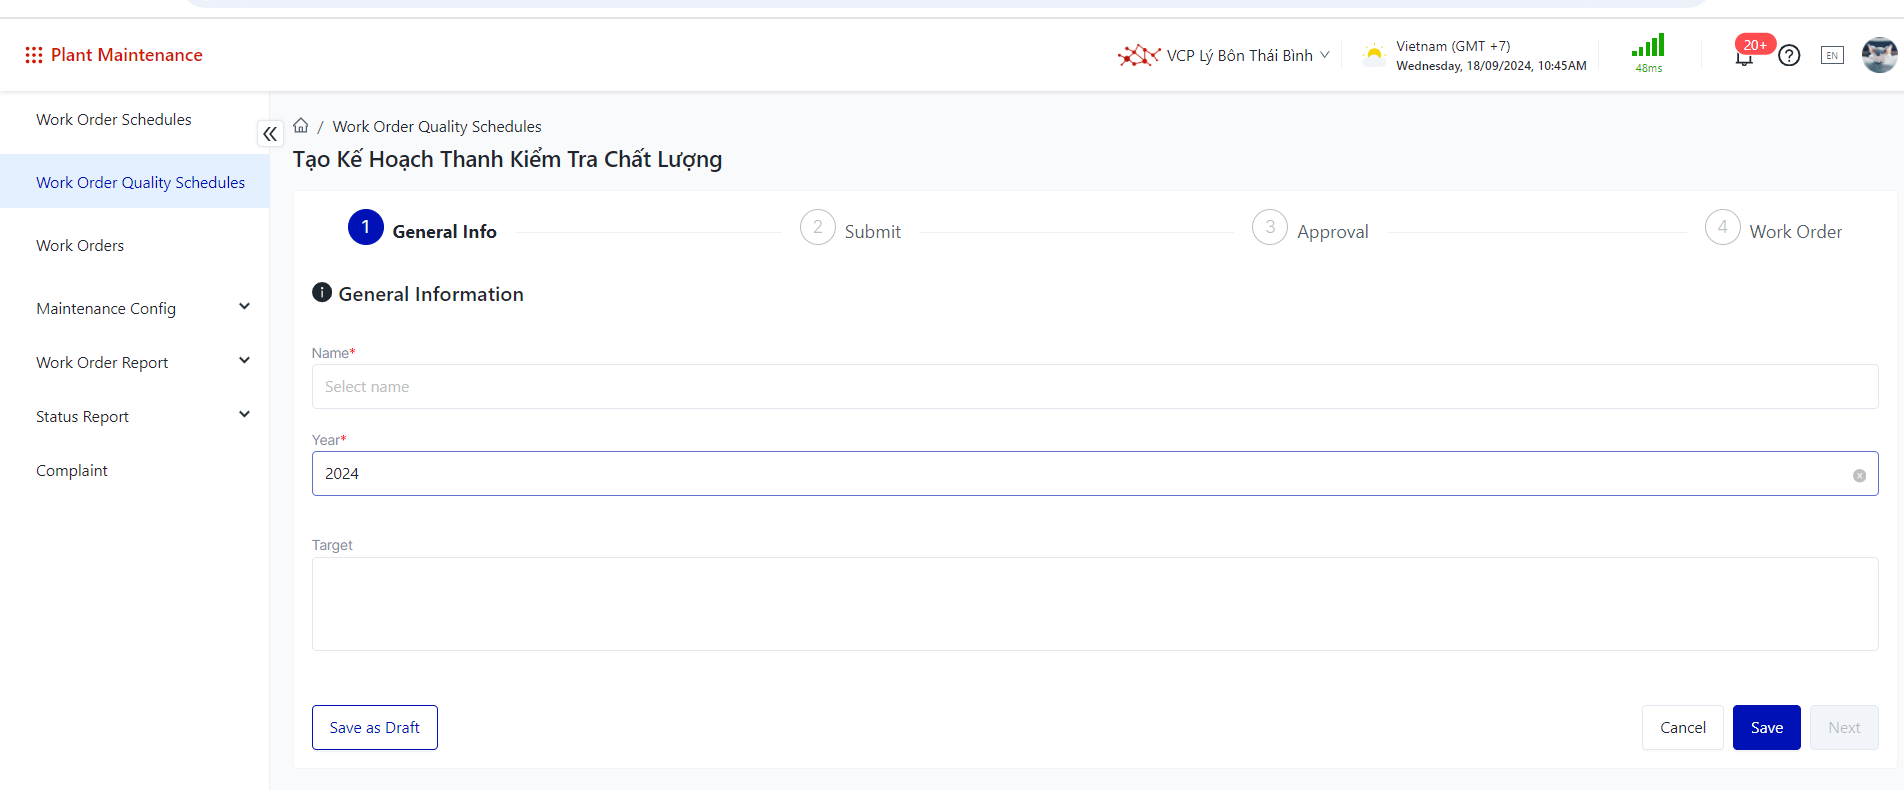
Step 2: Fill in the Information

  • Name : Required

  • Year: Required

  • Target : Not Required

image-20240918-034609.png

Step 3: Click Save => the system will display the Detailed Plan screen.

Step 4: Click Add to open the popup for creating a Detailed Plan.
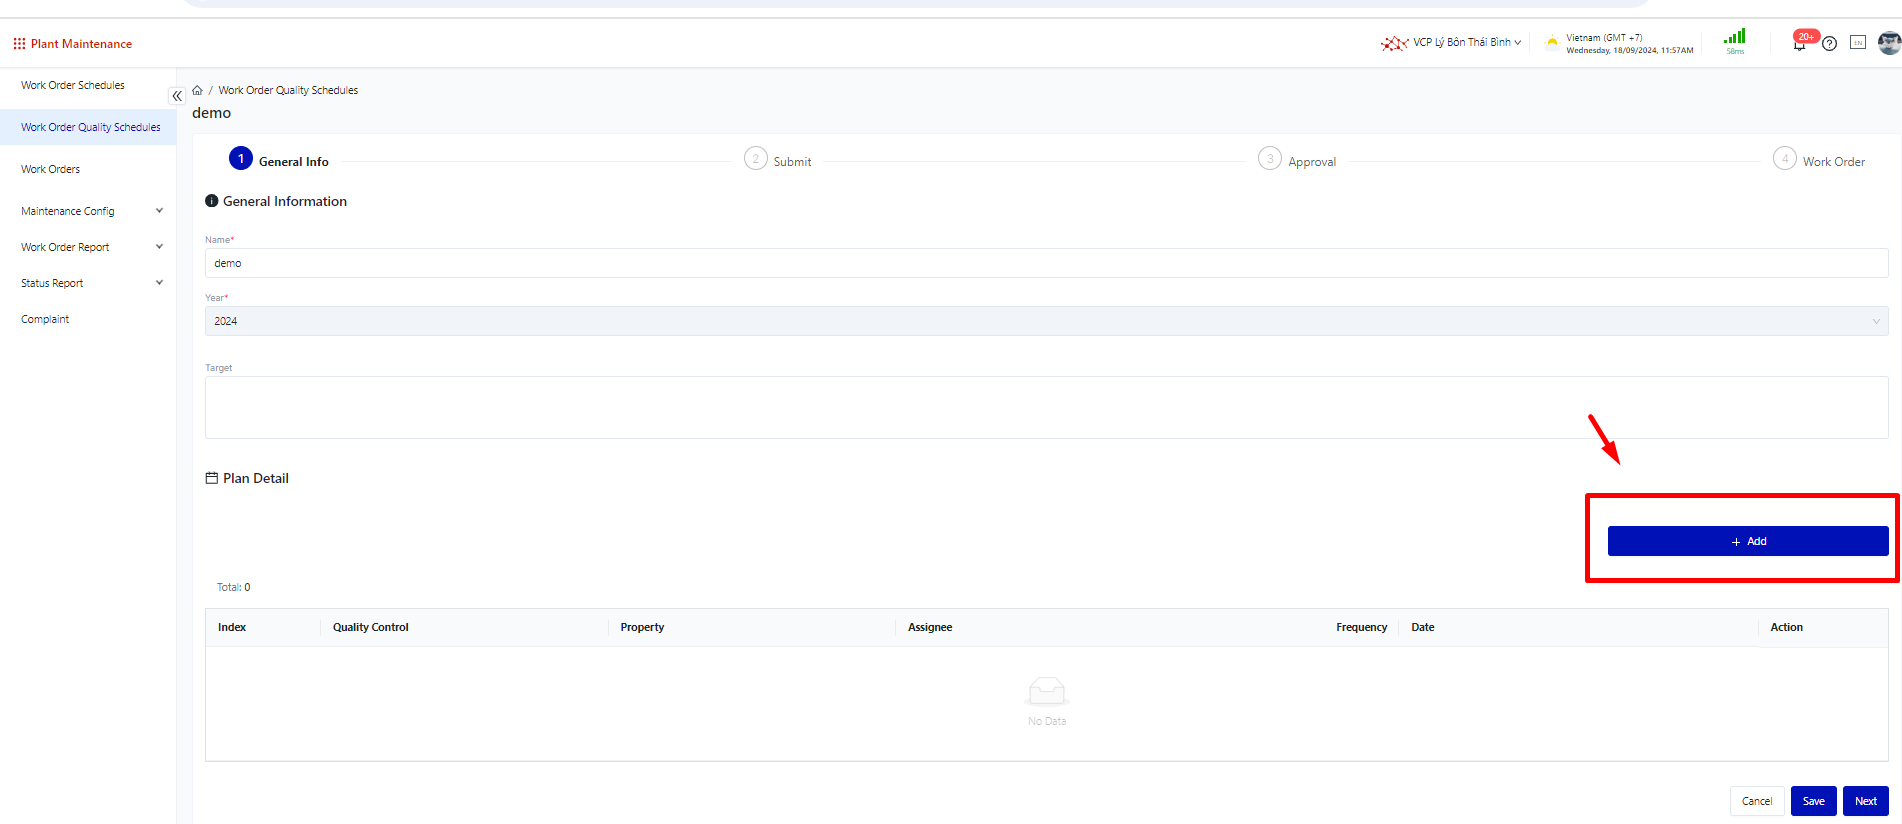
image-20240918-045815.png

Step 5: Enter the Detailed Plan information.
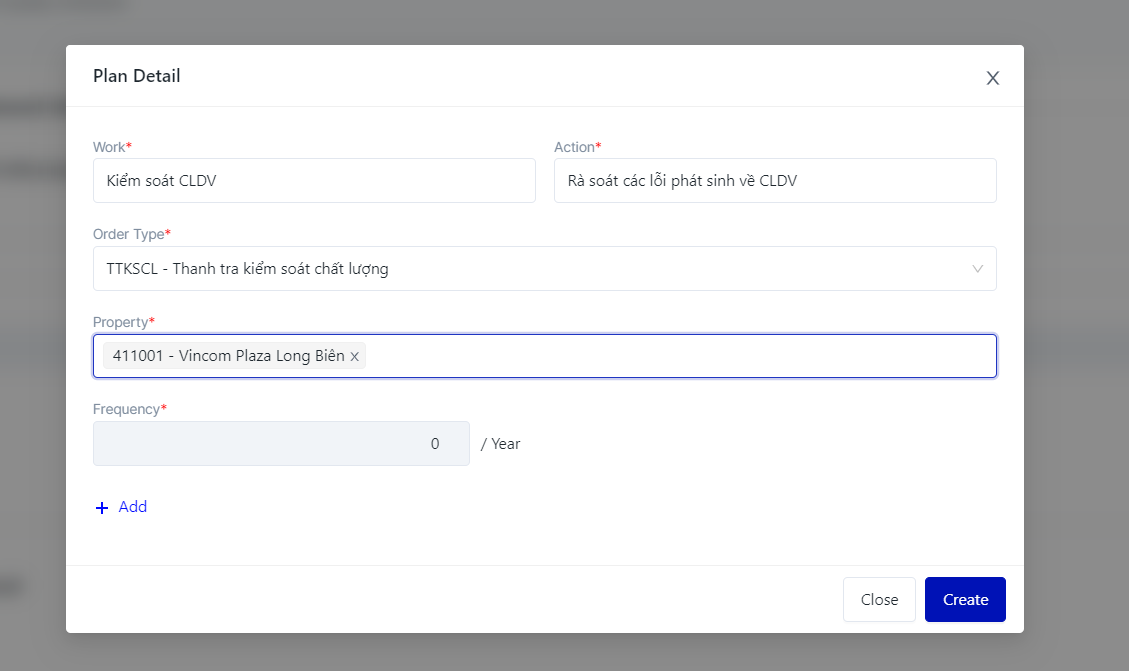
  • Work: Required

  • Action: Required

  • Order Type: Required

  • Property: Required

  • Frequency: counted by the number of plans added

image-20240918-065412.png

Step 5.1 Click Add Plan and enter the time

  • Start date: Required

  • End date: Required

  • Assignee: Optional


image-20240918-065819.png

Step 6: Click Create

Step 7: Click Next.

2. Plan Submit

*Case of 2 Approvers

Step 1: Click the Add button.
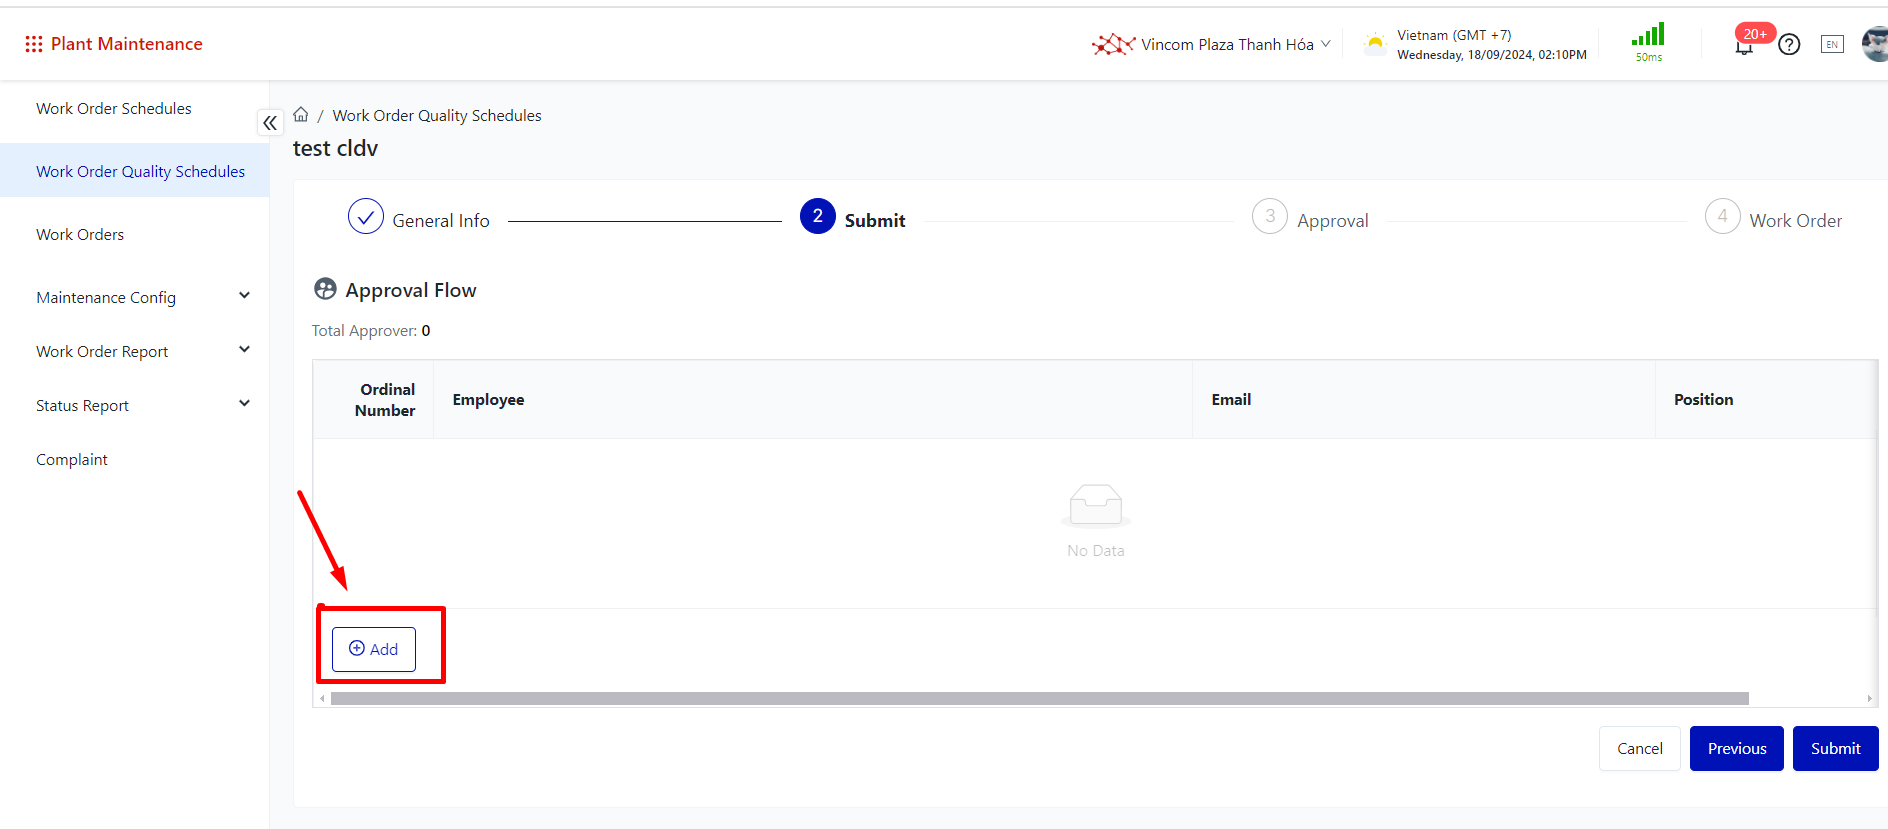
image-20240918-071101.png

Step 2: Select Employee 1 and Employee 2.
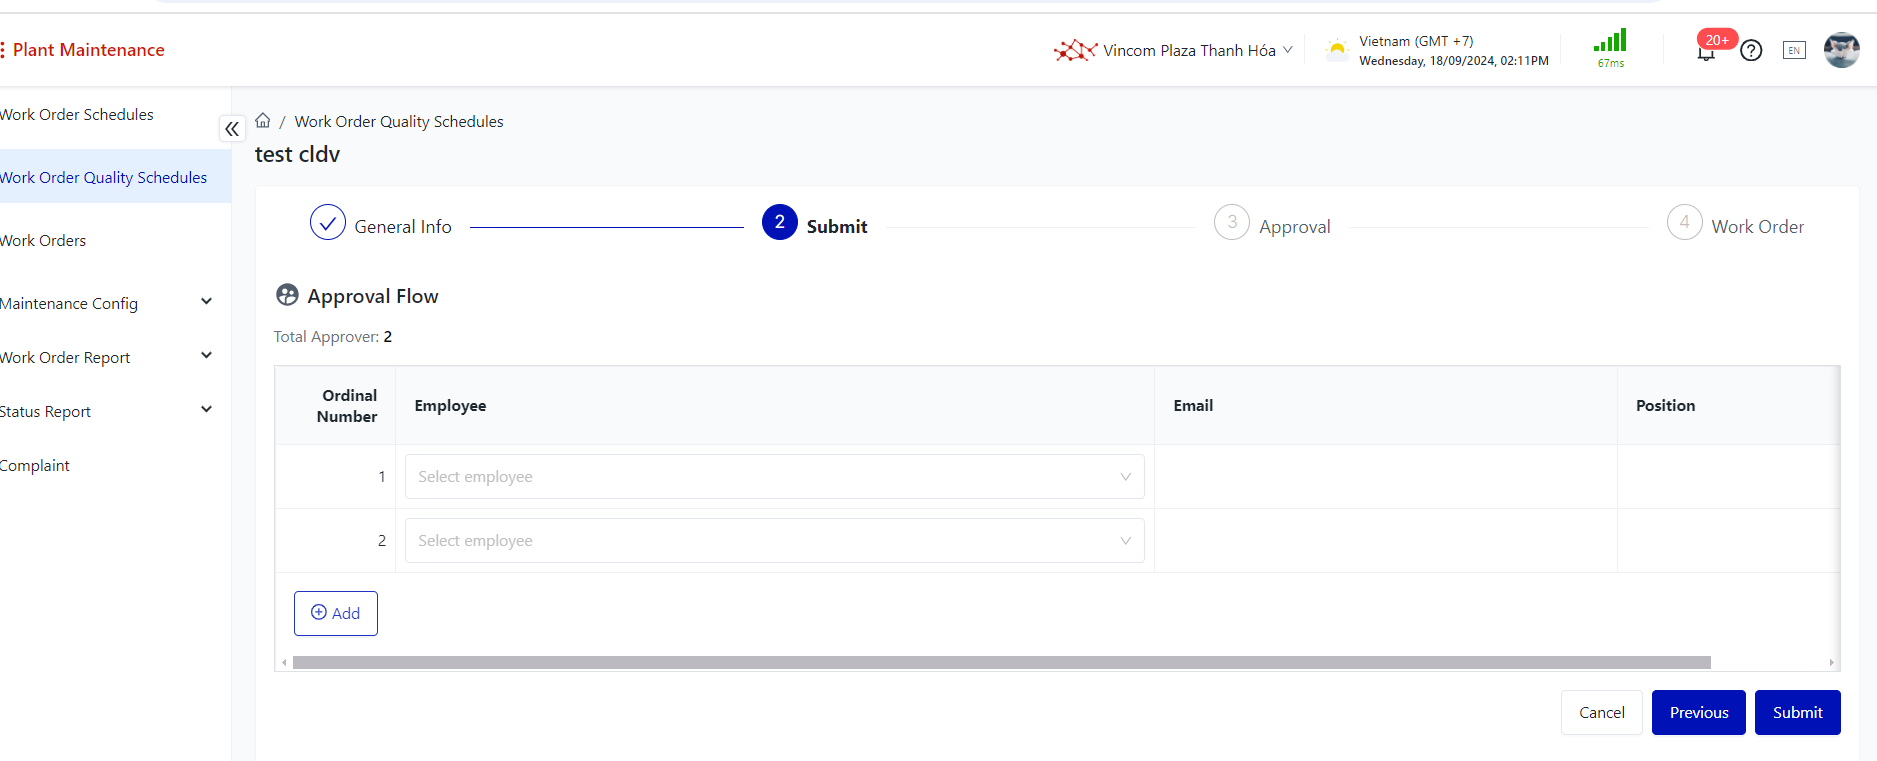
 

image-20240918-071136.png

Step 3: Click Submit

image-20240918-071525.png

Note:

Case 1: If Approver 1 agrees to approve the plan, the system will send a notification to Approver 2.

Case 2: If Approver 1 rejects the plan, no notification will be sent to Approver 2 => the user can resubmit the plan.

Case 3: If Approver 1 agrees and Approver 2 rejects => the user can resubmit the plan.

Case 4: If both Approver 1 and Approver 2 agree, the plan will be successfully approved, and tasks will be automatically generated.


3. Plan Approval

Step 1: Approver 1 logs into their account.

Step 2: Open notifications > Click on the notification.

image-20240918-073538.png

Step 3: Click Approve.

image-20240918-073810.png

Step 4: Enter Approval Notes => Click the Approve button.
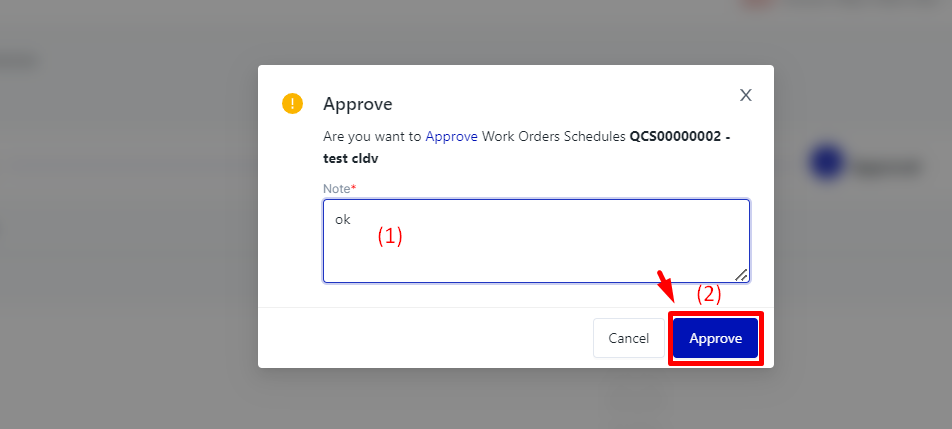
image-20240918-074058.png

Step 5: Approver 2 logs into their account.

Step 6: Open notifications > Click on the notification.

image-20240919-034627.png

Step 7: Click Approve.

image-20240919-034653.png

Step 8: Enter Approval Notes => Click the Approve button.
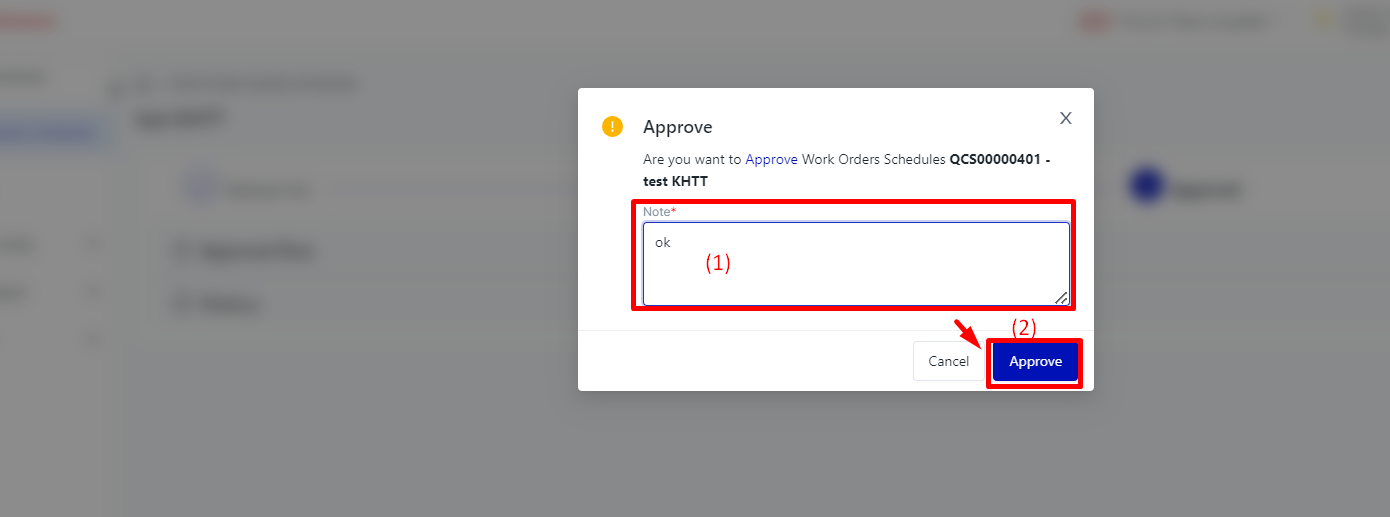
image-20240919-034833.png

Note: Once the plan is successfully approved, tasks will be automatically generated
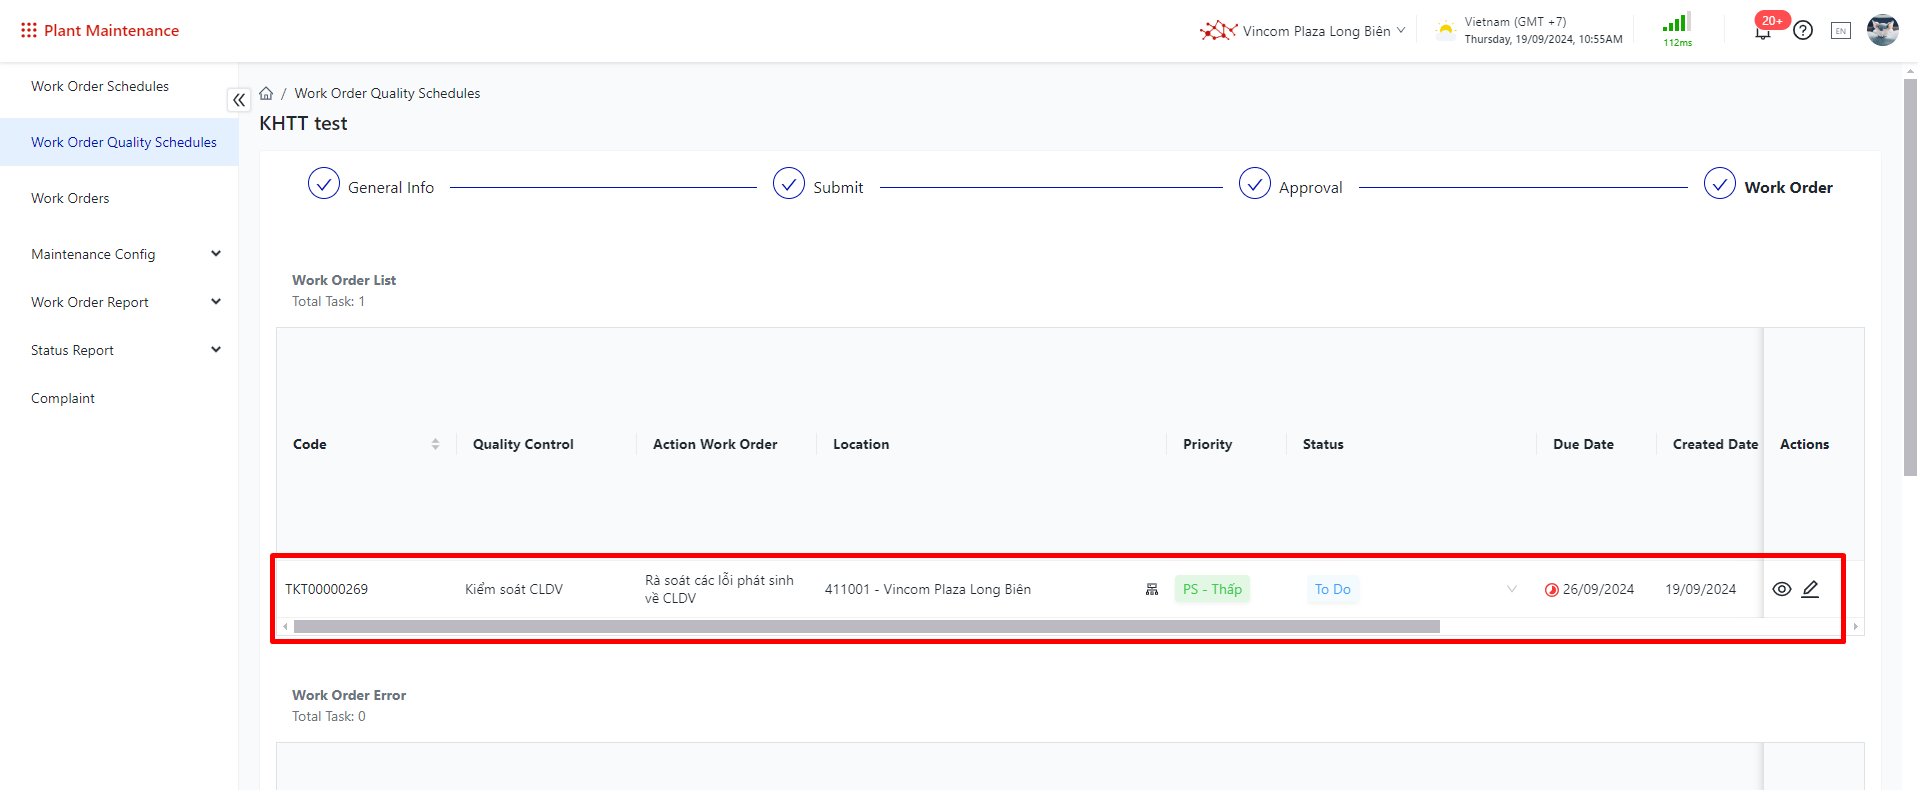
image-20240919-035533.png


4. Work Order

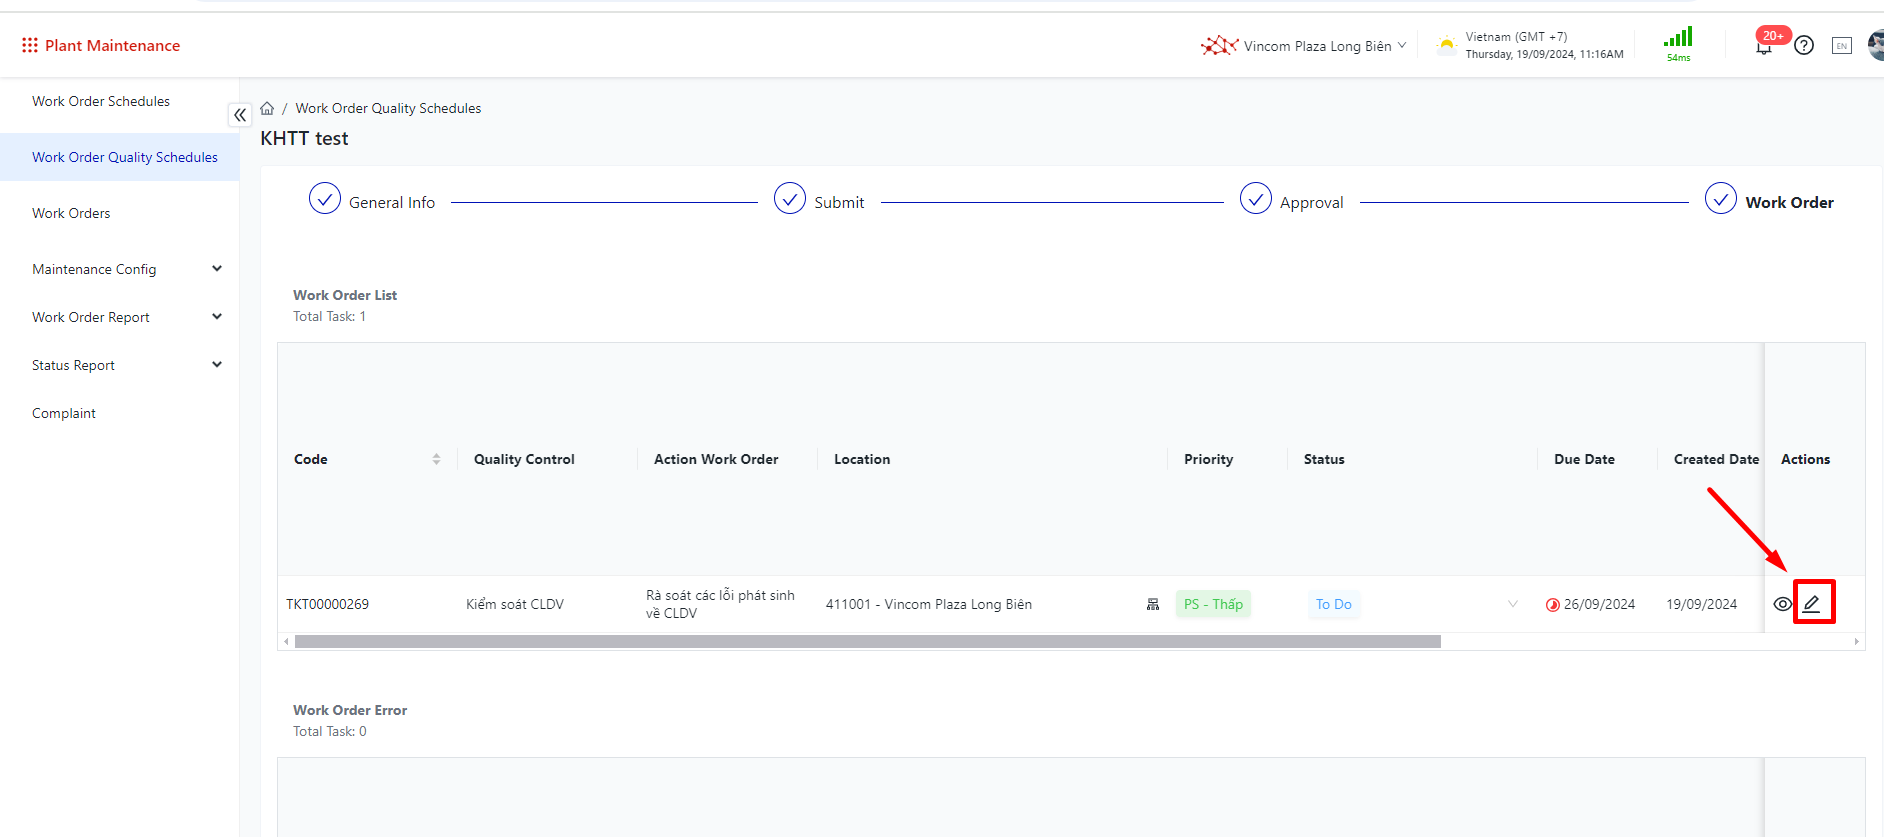
Step 1: Click on Edit

image-20240919-041649.png

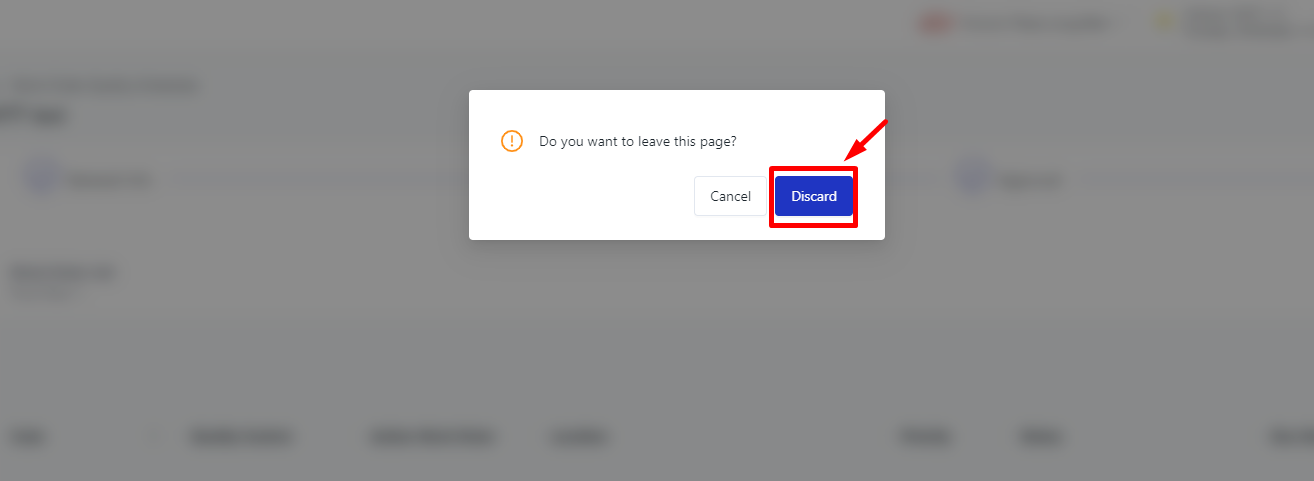
Step 2: Click on Discard

image-20240919-041746.png

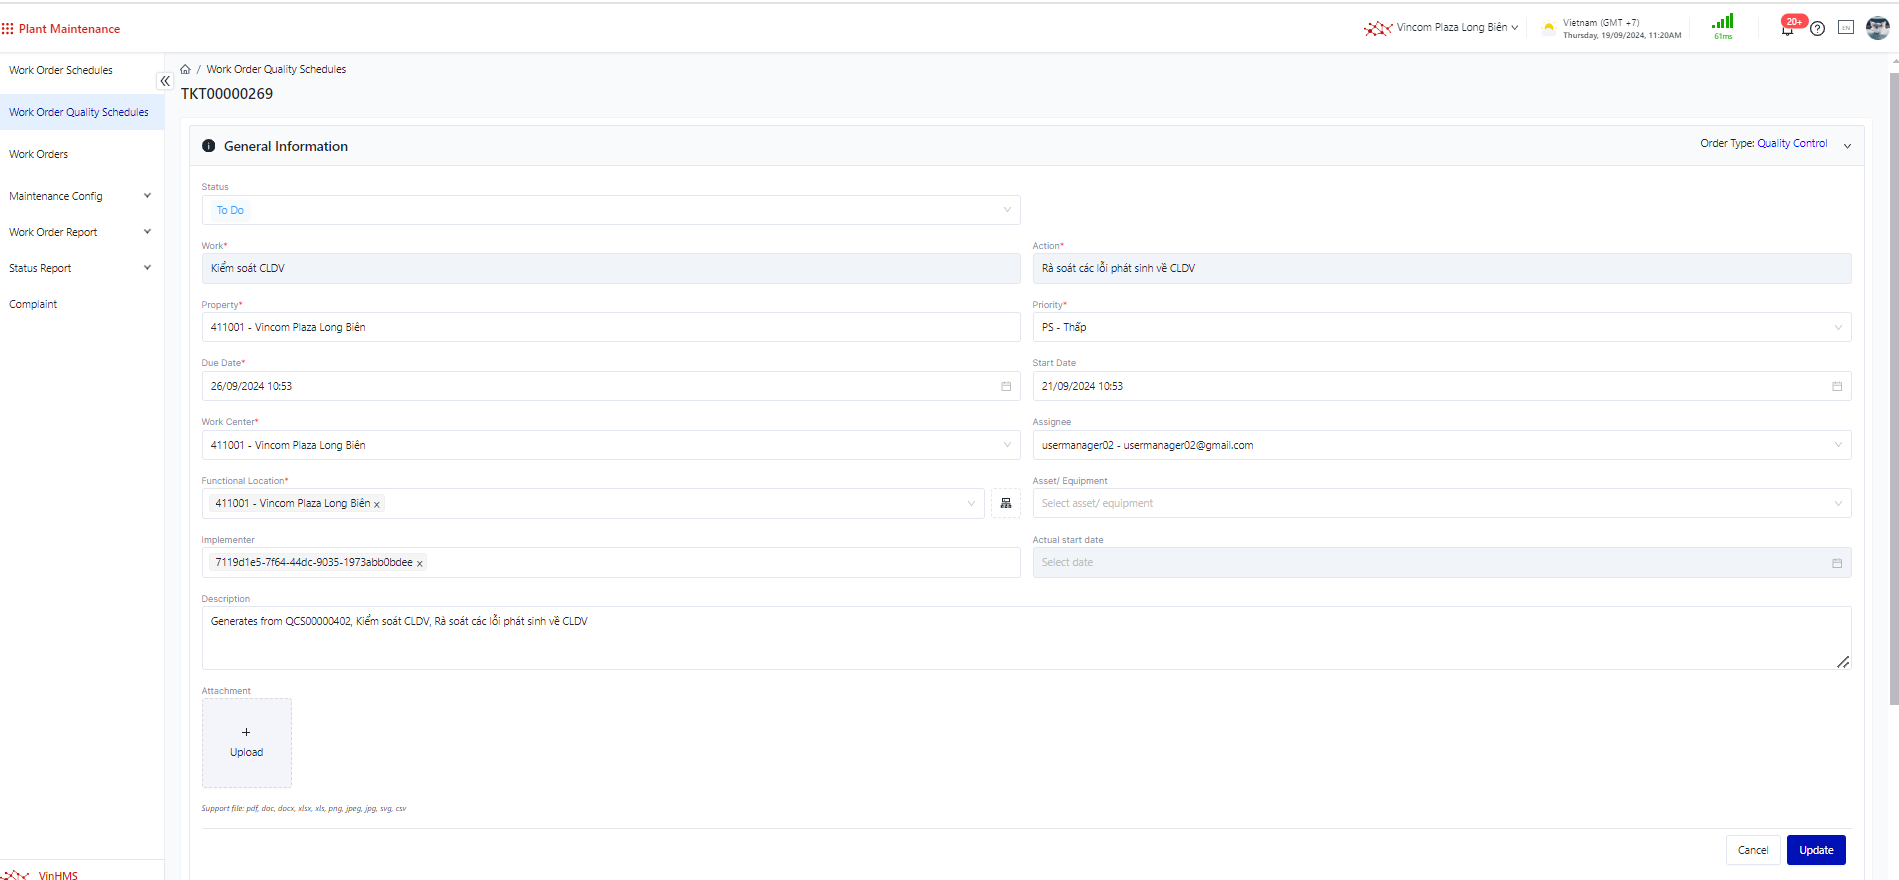
Step 3: Enter information

  • Work: Take information from the detailed plan (not editable)

  • Action: Take information from the detailed plan (not editable)

  • Property: Take information from the detailed plan (not editable)

  • Priority: Required

  • Due Date: Required

  • Start Date

  • Work Center: Required

  • Assignee: Optional

  • Functional Location: Required

  • Asset/ Equipment: Optional

  • Implementer: Optional

  • Status: Optional

  • Description: Optional

  • Attachment: Optional

image-20240919-042025.png

Step 4: Click on Update

5. Recording Errors Arising from the Journey

For Record Fault there are 2 case: Create work order Do not create work order.

On Trip Information:

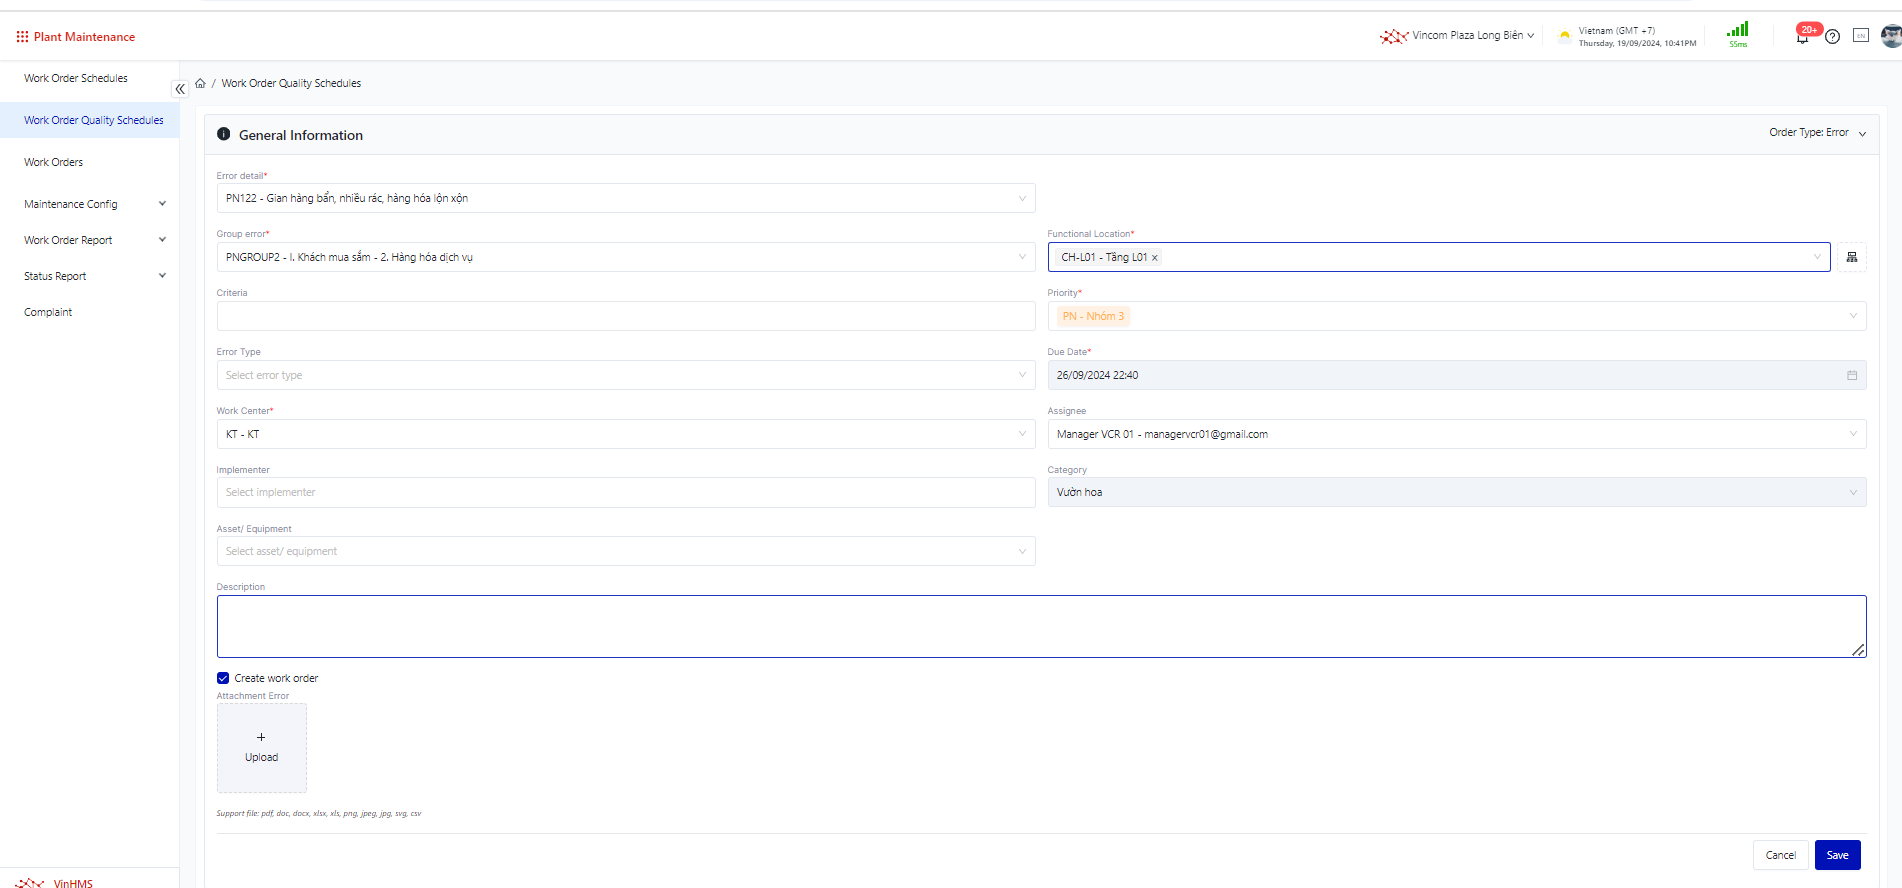
Step 1: Click on Fault
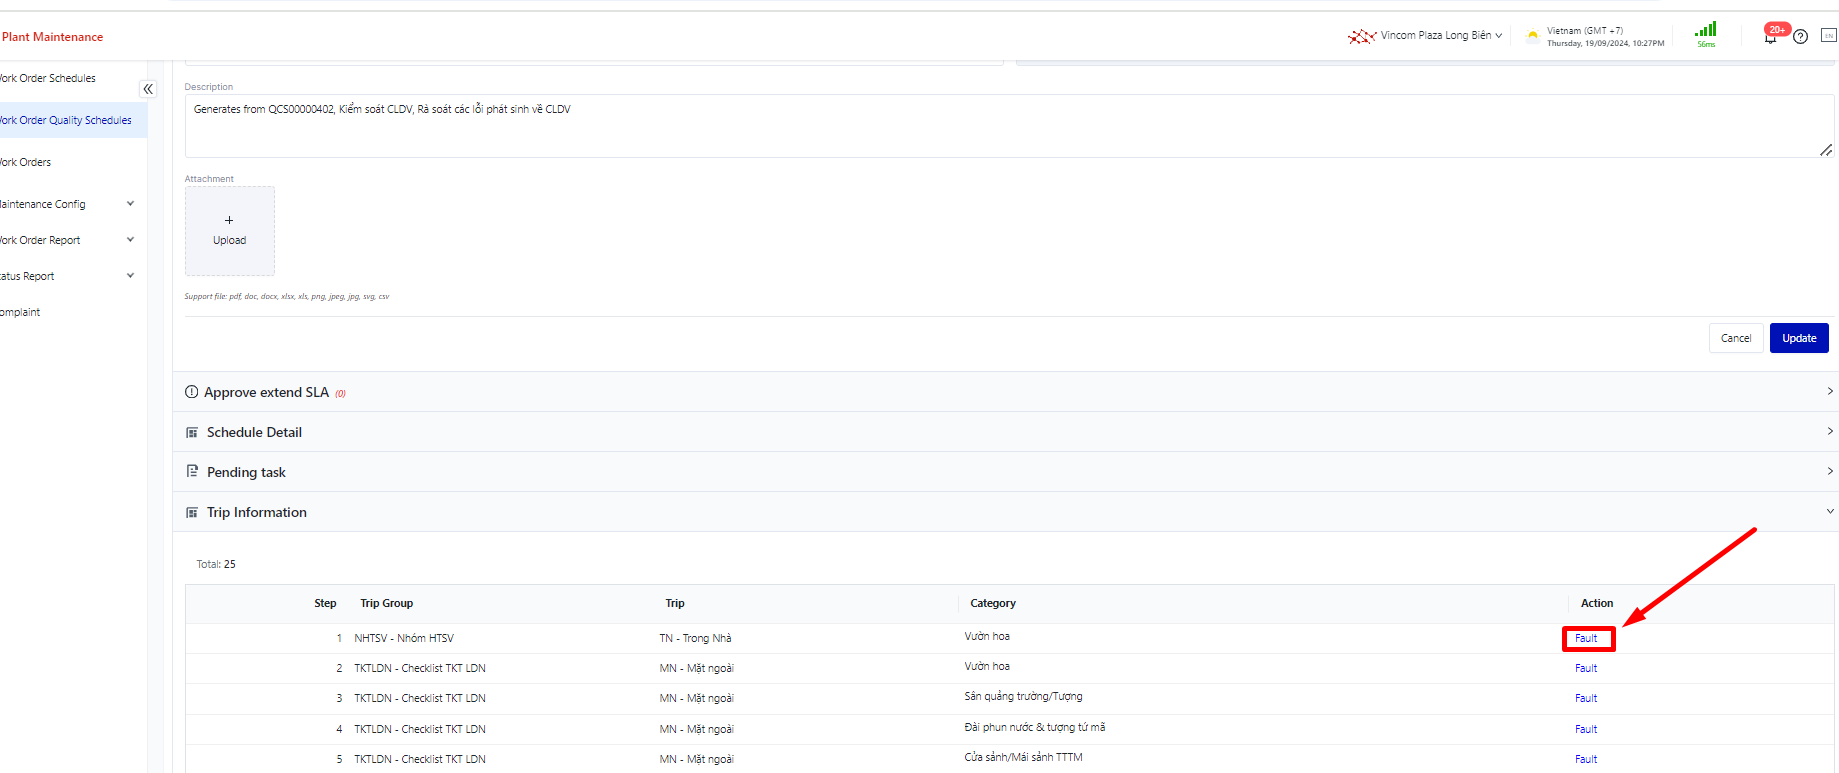
image-20240919-152802.png

Step: Enter information

  • Error deatail: Required

  • Group error: Taken from Error Details

  • Functional Location: Required

  • Criteria: Required

  • Priority: Required

  • Error type: Required

  • Due date: Required

  • Work Center: Required

  • Implementer: Optional

  • Assignee: Optional

  • Category: Optional

  • Description: Optional

  • Attachment Error: Optional

  • Asset/ Equipment: Optional

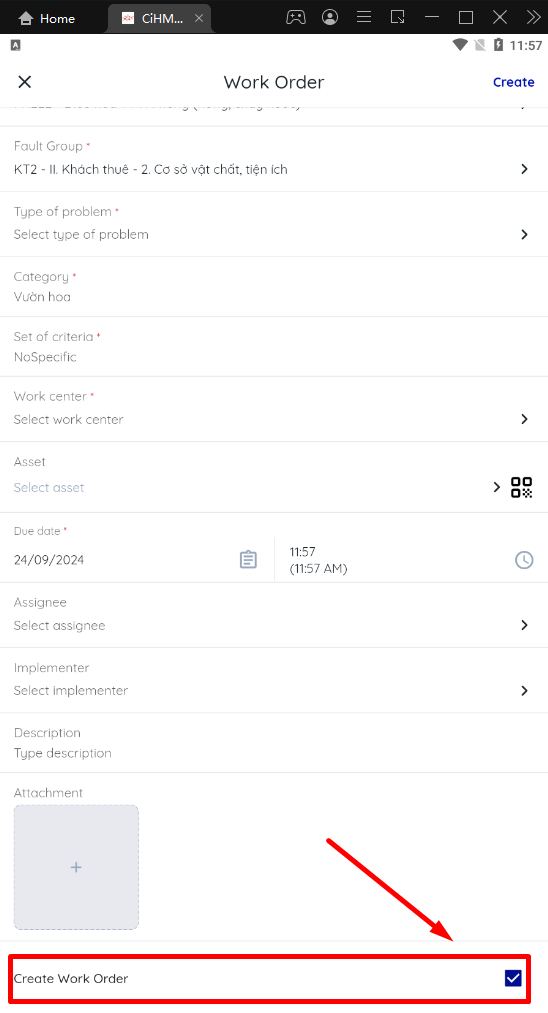
  • Checkbox Create work order: When checked, a task will be generated.


image-20240919-154128.png

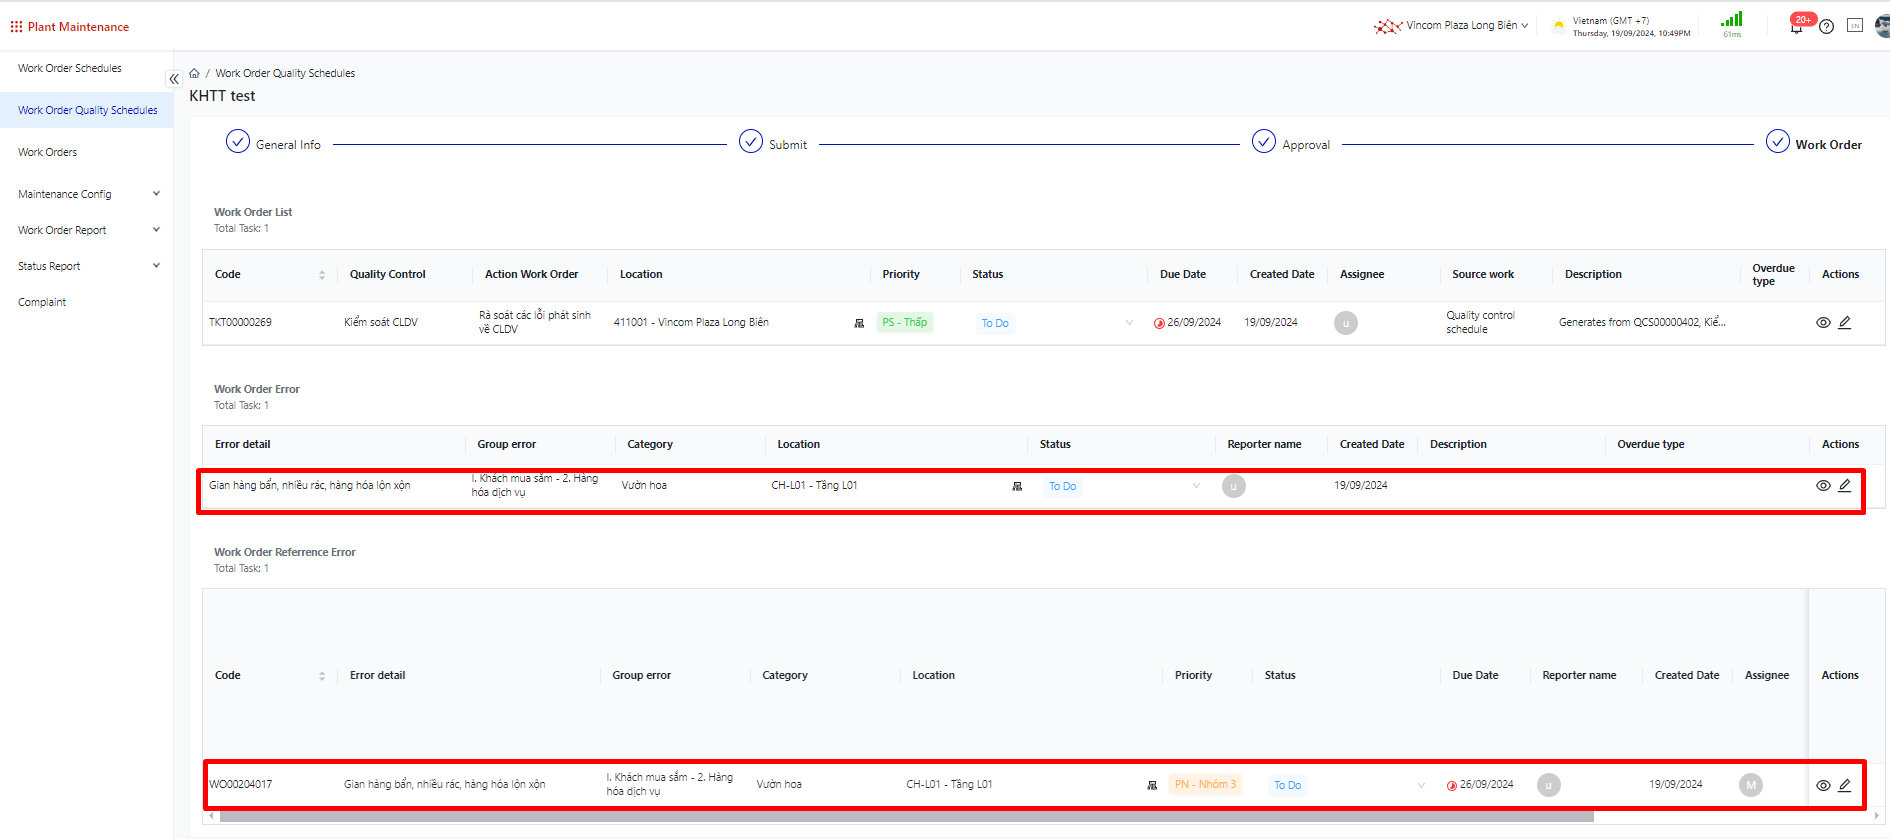
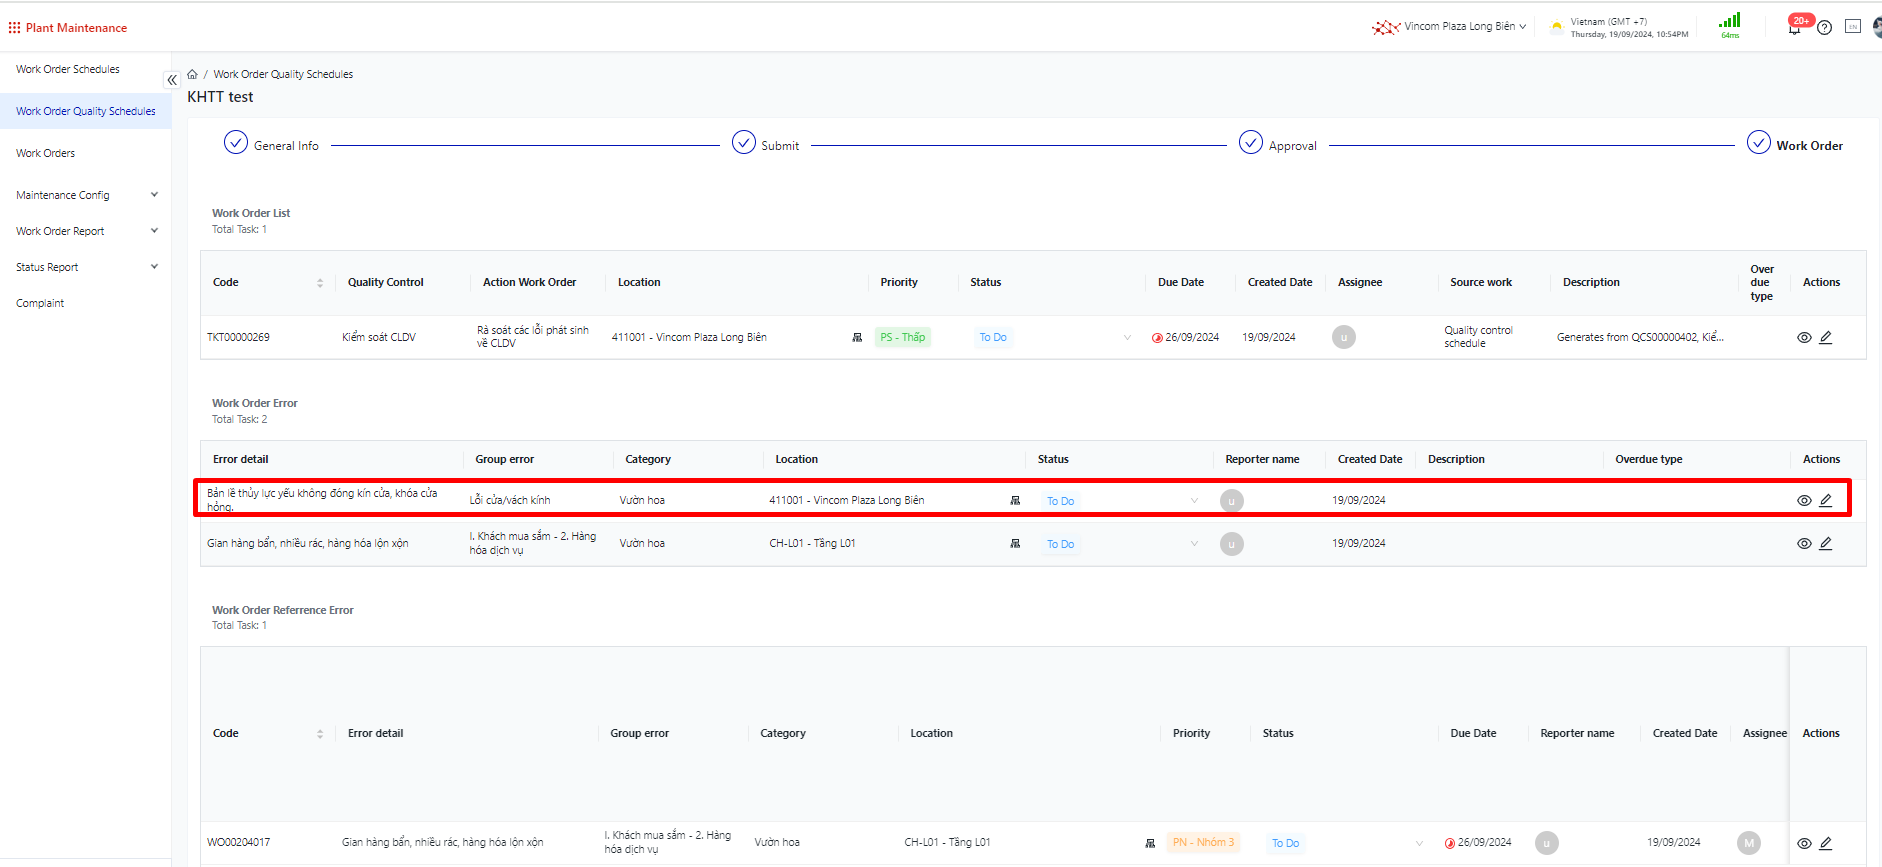
Step 3: Click Save

  • If "Create Work Order" is selected: Work order arising from Trip errors will be recorded in the Work Order Error and Work Order Referrence Error

image-20240919-155015.png

  • If "Create Work order" is not selected: The error will be saved in the Error List.

image-20240919-155455.png

For errors and tasks arising from journey errors, users are required to update remediation images to change the status to Completed/Closed.

6. Report an error on the app

Step 1: Access the app

Step 2: Go to the TKT module
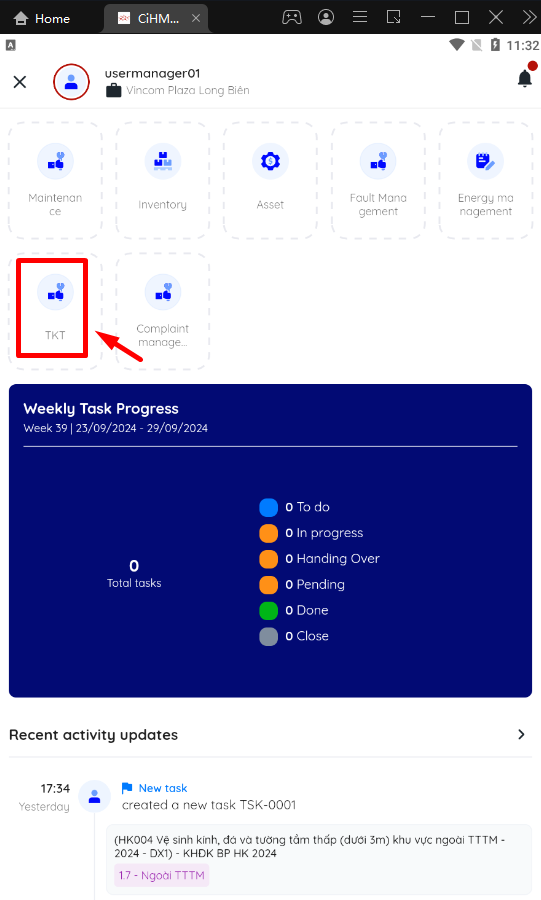
 

image-20240924-043309.png


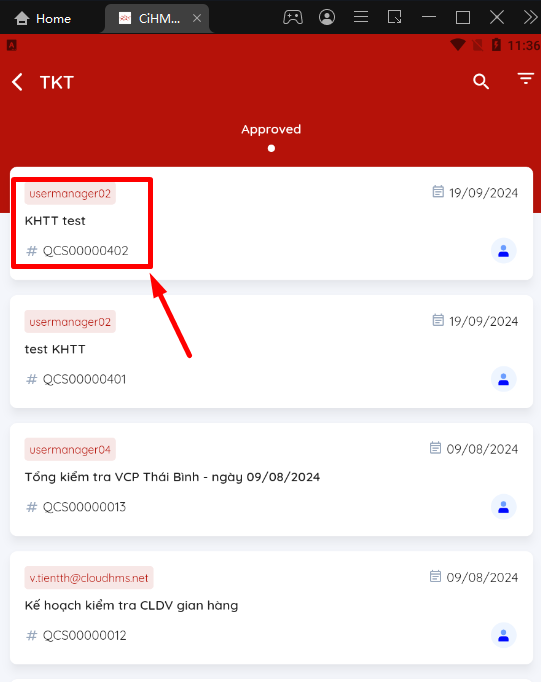
Step 3: Click on the TKT plan


image-20240924-043719.png

Step 4: Click on the work order to do
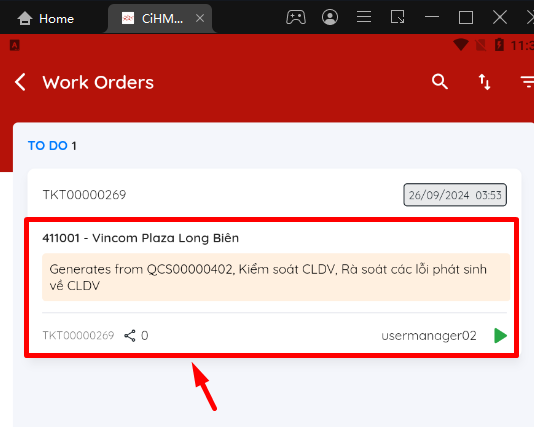
 

image-20240924-043817.png

Step 5: In the Checklist to Execute: Click on Error Recording
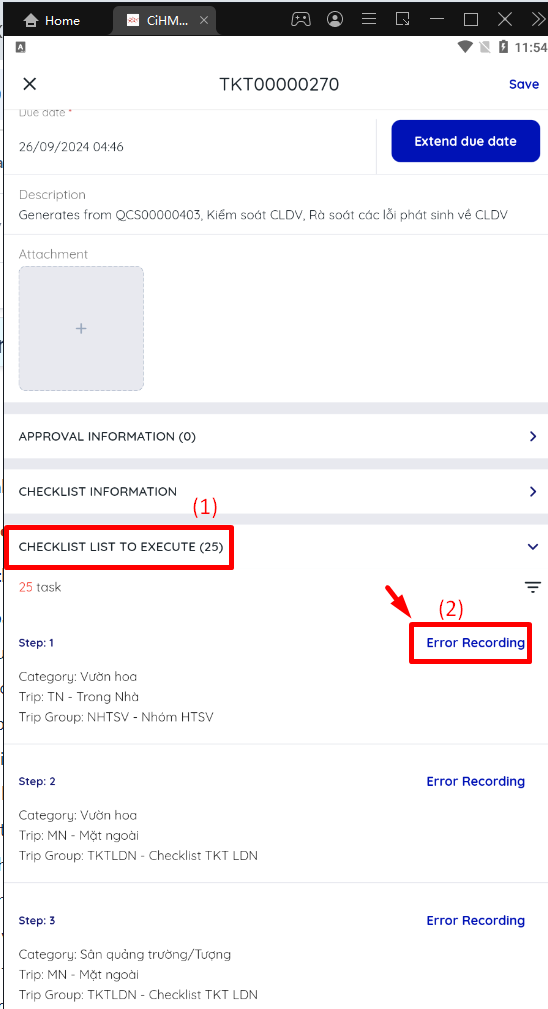
image-20240924-045550.png

If Create Work Order:

Step 6: Enter Information:

  • Fault Detail: Required

  • Fault Group: Taken from Fault Details

  • Functional Location: Required

  • Criteria: Required

  • Priority: Required

  • Error type: Required

  • Due date: Required

  • Work Center: Required

  • Implementer: Optional

  • Assignee: Optional

  • Category: Optional

  • Description: Optional

  • Attachment Error: Optional

  • Asset/ Equipment: Optional

  • Checkbox Create work order: When checked, a task will be generated.

Step 7: Tick Create Work Order


image-20240924-045837.png


=> Work generated from journey errors will be displayed on the task list screen from the checklist and Task menu.
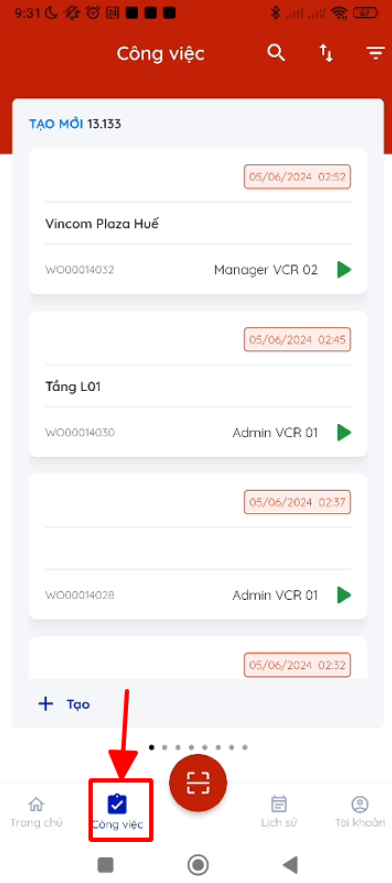
 

image-20240729-100034.png


Case Not Create Work Order:

Step 6: Enter Information:

  • Fault Detail: Required

  • Fault Group: Taken from Fault Details

  • Functional Location: Required

  • Criteria: Required

  • Priority: Required

  • Error type: Required

  • Due date: Required

  • Work Center: Required

  • Implementer: Optional

  • Assignee: Optional

  • Category: Optional

  • Description: Optional

  • Attachment Error: Optional

  • Asset/ Equipment: Optional

Step 7: Do not tick Create Work Order

=>The created error will be saved in the list of errors arising from the journey.


image-20240729-100059.png


JavaScript errors detected

Please note, these errors can depend on your browser setup.

If this problem persists, please contact our support.