[VCR] Energy Recording Plan List
Screen Name |
|---|
Energy Recording |
Open Link |
Login → Energy management → Energy Recording → Energy Recording Plan List |
Summary |
The Energy Recording process is planned through the operation of scheduling the devices that need to be recorded and then using a mobile app to scan the barcode on each meter to record the electricity/water readings. |
1. Create Energy Recording Plan List |
Step 1: Create Energy Recording Plan list 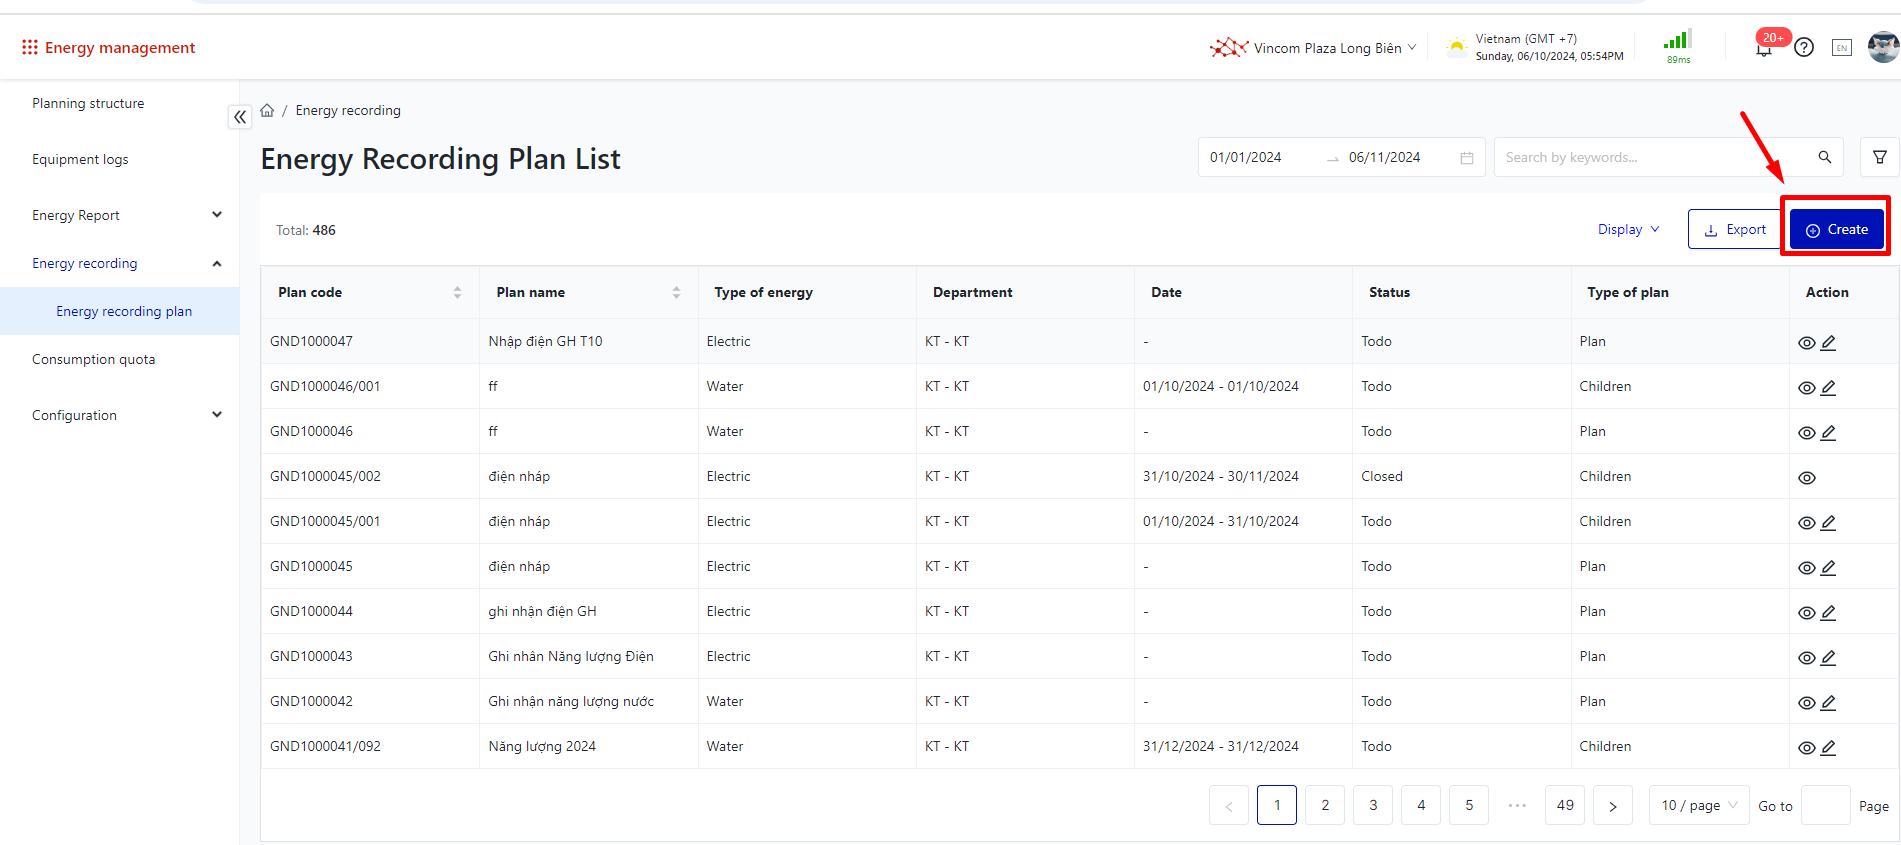 Step 2: Fill in information :
Then click “Next”  Step 3: Select the list of devices to be recorded, then click “ Confirm the list of devices” → click “ Next” 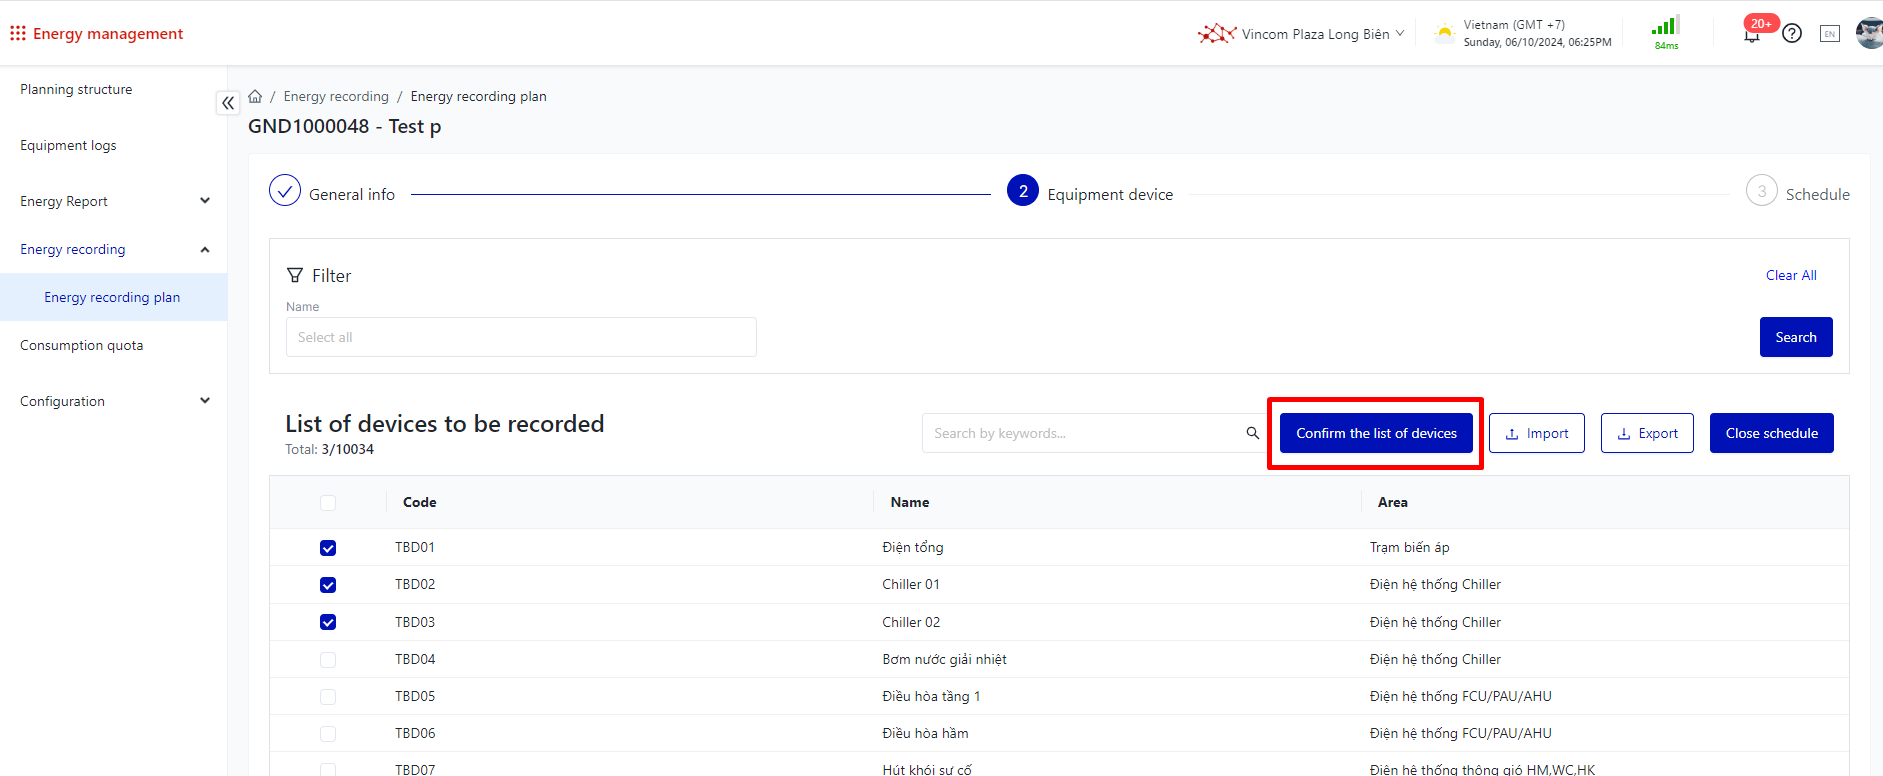 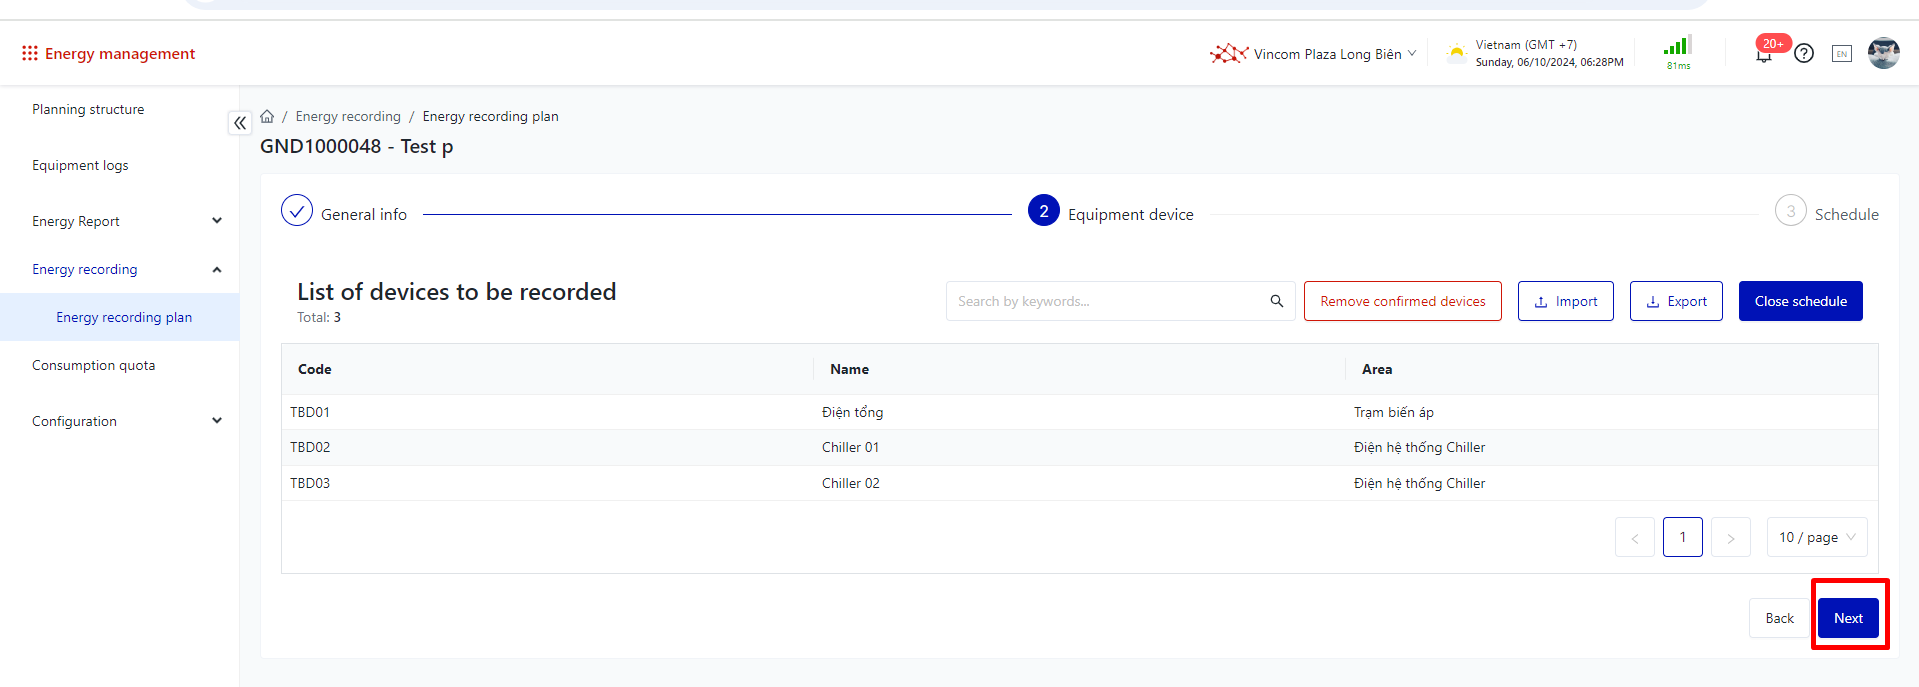 Step 4 : Create schedule:
Then click "Close" to complete the schedule creation step. 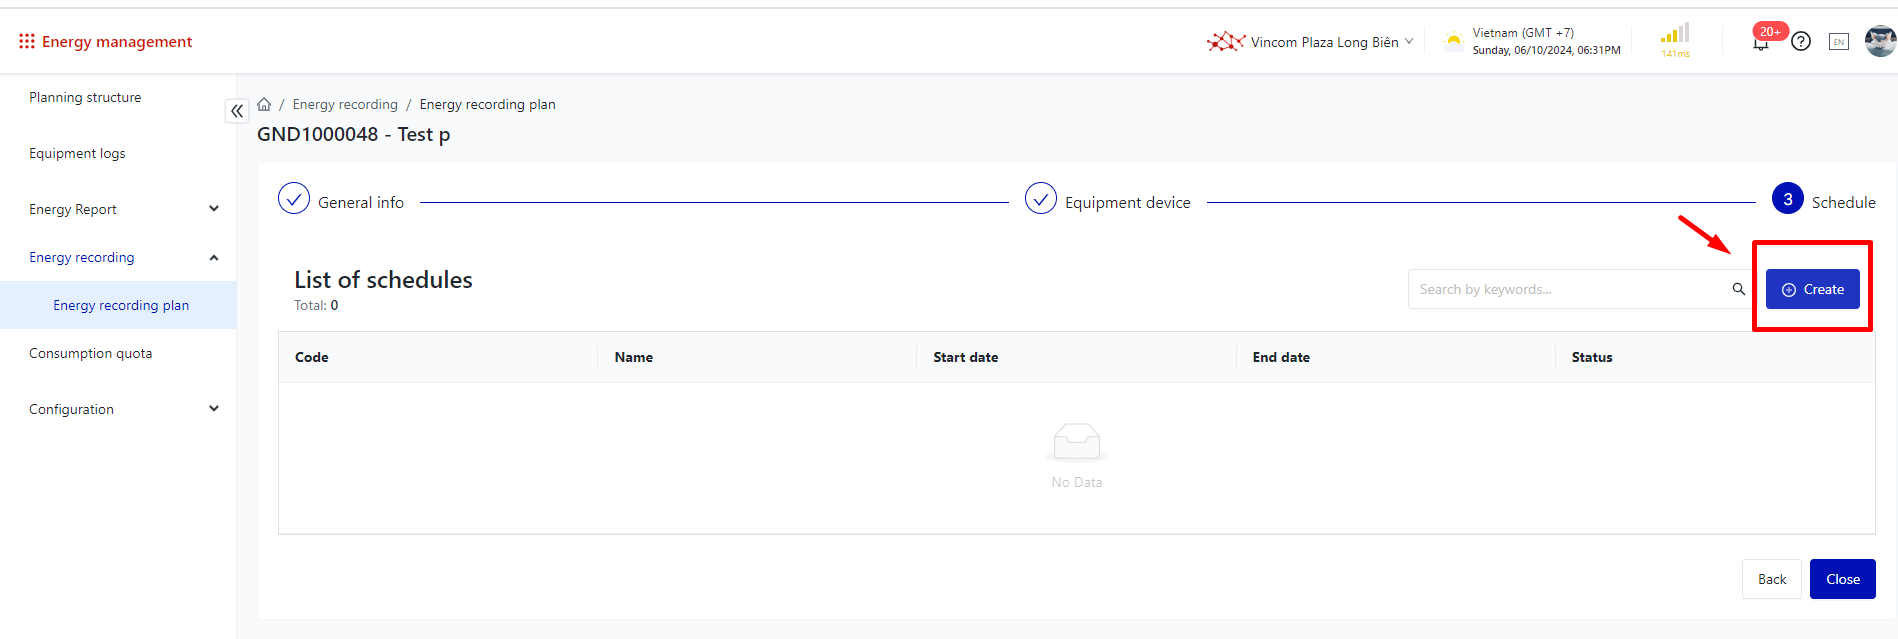 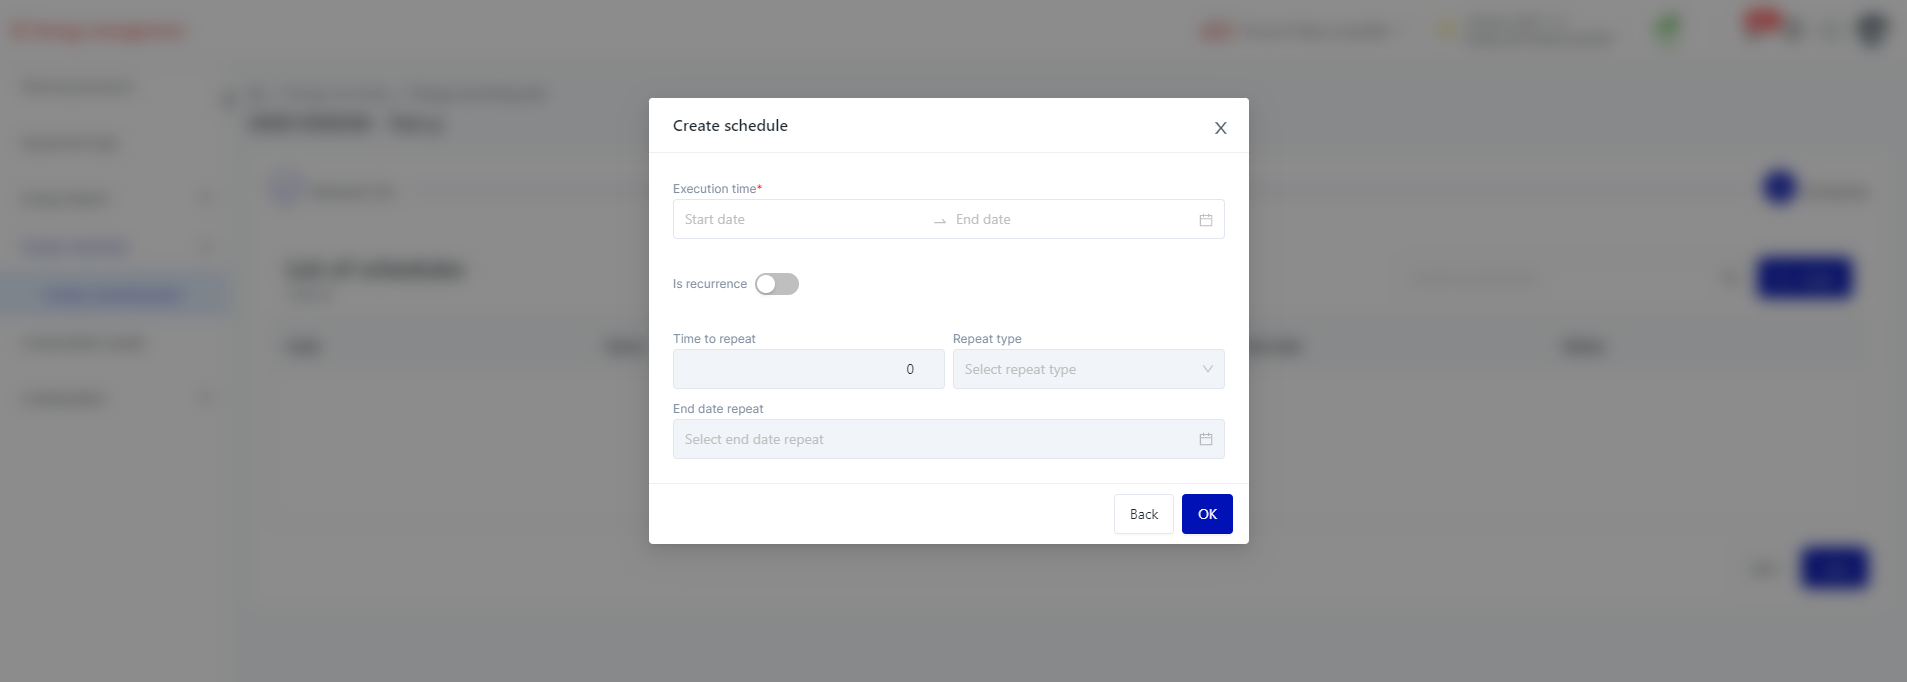 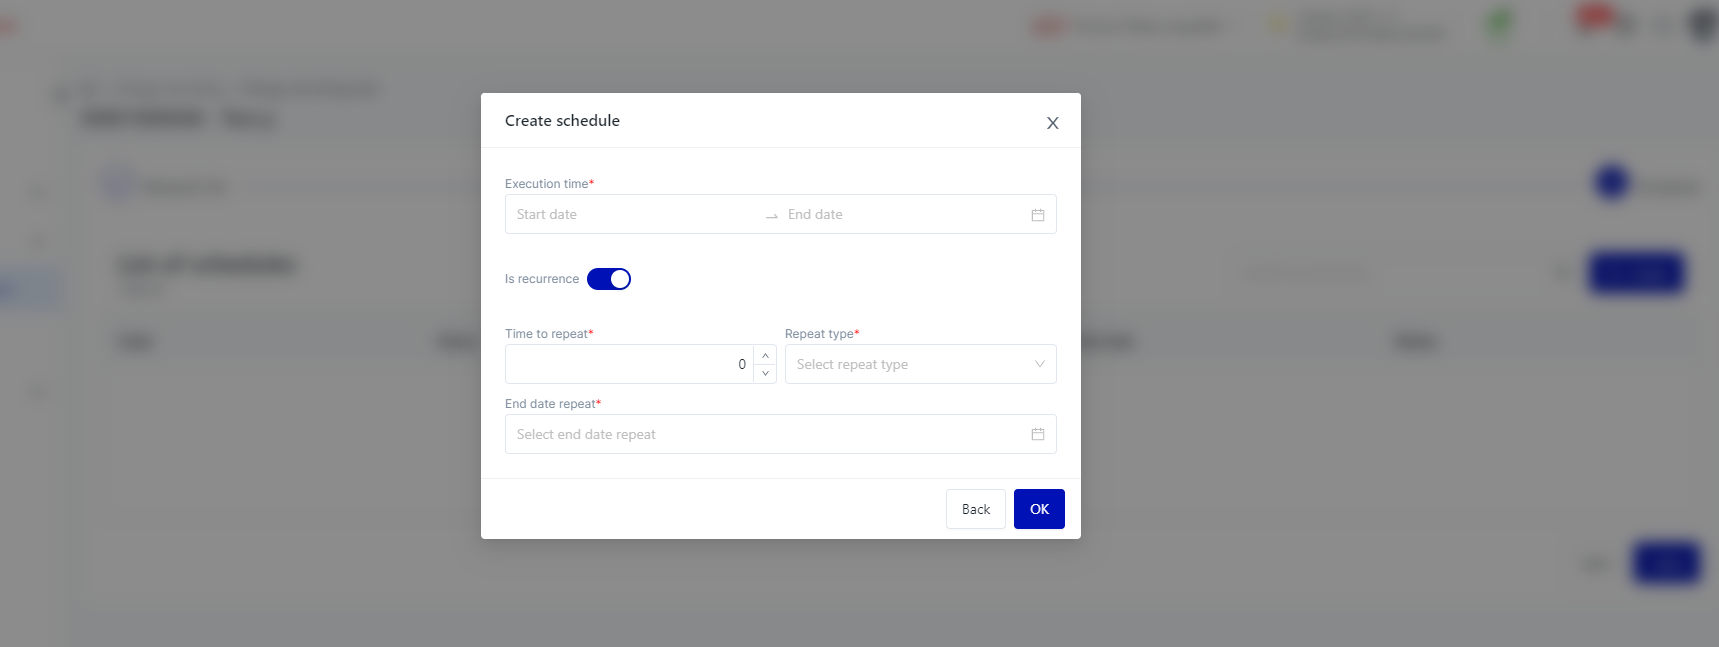 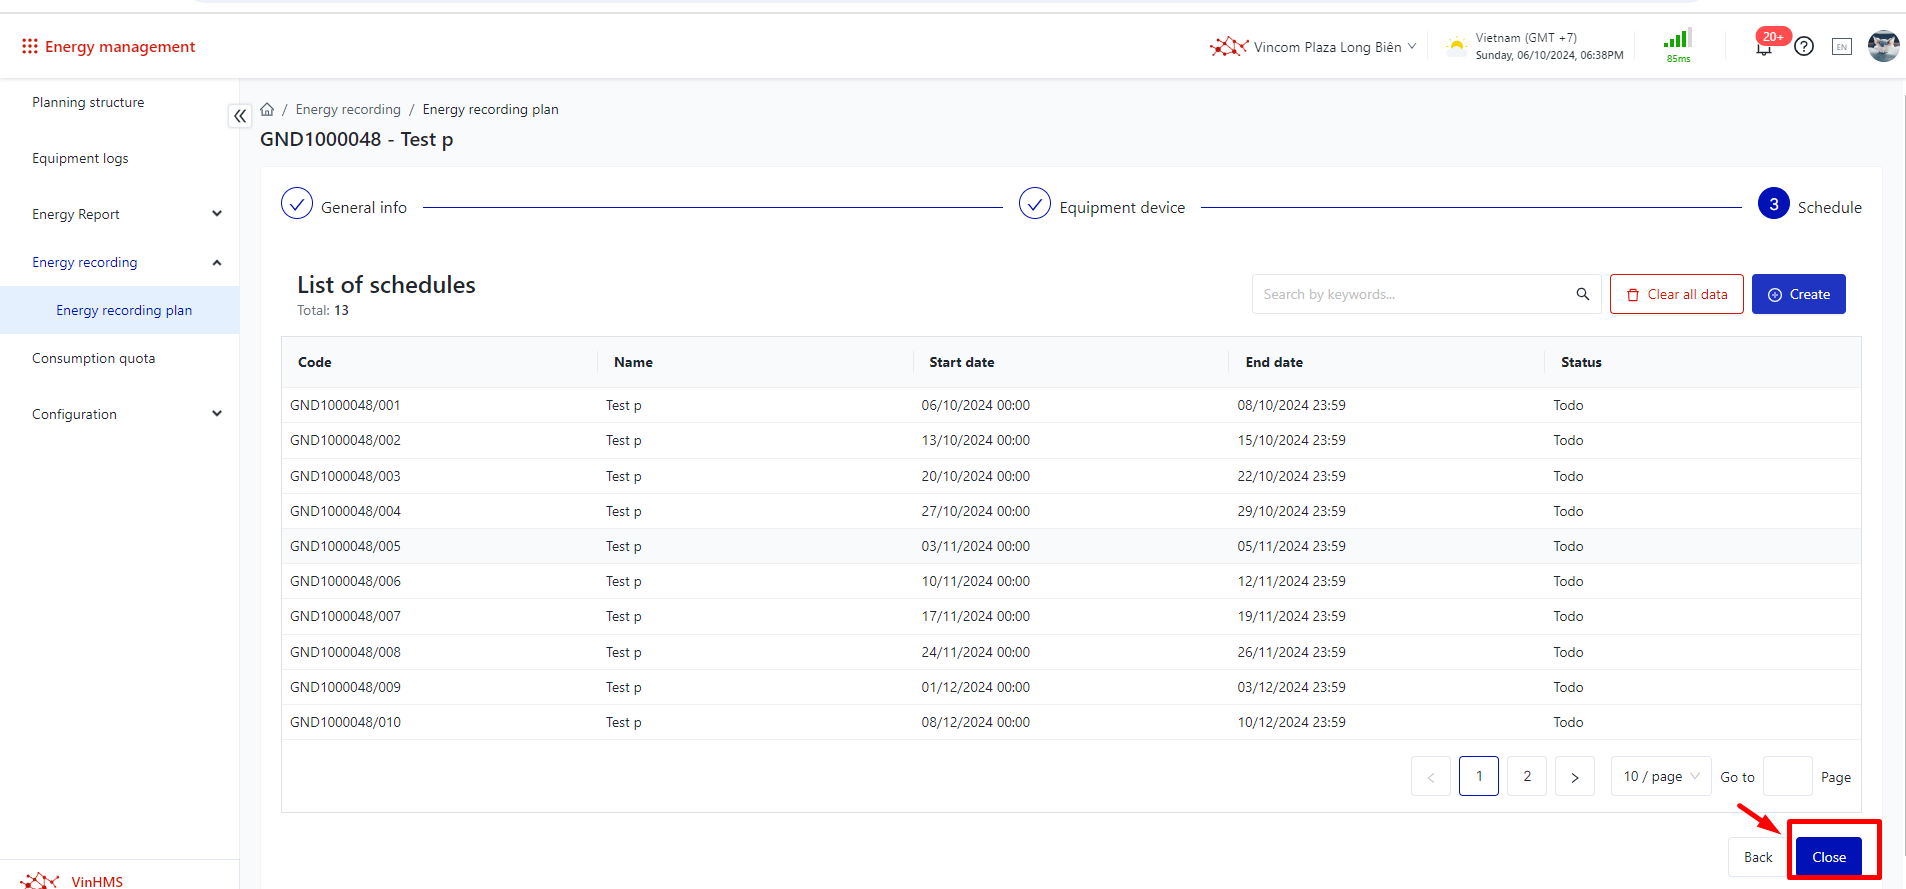 Step 5 : Add Task Recipients and Change Implementation Schedule Status

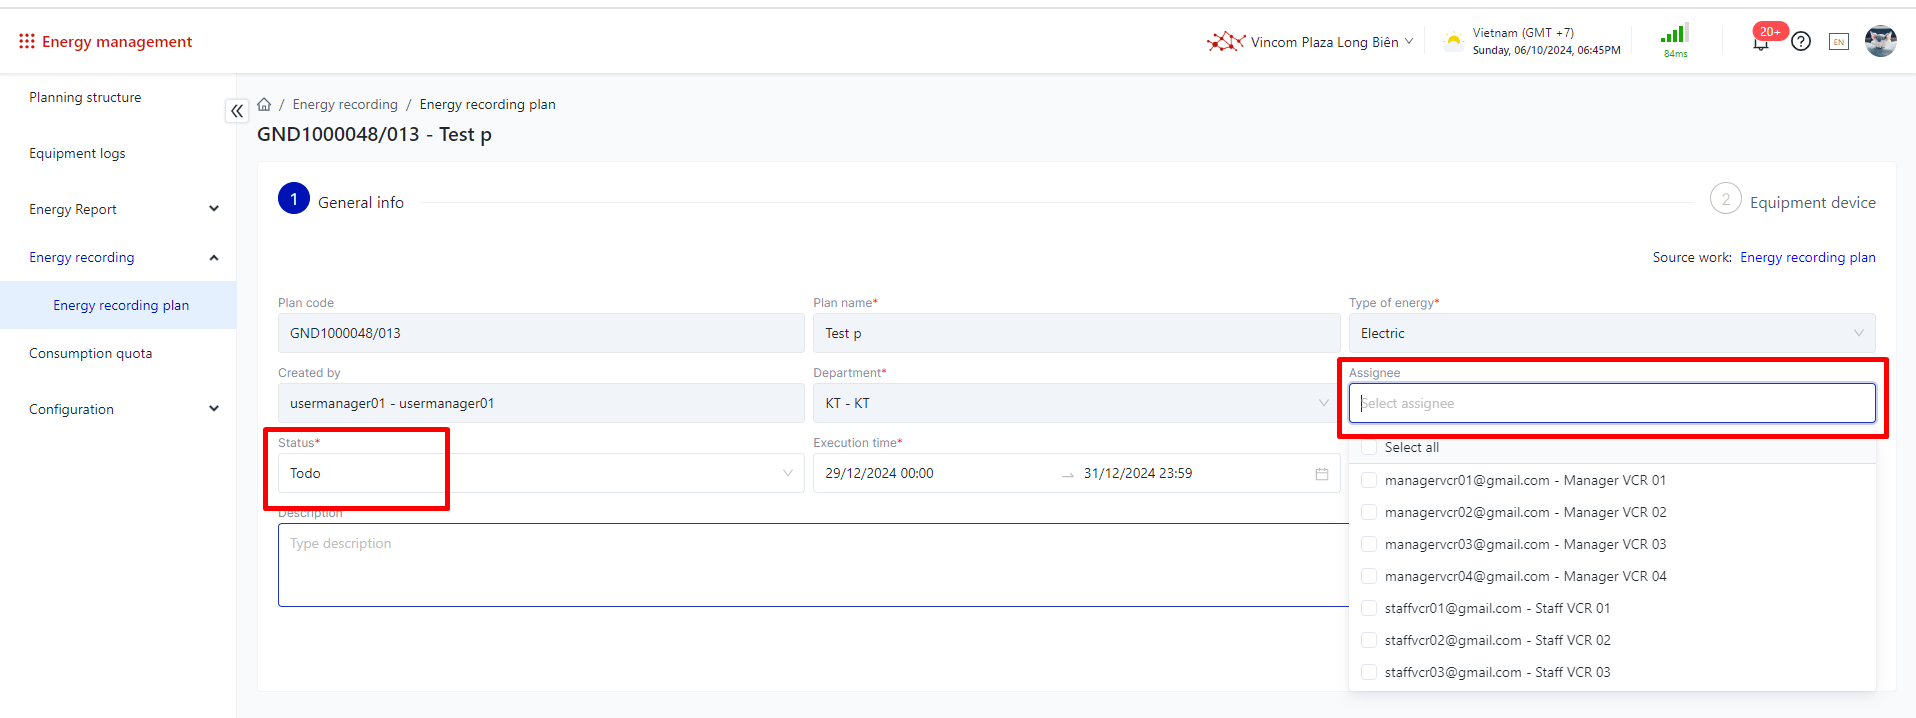
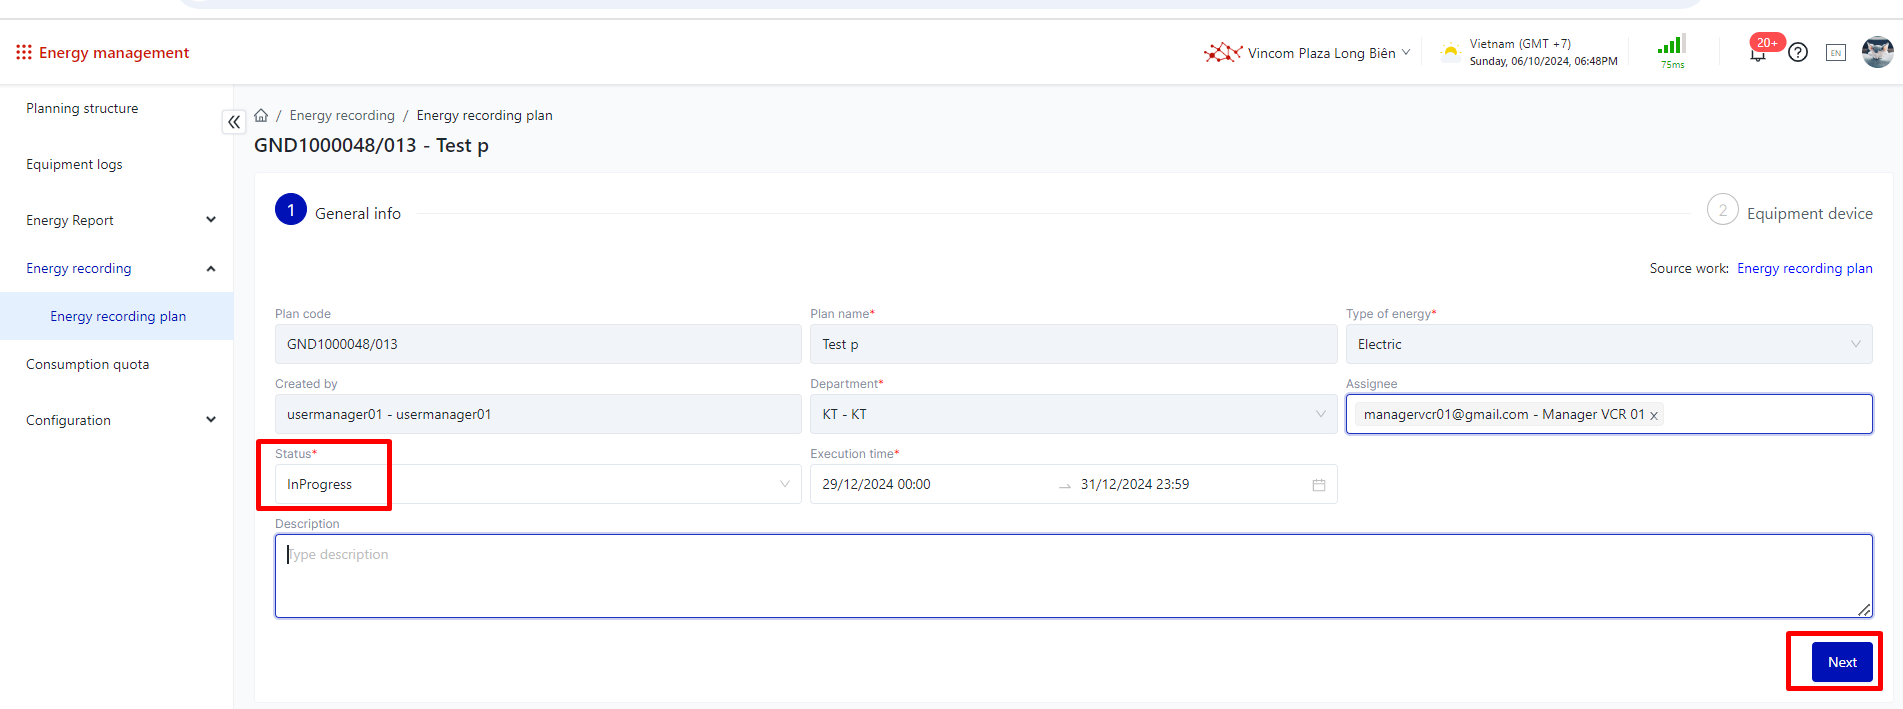 Click next → Complete the creation of the implementation plan. |
2. Recording Electricity/Water Readings via Import File on the Web |
Step 1: Select to edit the implementation schedule in the Energy Recording Plan List. Step 2: Click “Next” Step 3: Click “Import” 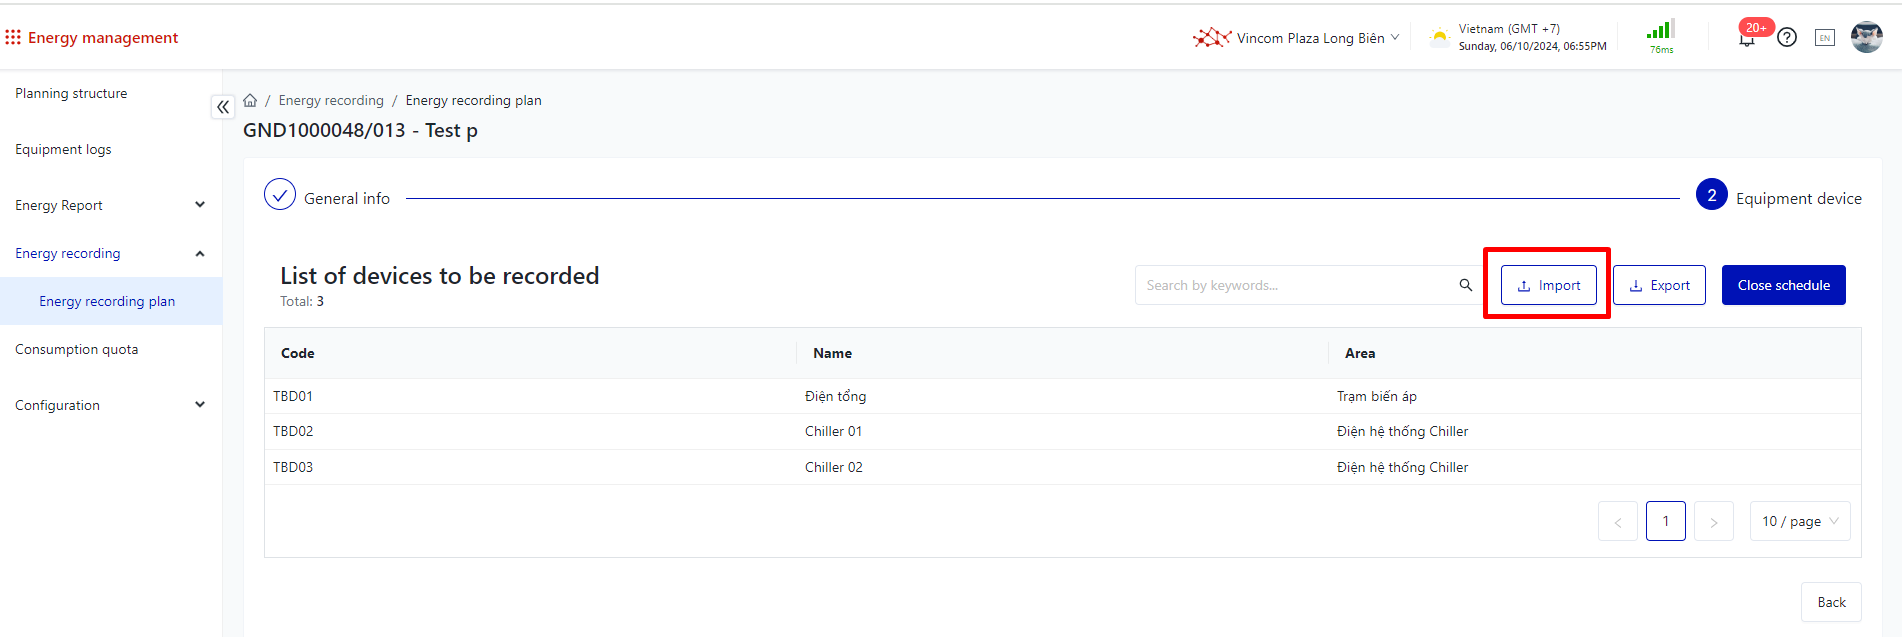 Step 4: Users download template file and fill in the required information correctly. (Note: When filling in the recorded readings, do not modify any column information.)  => Template file specifications:: +Reading Lock Field: 0 means no lock on the reading, 1 means lock on the reading.  Step 5: Enter the information and save the file, then click "Select File" and select the file to upload. 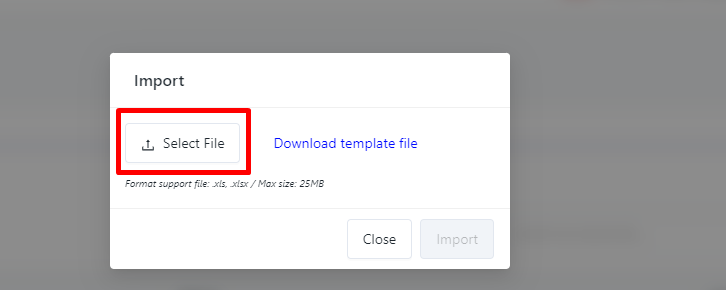 Step 6: Click Import => Once uploaded successfully, the results will be recorded in the app. Users can choose "Download" to check the results of the readings just uploaded. |
3. Recording Electricity/Water Readings on the Mobile App |
Step 1: In the "To Do/In-progress" section, select the schedules that are pending execution 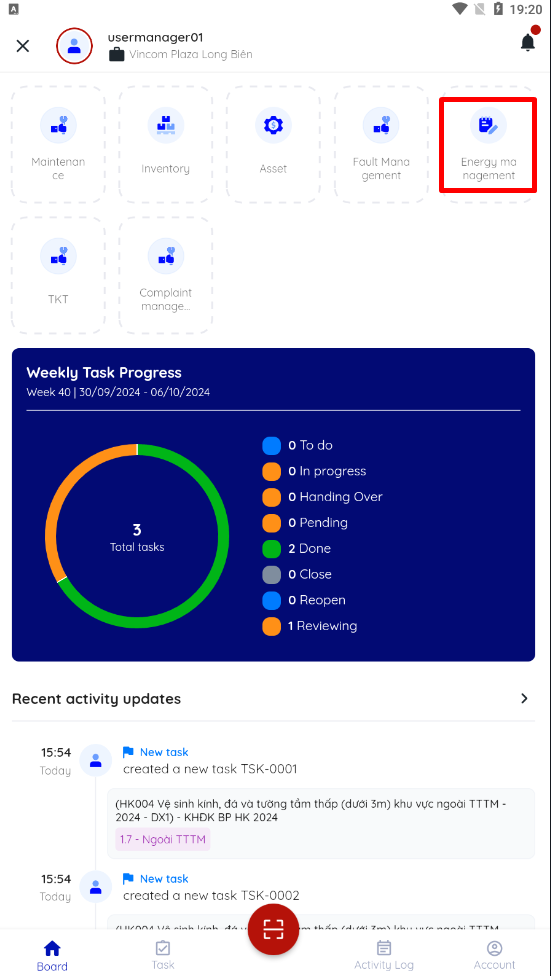 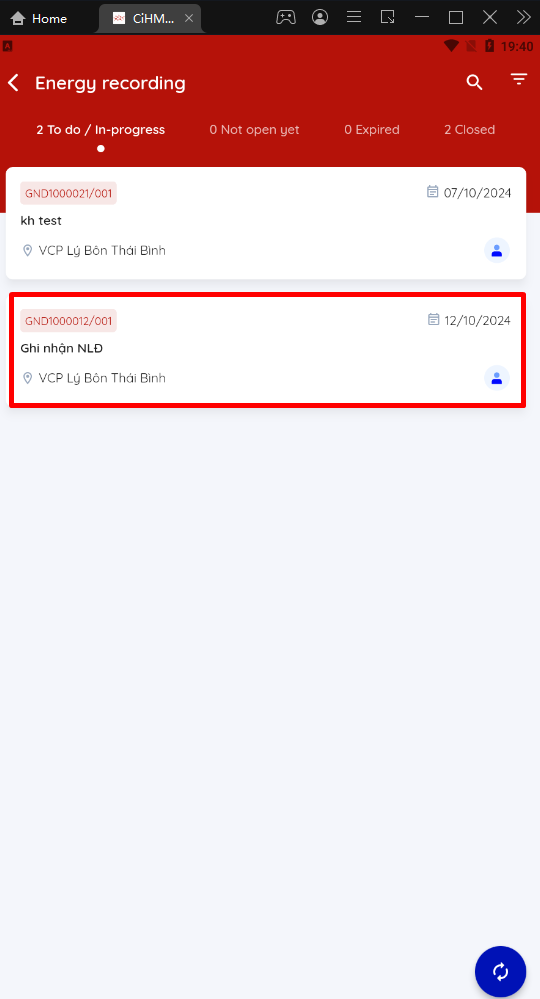 Step 2 : Use the QR code to scan the device and enter information for each meter. Bước 3: Enter the information: -New Active (IMP) Index
-Enter New Active (EXP) Index
-Note: Optional -Attach Image files: Optional, maximum of 10 photos -Confirm meter reading: Optional 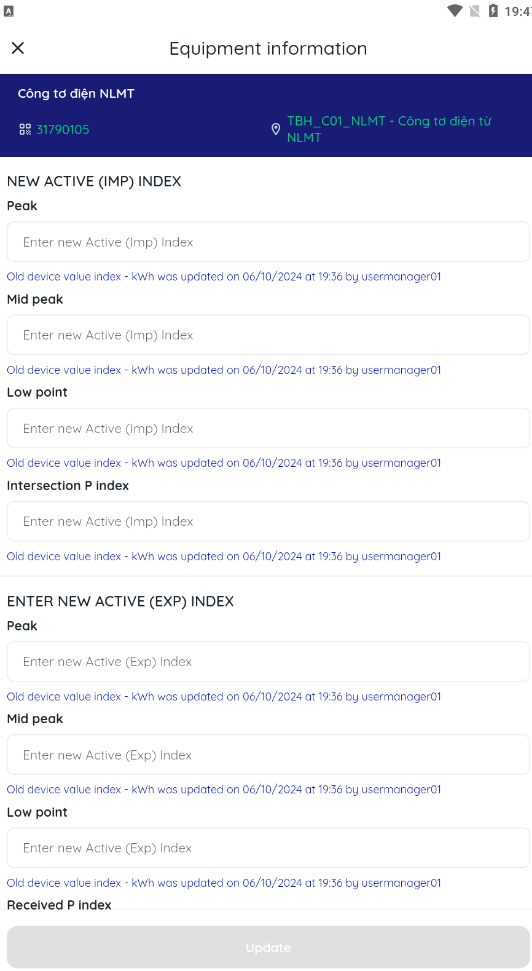 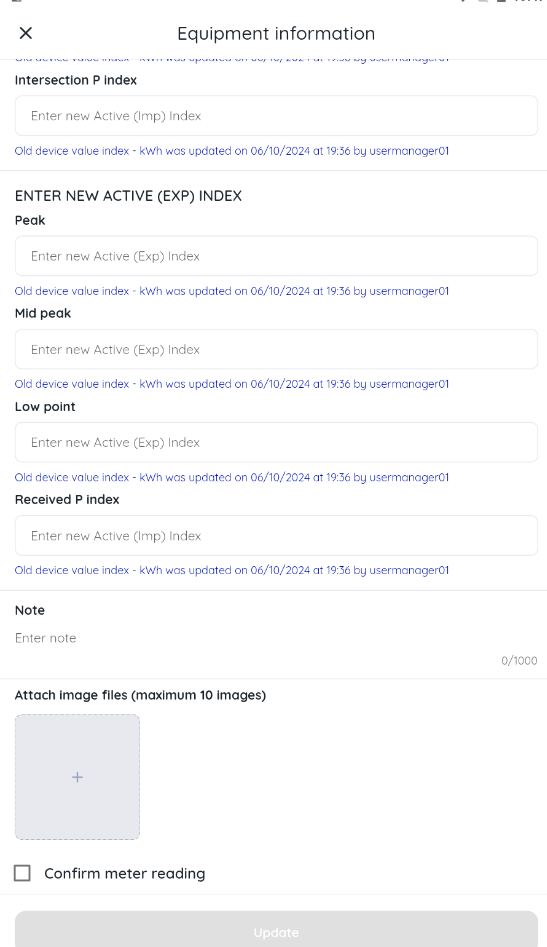 Step 4 : Click “Update” Step 5 : Click "Close Implementation Schedule" after reviewing the recorded parameters in the "Completed" tab. Users can adjust the information before confirming the closure of the implementation schedule. Step 6 : Review information in the "Closed" section -- For schedules set for a future time with a status of "Not Executed," they will appear in the "Not Opened" section, and the recorded information will only be viewable. Once the status changes to "In Progress," users will be allowed to make adjustments. 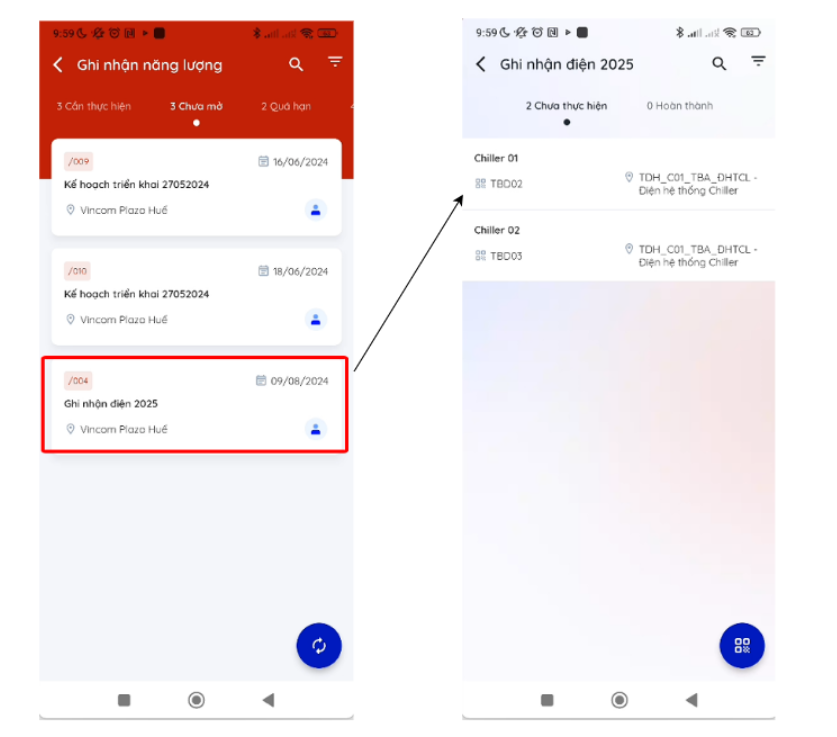 |
