Skip table of contents

[Eng] Rate Plan

Screen Name

Rate List

Log in – Program Management – Rate Plan

Summary

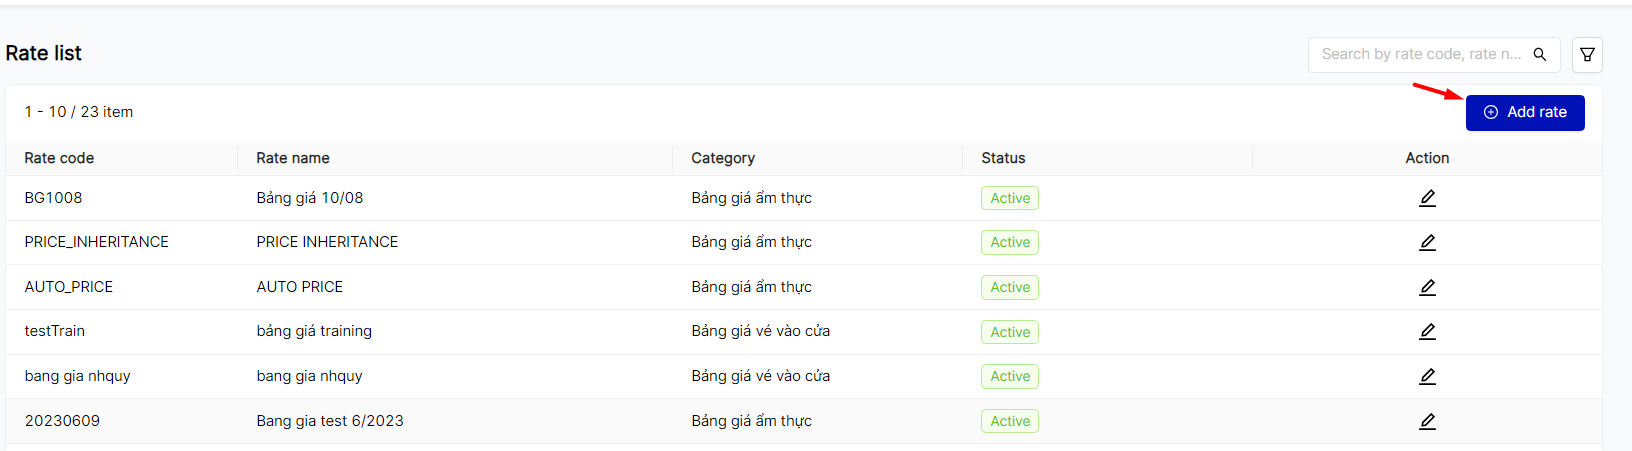
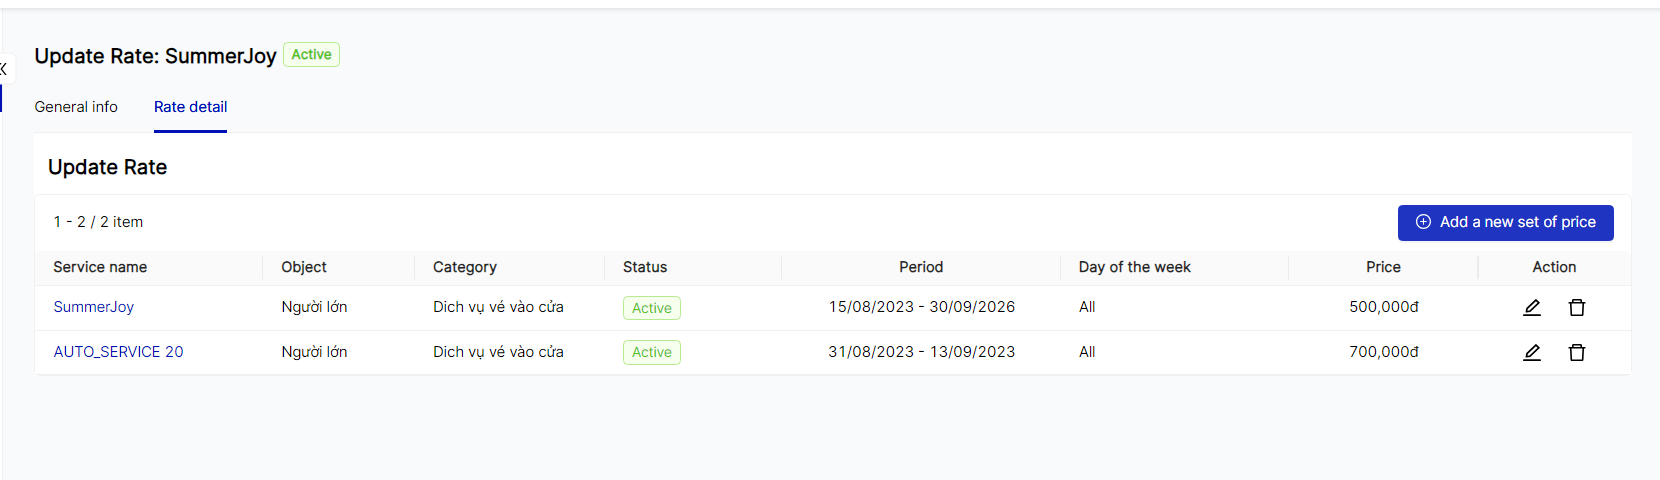
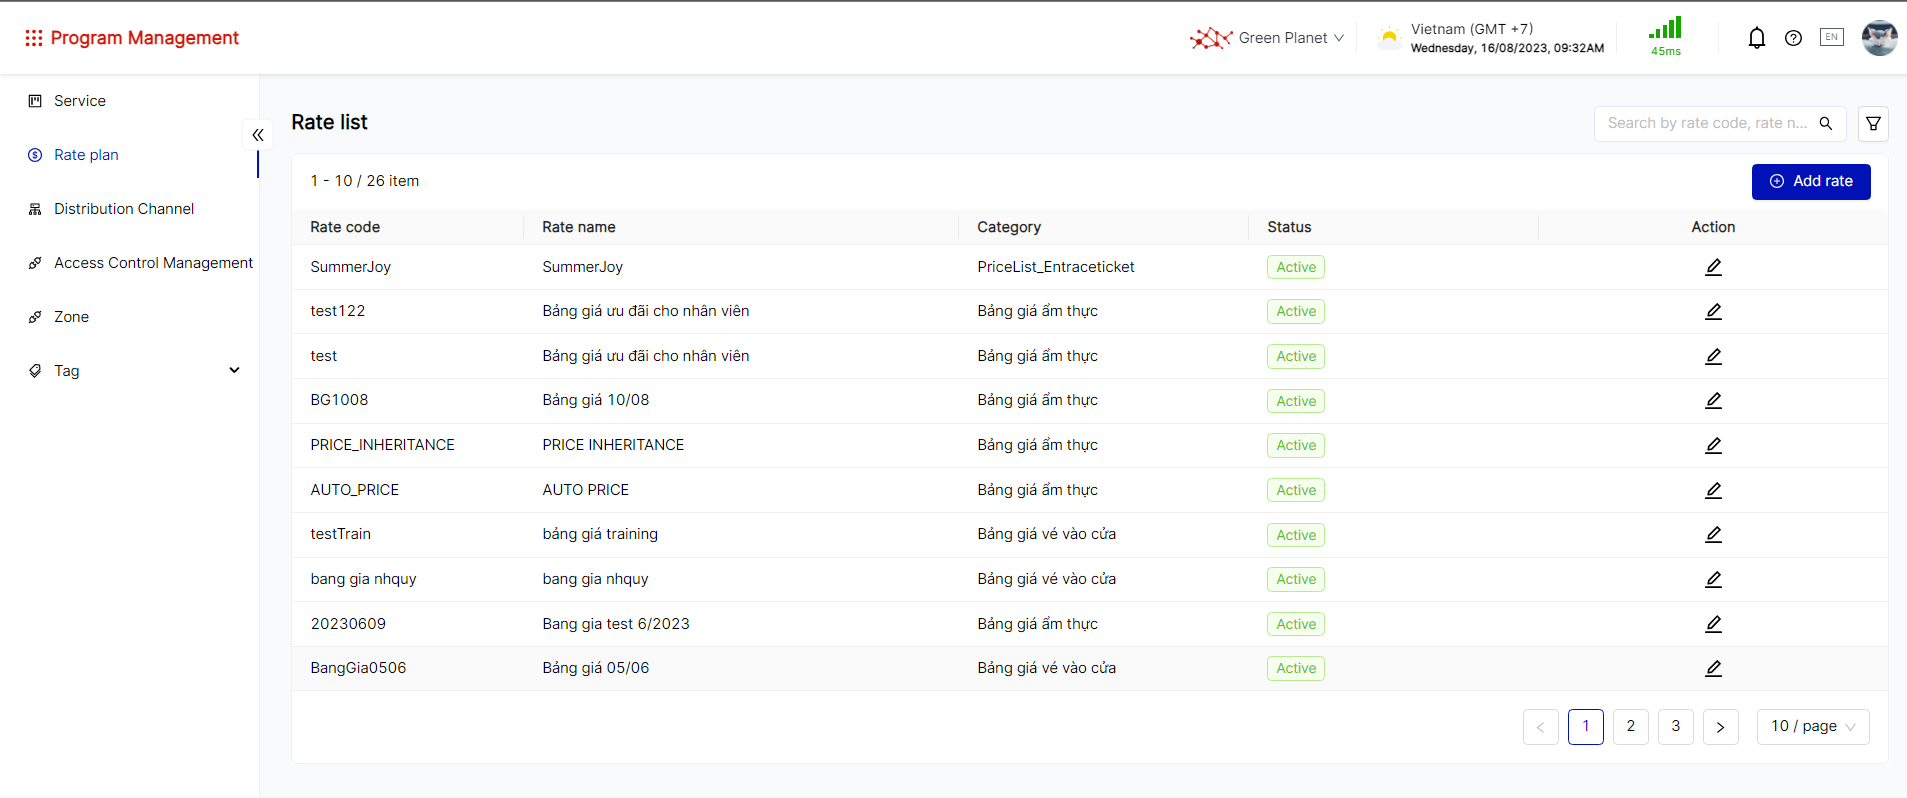
This screen allows users to view details about the price list and pricing policies for each service being sold.

Screen

Fields Description

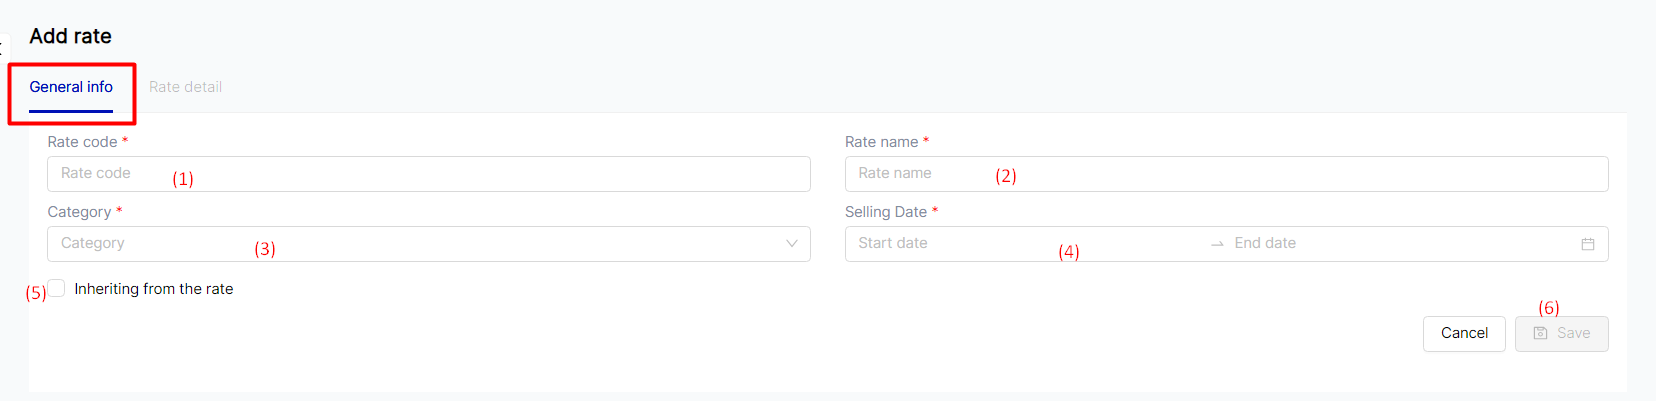
[Search and filter rate list]

The user enters the code and name of the price list to search.

[Add and Edit Rate list]

  1. To add a new rate list, follow these steps:

  • Step 1: On the rate list screen, click on the "Add rate" button.

  • Step 2: On the new rate list creation screen, two tabs will appear, including the General information tab and the rate detail tab

    • On the General information tab: Enter the necessary information for the new rate list

      • (1) Rate code: Enter the code for the new rate list

      • (2) Rate name: Enter the rate name for the new rate list

      • (3) Category: Select the pre-configured service category

      • (4) Selling Date: Select the rate list sales period

      • (5) Inheriting from a rate list: In case a new rate list is inherited from an old one, the user configures by checking the box:ô_vuông:, details are shown at the bottom of the page.

      • (6) Click “Save” to save the general information that has just been created, then continue to configure the selling price in the rate detail tab.

    • On the Rate detail tab, click on “Add a new set of price” if the user needs to create a new set of prices for services in the rate list or select :chỉnh_sửa: to modify the price details for a previously created price set.

      • After selecting "Add a new set of price", the user needs to select a service in the rate list to configure the price details for that service

      • The system will display the "Add new price" button on the Add Service Price Set screen.

      • Click on “Add new price”

        • (1) Select the rate list sales period

        • (2) Select the day of the week to apply the selling price in section (3); or tick the “a week” box to apply the same selling price for the entire week.

        • (3) Enter the selling price of the service applied based on the selling time in sections (1) and (2).
          (4) Delete the rate detail

        • (5) Click on “Add new price” in case of the same type of service but the facility divides the selling price differently for multiple selling periods, for example:

  • The Rate Detail screen:

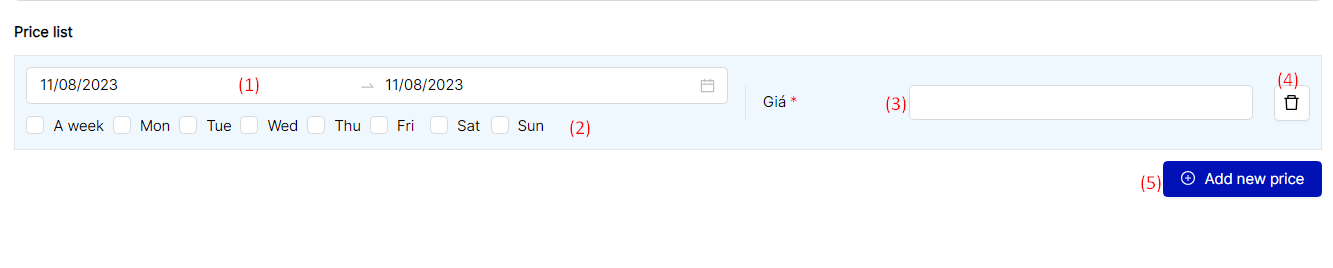
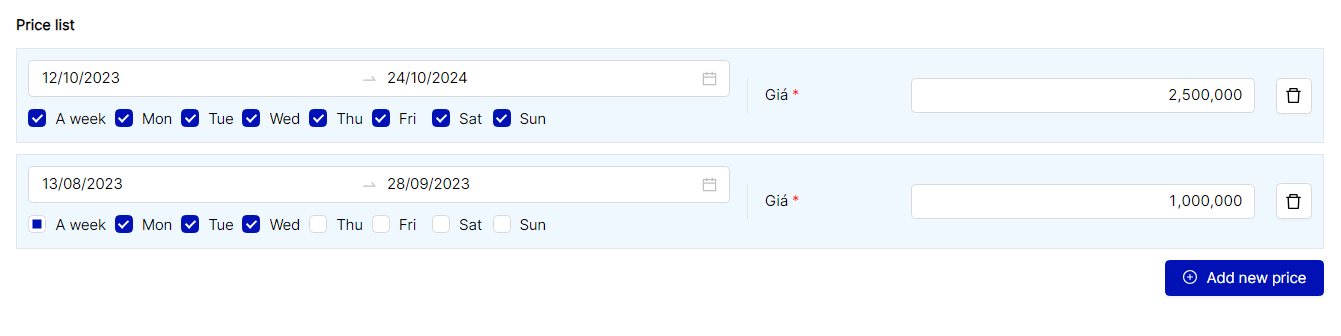
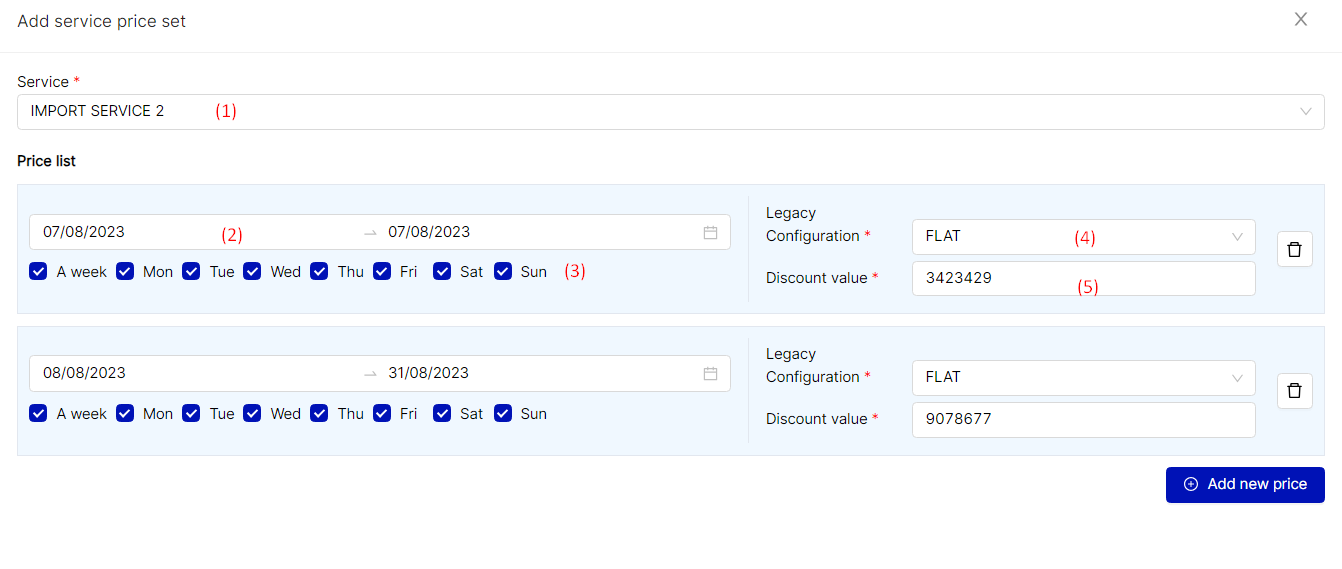
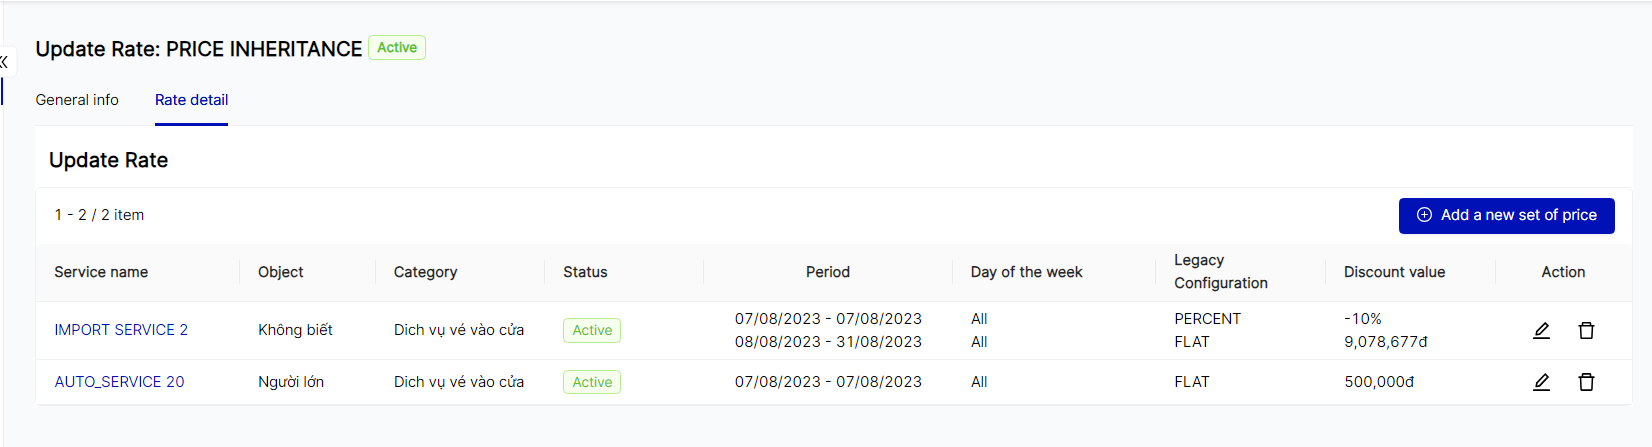
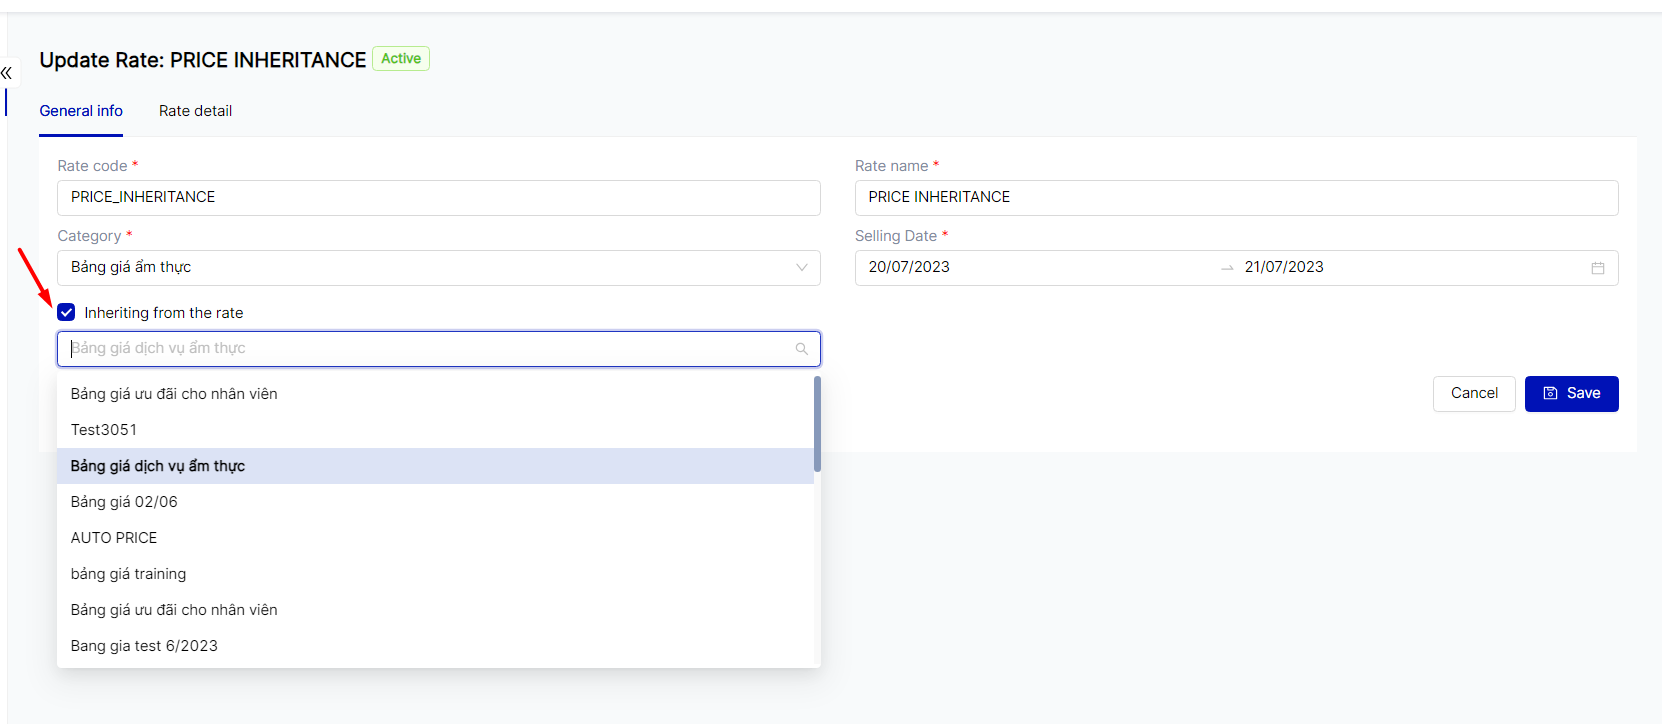
[In case of creating a new price list or editing an existing price list inherited from another price list]

  • Step 1: Tick “Inheriting from the rate” box, then select the available price list to configure the price details

  • After selecting the inherited rate list, go to the "Rate Detail" tab

    • (1) Select a service from an inherited rate list

    • (2) Select the rate list sales period

    • (3) Select the day of the week to apply the selling price; or tick the “a week” box to apply the same selling price for the entire week.

    • (4) Select Legacy configuration:

      • Inherit by percentage (PERCENT)

      • Inherit by amount (FLAT)

    • (5) Select the discount value: When the user selects the inheritance configuration in step (4), the discount value will decrease according to:

      • Percent: Enter the percentage to be deducted from the price of the selected original service in step (1).

        • Enter a negative value: Decrease the price compared to the original price

        • Enter a positive value: Increase the price compared to the original price

      • Flat: Enter the amount to be deducted from the price of the selected original service in step (1)

  • Inherited rate detail screen:

Remarks

N/A

JavaScript errors detected

Please note, these errors can depend on your browser setup.

If this problem persists, please contact our support.