Skip table of contents

[Eng] Add Routing

Screen Name

Routing

  1. Log in - Front Office - Reservation - Confirmation Detail - Billing - Select ““ - Select “Routing” - Select “New

  2. Log in - Front Office - Reservation - Tab In-house - Confirmation Detail - Select “View Routing” - Select “New

Summary

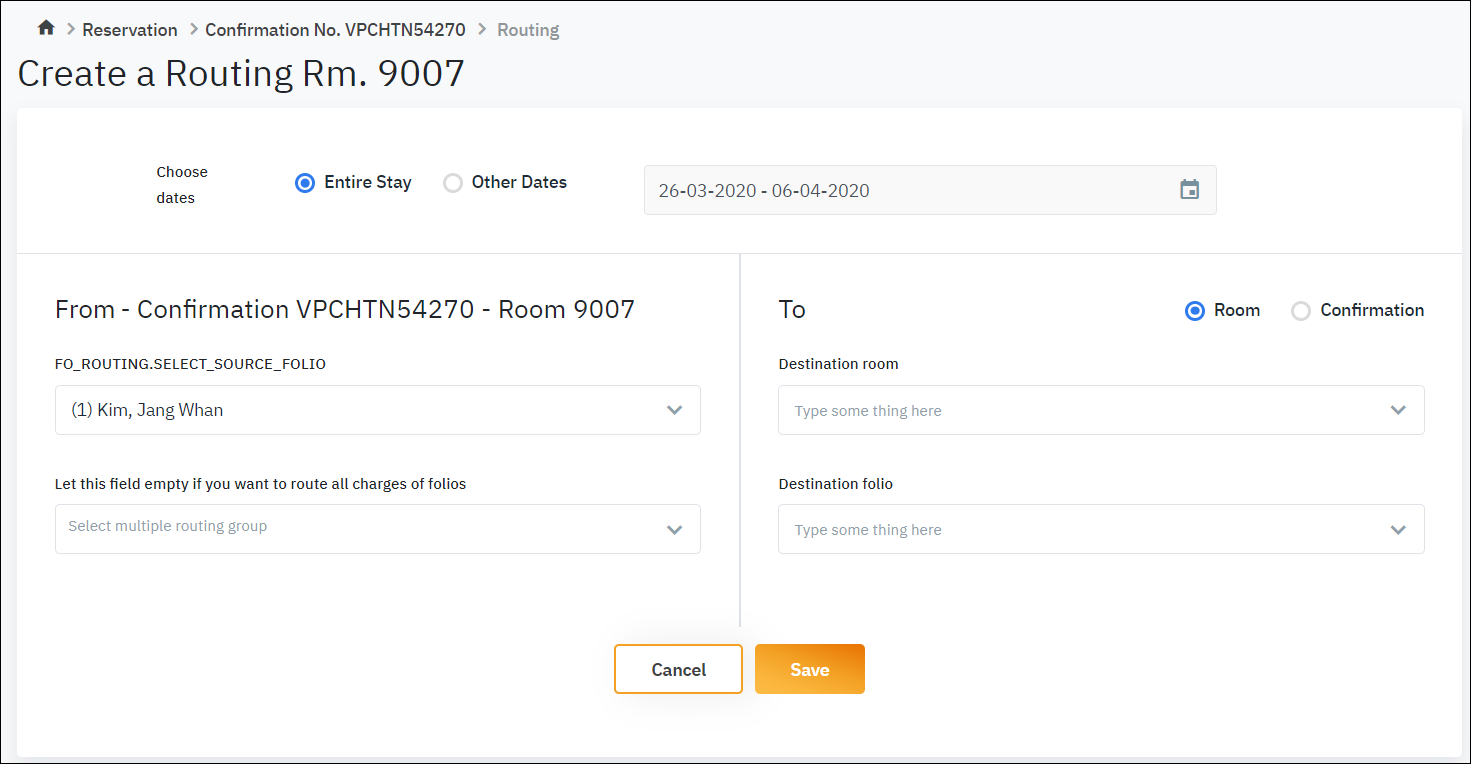
The Routing feature allows you to define a routing instruction applied for a reservation. The routing instruction is used to forward charges for specific transaction codes (or groups of transaction codes) to a group/company or travel agent’s bill.

Screen

Fields Description

Routing period:

  • Entire Stay: Apply the routing during the entire stay of guests.

  • Other Dates: Apply the routing for a specific date of a range of dates.

Origin folio:

  • Folio: Select the origin folio. Let it empty if you want to route all the folios in this room.

  • Transactions: Select the transaction codes to route. Let it empty if you want to rout all the transactions of this folio/this room.

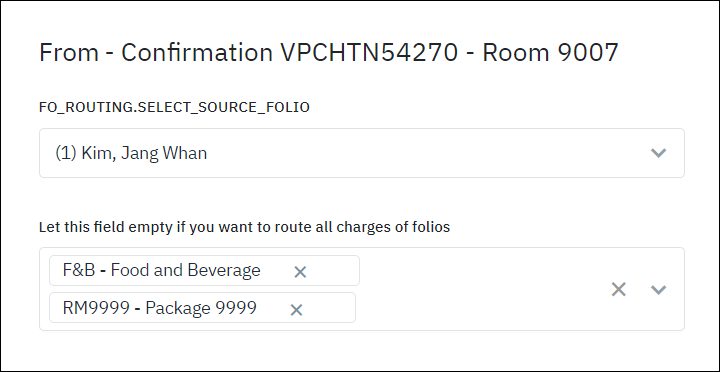
Destination folio:

You can search by room or by confirmation.

  • Room: Select the room number to which the transactions will be routed

  • Confirmation: Select the confirmation number to which the transactions will be routed, used when the reservation has not been assigned the room number.

  • Destination folio: Select the folio to which the transactions will be routed

Edit Routing:

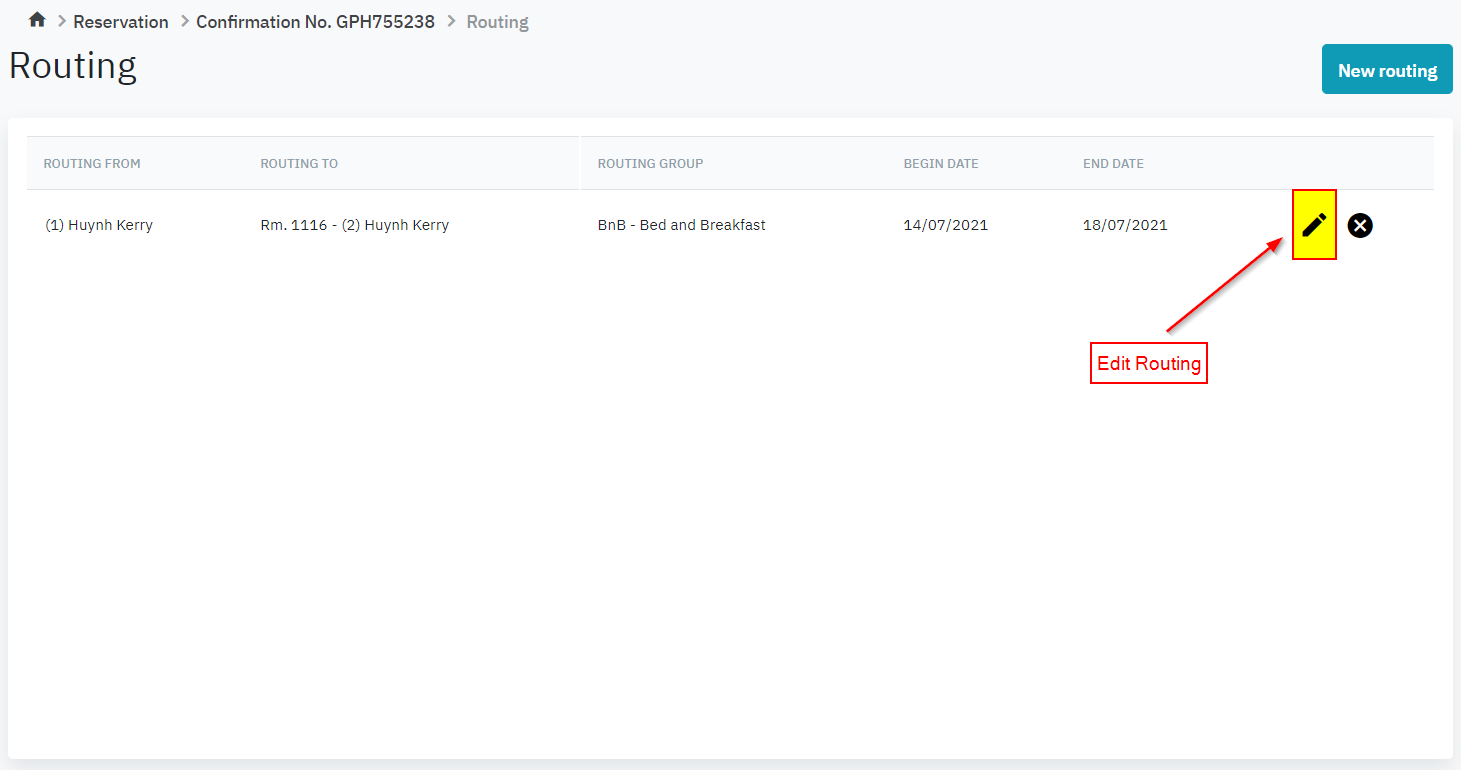
After setting up, you can always go to the Billing and select Edit Routing to modify the detail of the routing.

Remarks

When the routing is successfully defined, the instructions will be displayed on the Guest Billing screen.
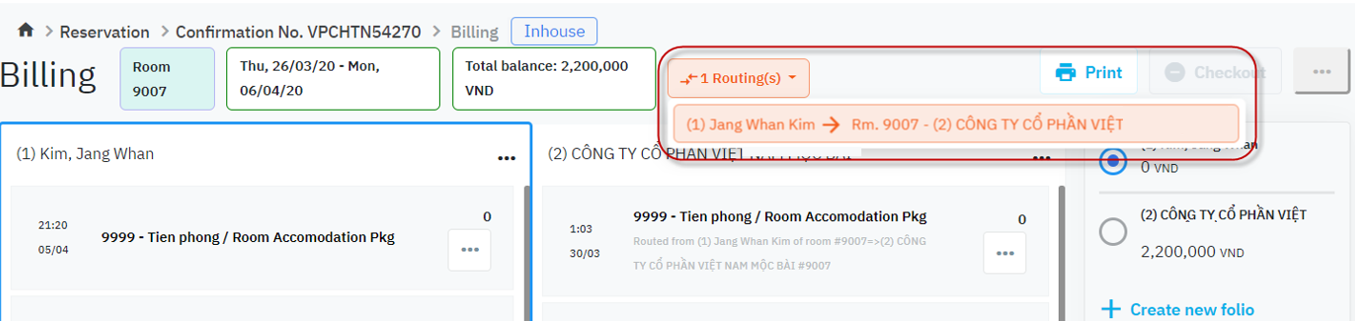
JavaScript errors detected

Please note, these errors can depend on your browser setup.

If this problem persists, please contact our support.