
[Eng] CiHMS Distribution Channel Manager

Channel Configuration page
The screen allows you to activate/inactivate a distribution channel on the system, as well as the Room Types and Rate Plan that are sold in this channel.
All the changes in this screen will be applied for other places that allow to manage the DC, Room type, Rate plan in the Channel Manager such as: Room Management page, Rate Management page…
The system supports the following functionalities:
- View the status of DC
- Display the data by DC
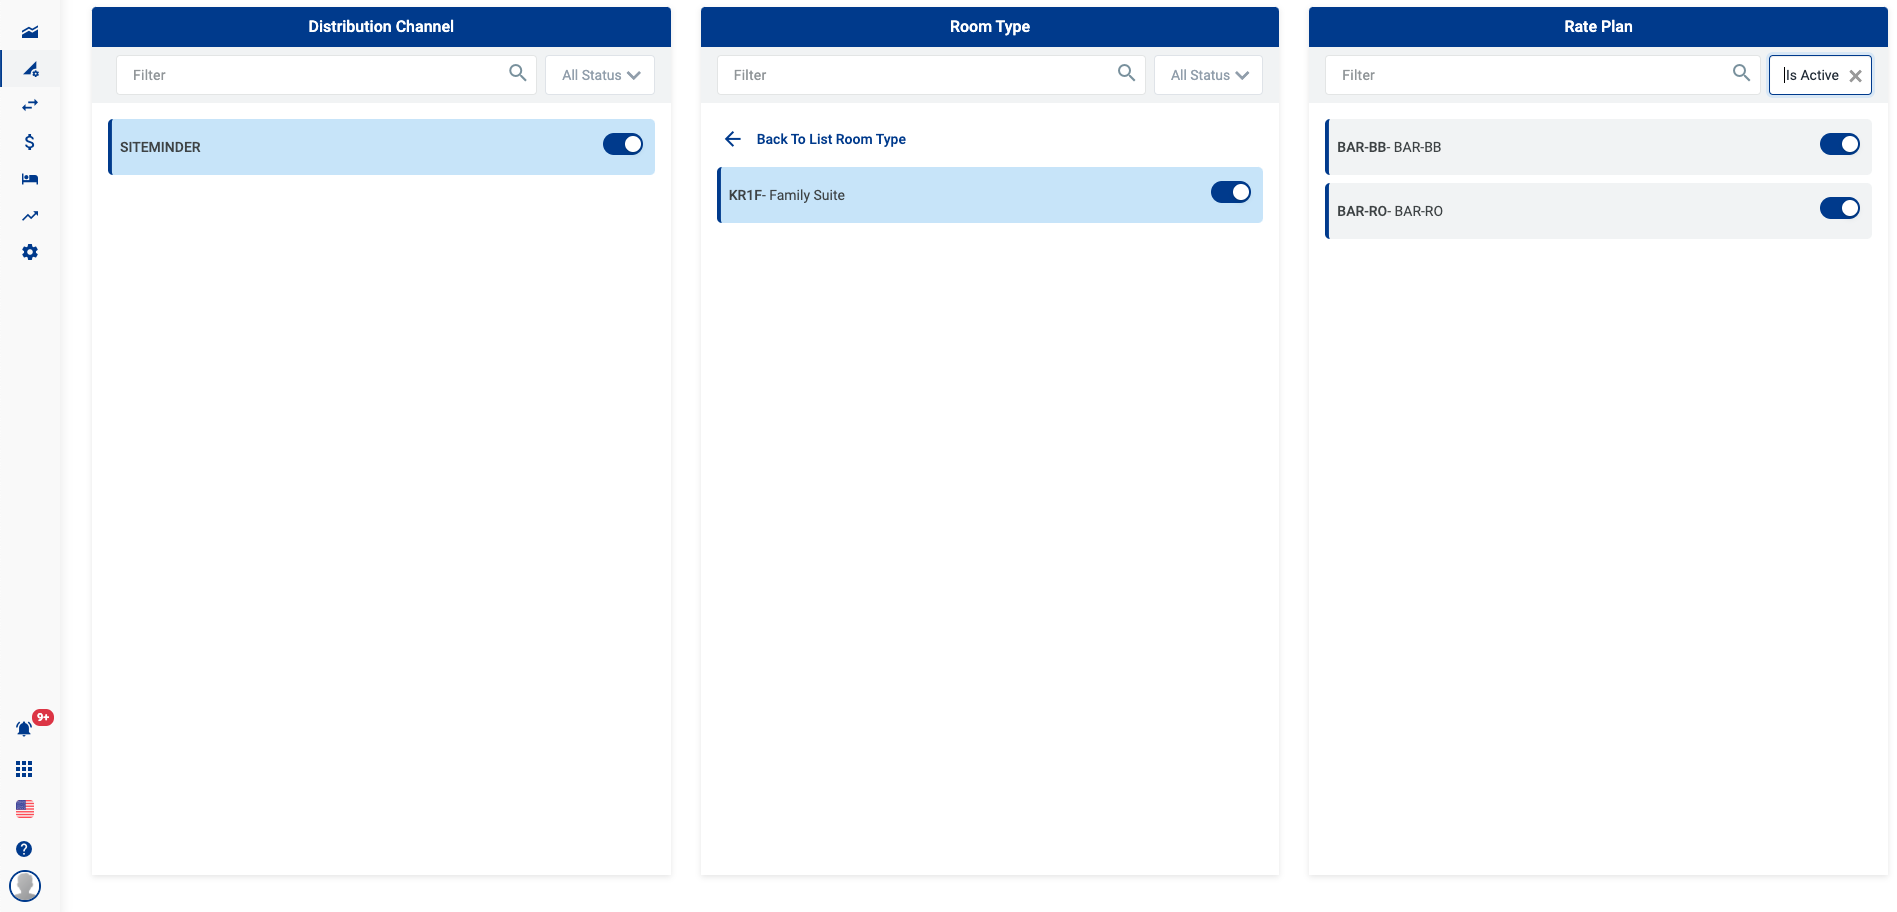
- Display the data by DC, Room Type, Rate Plan
- Activate/Inactivate a DC
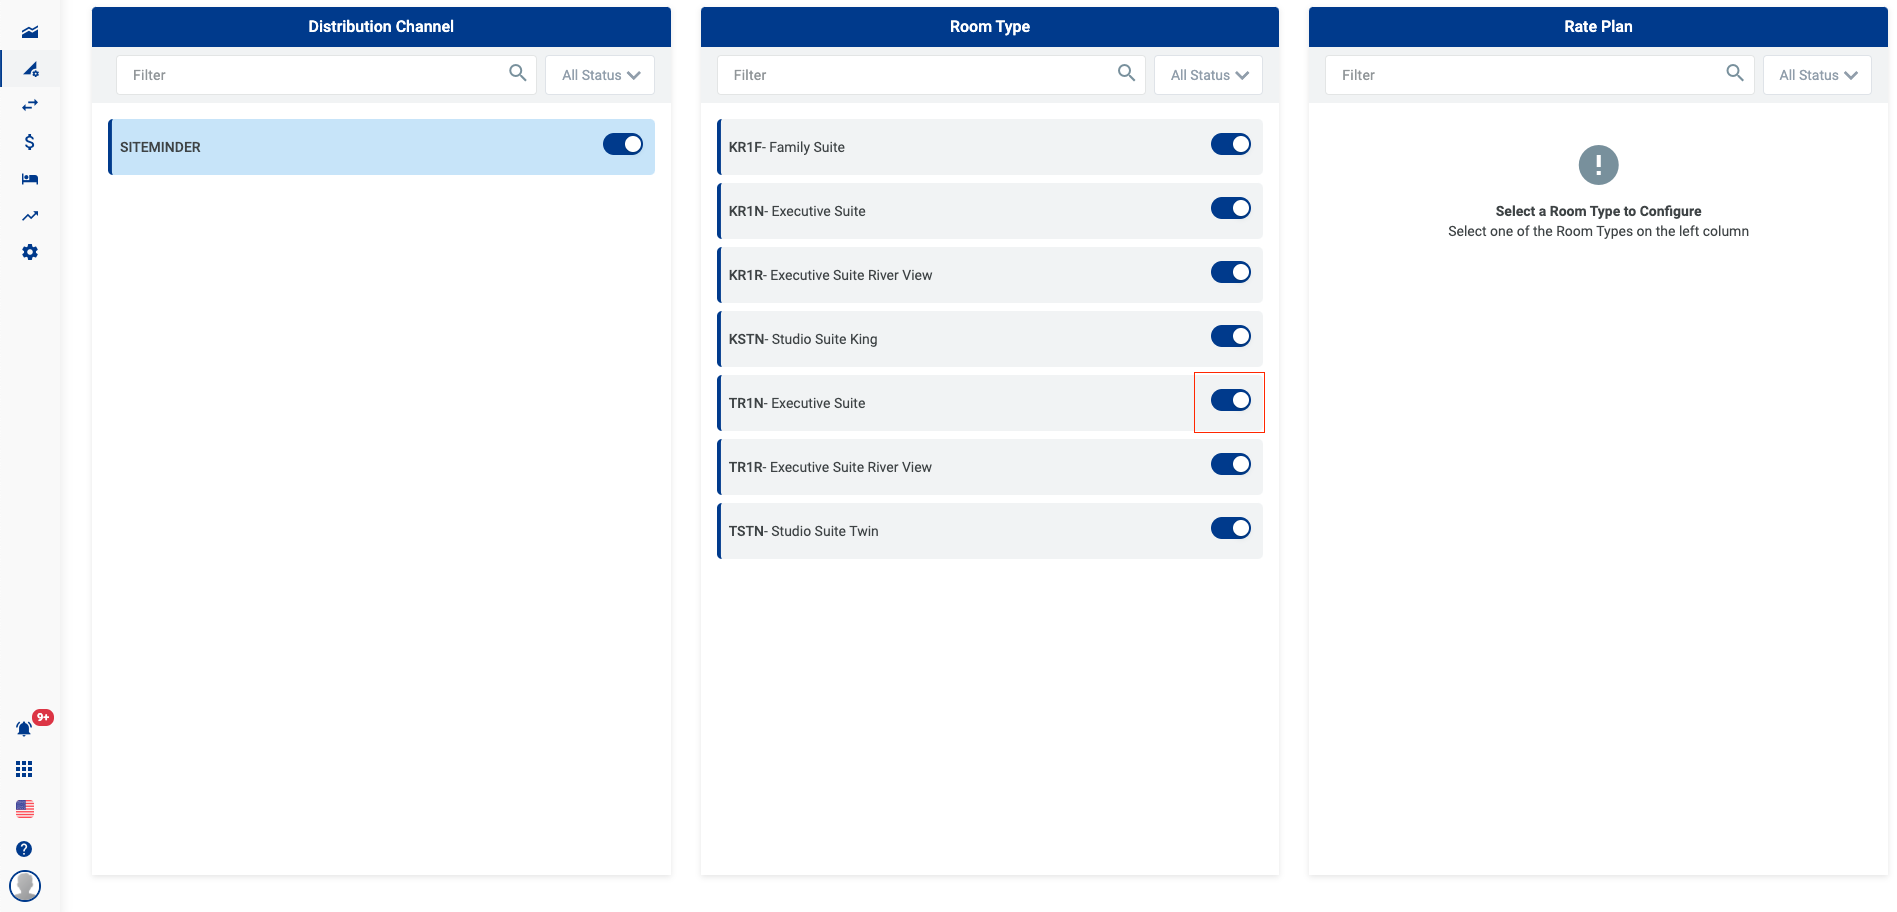
- Activate/Inactivate a Room Type
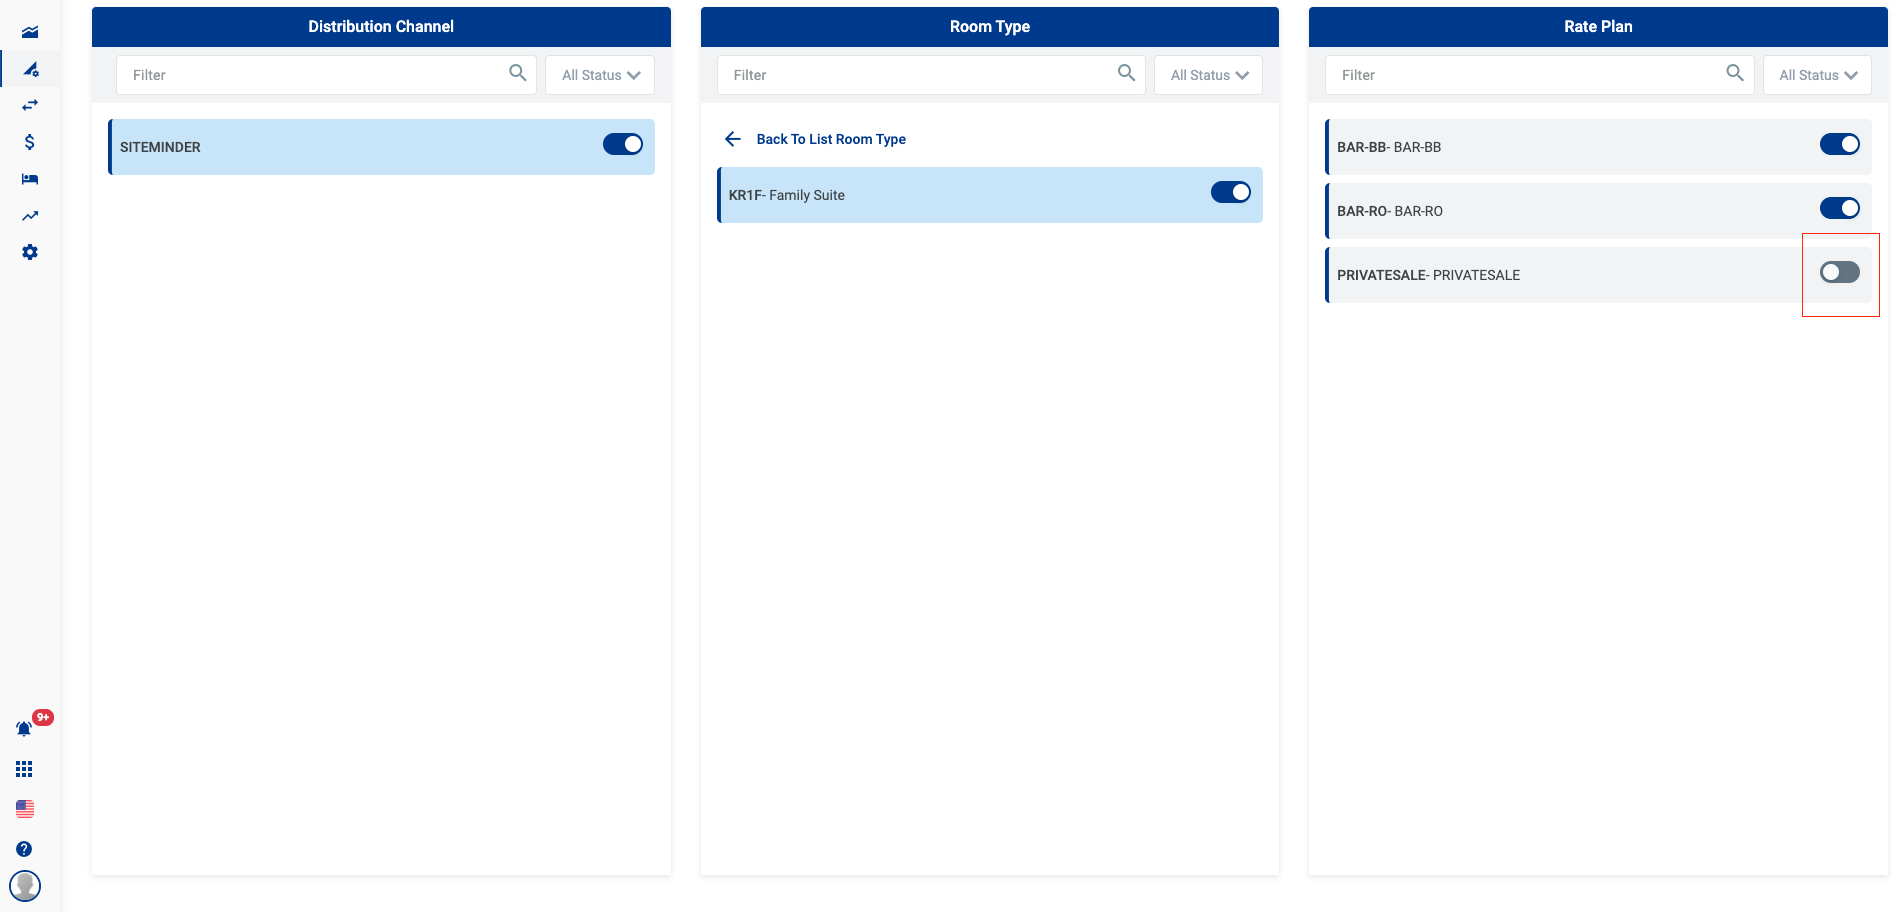
- Activate/Inactivate a Rate Plan
1. Open Link
1.1 Get to the Channel Configuration page by clicking on the icon below
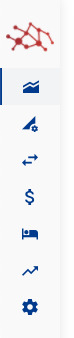
1.2 Screen Channel Configuration
2. Functions
2.1 Display the status of the DC
Tab Distribution Channel: Click on the toggle to activate/inactivate the DC
Activate/inactivate the room type and rate plate for the DC

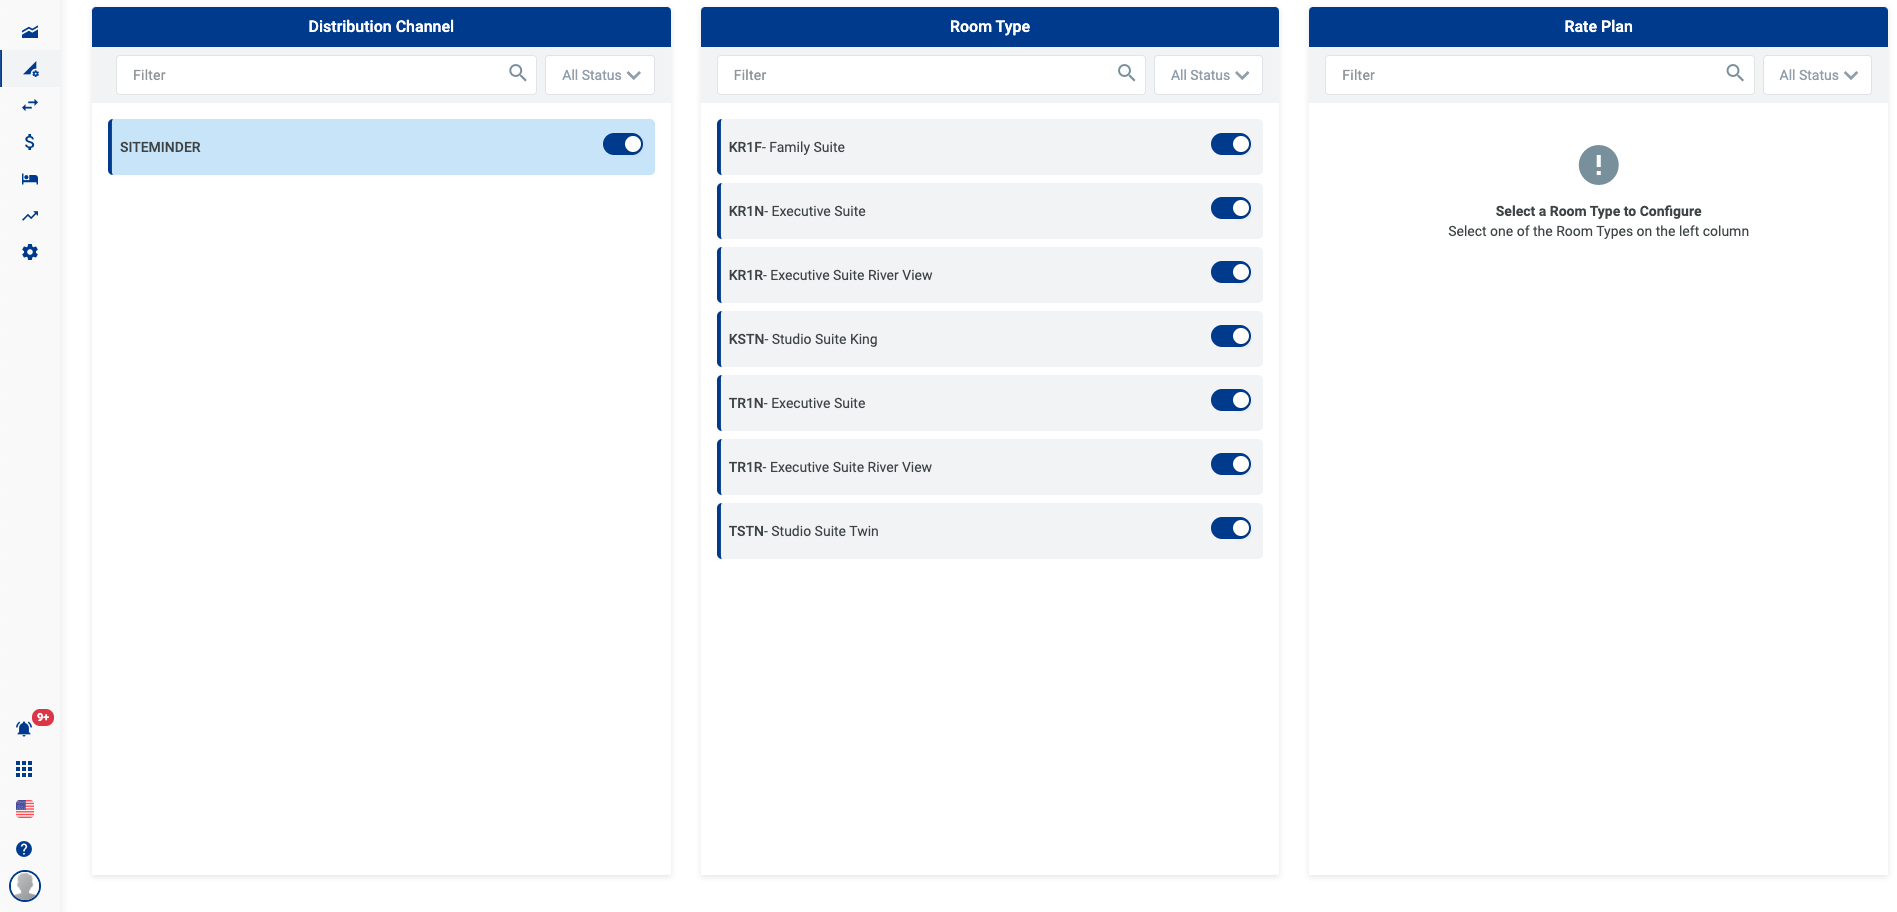
2.2 Filter

Filter by Status
Filter by Room Type

Filter by Room Type Status

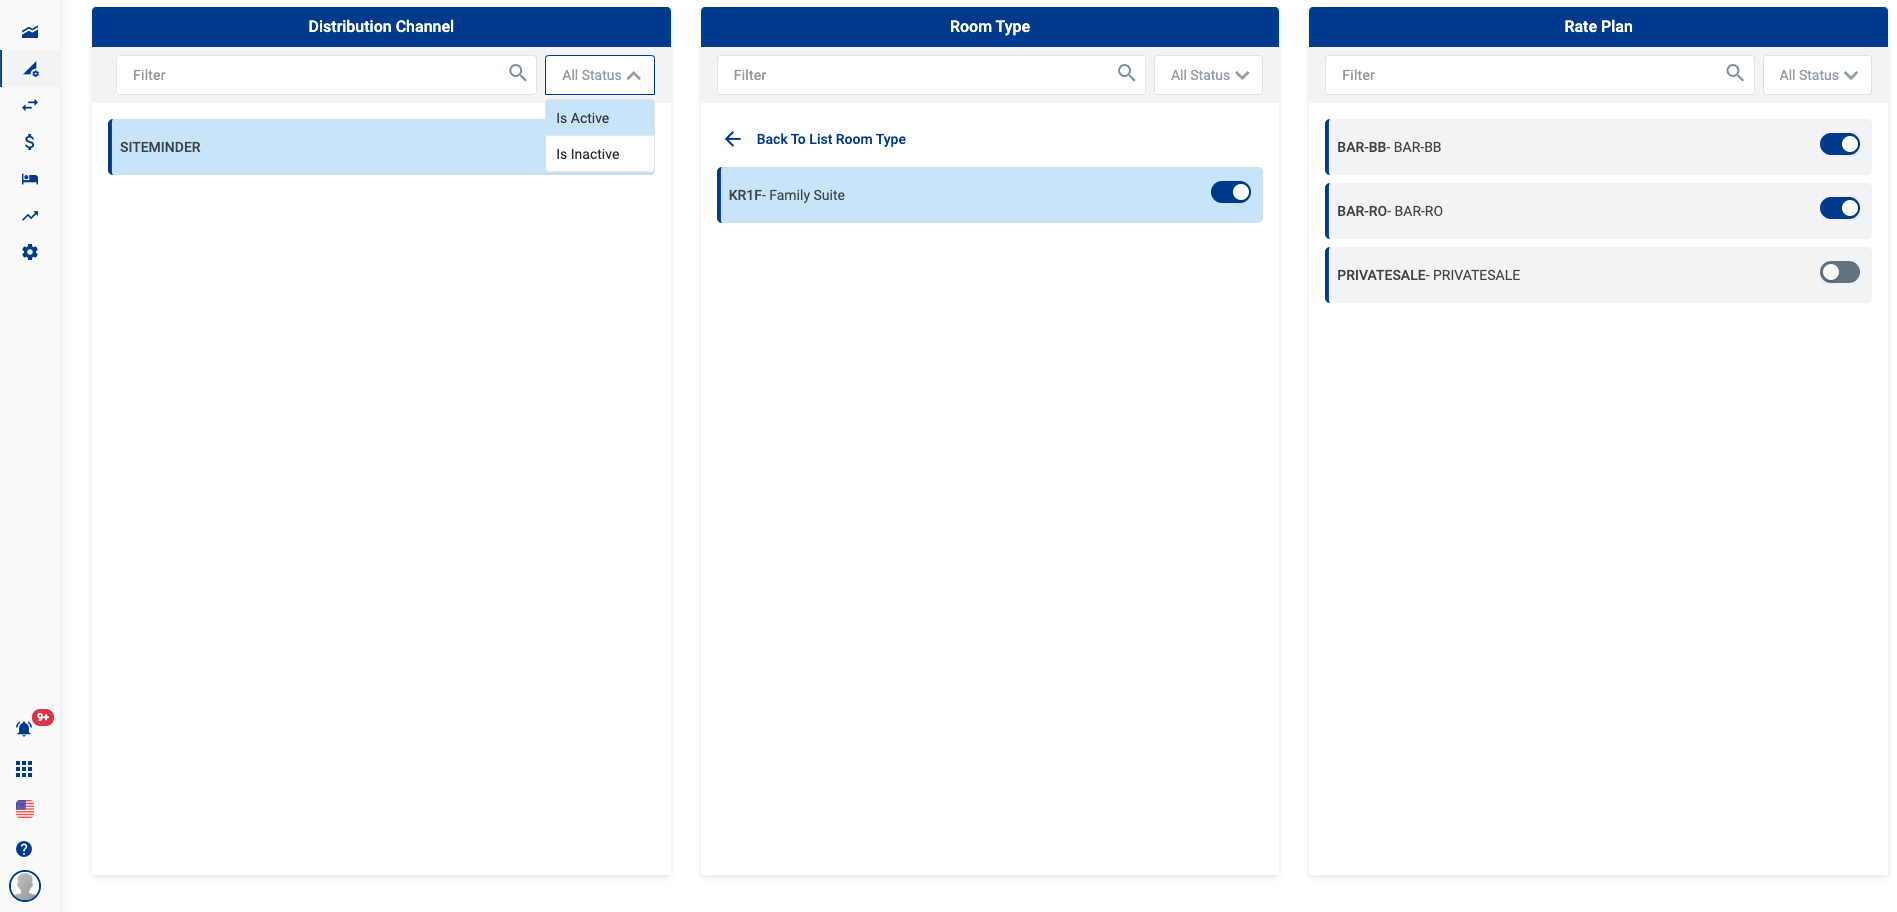
Filter by Rate Plan
Filter by Rate Plan Status
2.4. Activate/Inactivate the DC

2.5. Activate/Inactivate Room Type
2.6. Activate/Inactivate Rate Plan
Reservations page
The screen allows you to manage the list of reservations from the OTA.
The system supports the following functionalities:
- View the reservations by property
- Download the reservation to excel file
- Sort the reservations by Reservation ID or Date Created
- Filter by criteria
- Clear the selected filters
- Paging
- View the details of the reservation
- View the status of the reservation
1. Filters
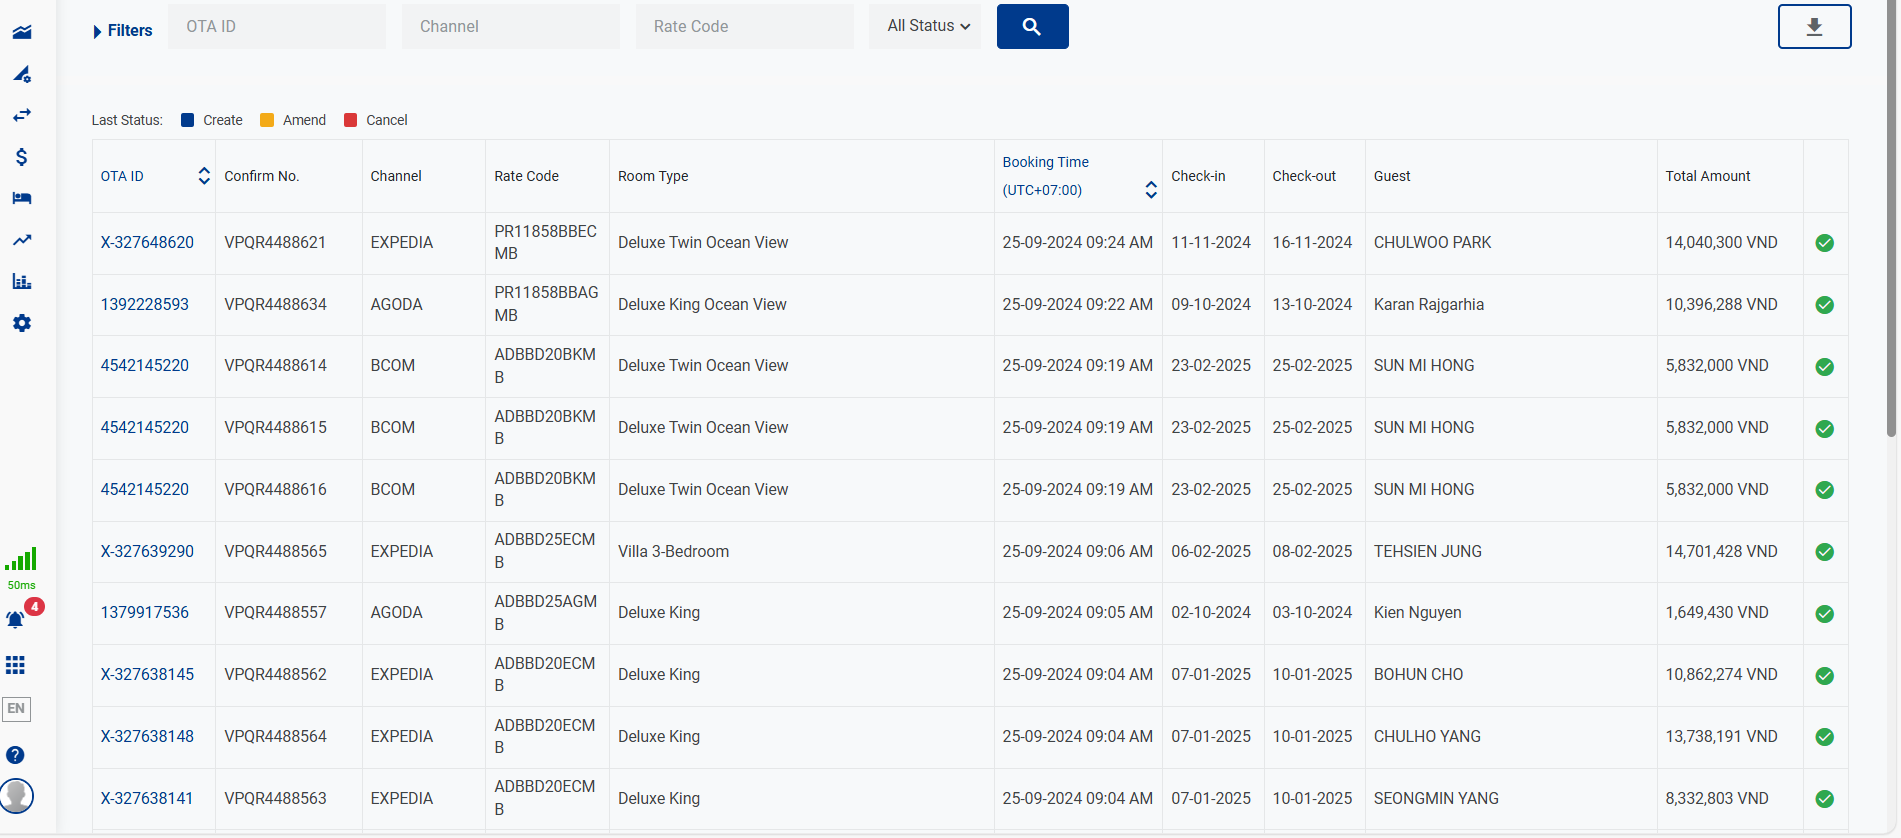
1.1 Status
Type of Status | Description |
|---|---|
Create (Blue) | New reservation |
Amend (Orange) | Reservation that is changed |
Cancel (Red) | Reservation that is canceled |
1.2 PMS Status
Type of PMS Status | Description |
|---|---|
New | New reservation |
Pending | Reservation that is pending to process |
Processed | Reservation that is in processing |
Failed | Reservation that is failed to create |
Ignored | Reservation that is ignored |
2. Open link
2.1 Go to the Reservations page by clicking on the icon below

2.2 Screen Reservations
3. Functions
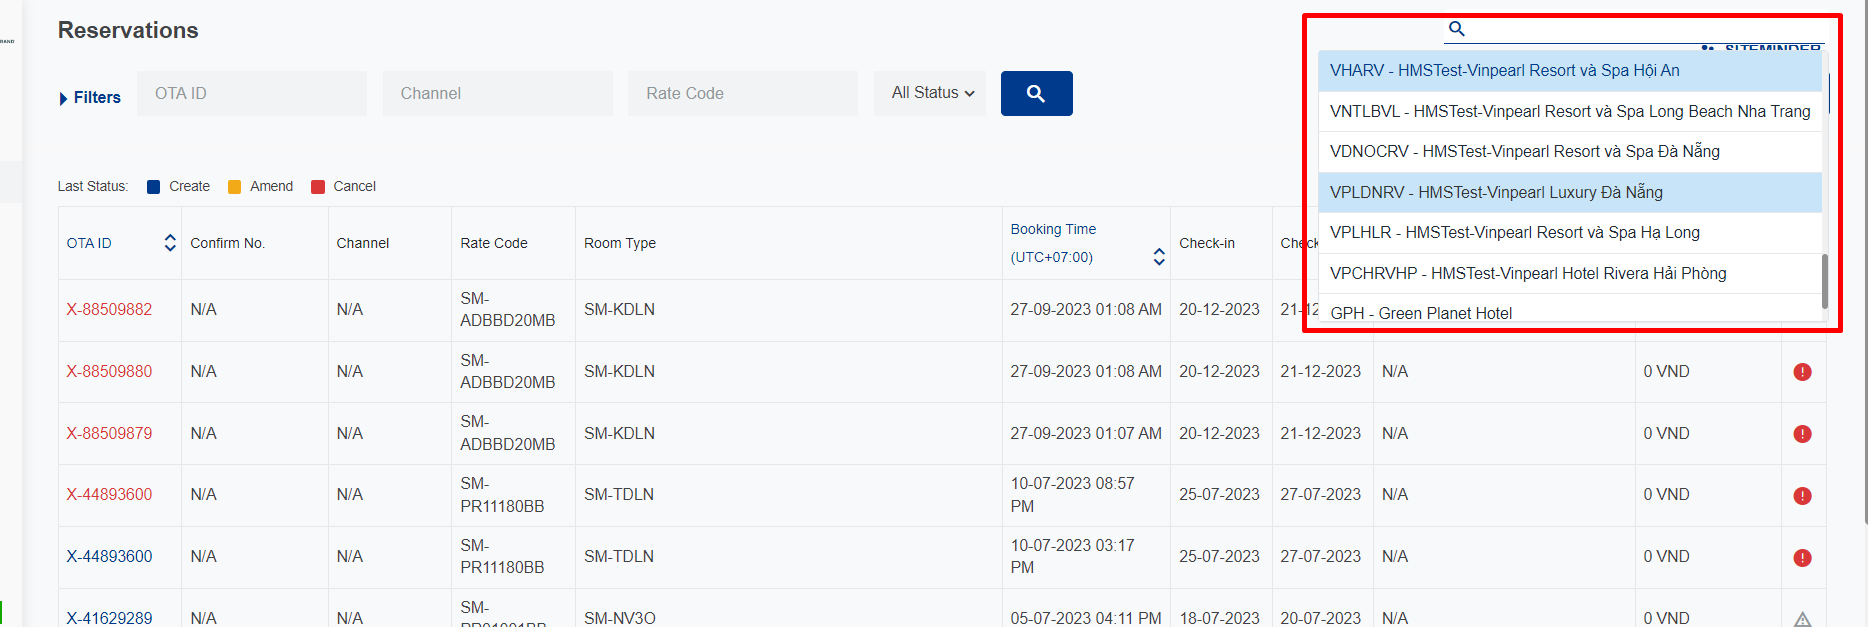
3.1 View the reservations by property
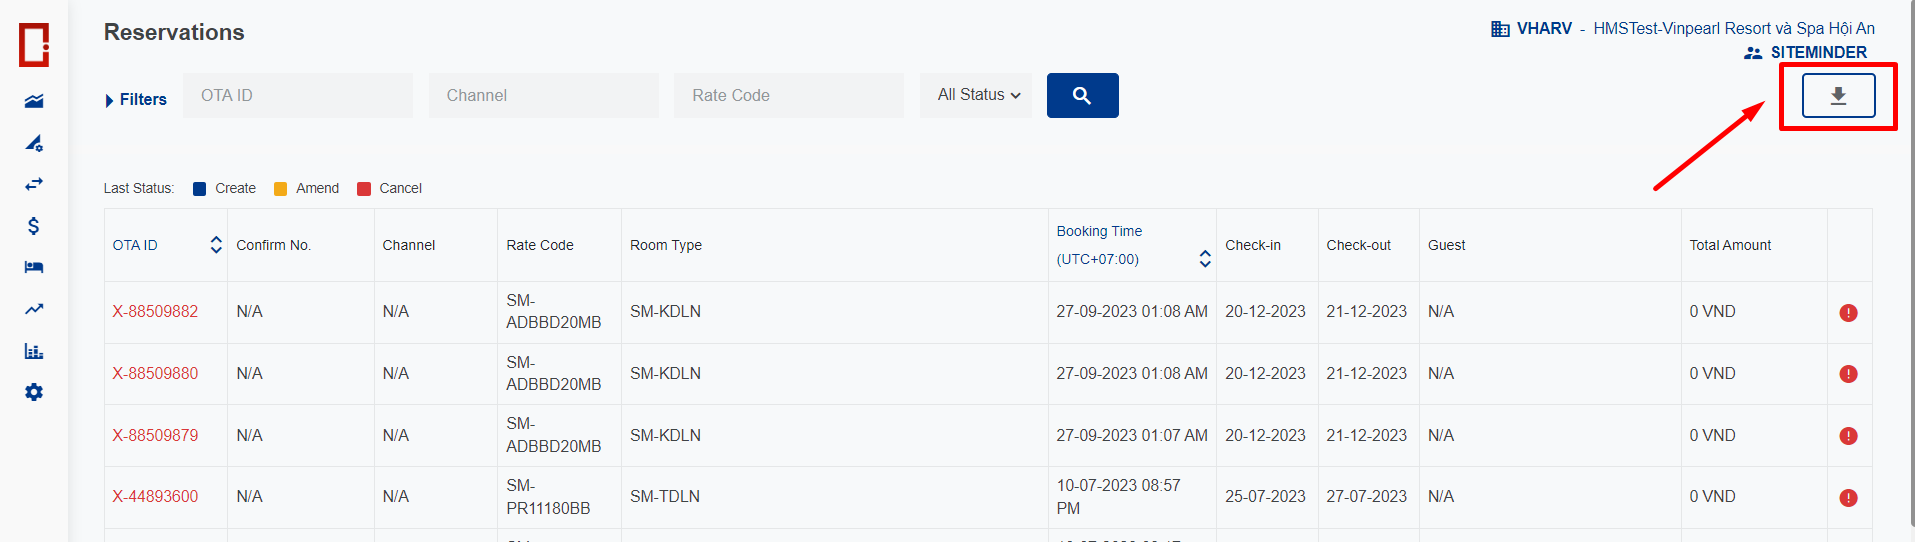
3.2 Download reservation to excel file
3.3 Sort the reservations by Reservation ID or Date Created
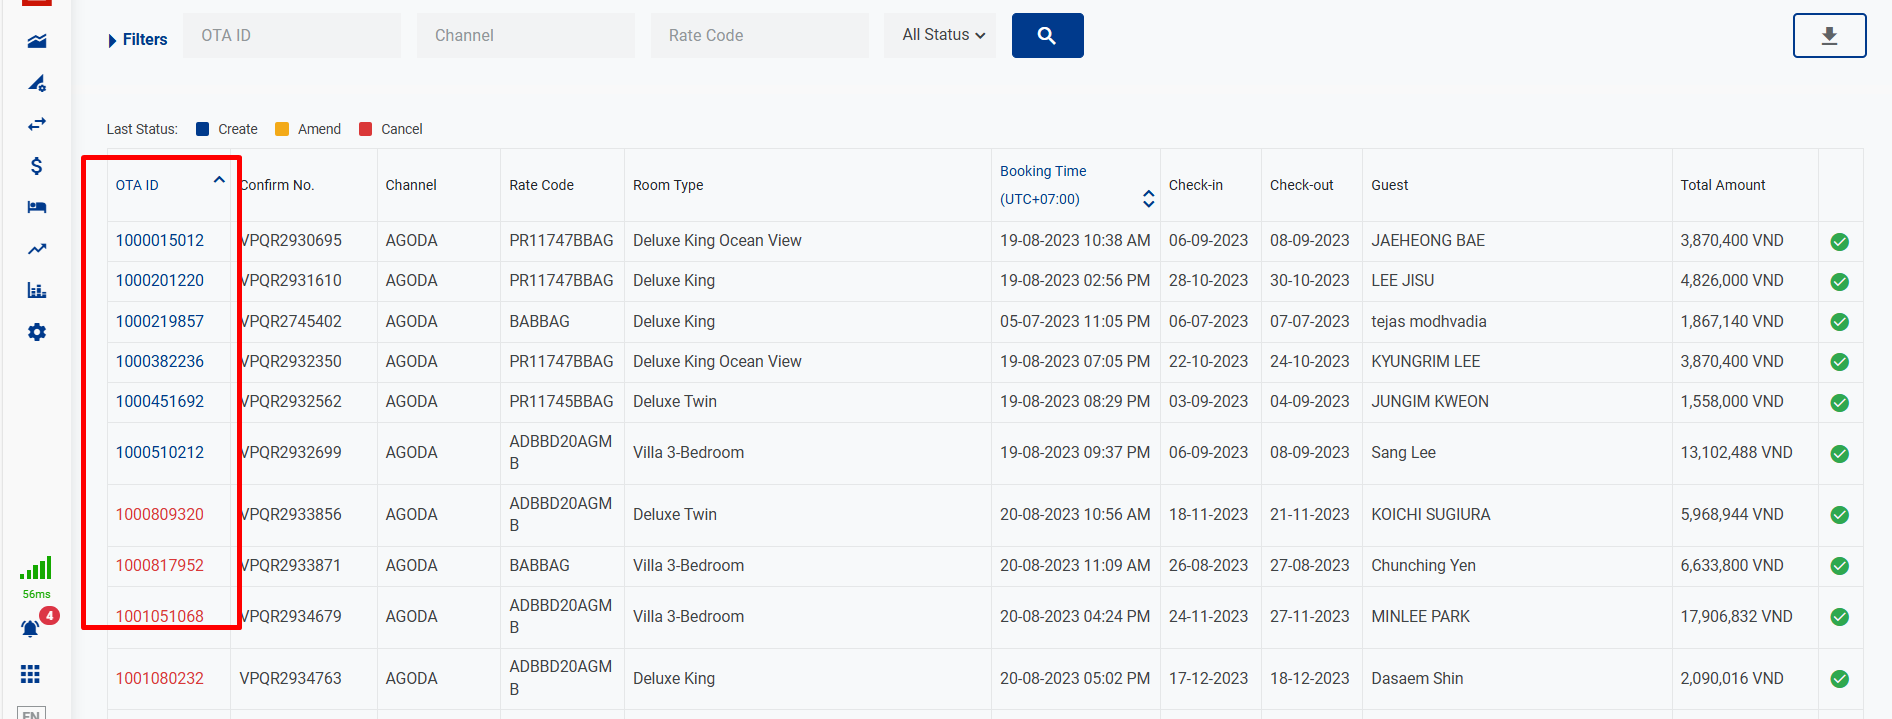
3.3.1 Order by OTA ID ascending
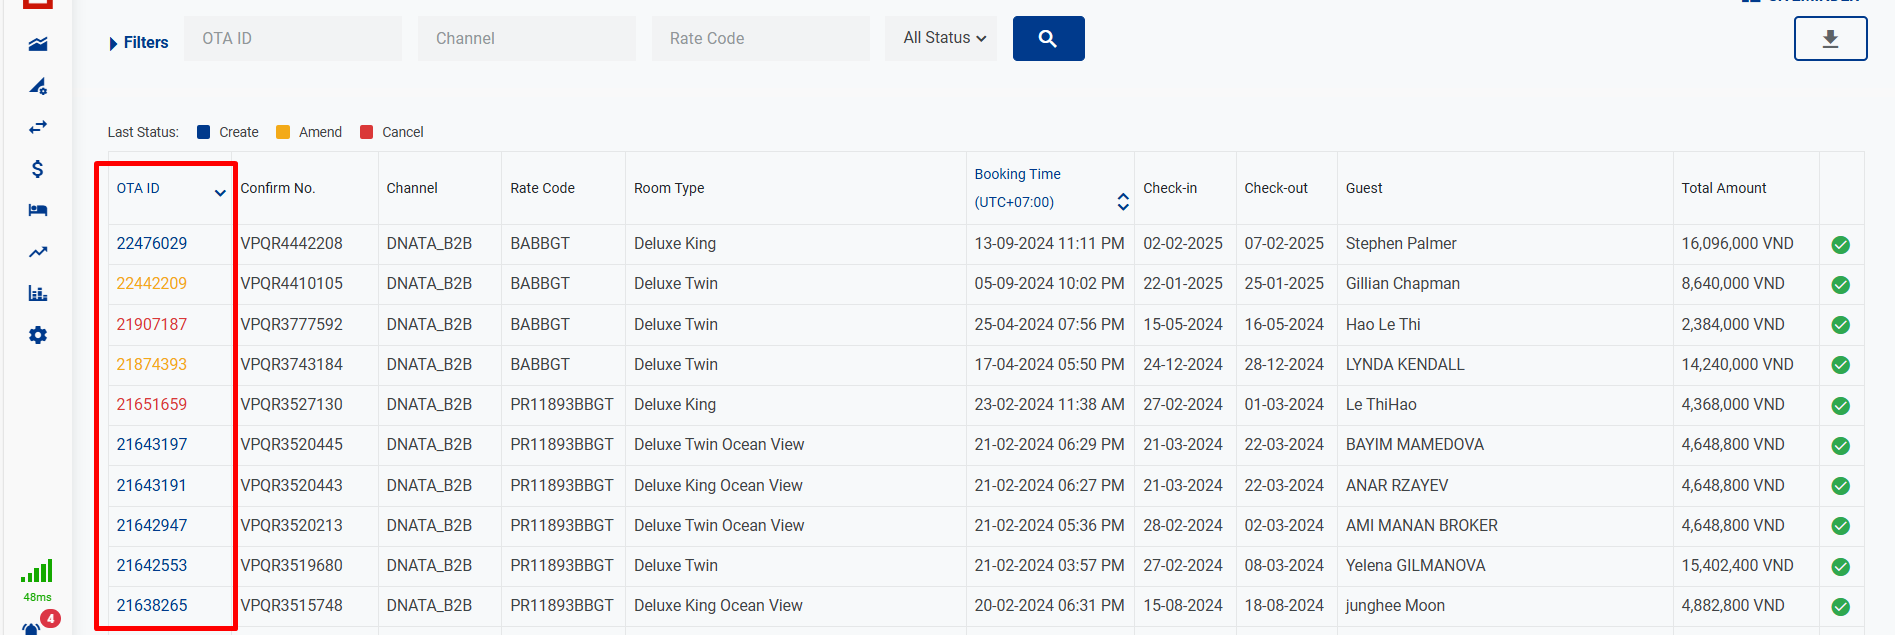
3.3.2 Order by OTA ID descending
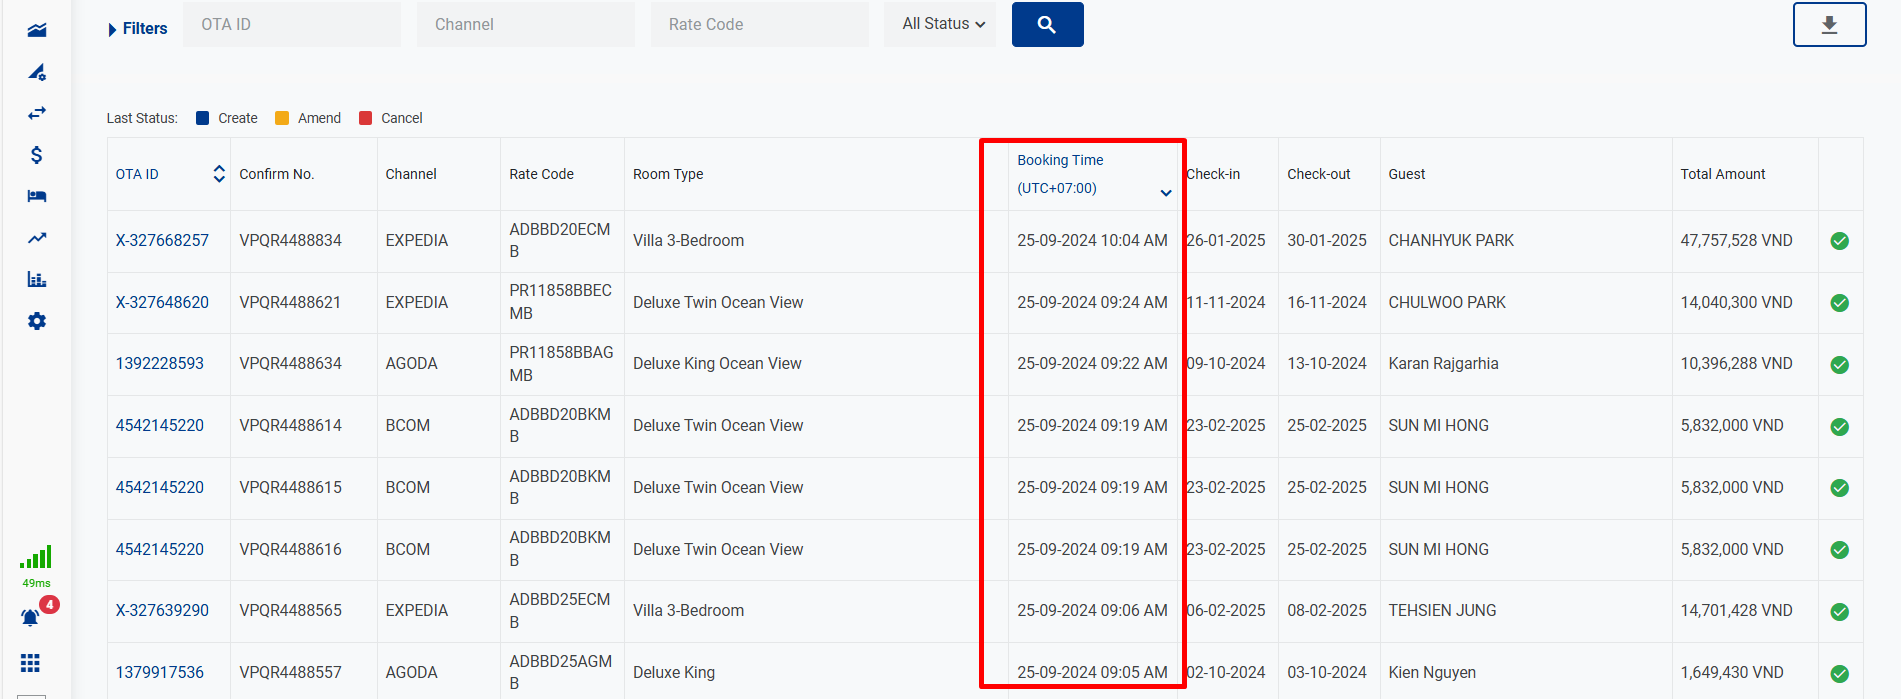
3.3.3 Order by Booking Time ascending
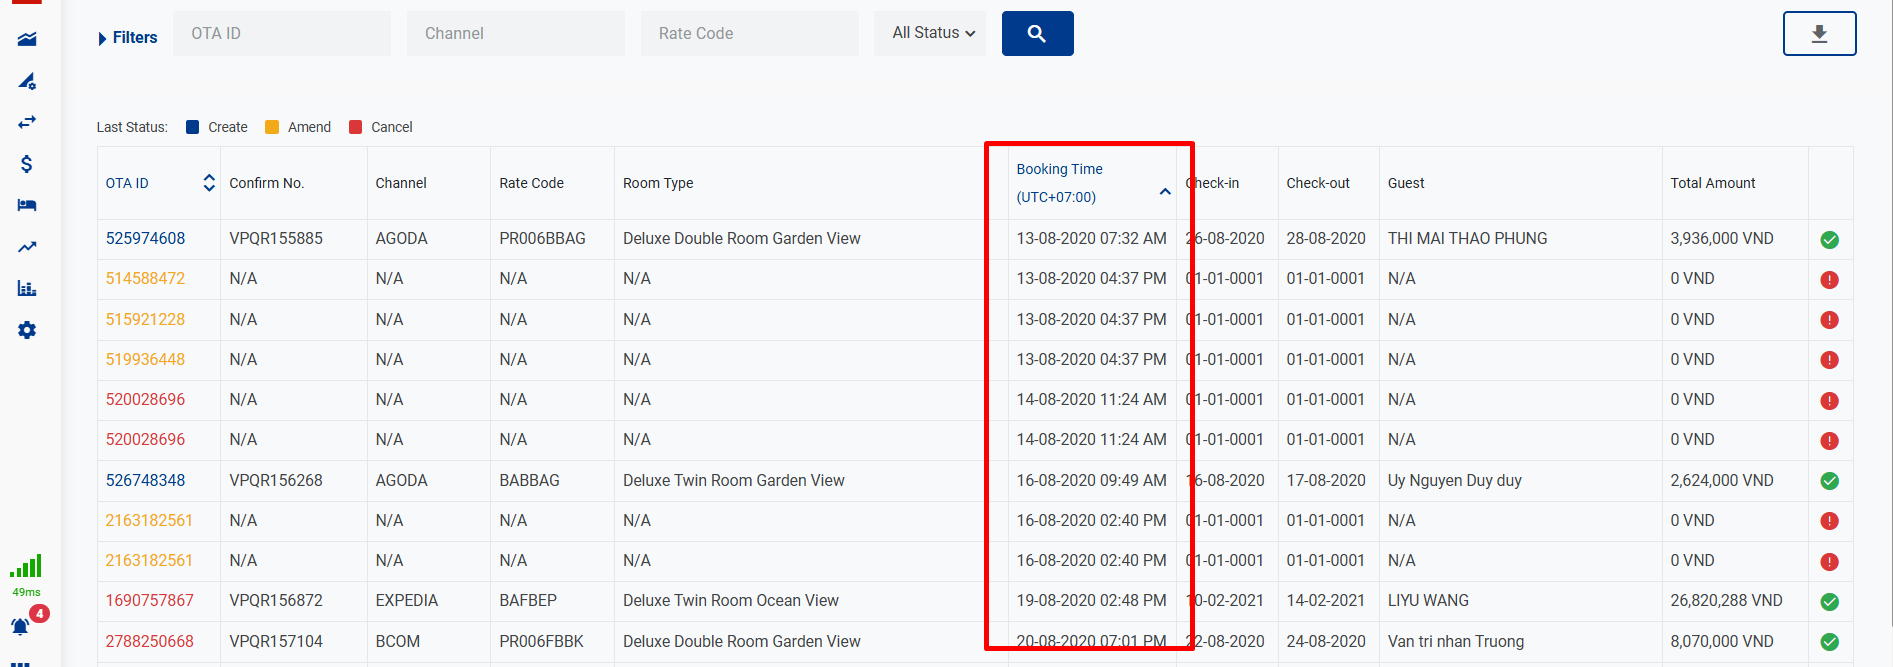
3.3.4 Order by Booking Time descending
3.4 Filters
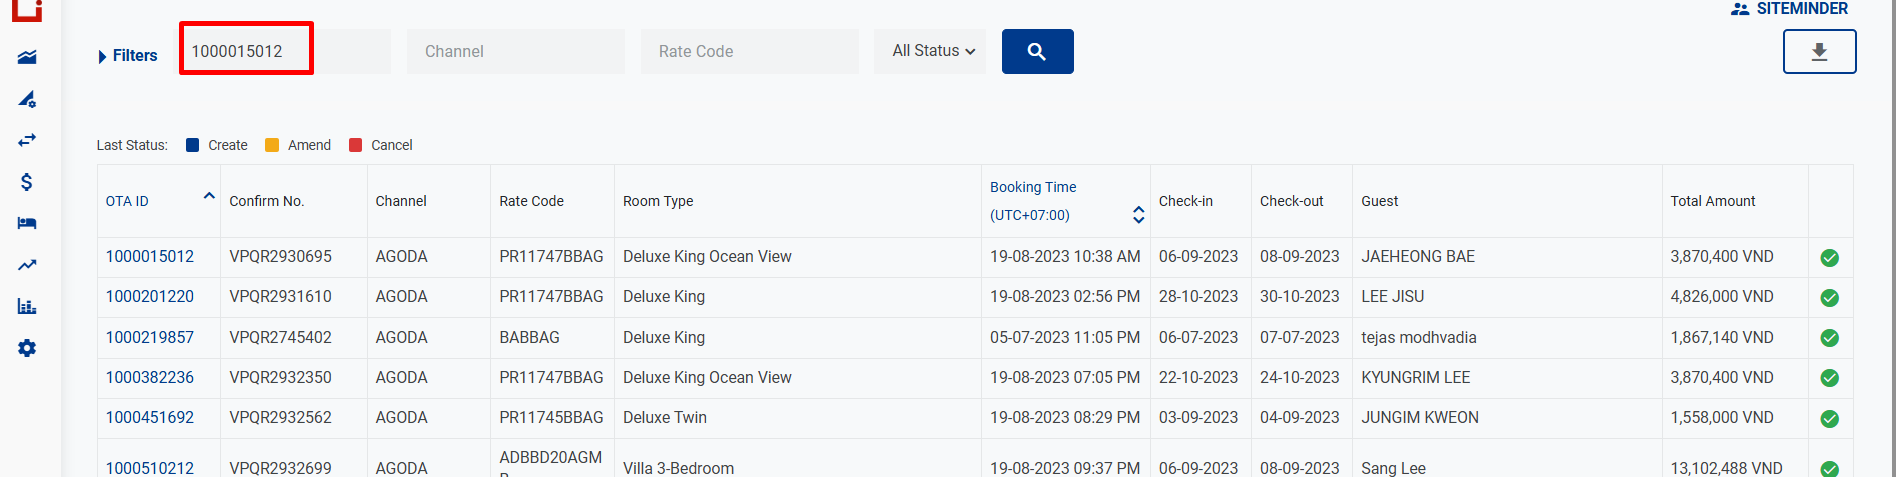
3.4.1 Filter by OTA ID
Enter the OTA ID to search for the reservations from this channel. You can enter the exact match ID or not.
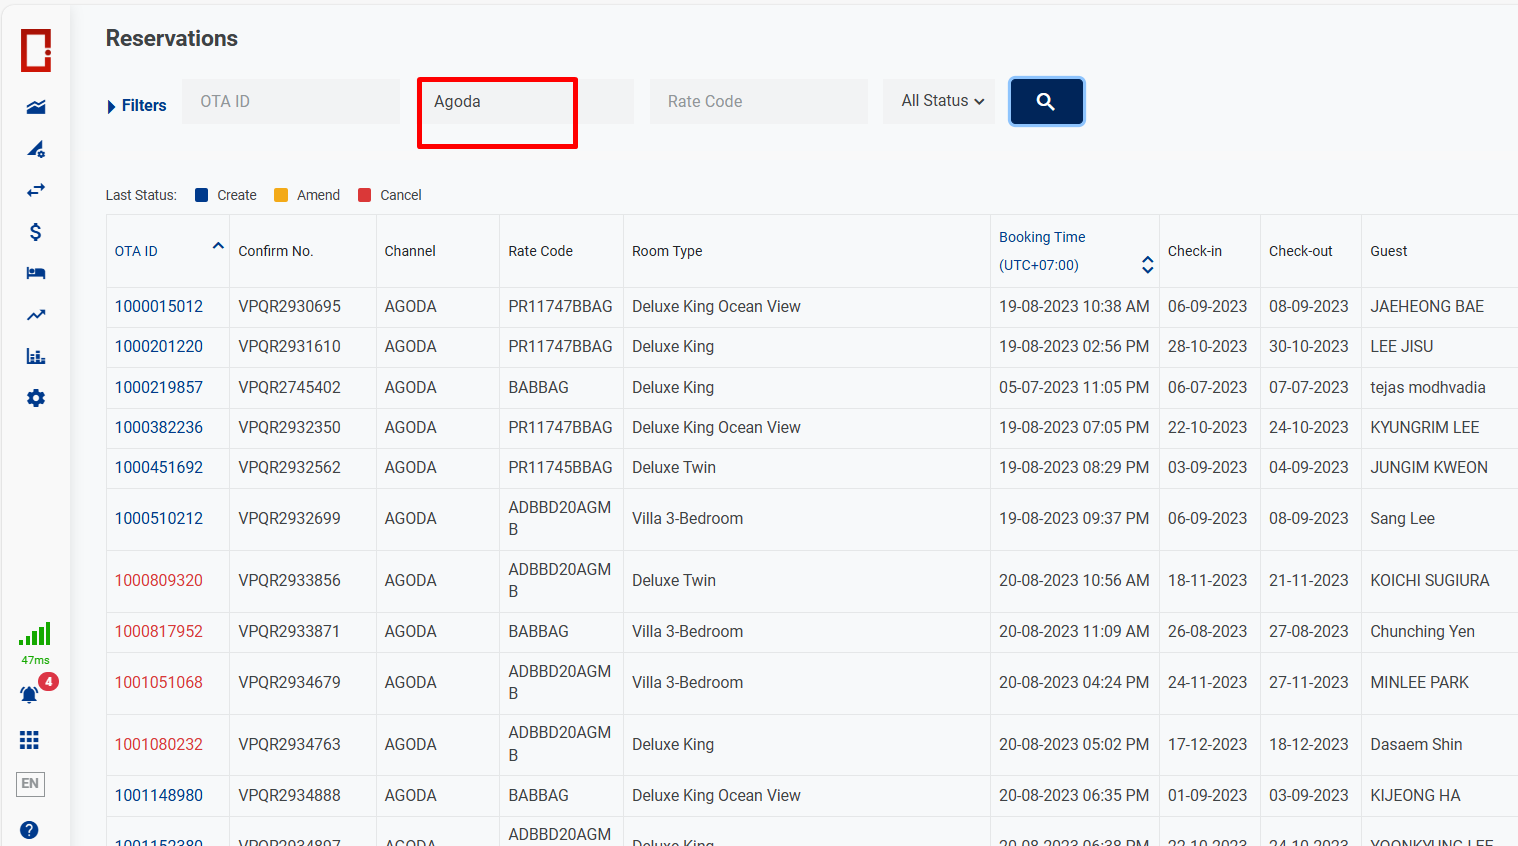
3.4.2 Filter by Channel
Enter the name of the channel you want to search for
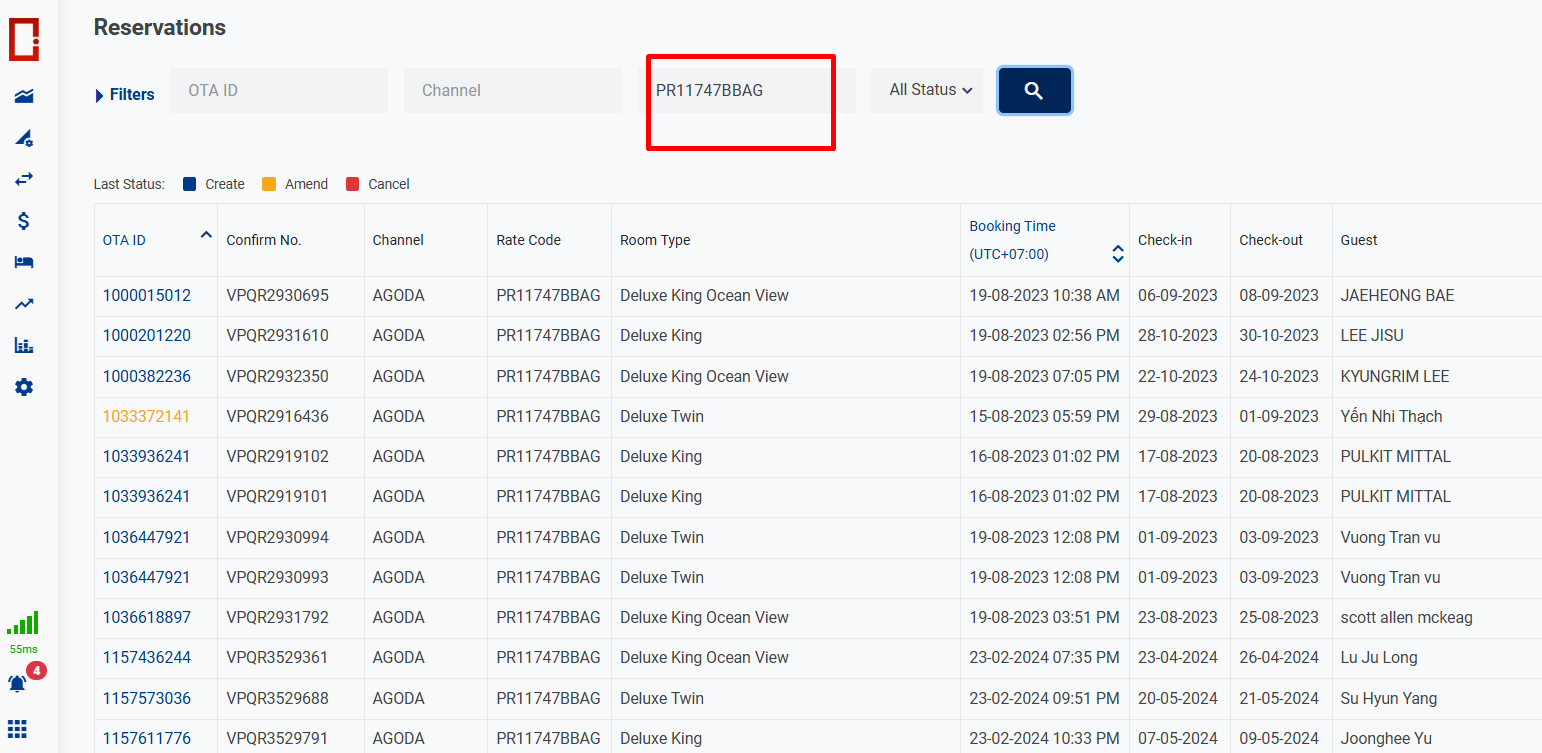
3.4.3 Filter by Rate code
Enter the Rate Code to search for the reservations that have this rate code.
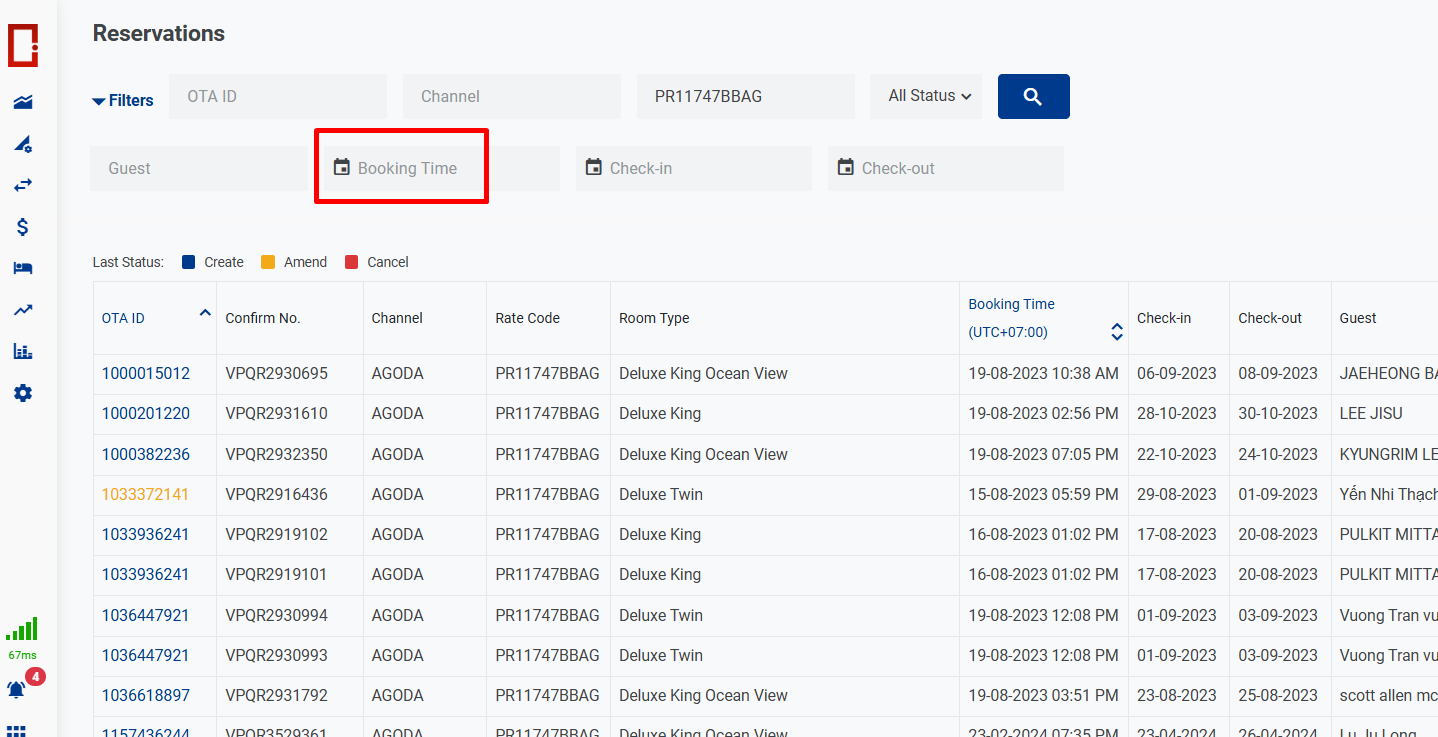
3.4.4 Filter by Booking Time
Enter the date on the calendar.
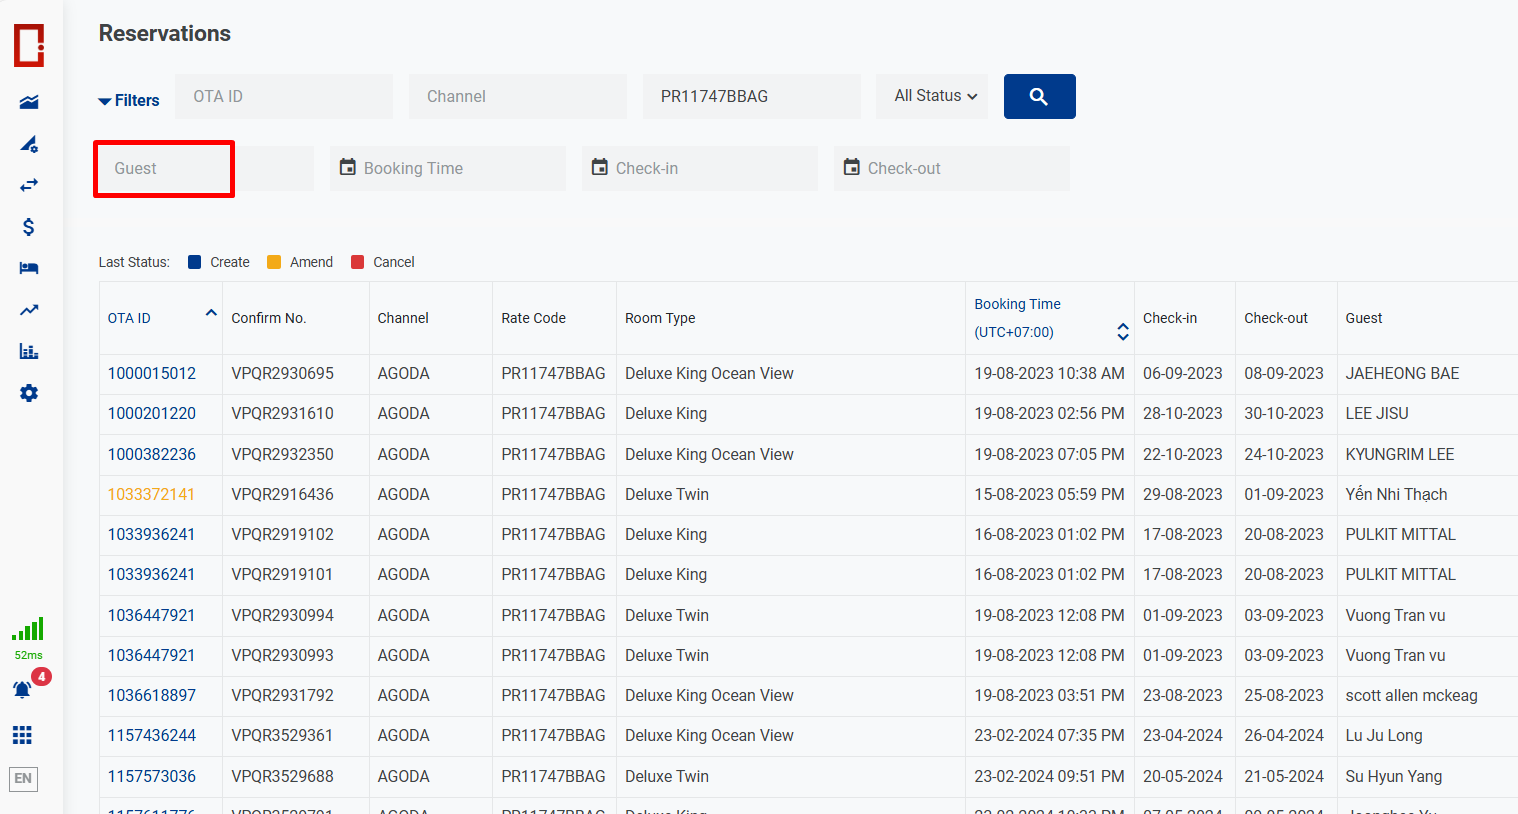
3.4.5 Filter by Guest
Enter the name of guest in the search field.
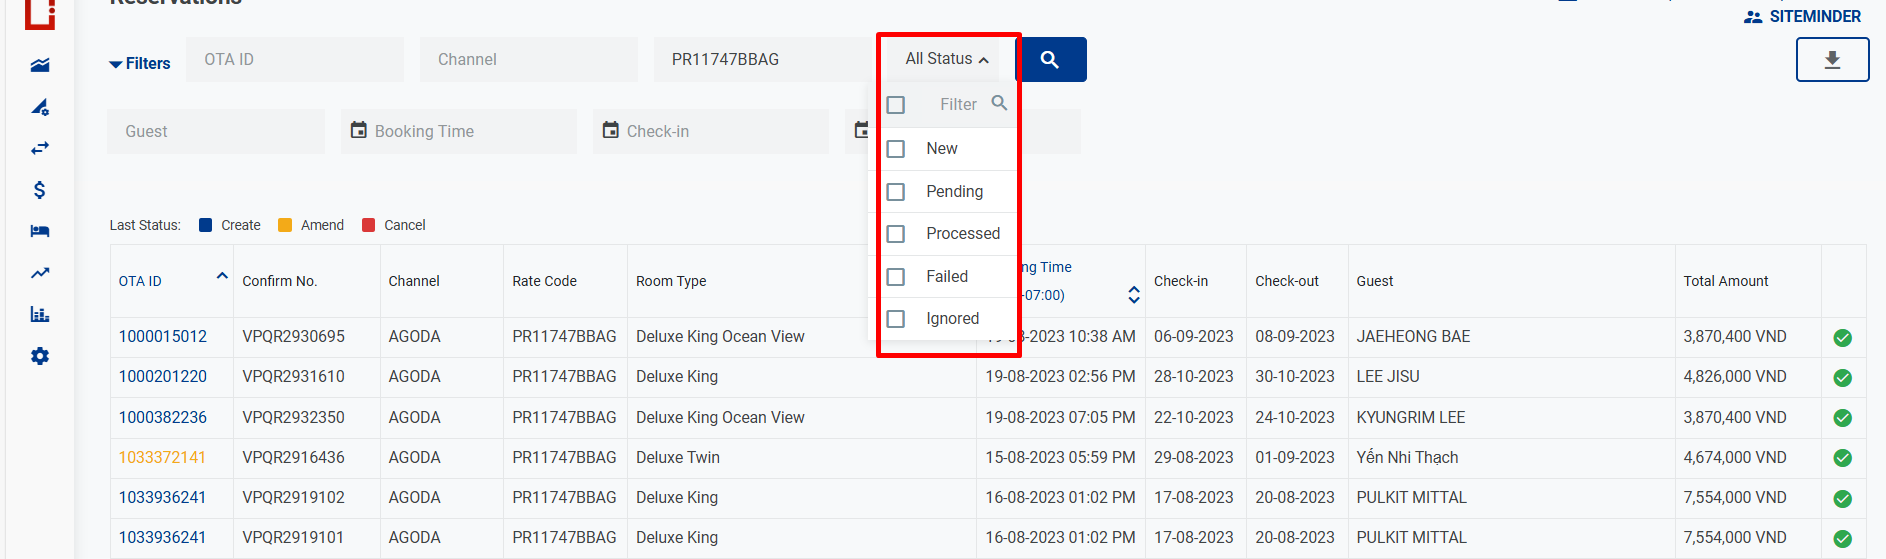
3.4.6 Filter by PMS Status
Select the status in the drop-down.
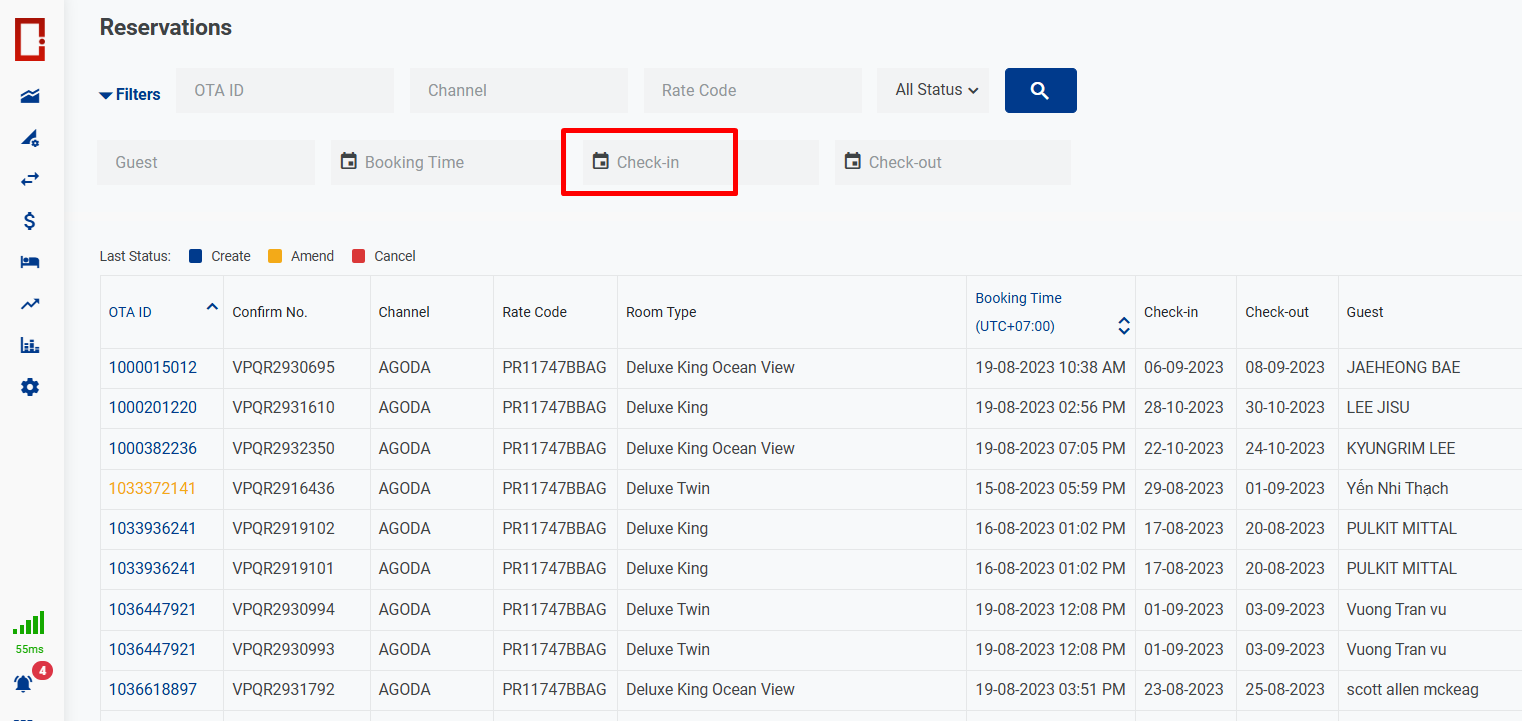
3.4.7 Filter by Check in date
Select the date on the calendar.
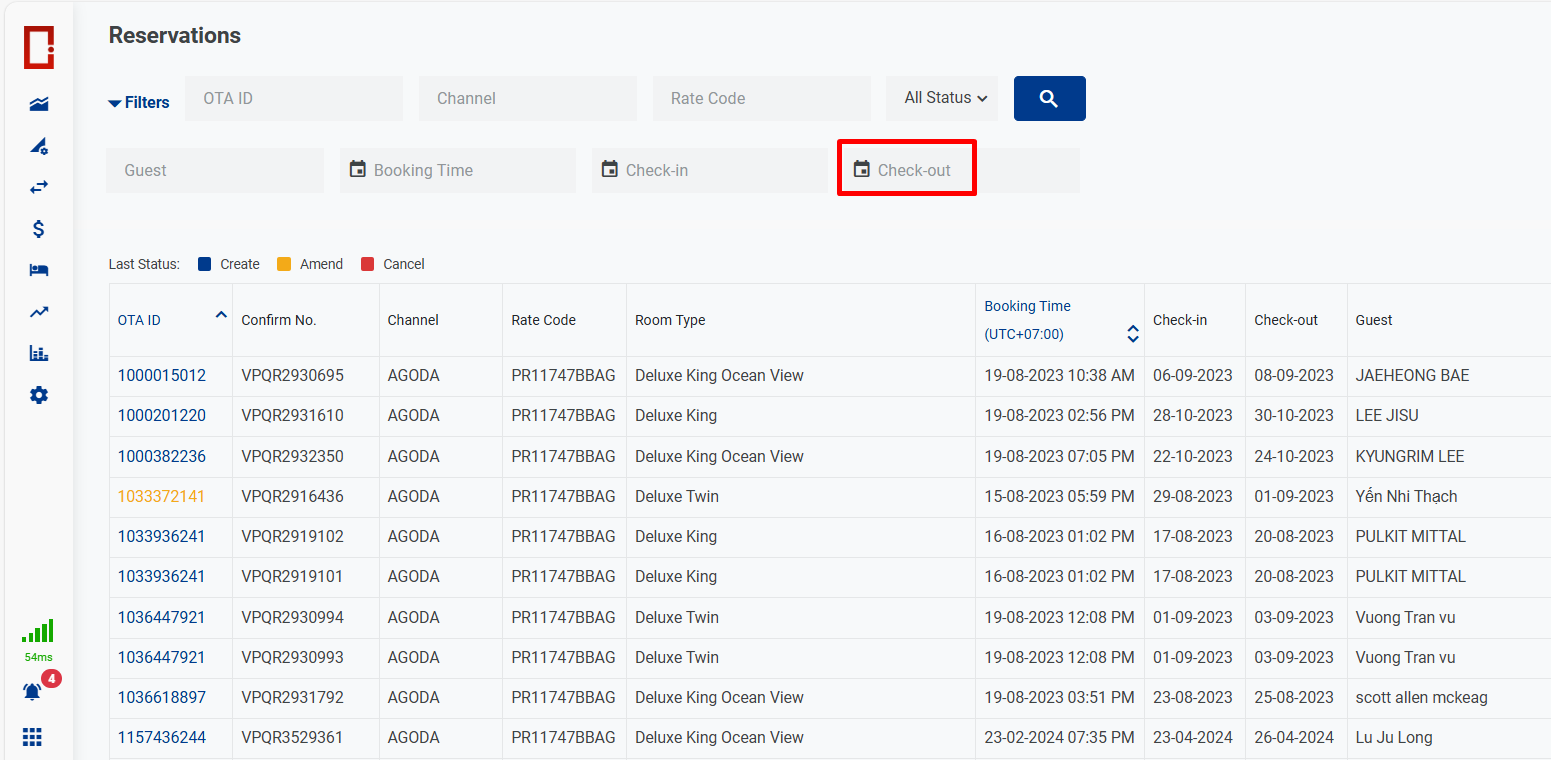
3.4.8 Filter by Check out date
3.5. Clear filters

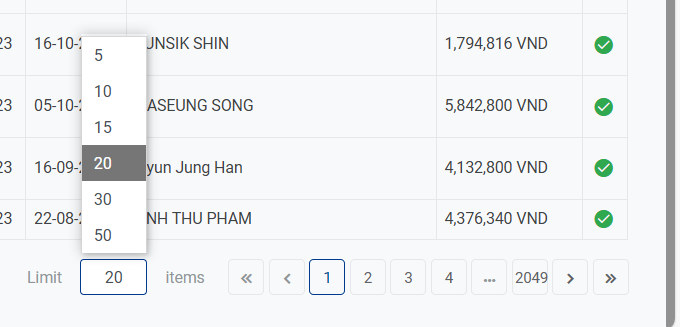
3.6. Paging
You can go to a specific page or set the number of items displayed on the screen.
3.7 View the details of the reservation
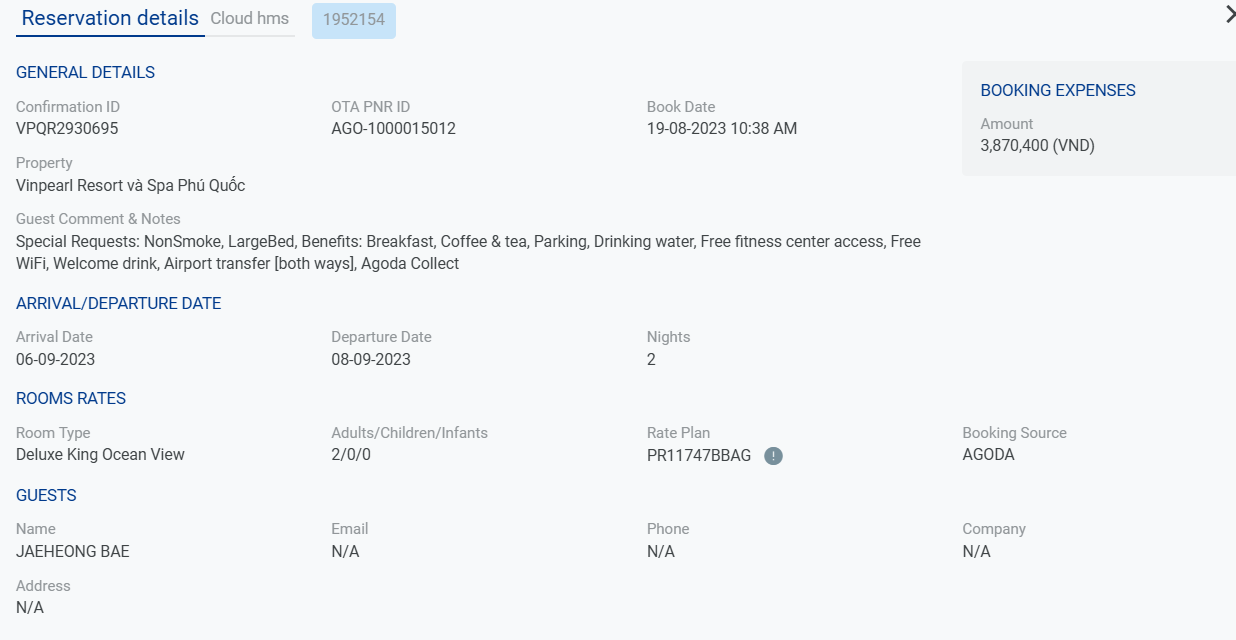
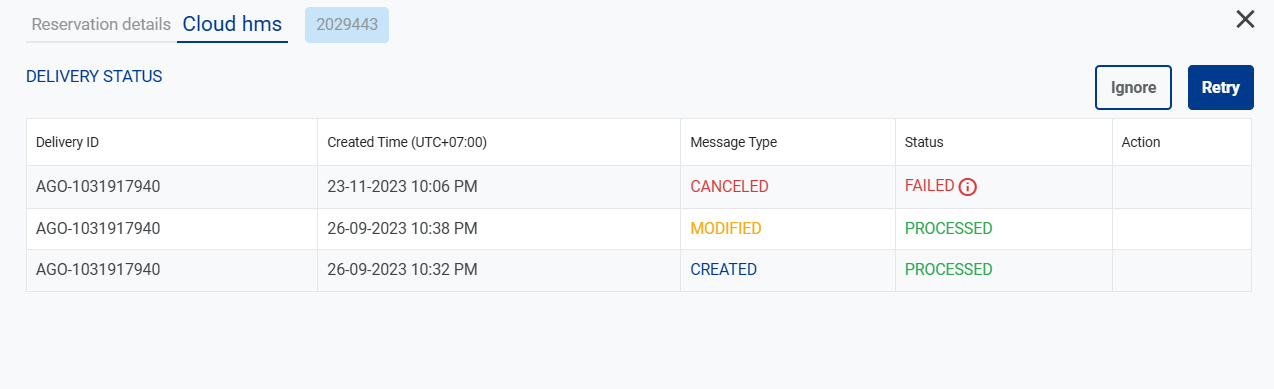
3.8 View the status of the reservation
Click on the OTA ID to open the reservation detail, select the tab Cloud HMS.
Rate Management page
The screen allows you to manage and update the rates by date for the Room Types and Rate Plans.
The changes will be applied for the selected DC and Property.
The system supports the following functionalities:
- View the distributed rate for each Room Type
- View the distributed rate by date
- Search and filter
- Set rate by date
- Bulk update rate for Room Type - Rate Plan
- Clear filters
- Set rate by Channel
- Shortcut keys
1. Open Link
1.1 Go to the Rates Management page by clicking on the icon below

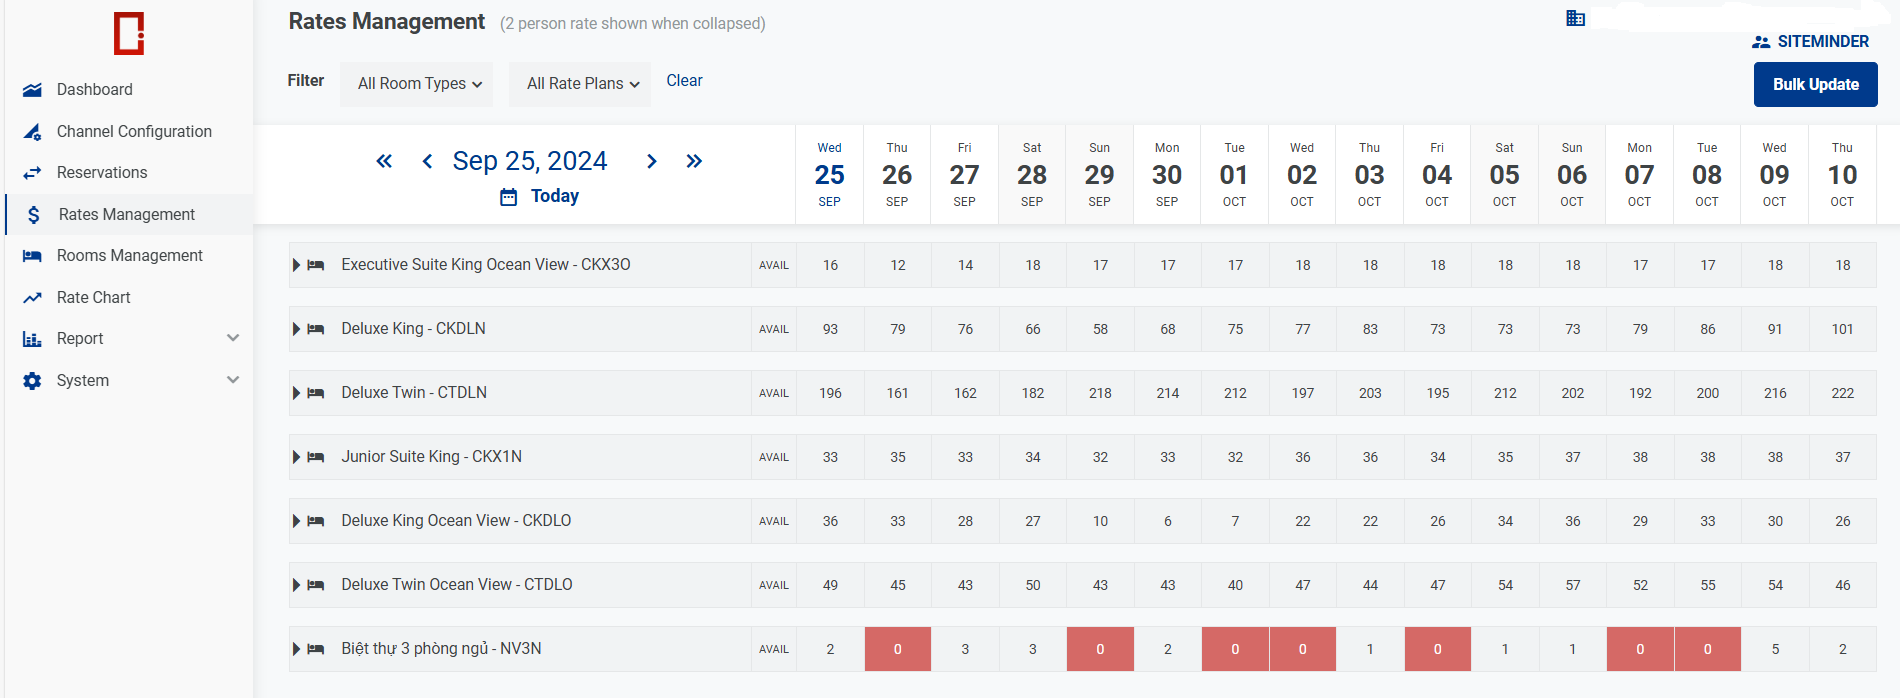
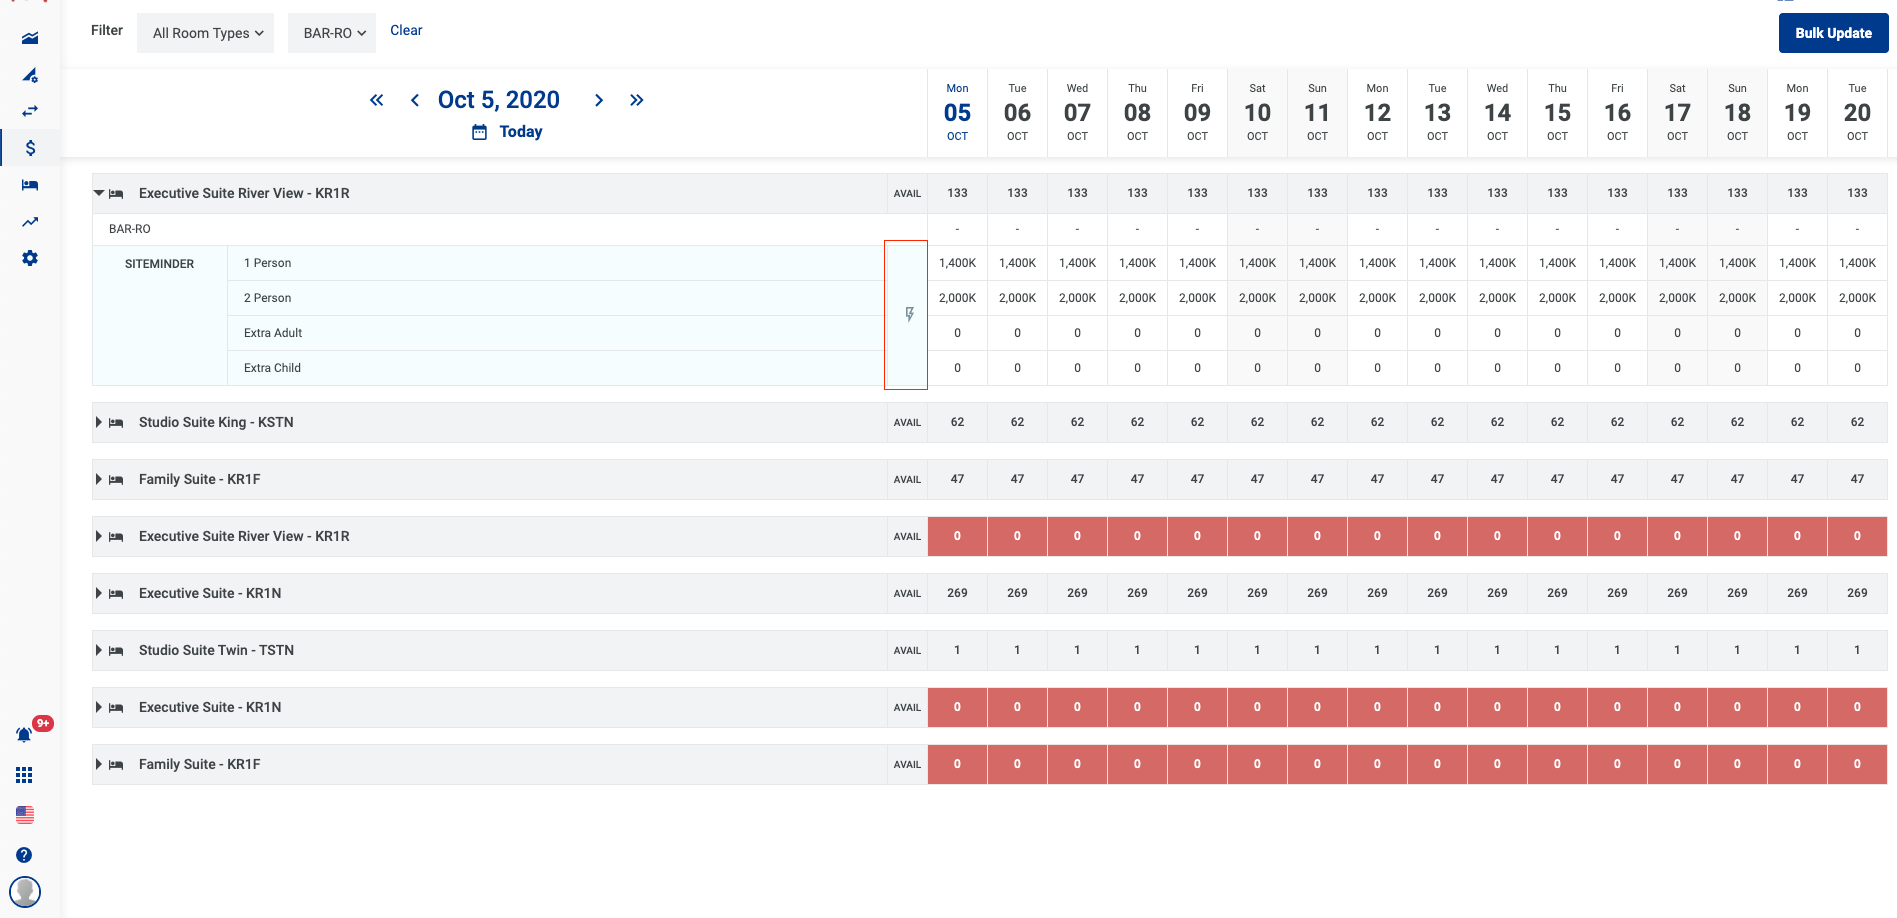
1.2 Screen Rates Management
2. Functions
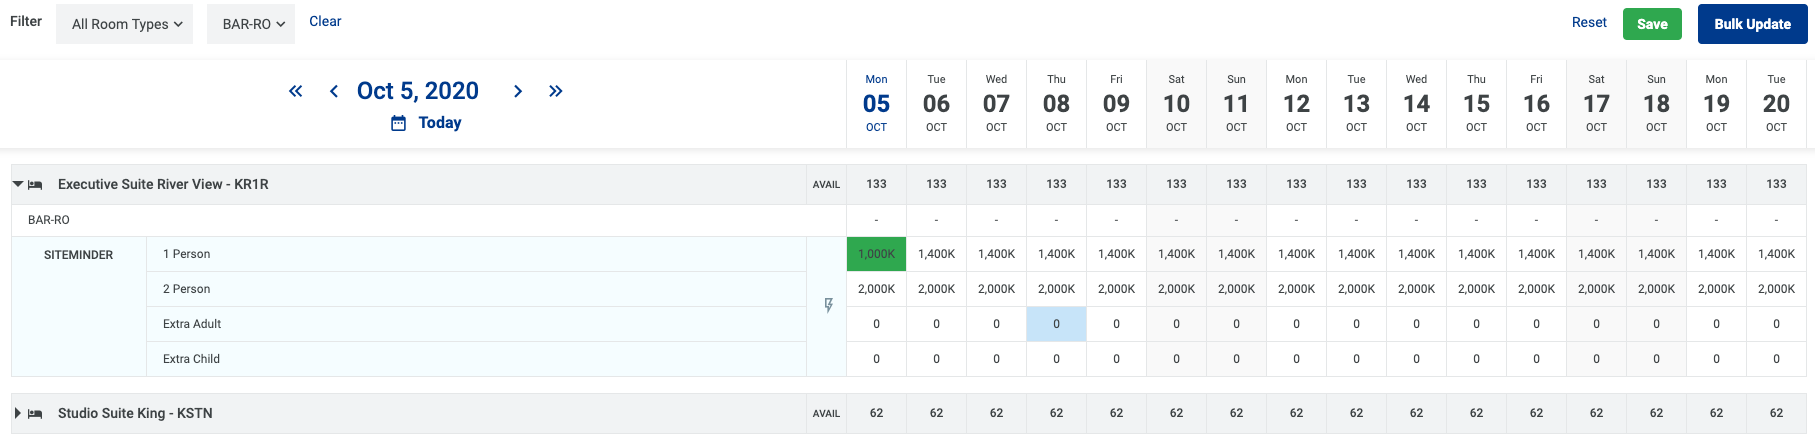
2.1 View the distributed rate for each Room Type
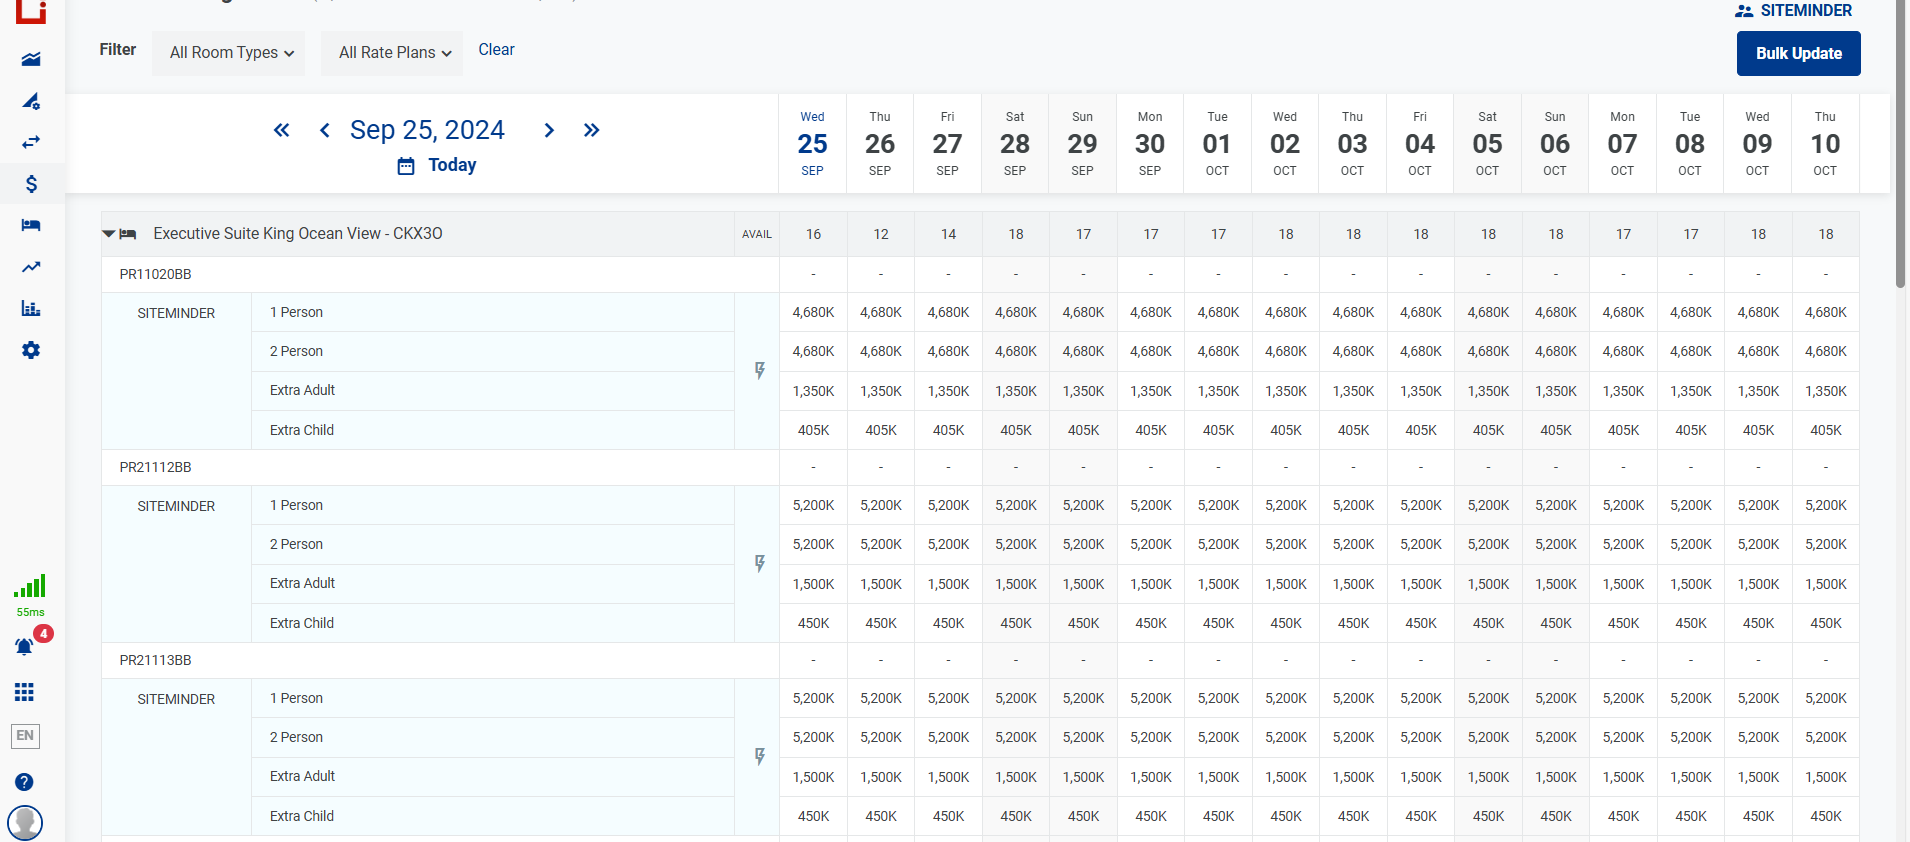
2.2 View the distributed rate by date
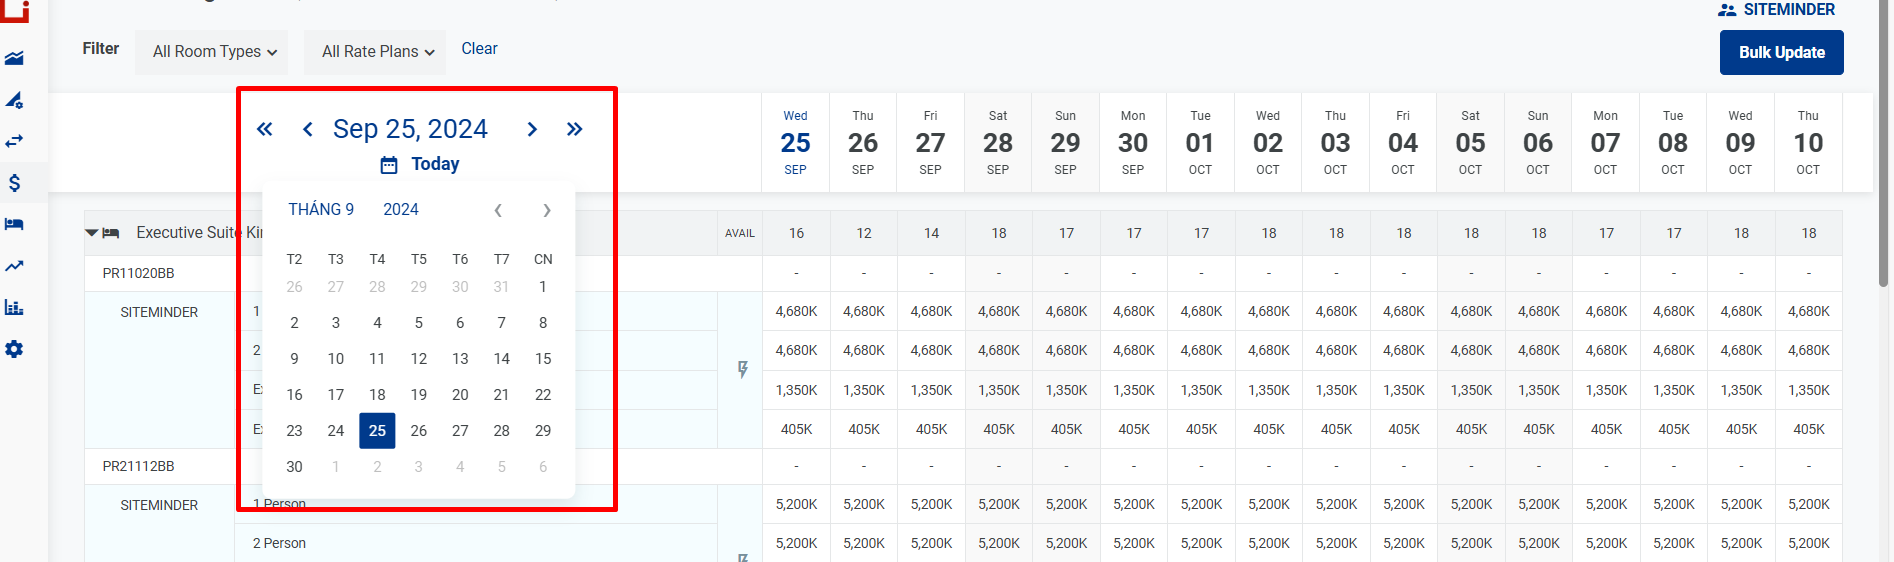
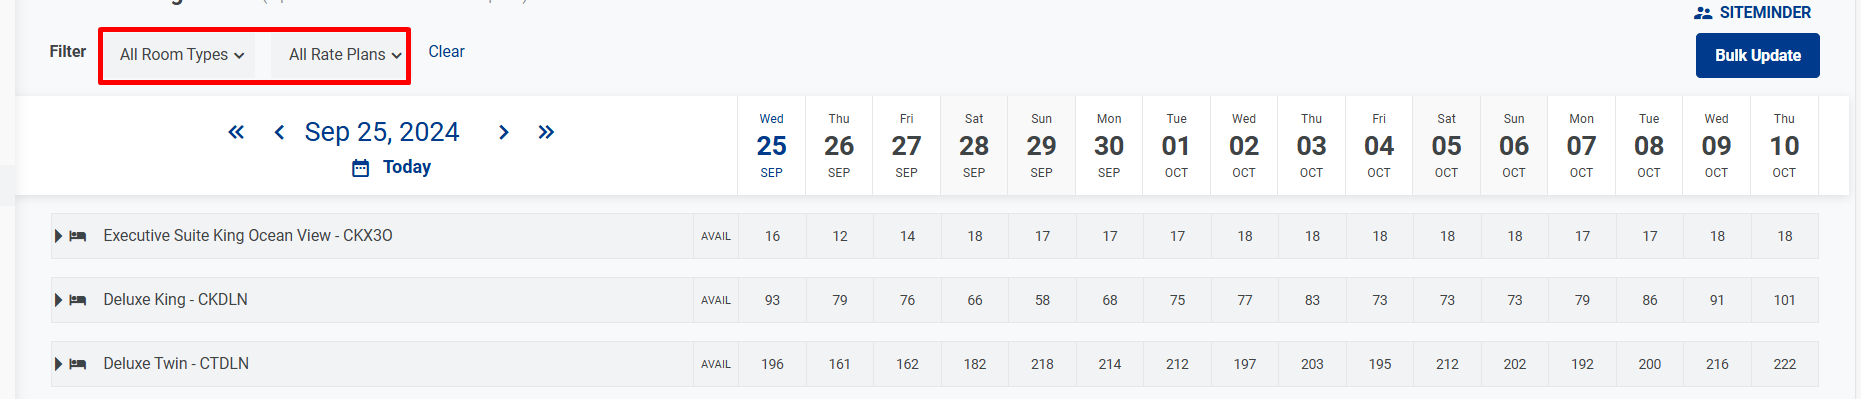
2.3 Search & filter
2.4 Set rate by date
2.4.1 Click on the cell, update the rate → Save
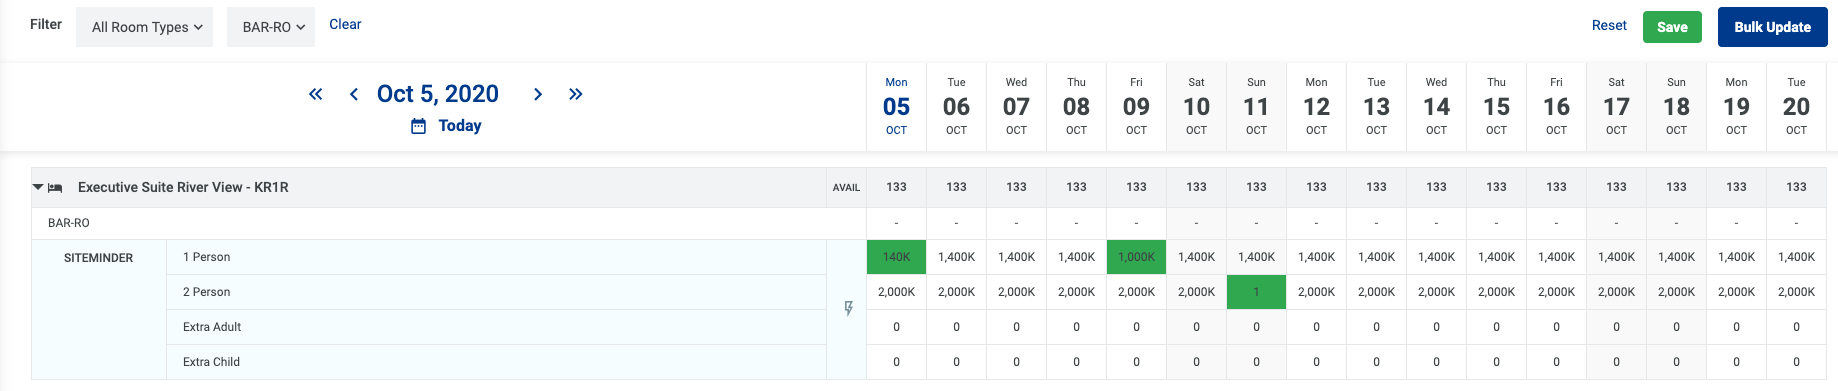
2.4.2 Update for many cells at the same time → Save
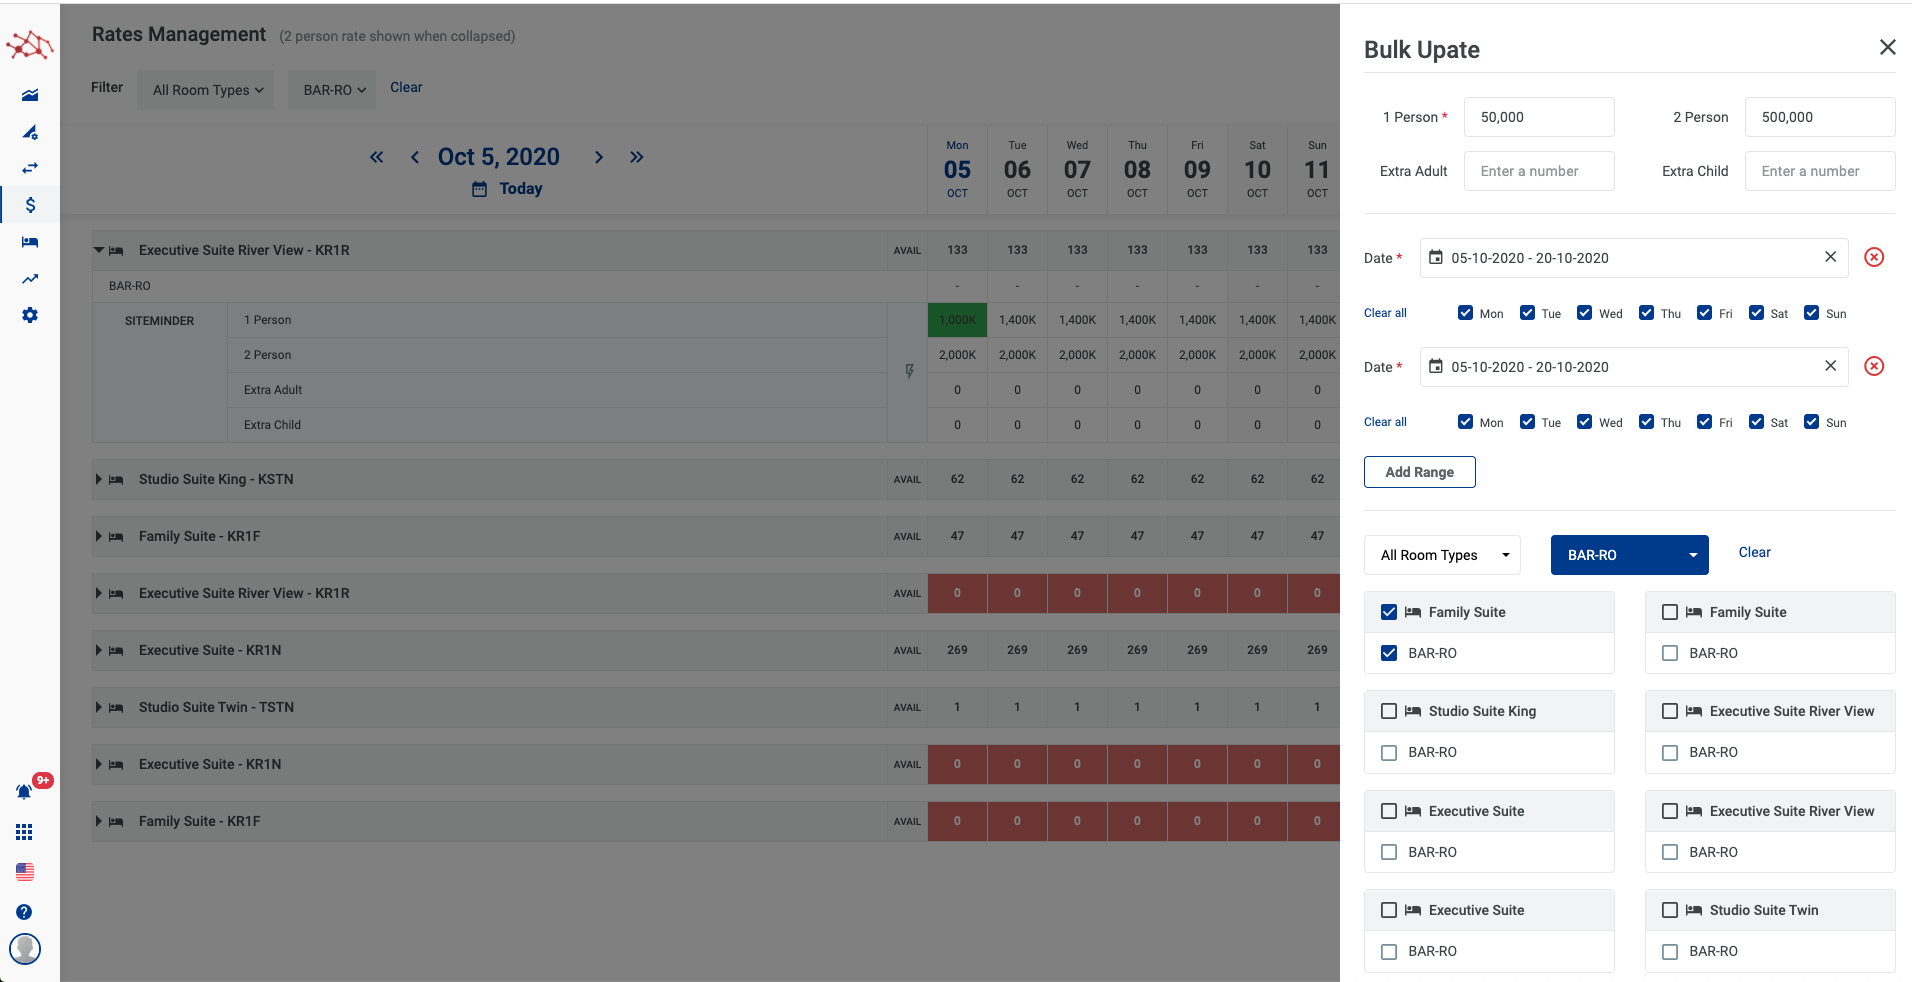
2.5 Bulk update rate for Room Type - Rate Plan
2.5.1 Select the DC → Enter the rate for Room type and Rate plan → Save
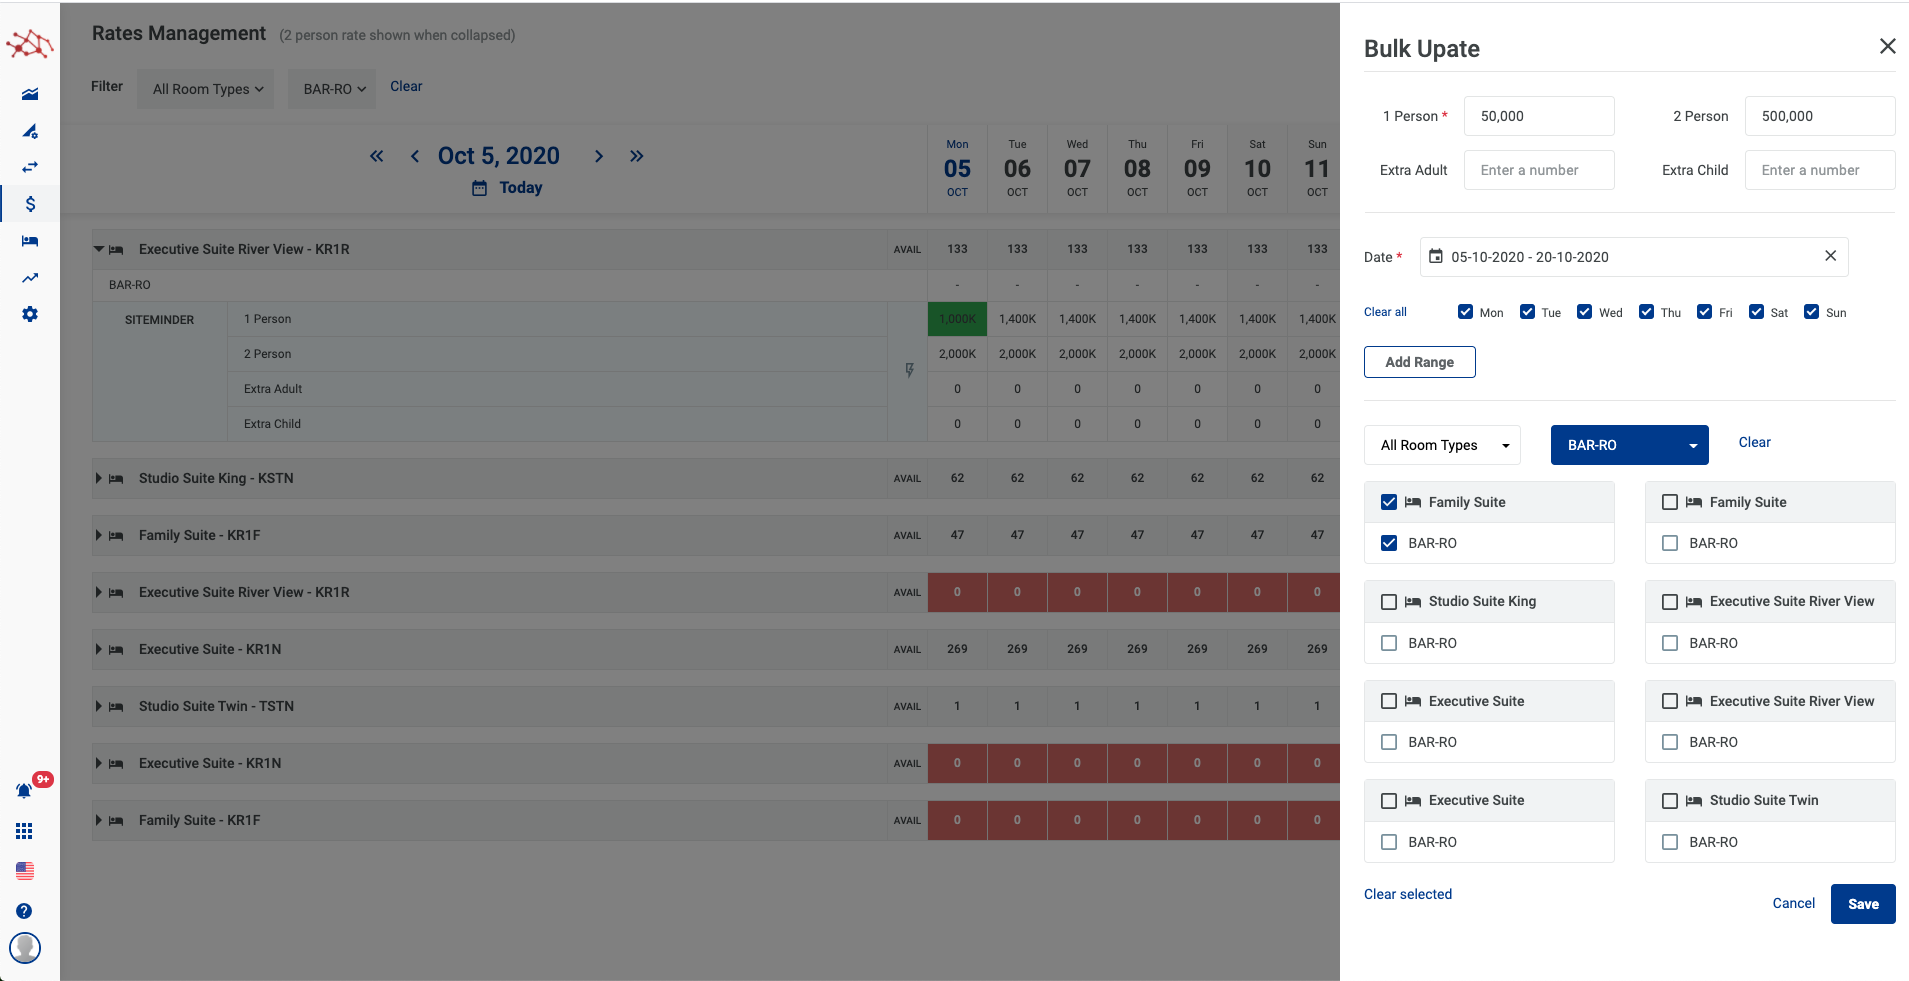
2.5.2 Add a date range and select the date of the week to apply the rate
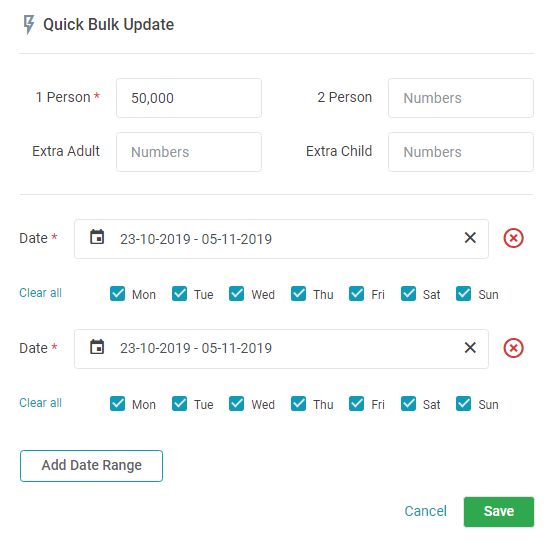
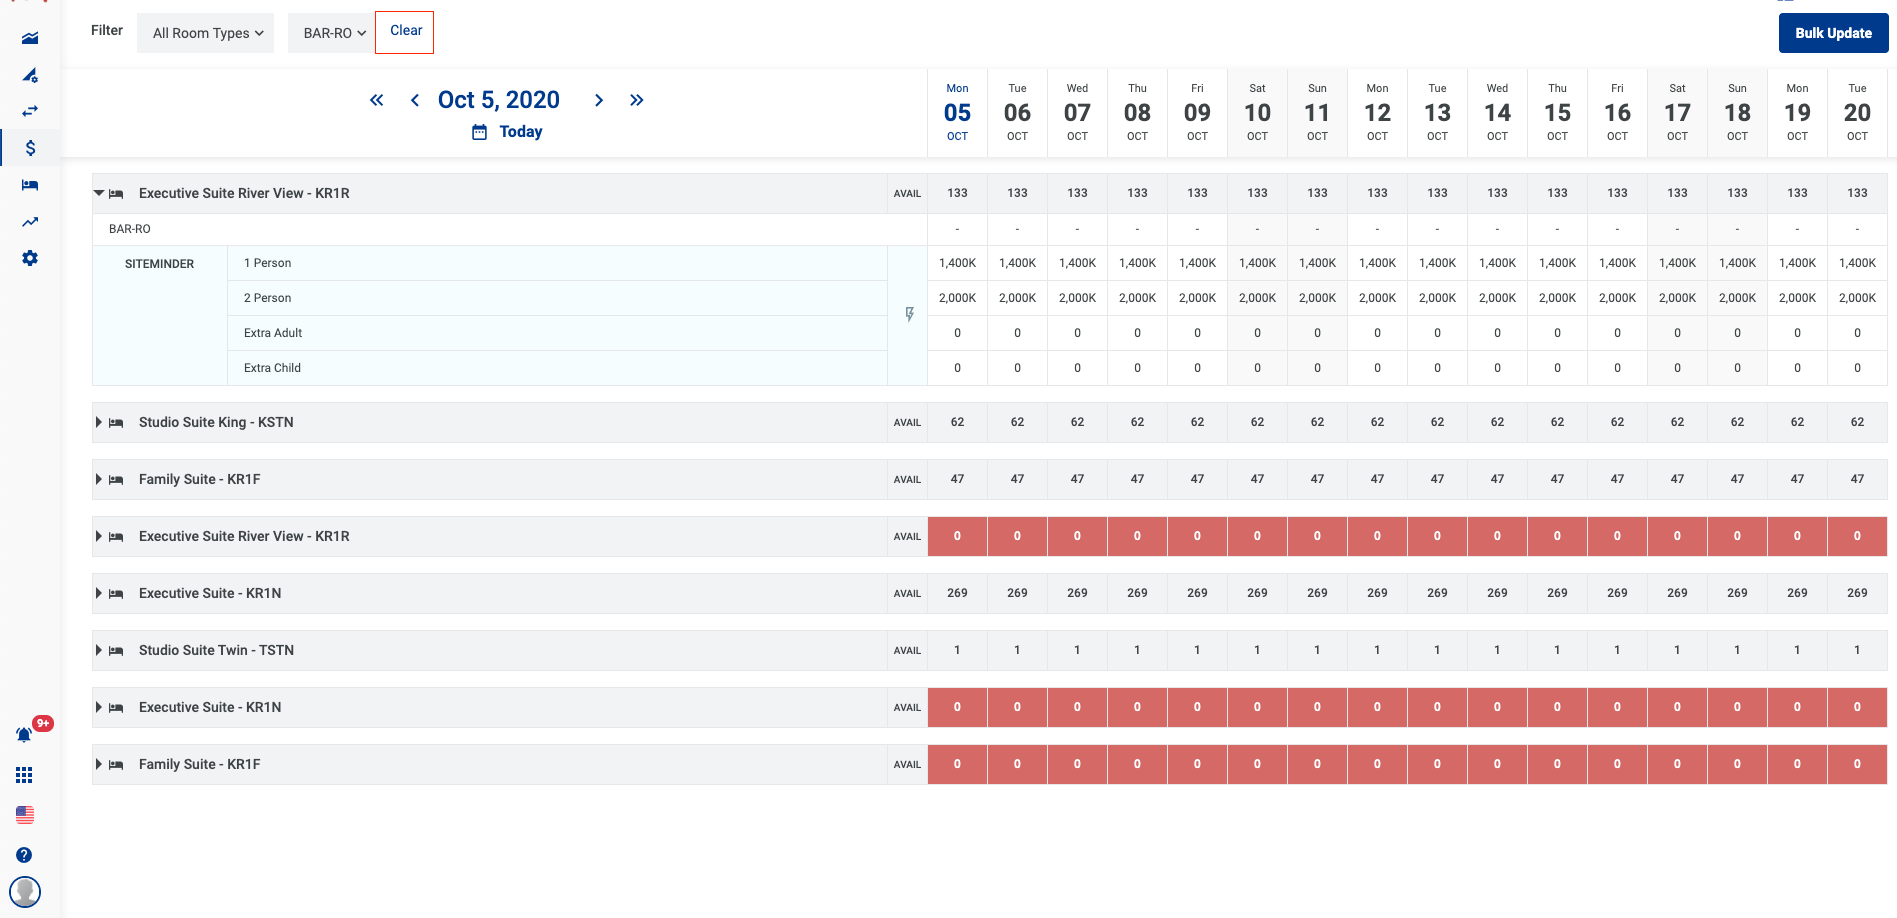
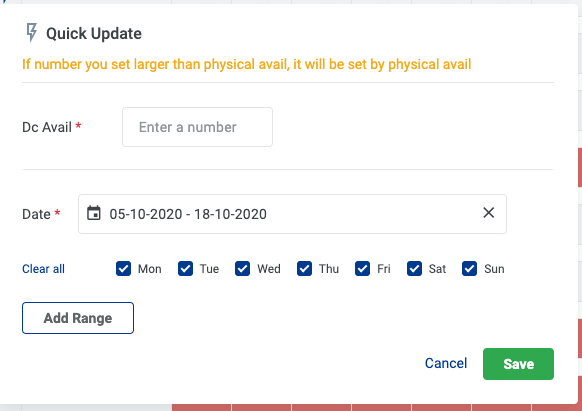
2.6 Quick Bulk Update
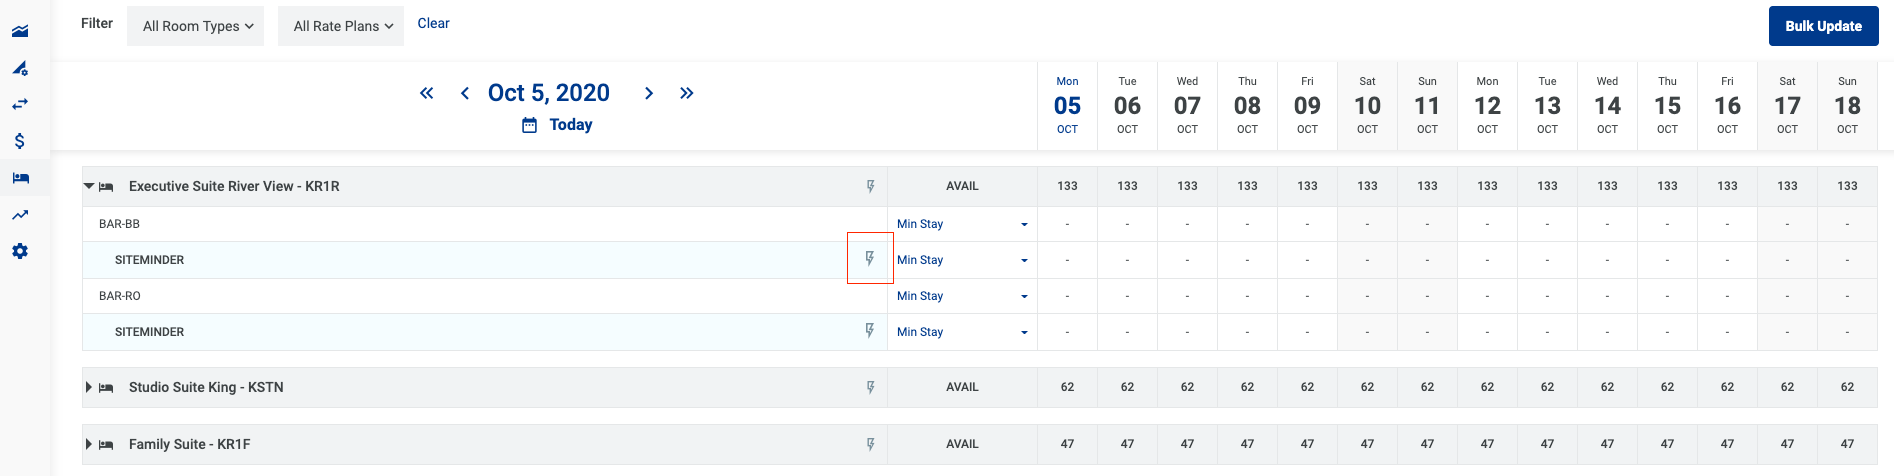
2.6.1 Select the icon Quick update for each room type
2.6.2 Enter the rate and the date range → Save.
2.7 Clear filters
2.9 Press Ctrl or Shift to update many cells at the same time.
Press Ctrl + click on the cell to select many cells
Press Shift + click on 2 cell to select the range of cells
Room Management page
The screen allows you to distribute and manage the restriction of rate plan for the distribution channel.
The changes will be applied for the selected DC and Property.
The system supports the following functionalities:
- View the distributed rooms by Room Type
- View the distributed rooms by date
- Select the system to limit sales
- Filter criteria
- Set specific date
- Bulk update for Room Type - Rate Plan
- Stop selling for a specific date
- Stop selling for a date range
- Clear filters
- Set CTA for a specific date
- Set CTA for room type - rate plan on a date range
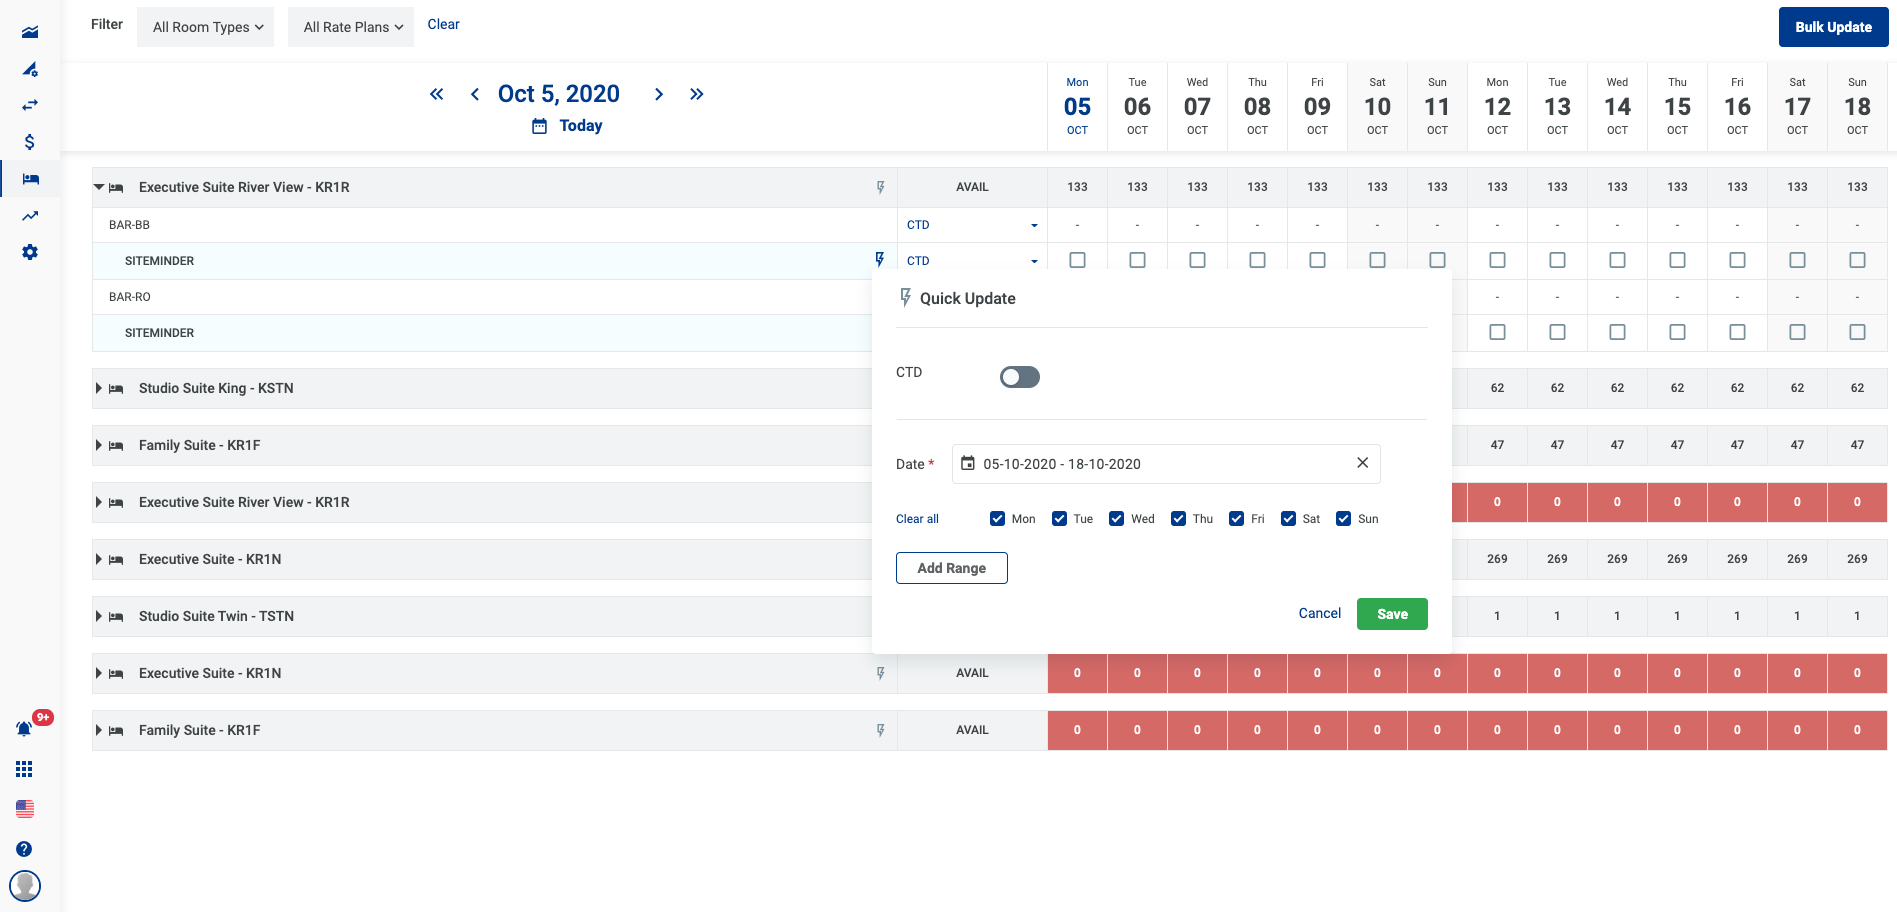
- Set CTD for a specific date
- Set CTD for room type - rate plan on a date range
- Set Min Stay for a specific date
- Set Min Stay for room type - rate plan on a date range
- Set Max Stay for a specific date
- Set Max Stay for room type - rate plan on a date range
1. Restriction type
Restriction type | Values | Description |
|---|---|---|
Stop Sell | True/False | Stop selling the room nights on the distribution channel. Stopping sales prevents the booking from the channel. This is typical when a hotel is sold out within a certain period. |
CTA - Closed To Arrival | True/False | If the "Closed To Arrival" option is set for a date, the guest cannot make the reservation if the guest arrives on this day. If the CTA date is included in the staying date of the reservation, but the arrival is not equal to the CTA date, the guest is still allowed to book the reservation. |
CTD -Closed To Departure | True/False | If the "Closed To Departure" option is set for a date, the guest cannot make the reservation if the guest is due out this day. If the CTD date is included in the staying date of the reservation, but the departure is not equal to the CTD date, the guest is still allowed to book the reservation. |
Min Stay | Number | Minimum LOS of booking. New reservations arriving on the date when a Min Length of Stay restriction is in place, must meet the minimum number of days to be booked. |
Max Stay | Number | Maximum LOS of booking. New reservations arriving on the date when a Max Length of Stay restriction is in place, must meet the minimum number of days to be booked. |
2. Open Link
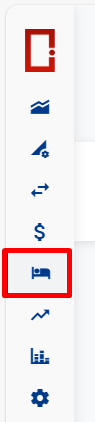
2.1 Go to the Rooms Management page by clicking on the icon below
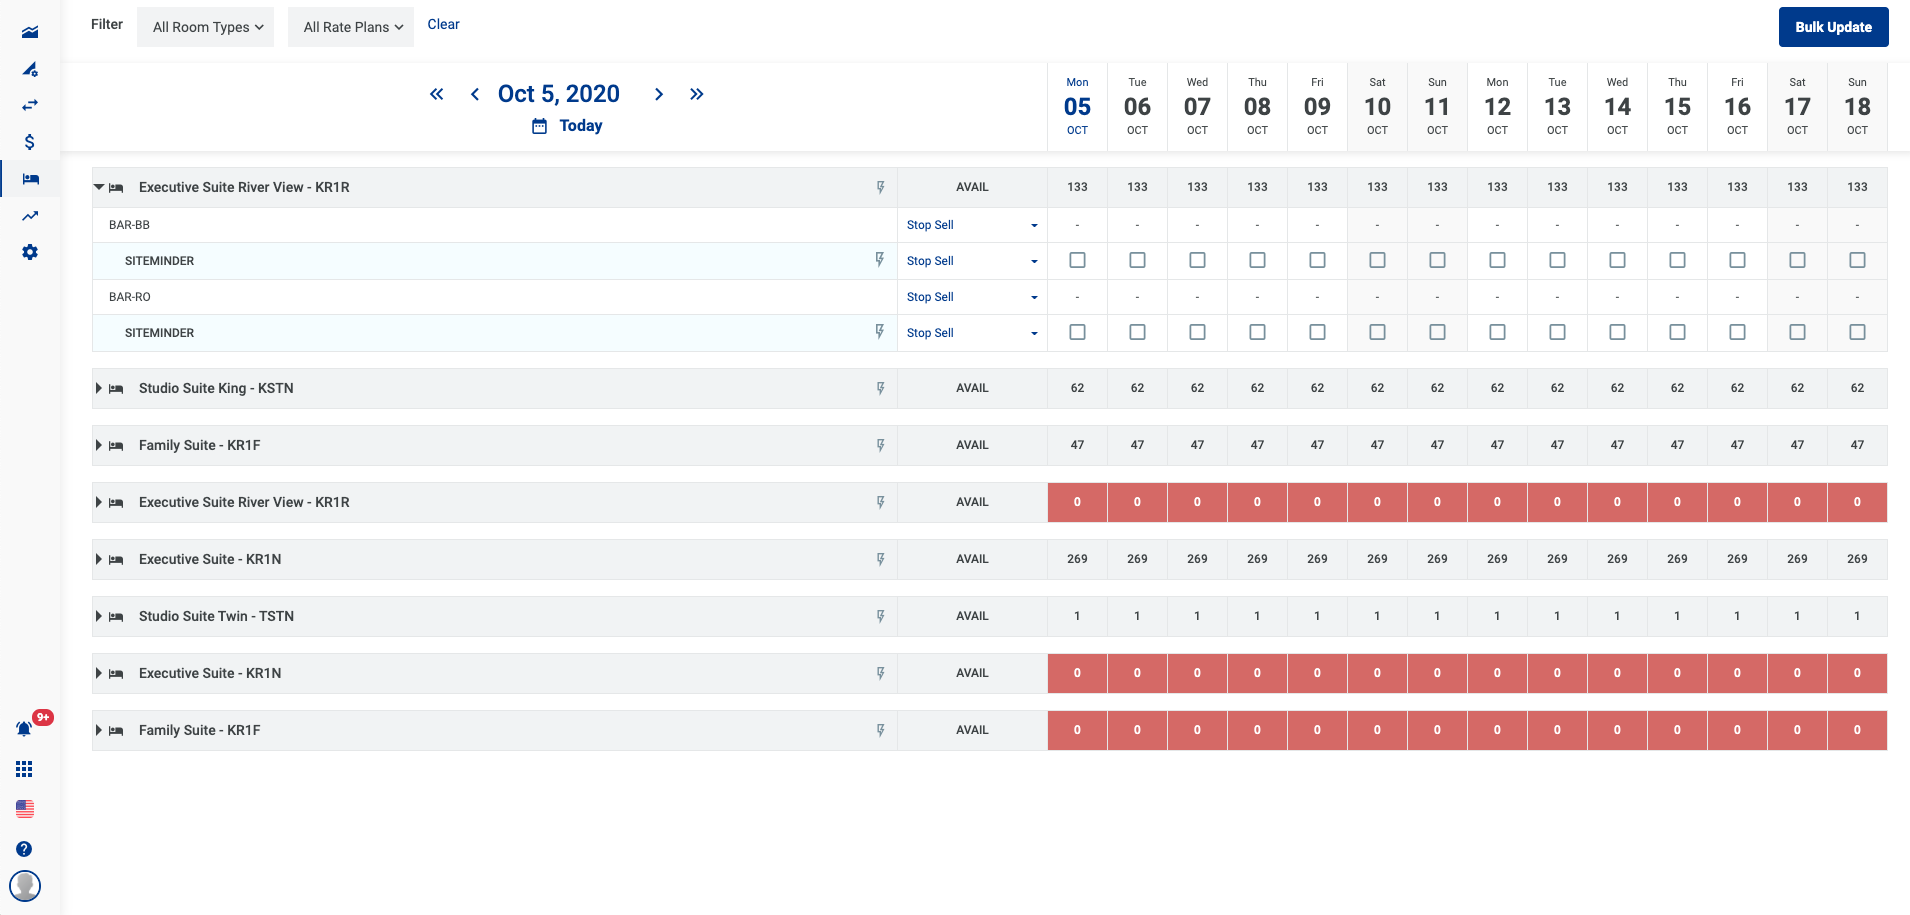
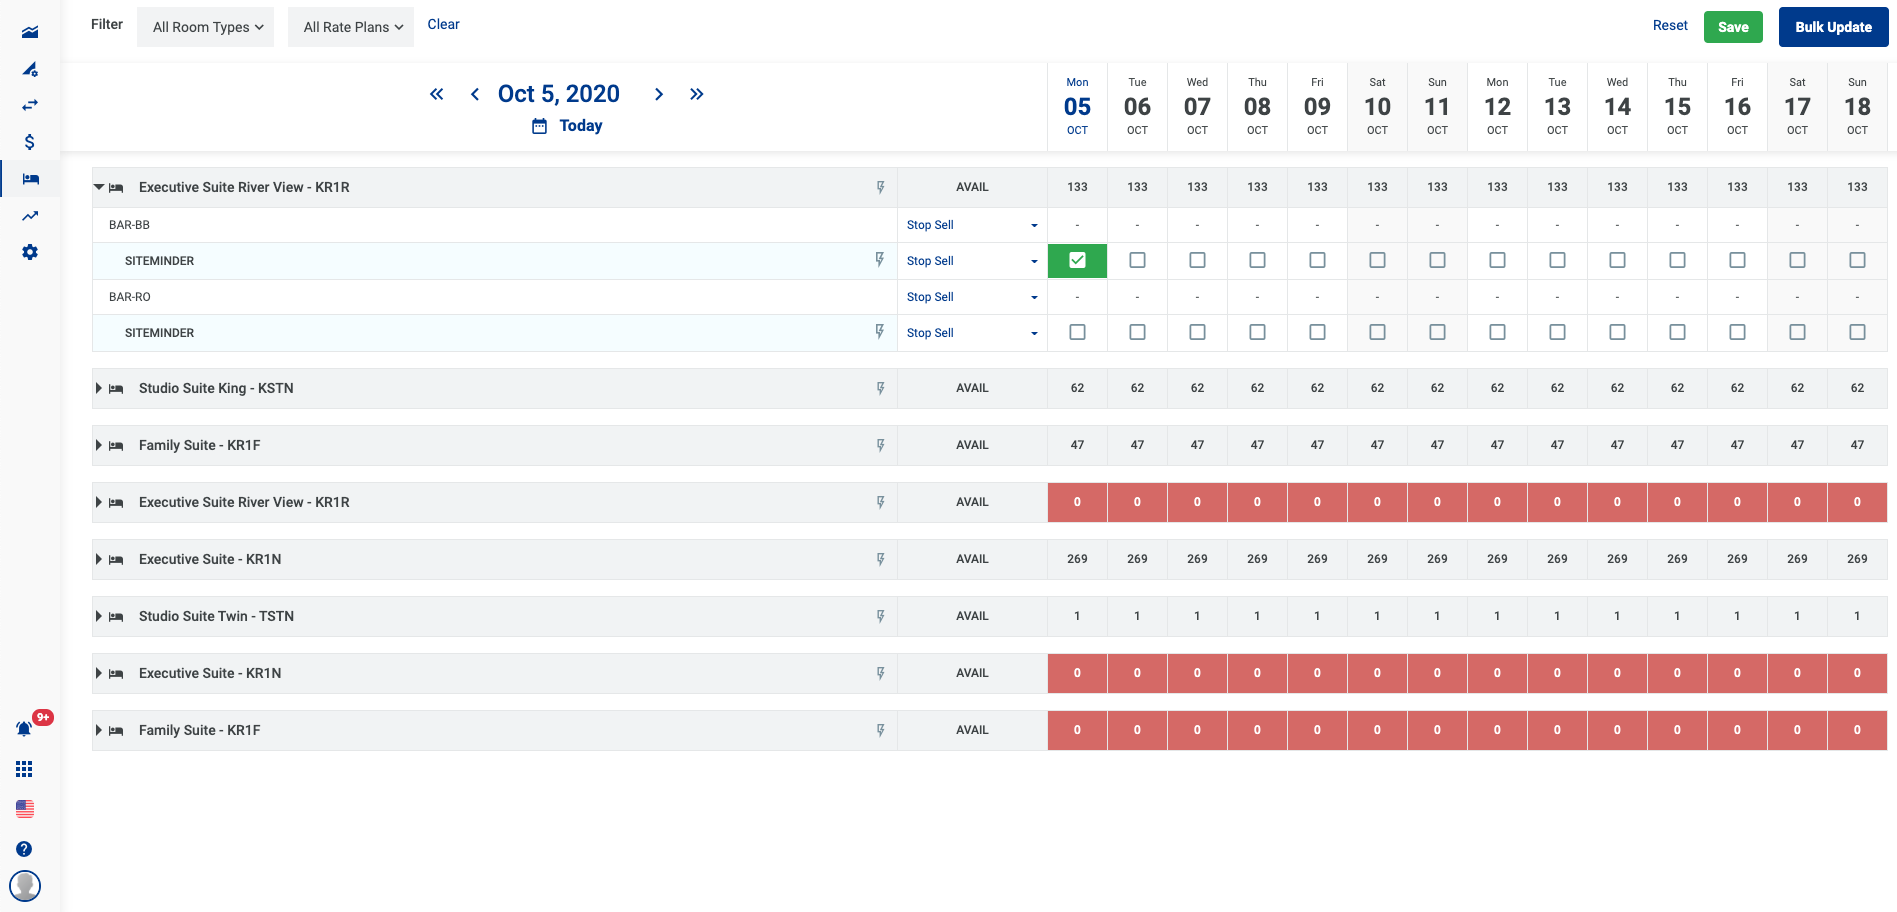
2.2 Screen Rooms Management
3. Functions
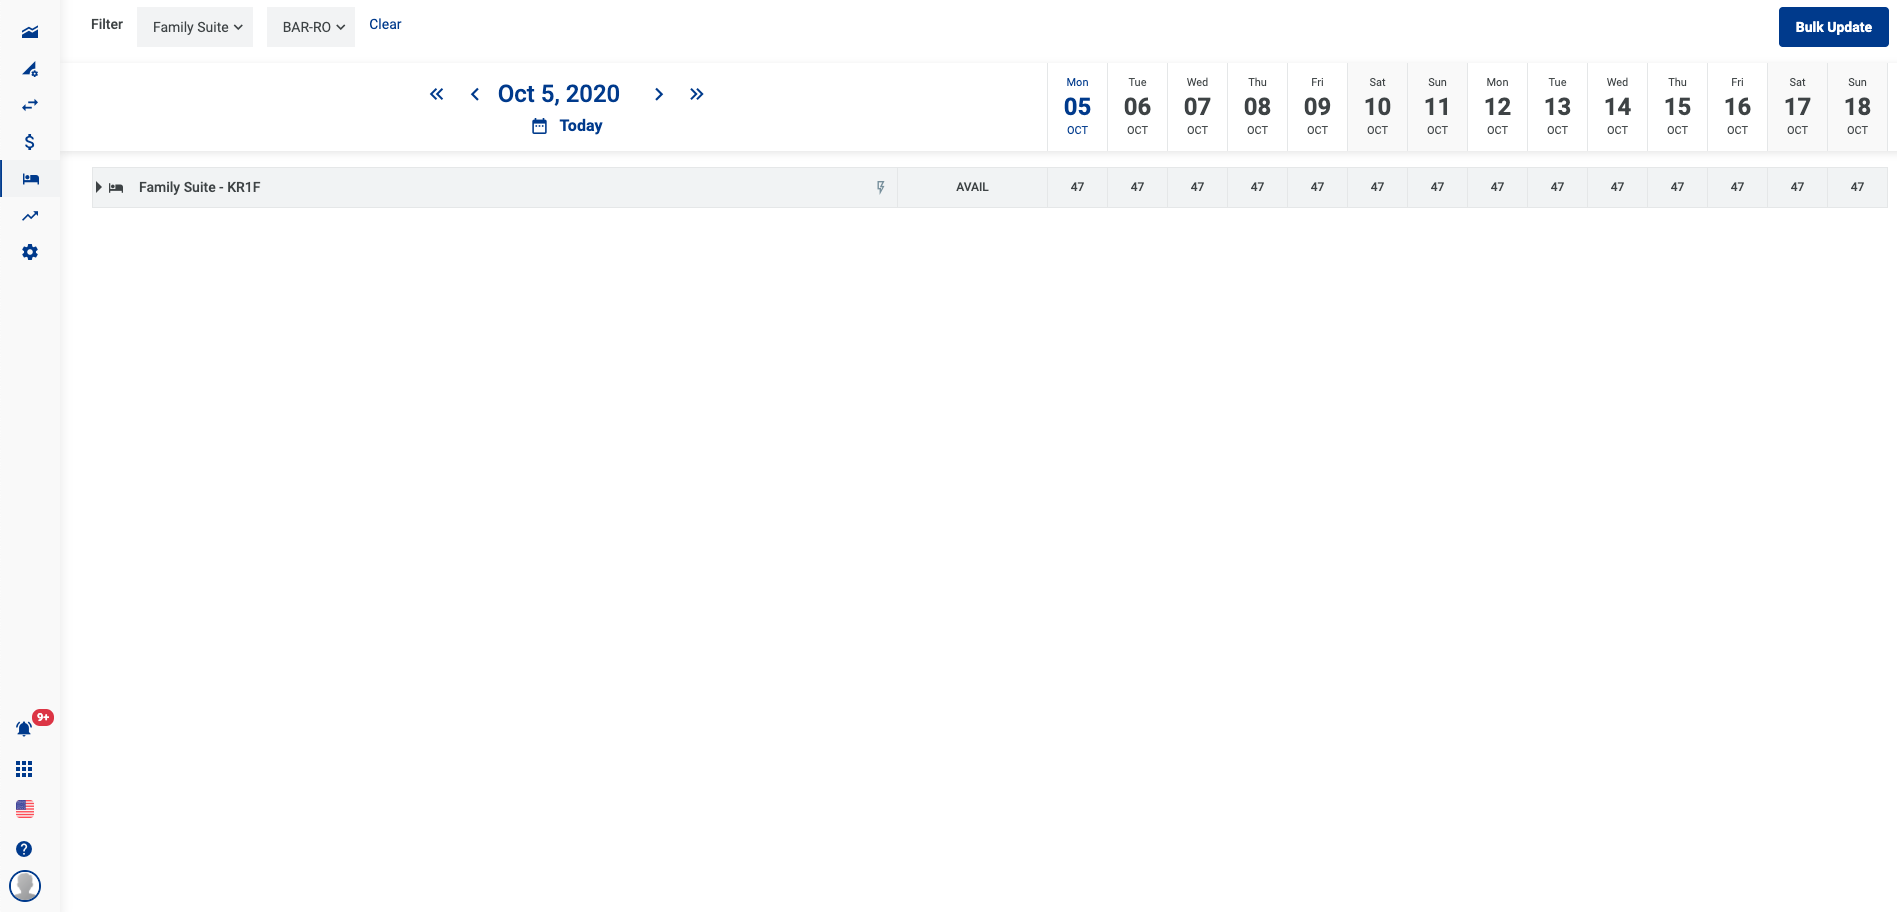
3.1 View the distributed rooms by Room Type
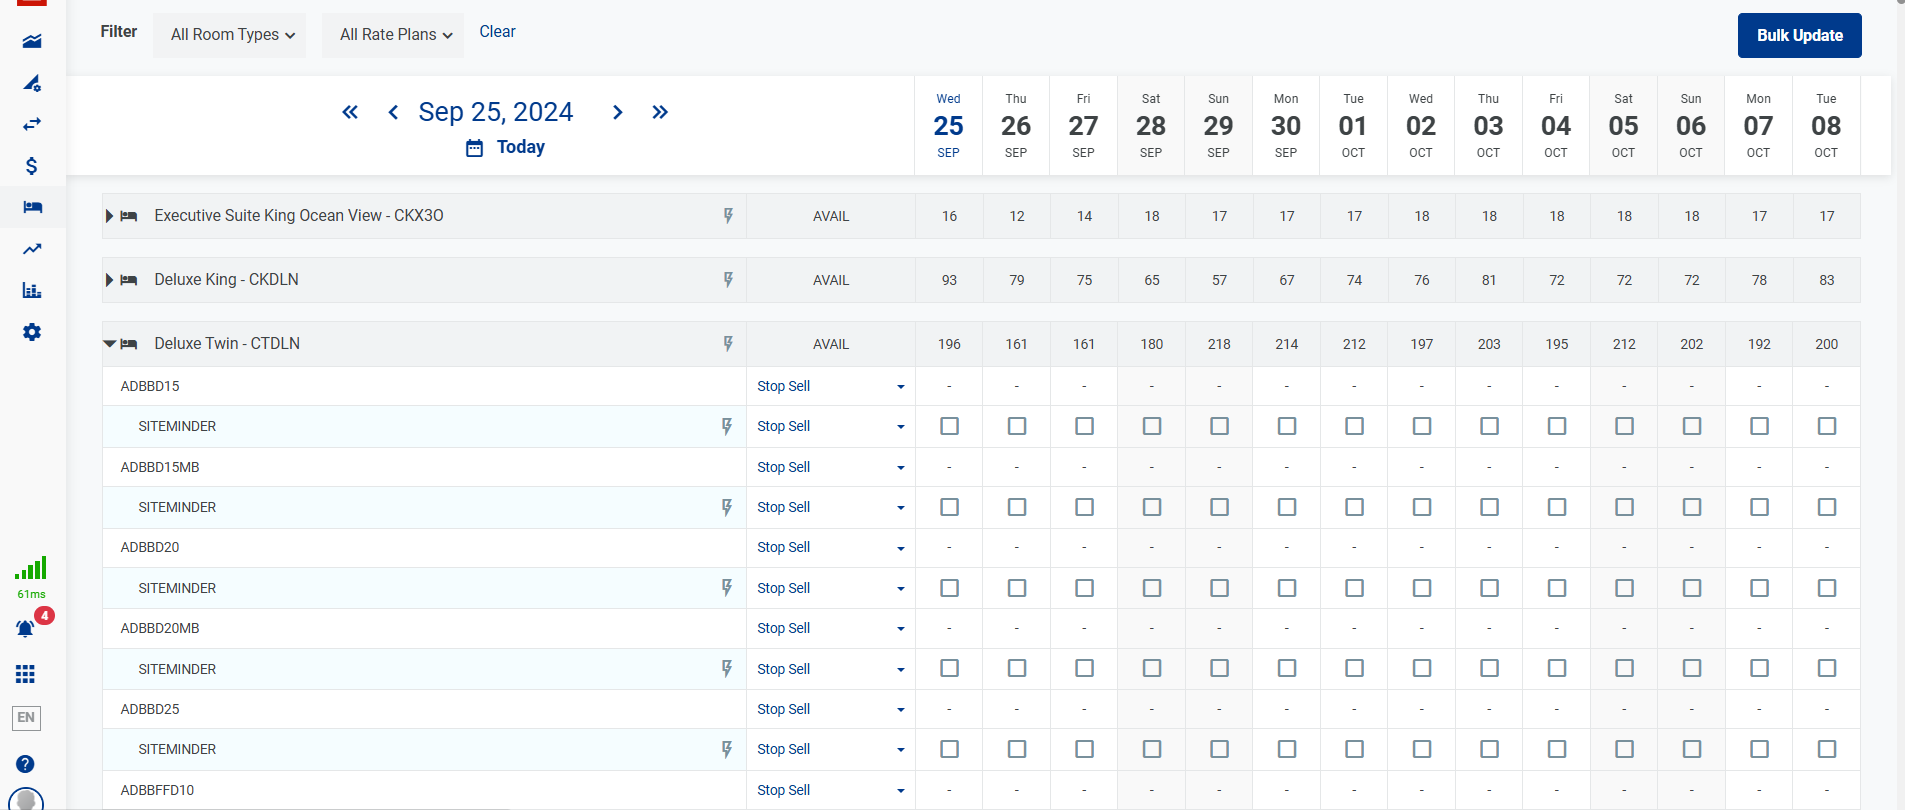
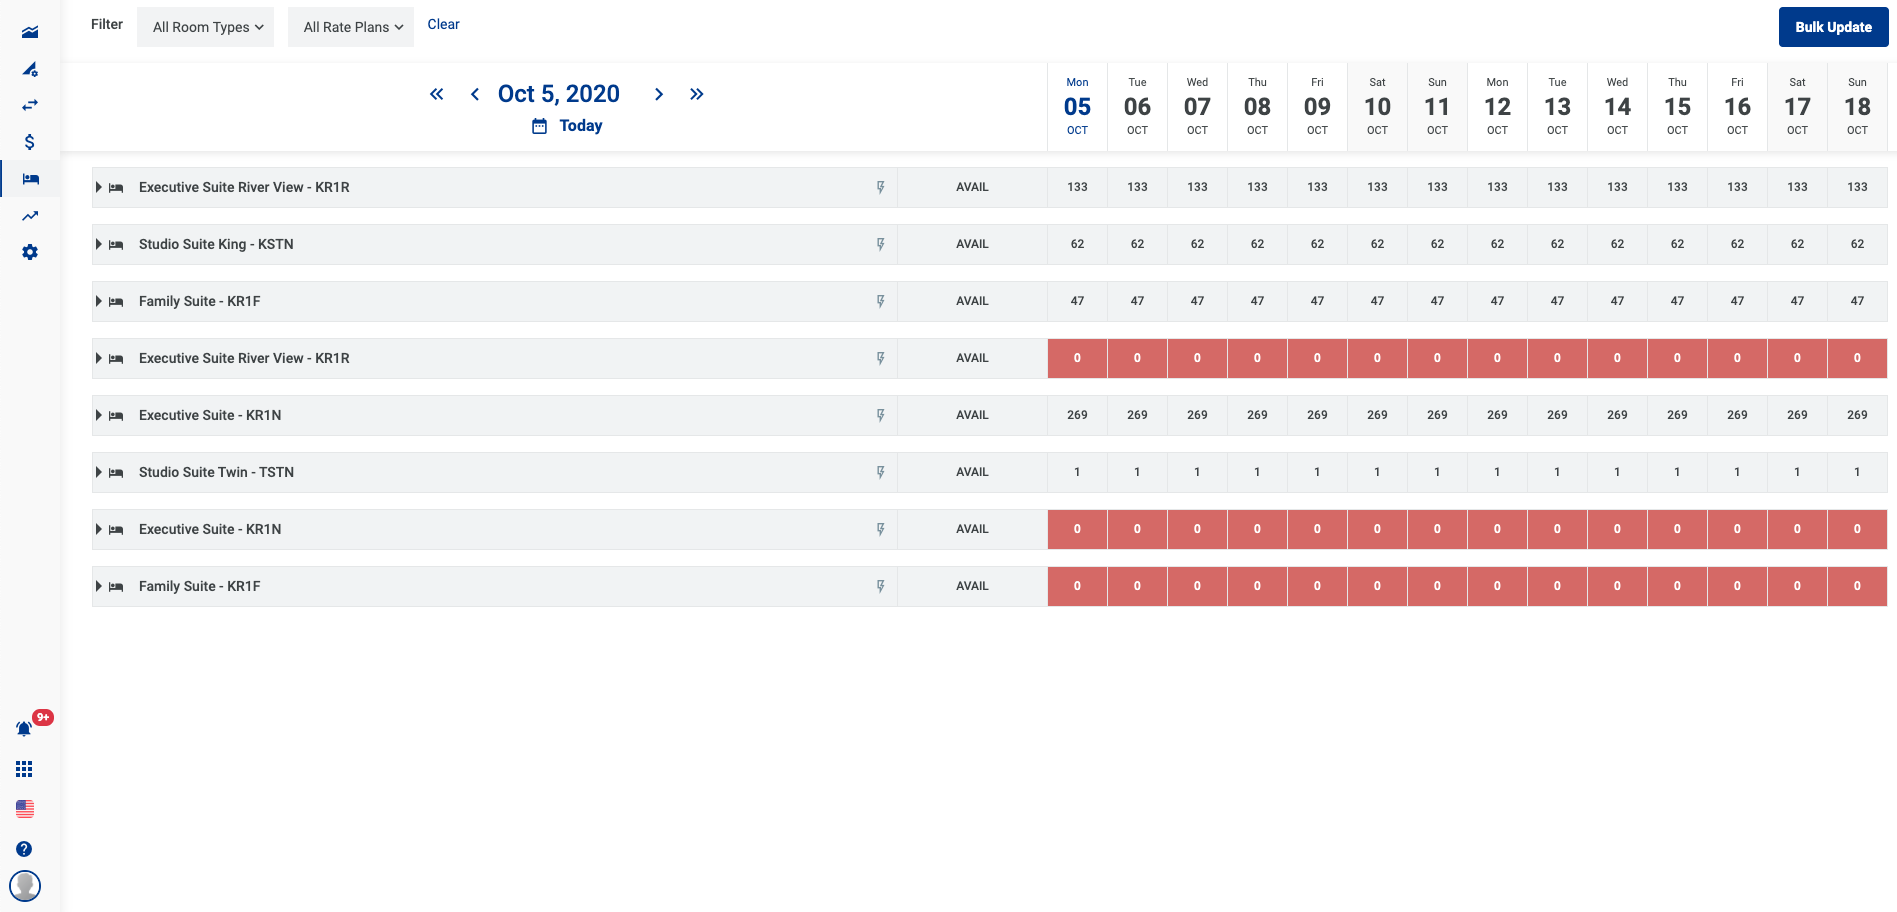
3.2 View the distributed rooms by date
3.3 Select the system to limit sales
3.3.1 The AVAIL row displays the number of rooms that are available to sell. If the number is equal to 0, the cell will change the background color to Red.
3.3.2 Update the available rooms
Select the Bulk update icon

Enter the number and select the applied date → Save
3.4 Search and filter
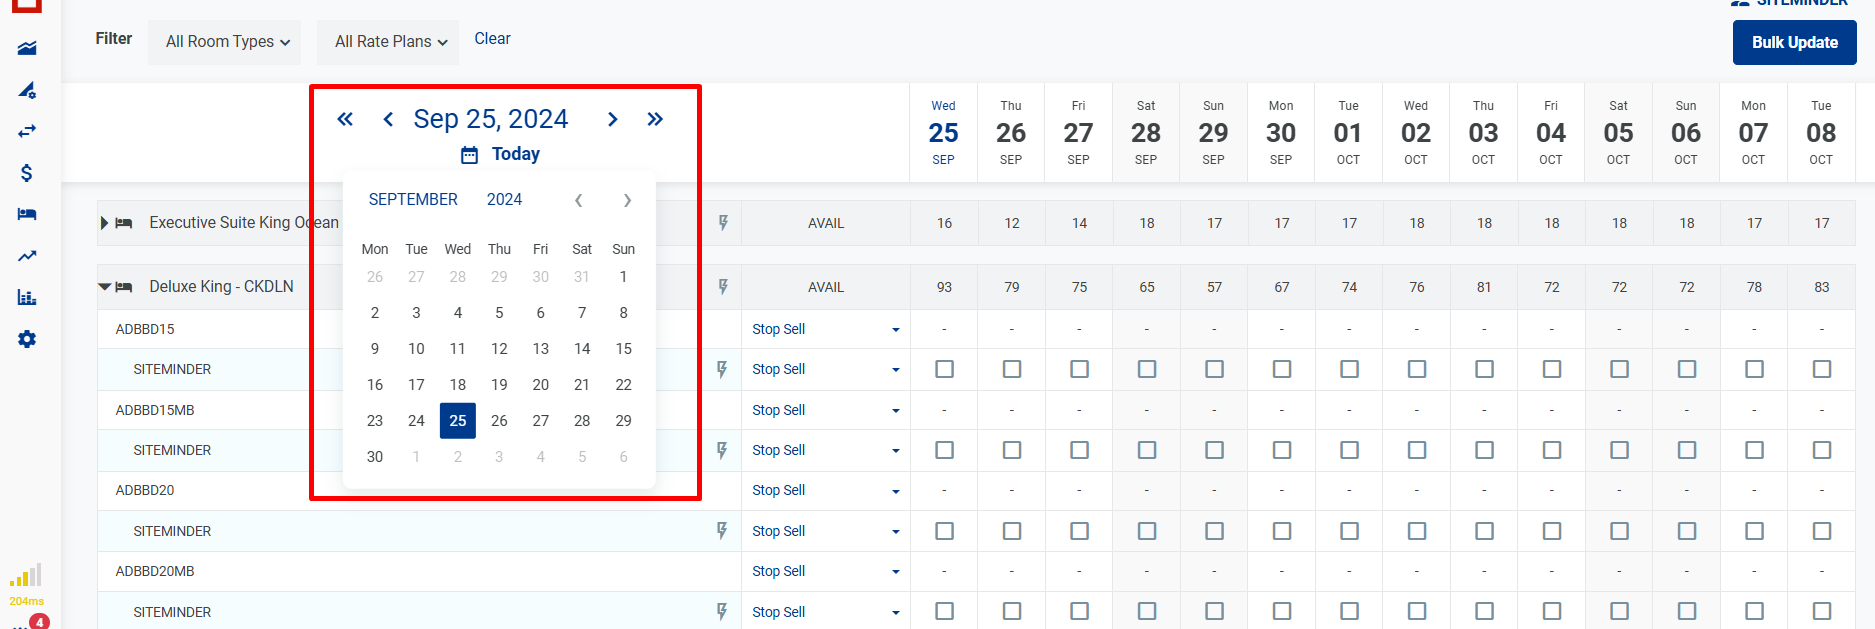
3.5 Set specific date

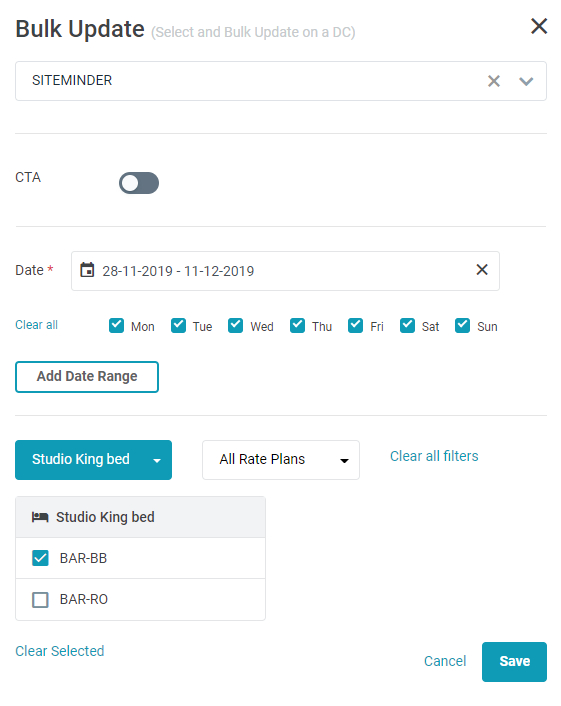
3.6 Bulk update for Room Type - Rate Plan
3.6.1 Select the button Bulk Update
Set Stop Sell restriction

Set CTA restriction
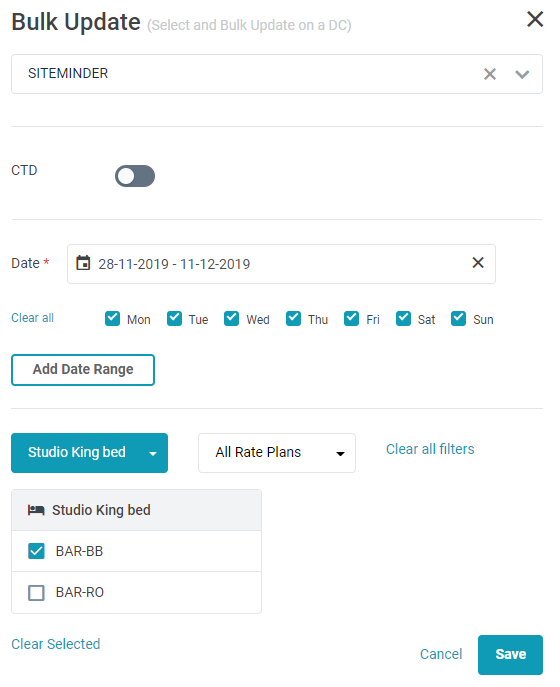
Set CTD restriction
Set Min Stay restriction
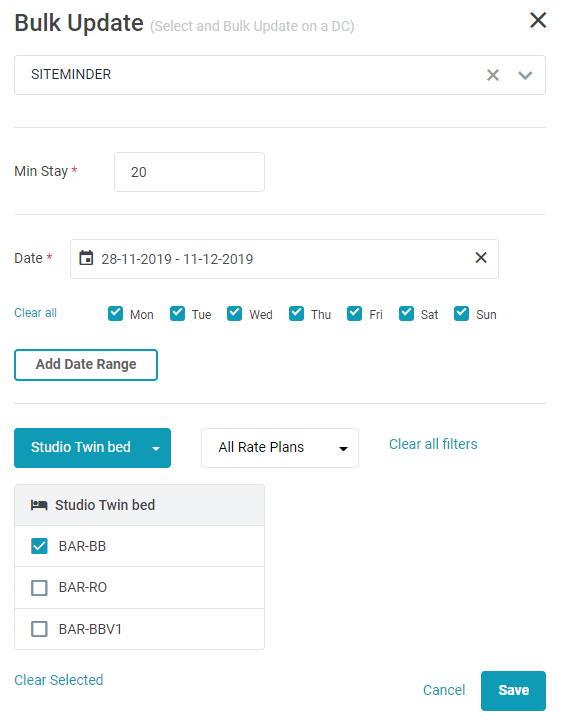
Set Max Stay restriction

3.7 Stop selling for a specific date
3.7.1 Select Stop Sell in the drop-down list

3.7.2 Select the date range when you want to stop selling.
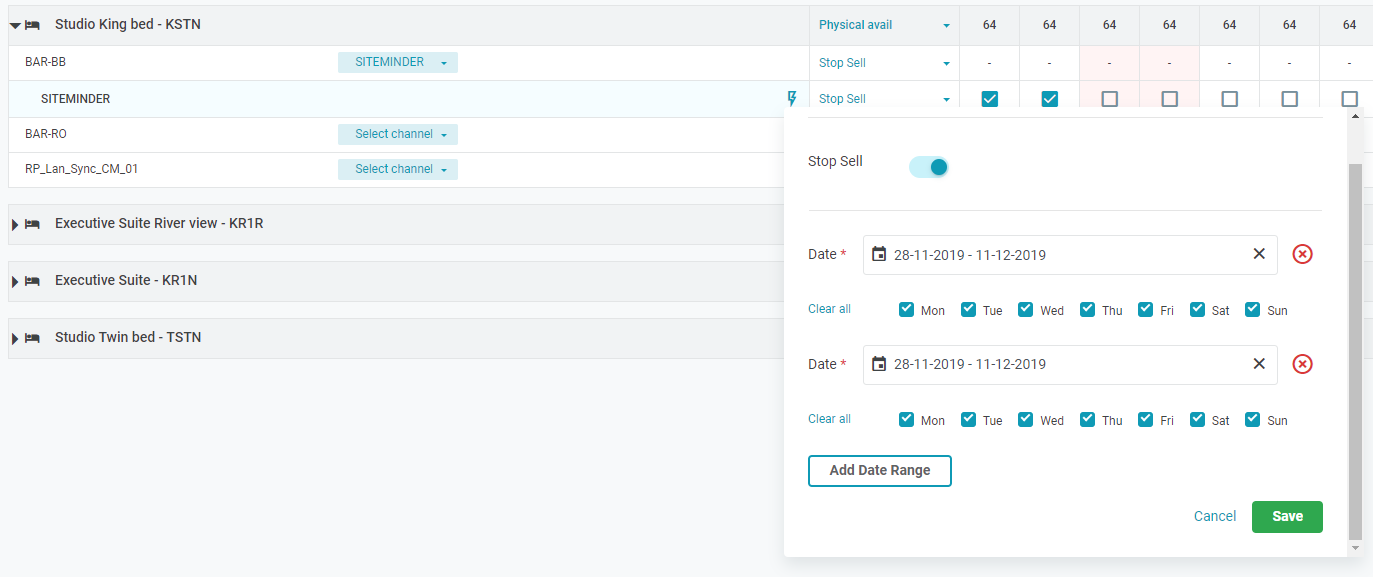
3.8 Stop selling for a date range
3.8.1 Select the Bulk update icon

3.8.2 Select the toggle and the date to apply the changes → Save
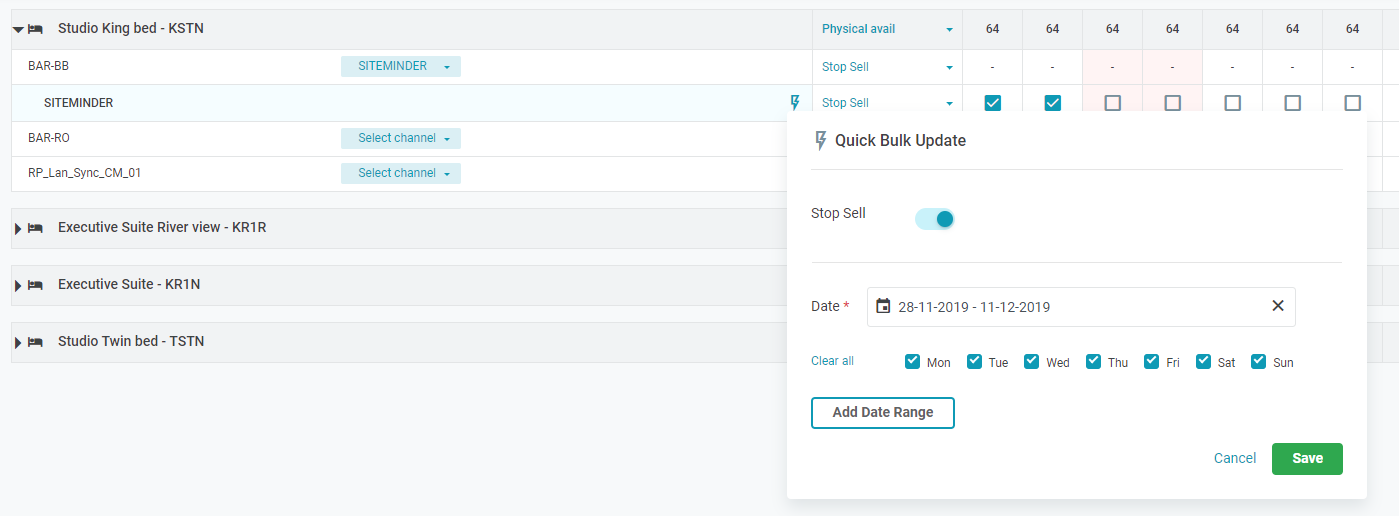
3.8.3 You can add more date range and set the day of the week to apply the changes.
3.9 Clear filters

3.10 Set CTA for a specific date
3.10.1 Select Rate plan and set CTA

3.10.2 Select a date to apply the CTA
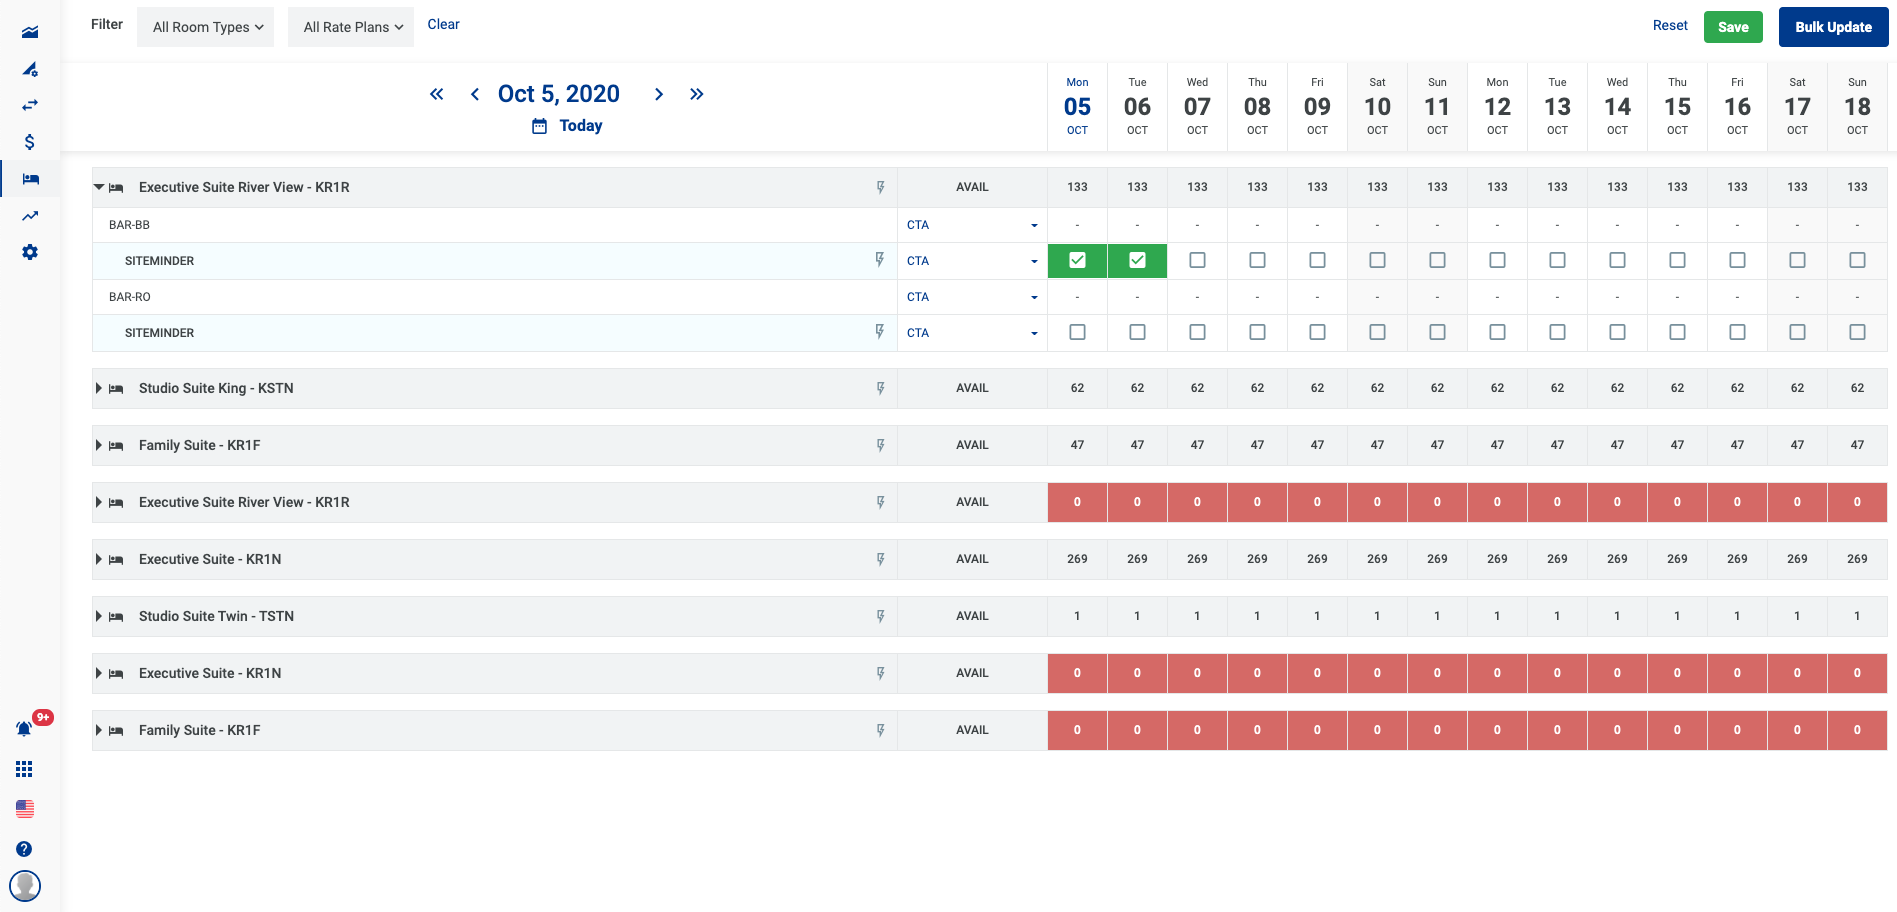
3.10.3 Select Save
3.11 Set CTA for room type - rate plan on a date range
3.11.1 Select icon Bulk Update on the Rate Plan row to edit
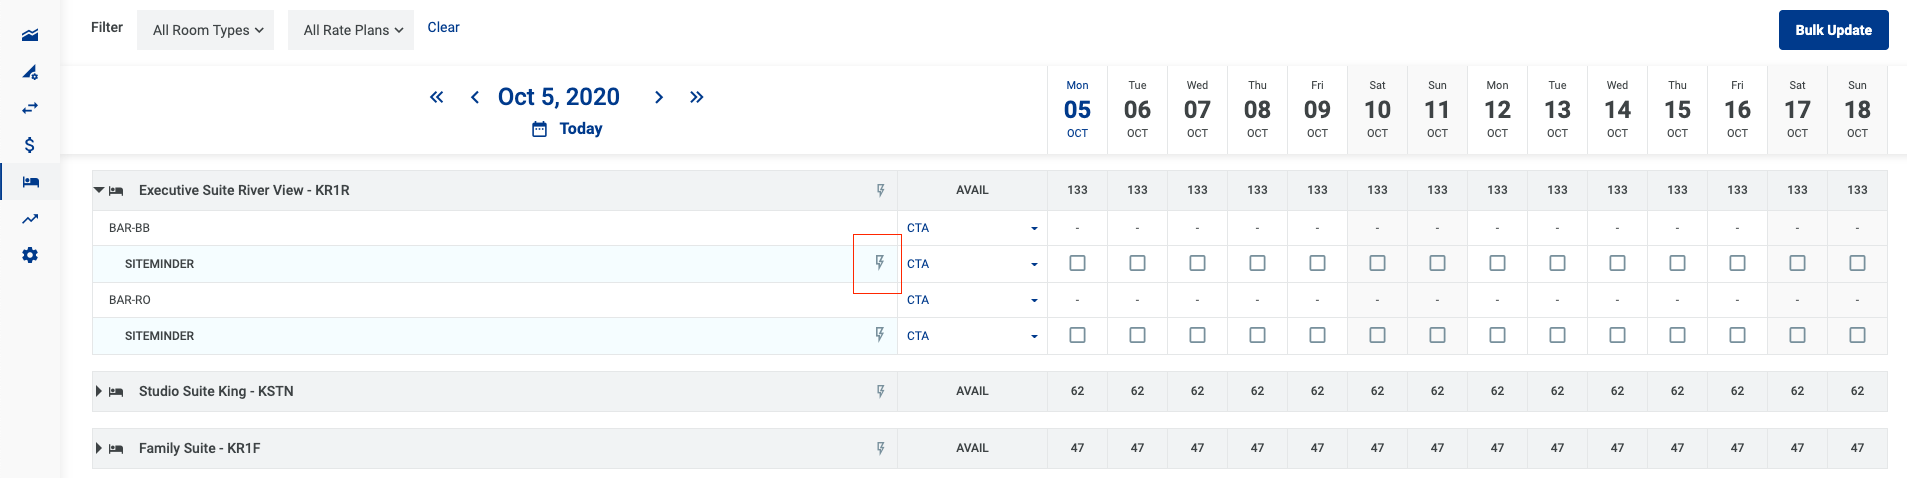
3.11.2 Select the date range

3.12 Set CTD for a specific date
3.12.1 Select the Rate plan and set CTD

3.12.2 Select a date to apply the CTD
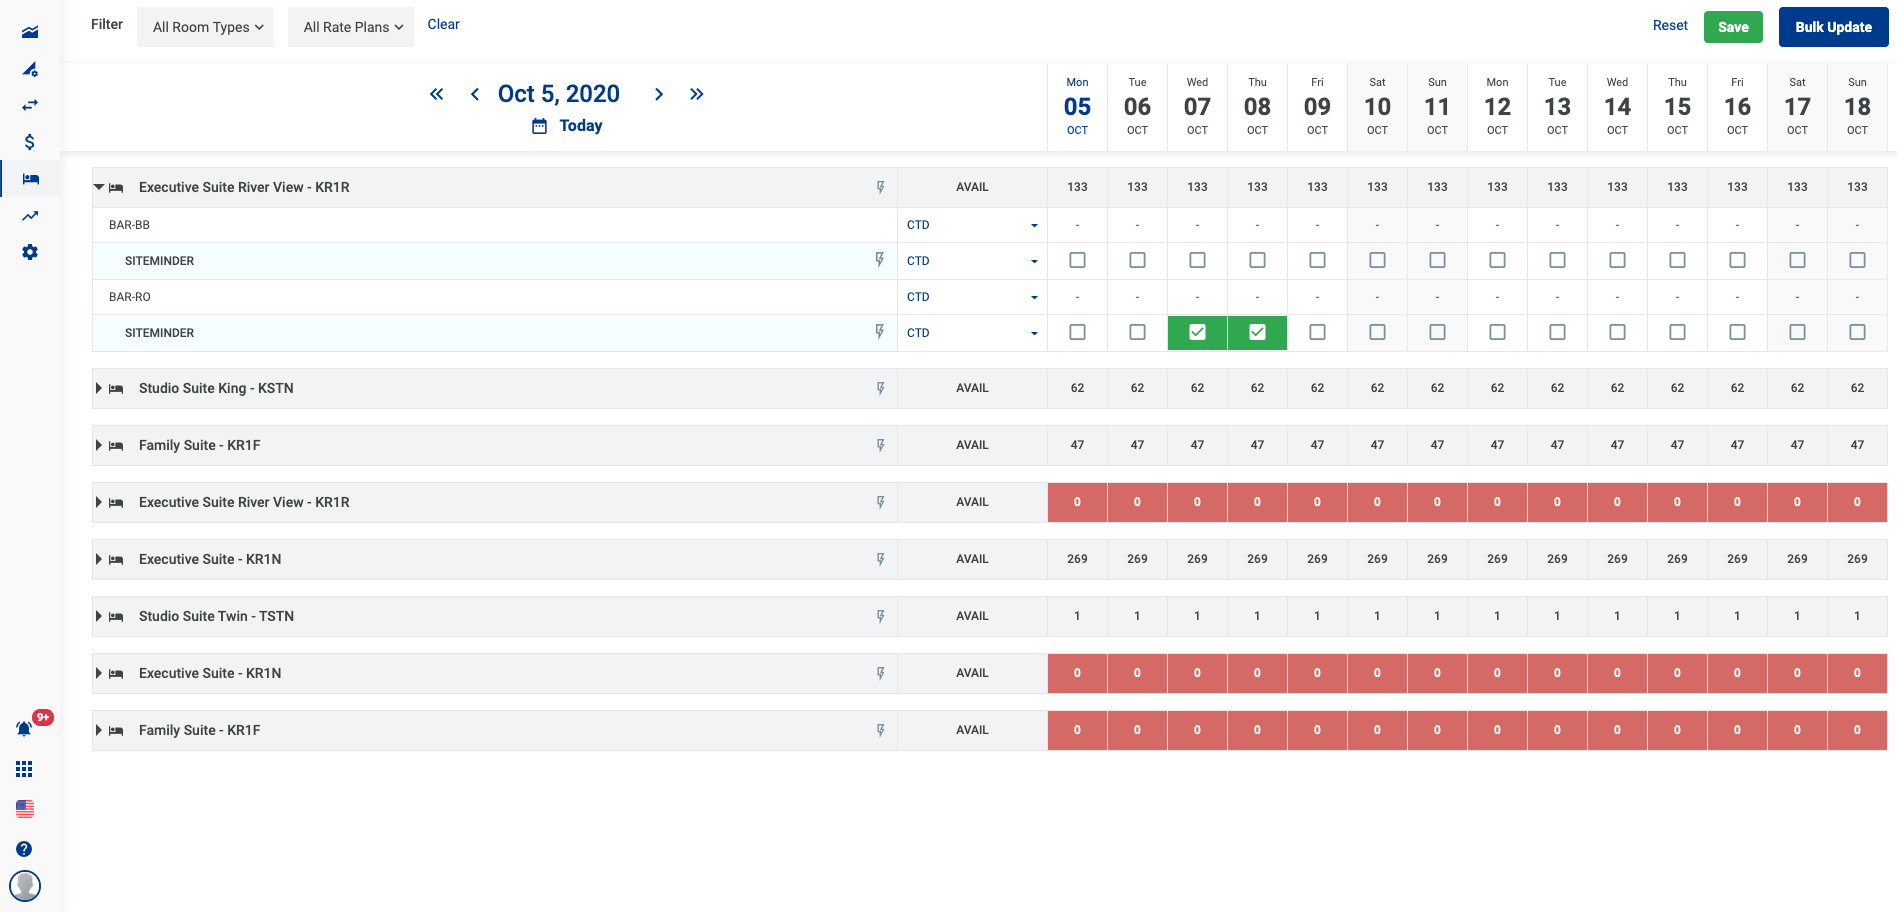
3.12.3 Select Save
3.13 Set CTD for room type - rate plan on a date range
3.13.1 Select icon Bulk Update on the Rate Plan row to edit

3.13.2 Select the date range
3.14 Set Min Stay for a specific date
3.14.1 Select the Rate plan and set Min Stay restriction

3.14.2 Select the date to apply
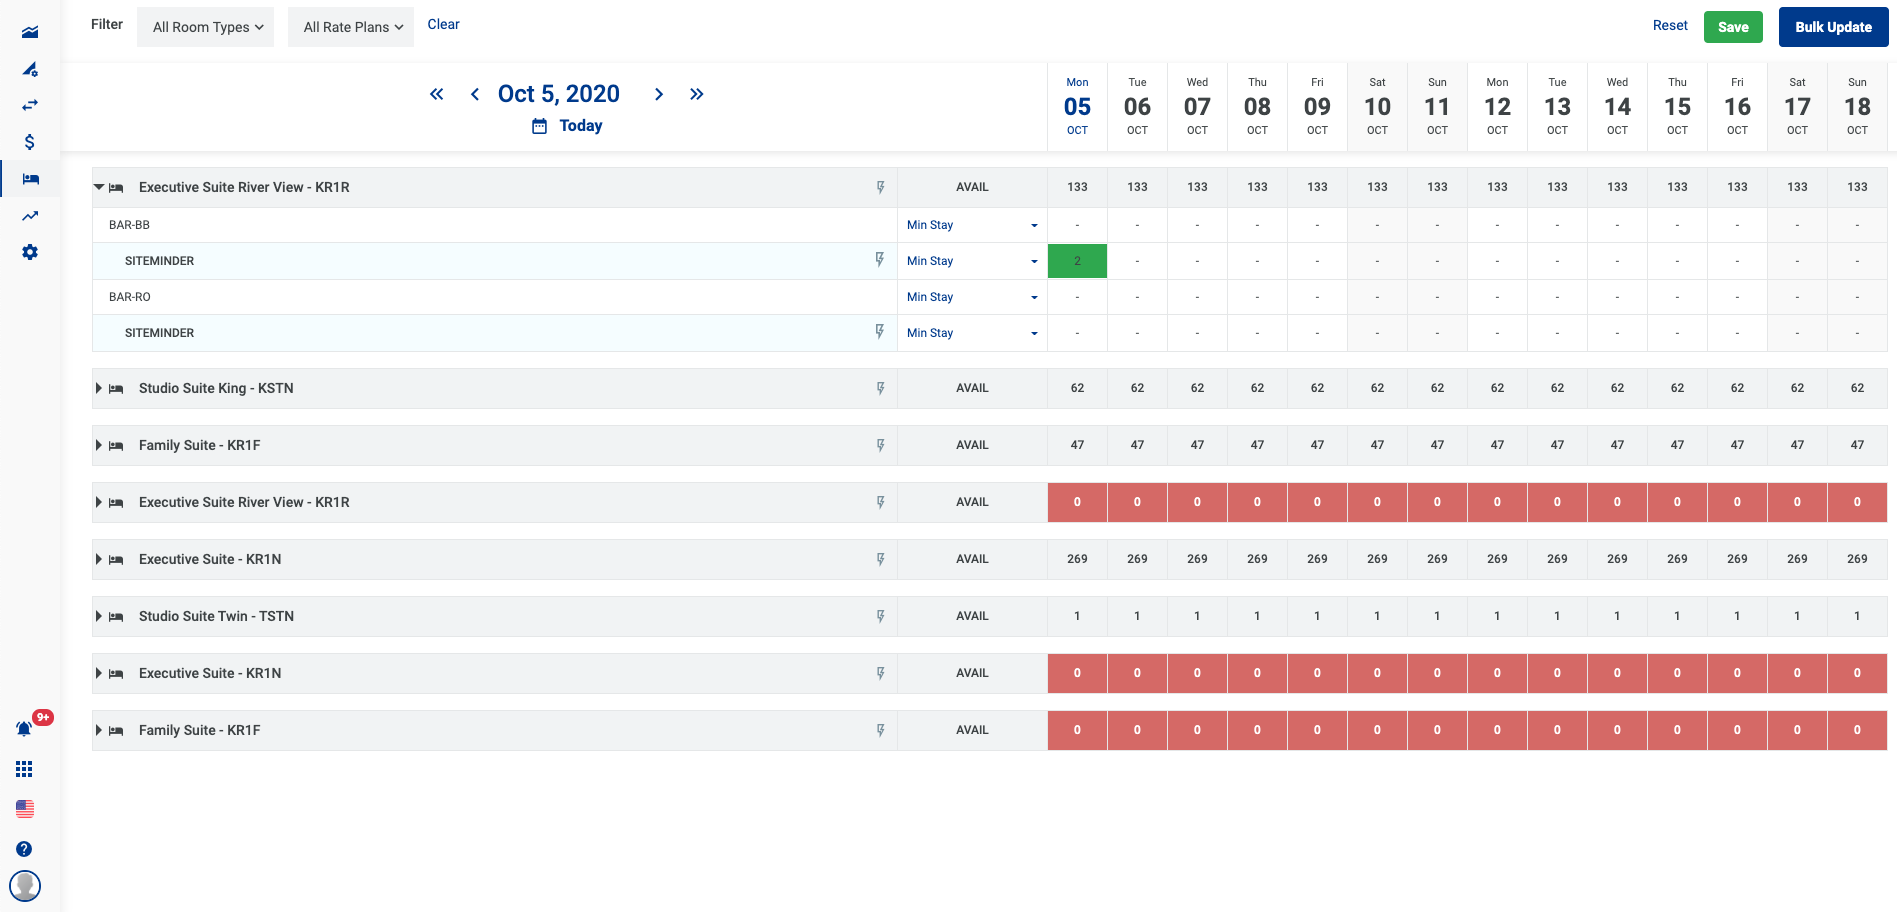
3.14.2 Select Save
3.15 Set Min Stay for room type - rate plan on a date range
3.15.1 Select icon Bulk Update on the Rate Plan row to edit
3.15.2 Enter the min LOS and the date range to apply

3.15.3 Select save
3.16 Set Max Stay for a specific date
3.16.1 Select Rate plan and set Max Stay restriction
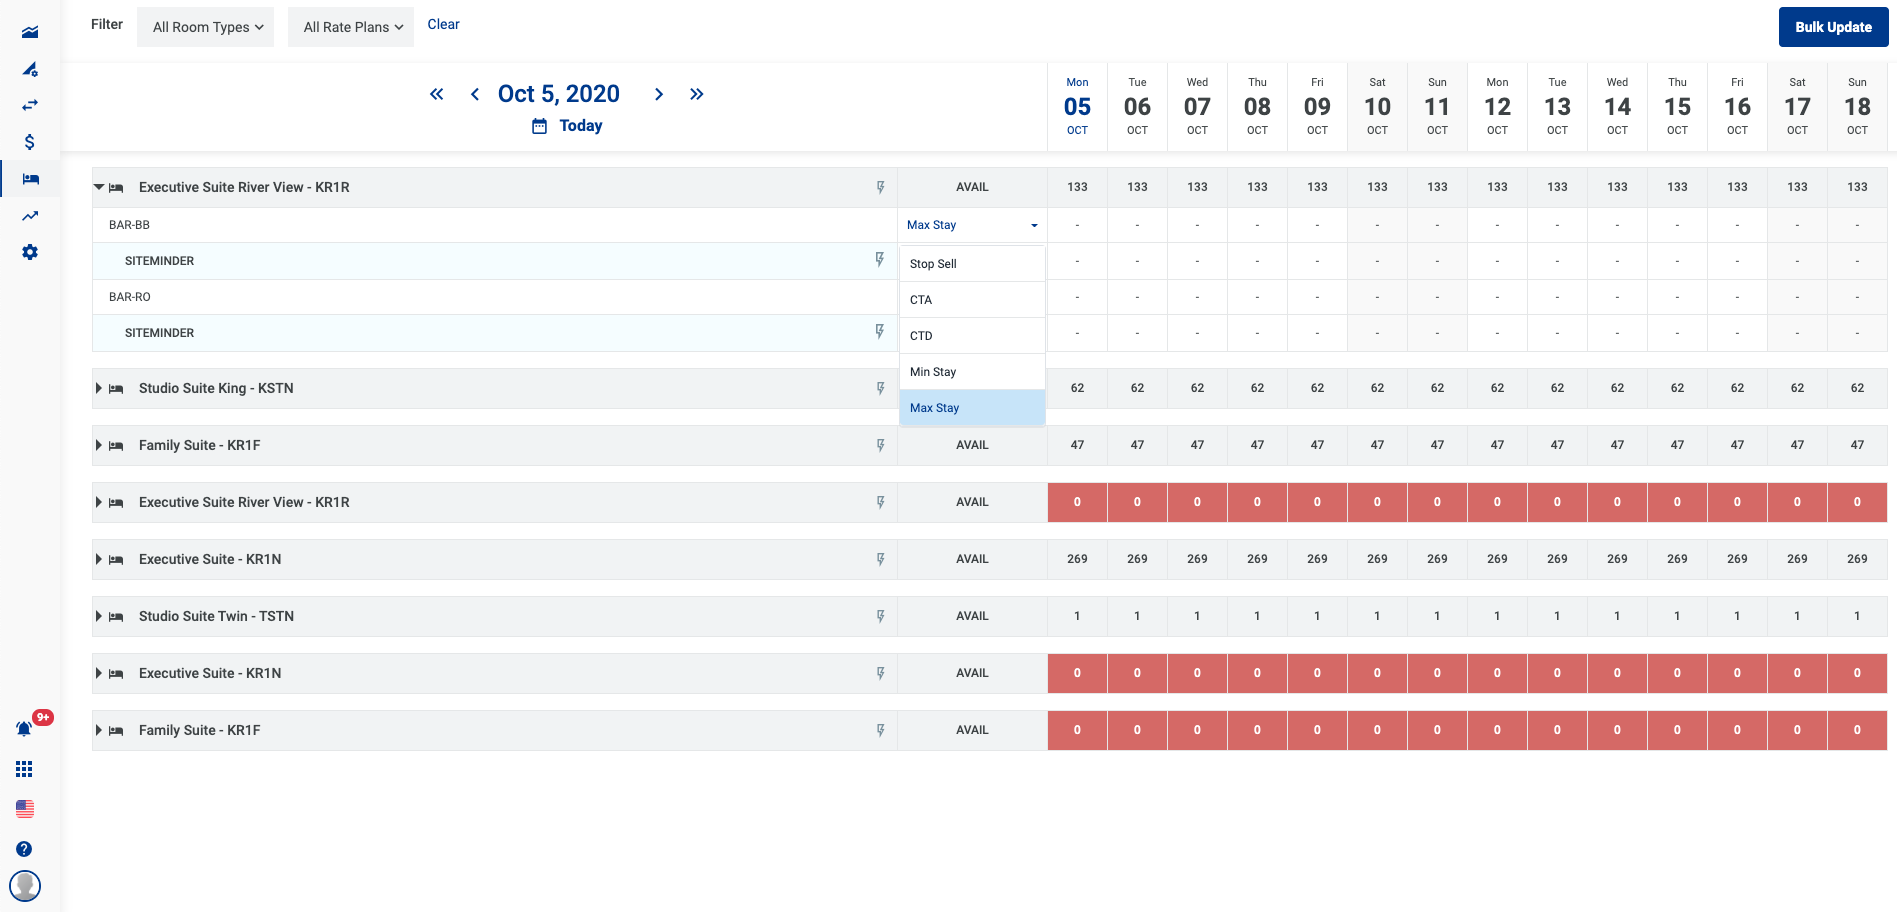
3.16.2 Select the date
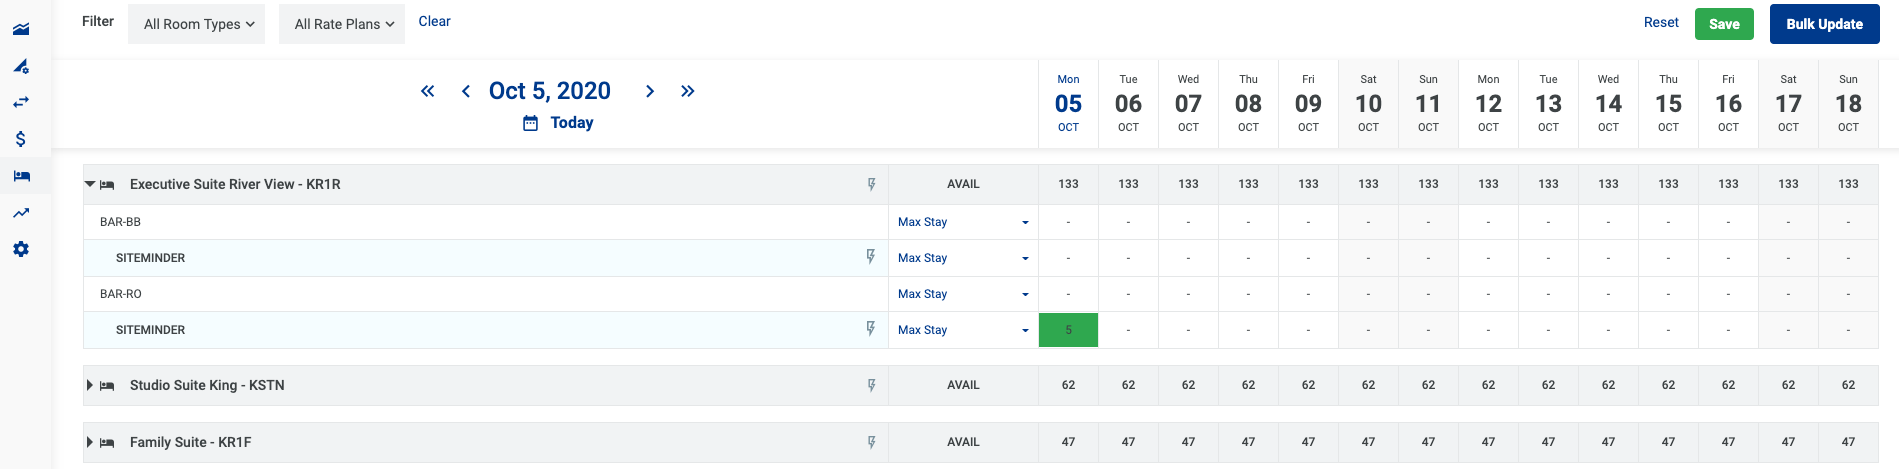
3.16.2 Select Save
3.17 Set Max for room type - rate plan on a date range
3.17.1 Select icon Bulk Update on the Rate Plan row to edit

3.17.2 Enter the max LOS and the date range to apply
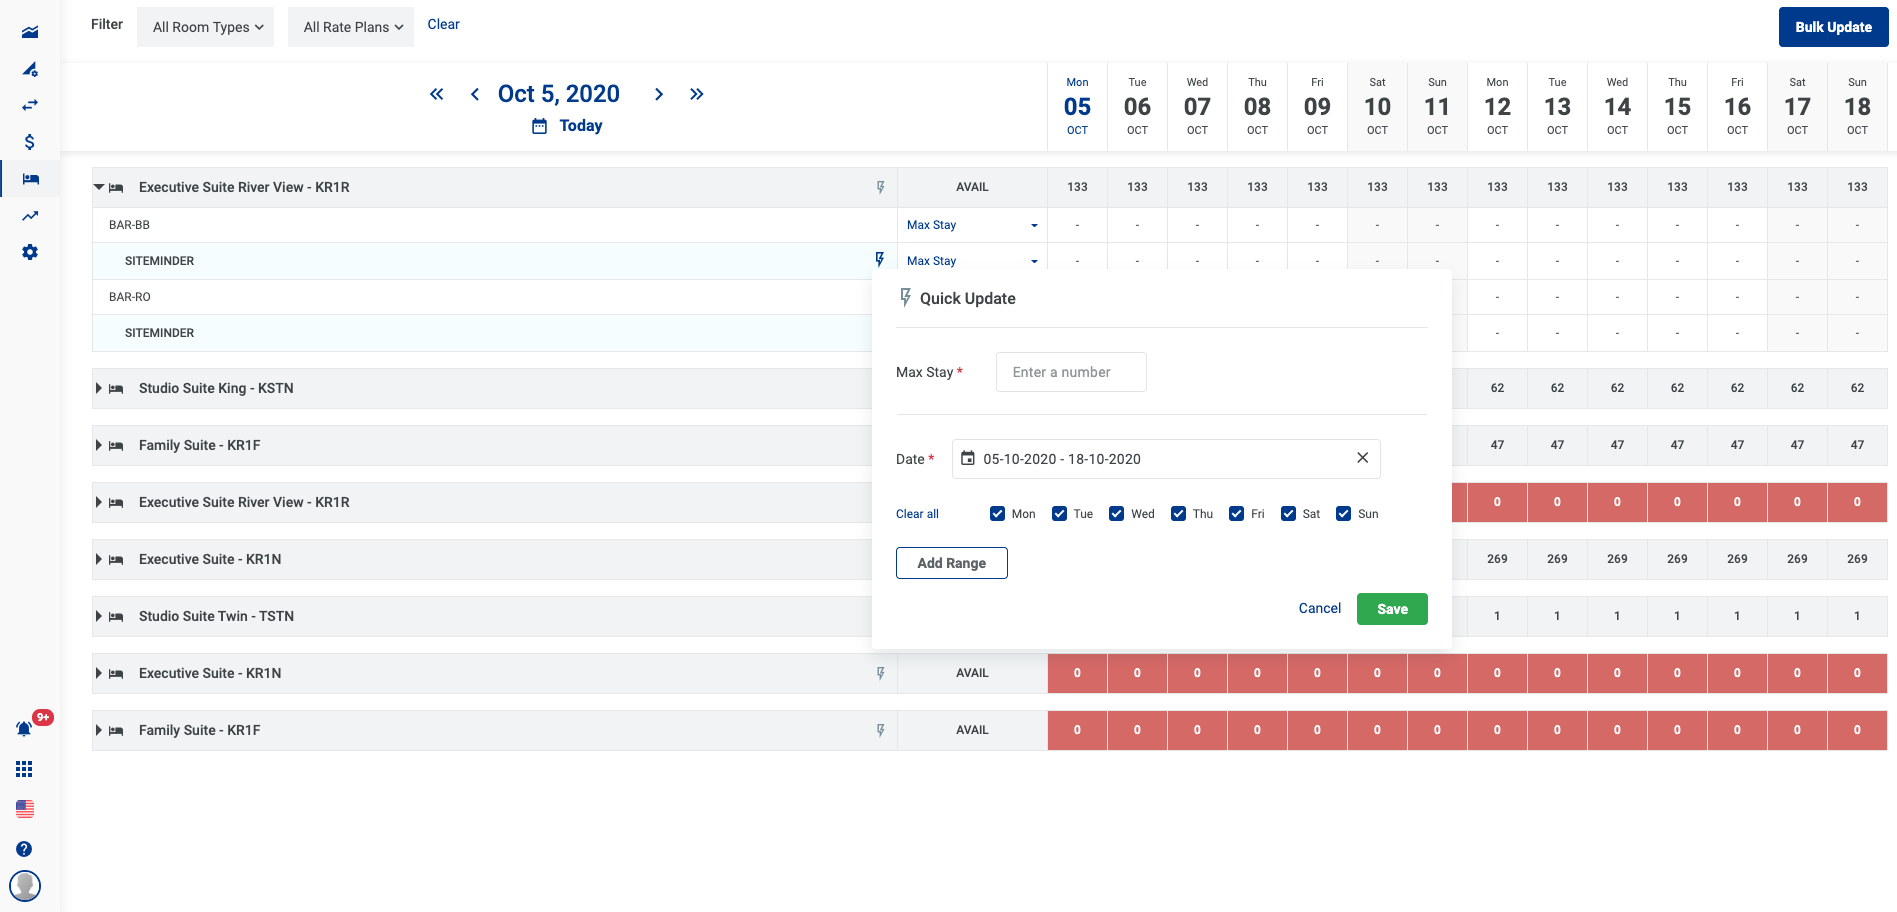
3.17.3 Select Save.