Skip table of contents

[Eng] QRMenu - Setting

1. QRMENU - OUTLET

Manage QR Code

Log in – Food & Beverage – Configuration - QR Generator

Summary

All outlets have been automatically generated QR Code corresponding to the table code in outlet/restaurant. Here it is possible to check/deactivate/active tables/areas/outlets that the facility does not want to use QR Menu for the facility

In case of setting more about display mode, do the following steps:

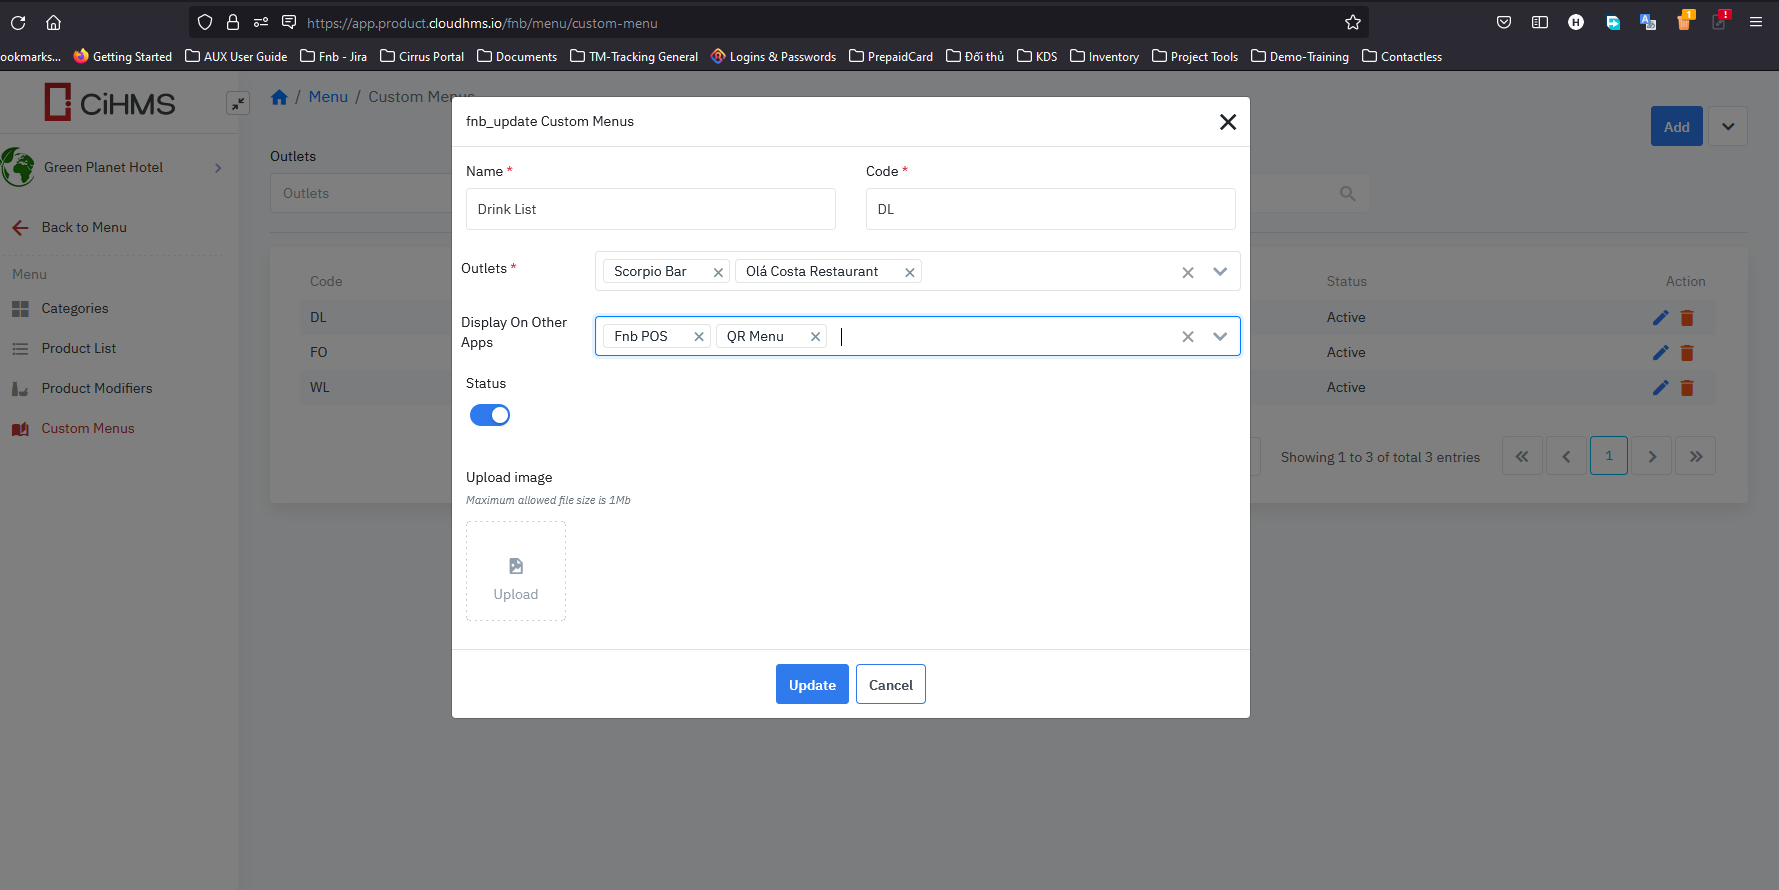
Select menu → Click assign “FnB POS” → Click “QR Menu” in Display On Other Apps

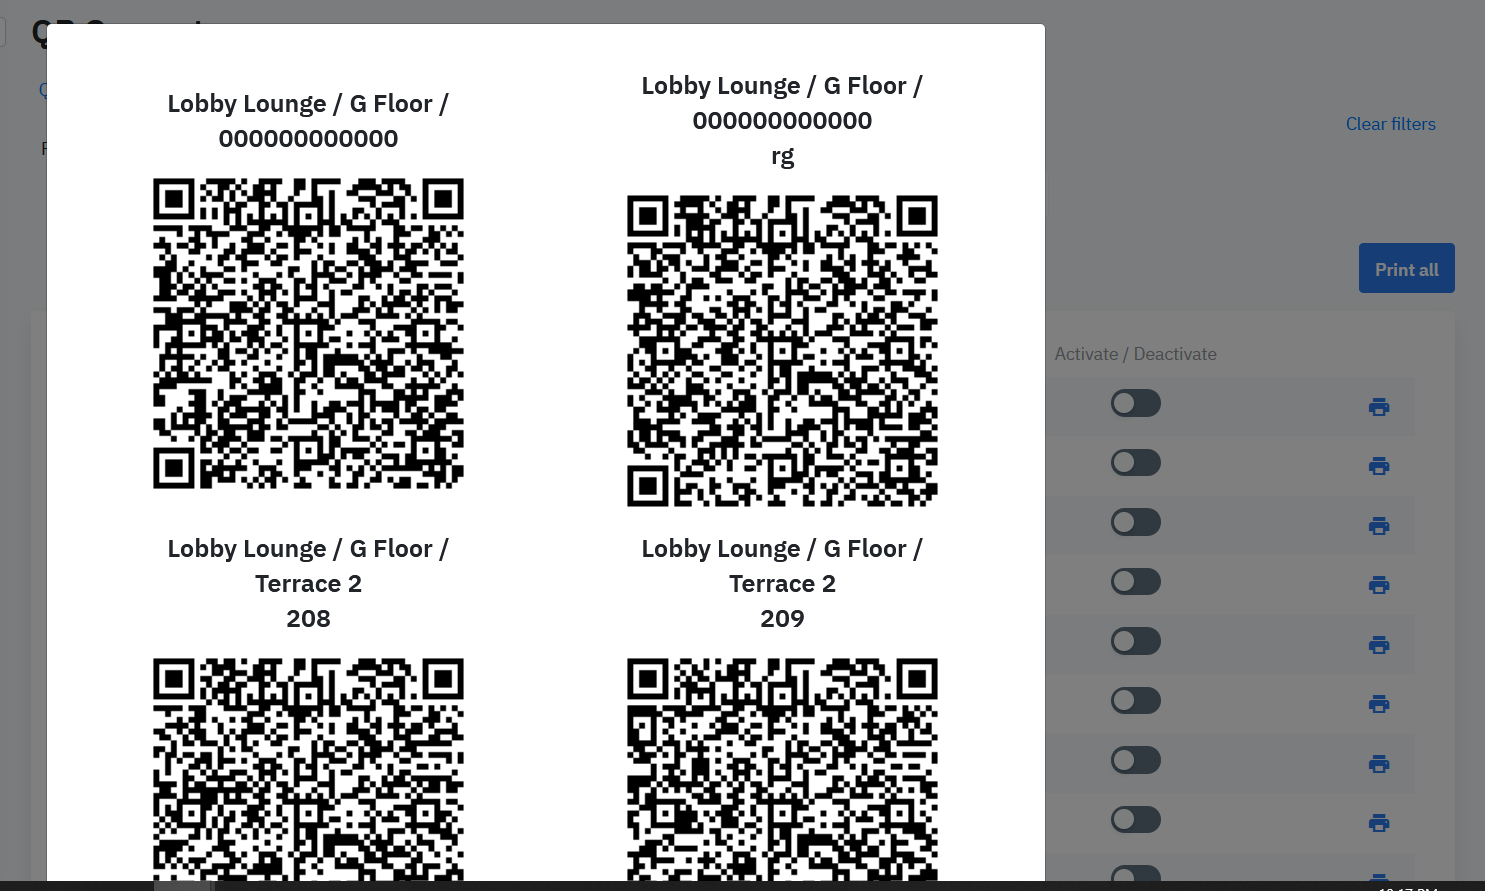
Print all the corresponding QR Codes and use them according to the purpose of user’s needs. Naming of QR Code = Outlet/Area/Table Name

Screen

1. Open QR menu at Custom Menu

2. QR Generator
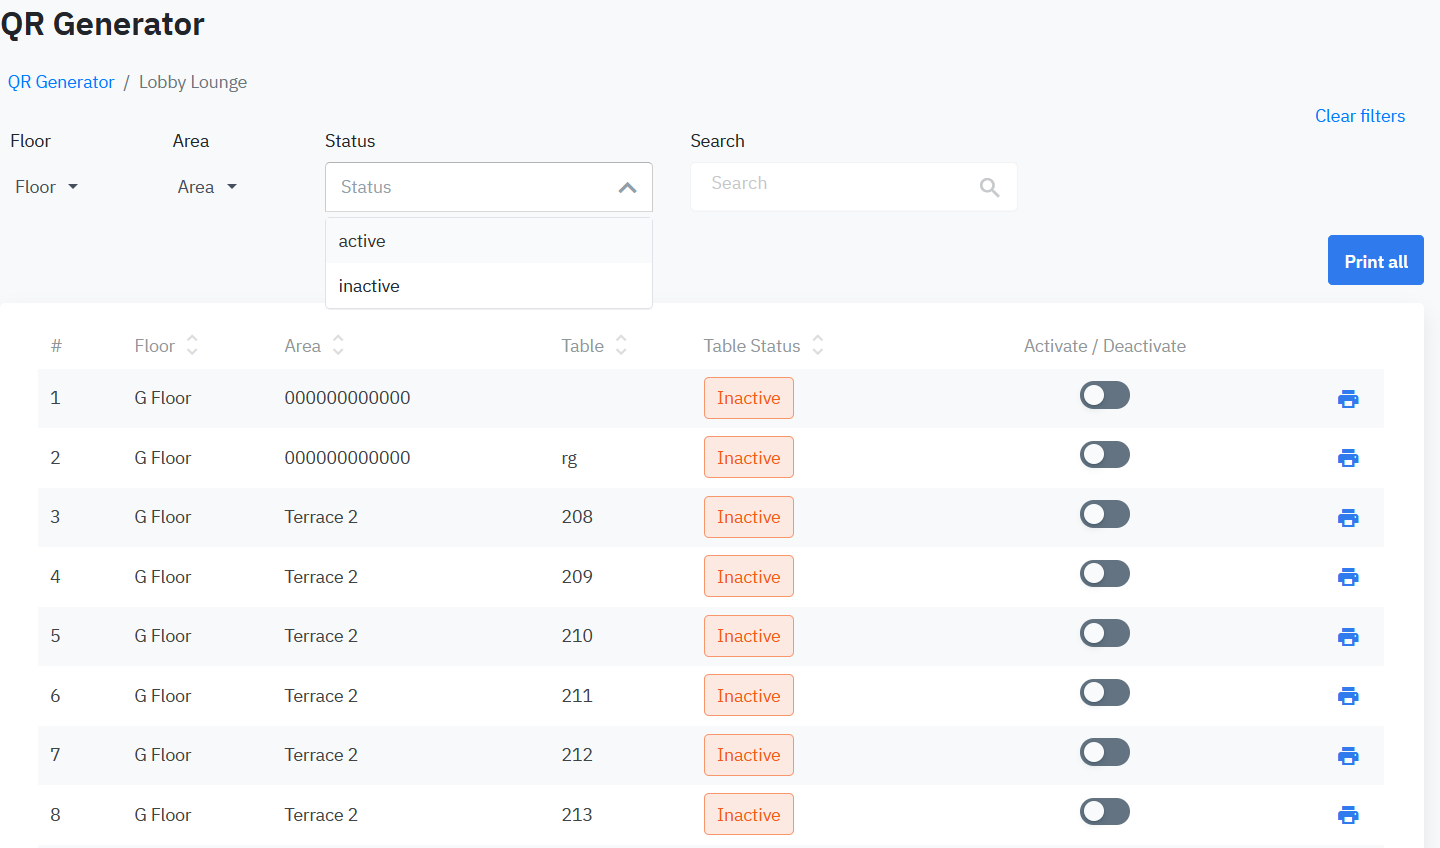
 

3.Detail

Fields Description

A. Summary:

  1. Outlet: sorted in order

  2. QR Quantity

  3. Action: Activate or Deactivate QR Menu

B. Detail:

  1. Floor

  2. Area

  3. Status

  4. Search

  5. Print QR Menu: Print all or print by selected

Remarks

You need to pay attention to print QR correctly for the table

2. USER GUIDE FOR GUEST

Guest use QR Menu to order

QR Code

Log in – Food & Beverage – Configuration - QR Generator

Summary

After printed the QR code corresponding to the table number - at the outlet and located in the most visible place. Guests use the phone's camera to scan the code and proceed to use the selection as follows:

For guests staying at the hotel:
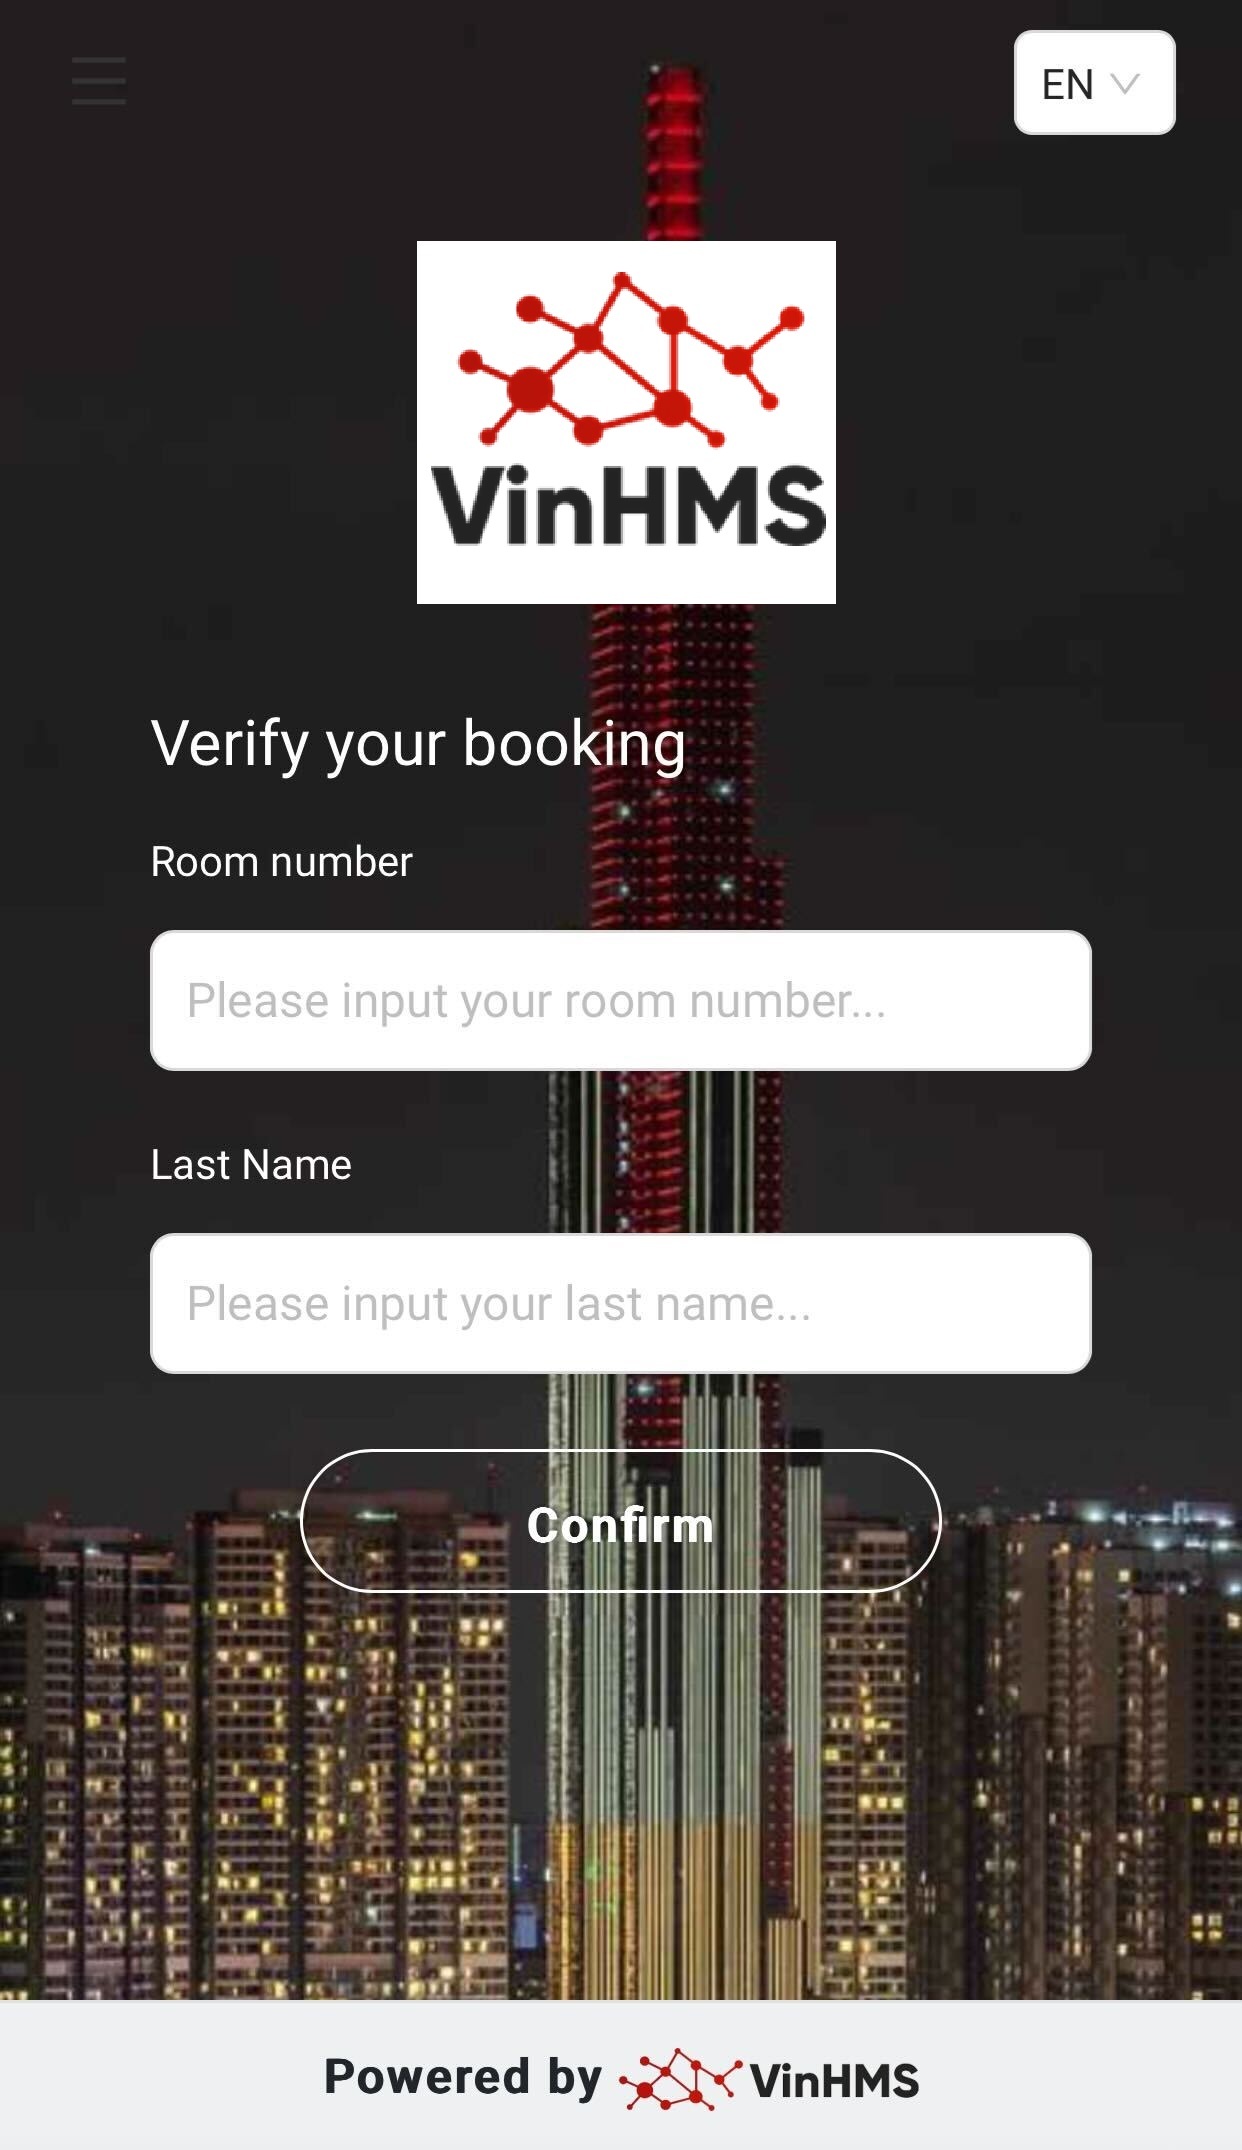
  • After scanning the QR code, guests will need to enter their room information.

    • Room Number: The room number the guest is staying in at the hotel

    • Last name: The guest's last name on the booking

inhouse.jpg

For non-staying guests:

  • For guests who are not staying at the hotel, after scanning the QR code, identification will be based on the table associated with the scanned QR code

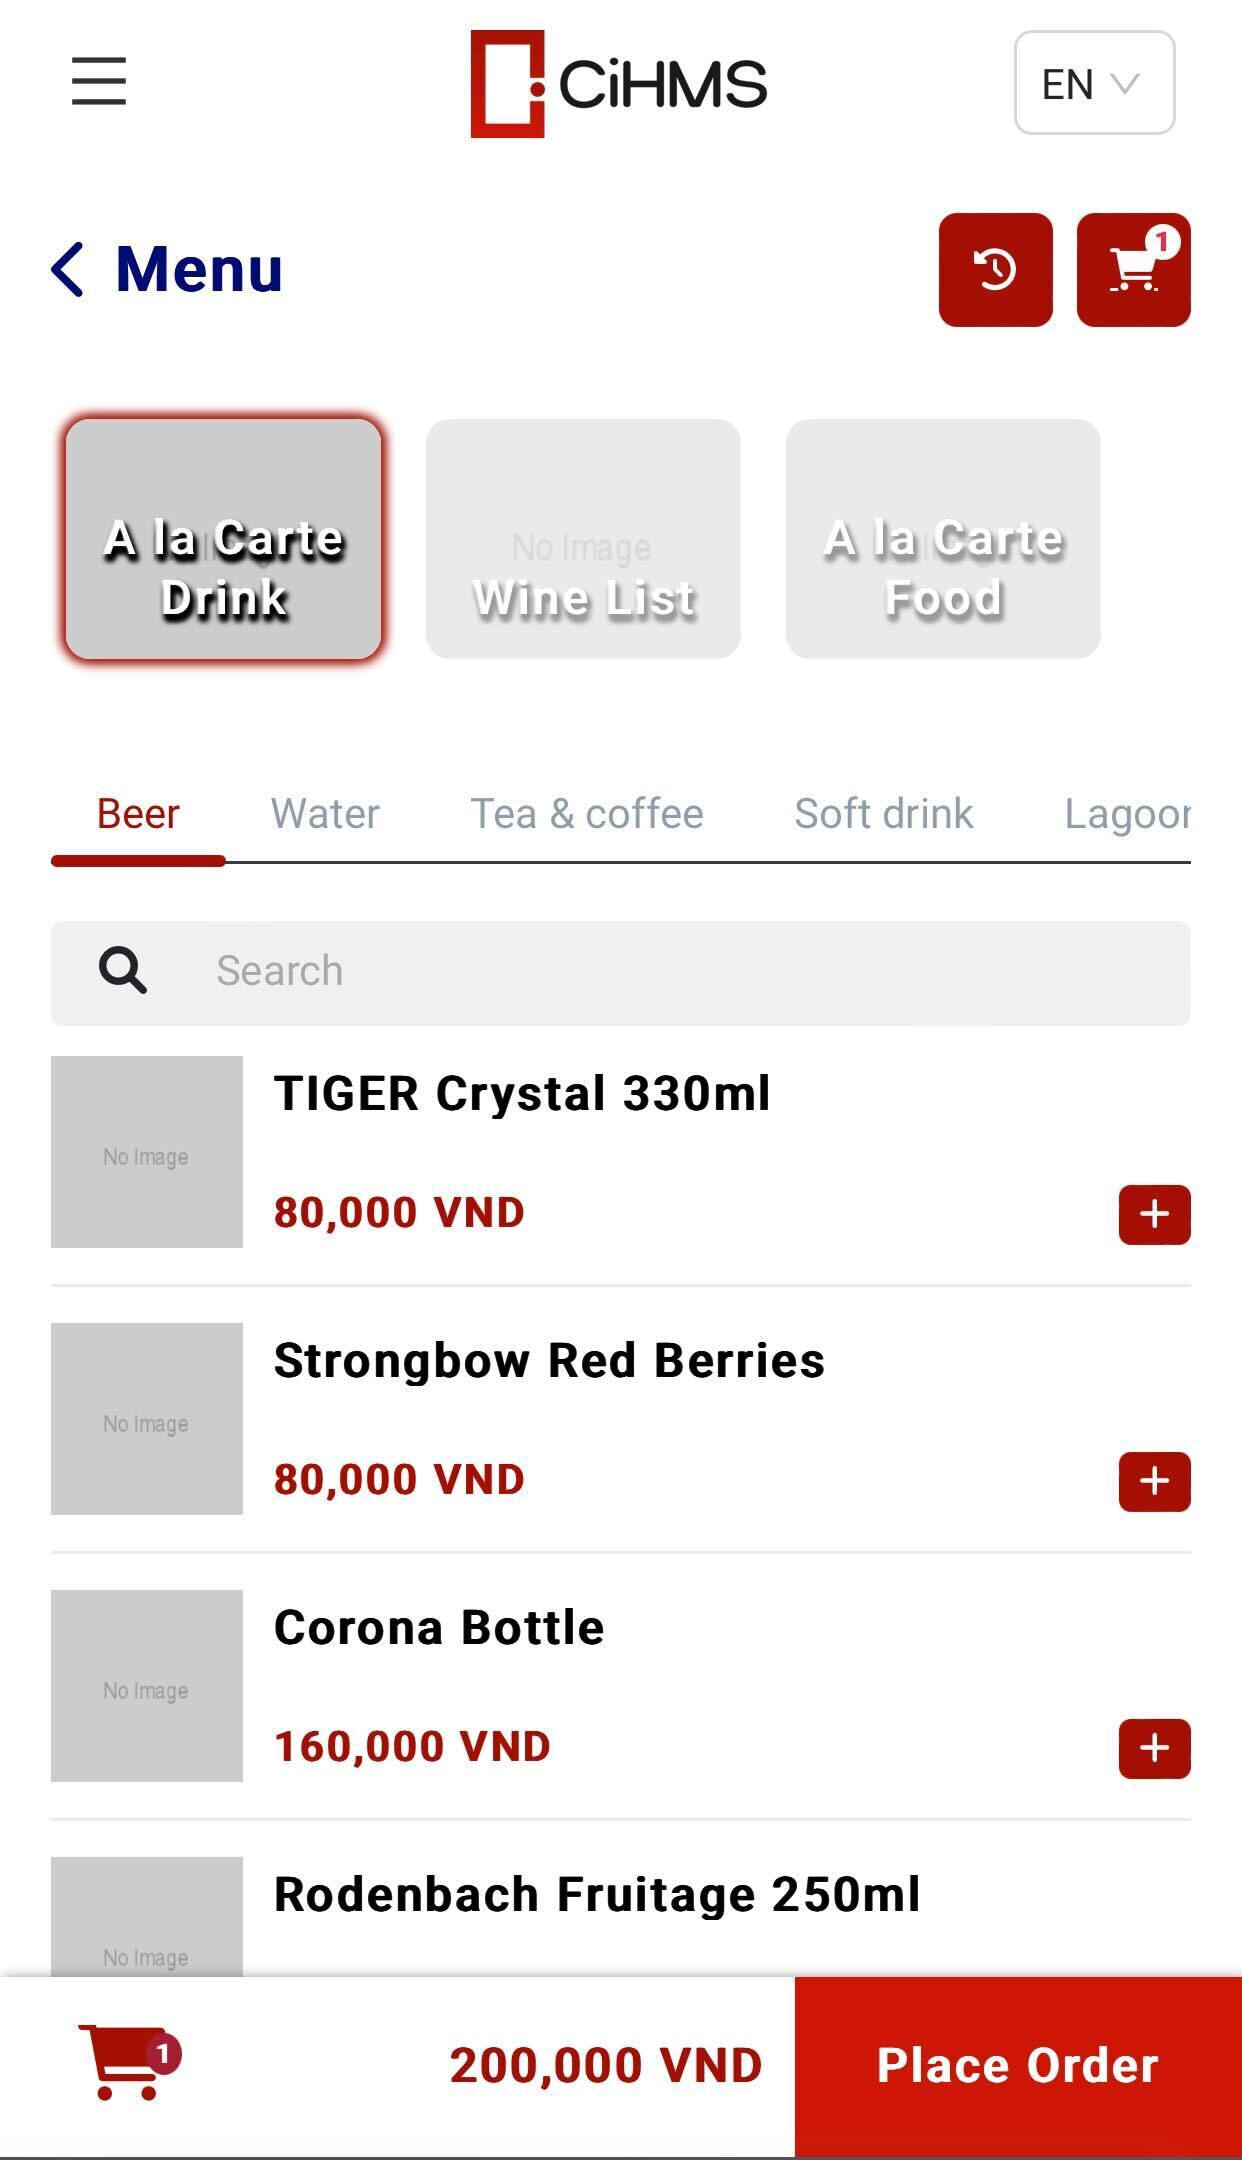
After scanning the QR code, the menu will be displayed:

  1. Select Menu

  2. Select Sub-menu (if any)

    IMG_5154.jpg

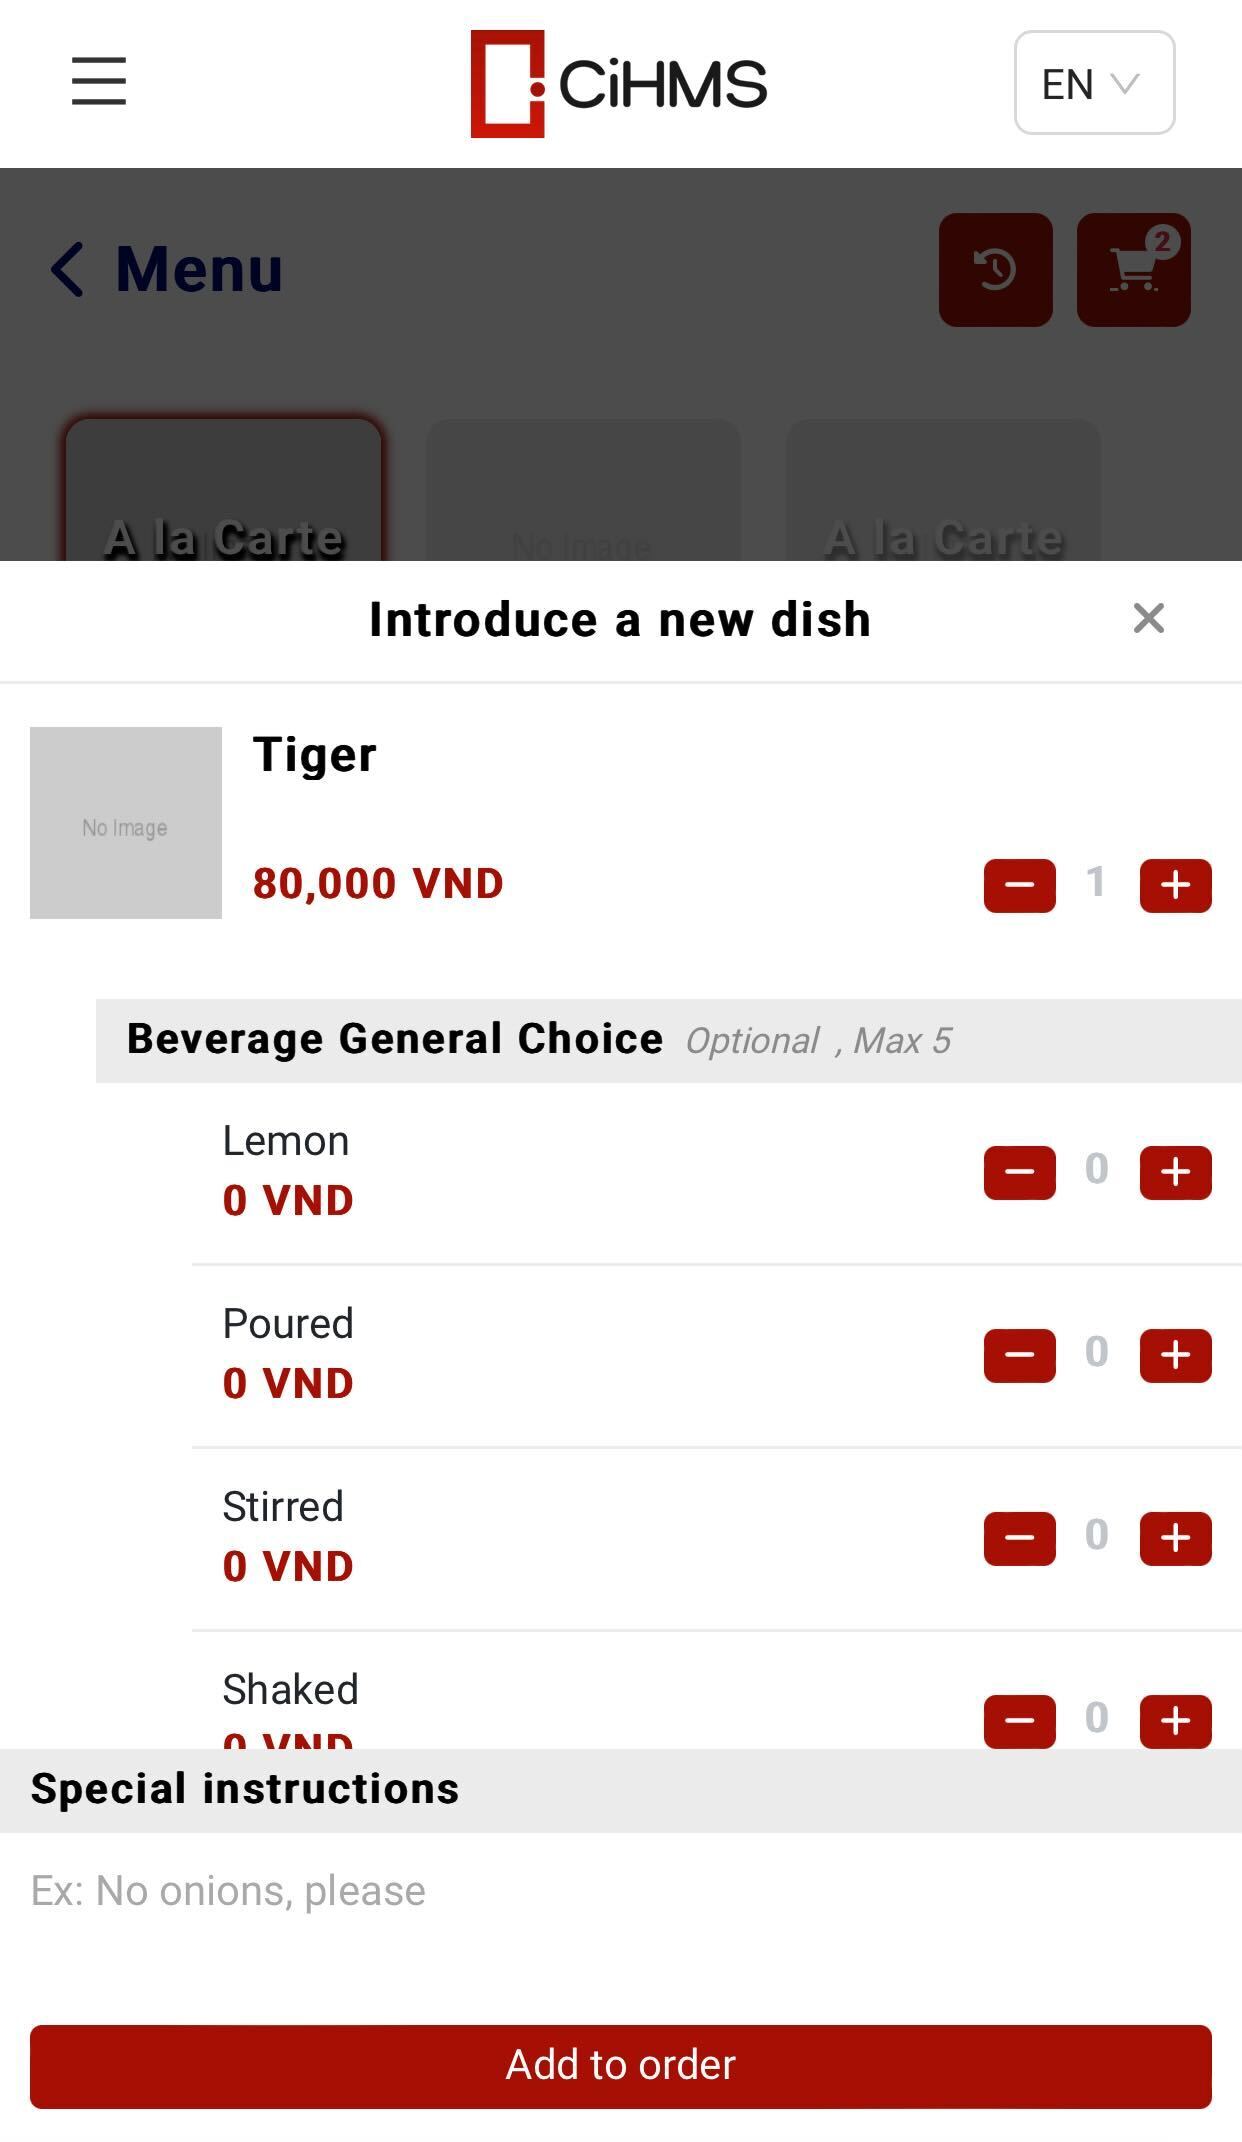
  3. Select item - Select option/Condiments/Note (if any)

    • Select number of items

  4. Click Add to Order

  5. Place Order” or “Add item +” on the right corner

    IMG_5155.jpg

  6. Re-do as step 1 if you want to add more items

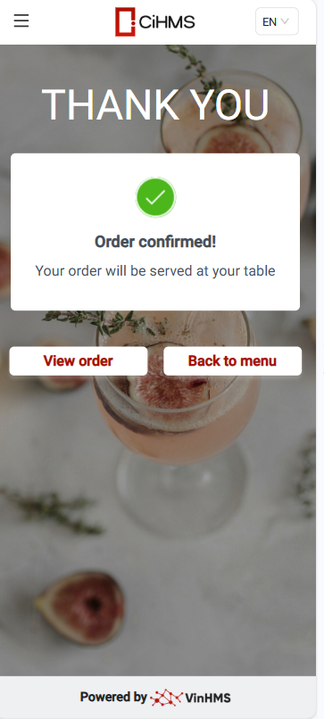
  7. Place Order

    • View Order

    • Back to Menu

      image_720.png

POS Device

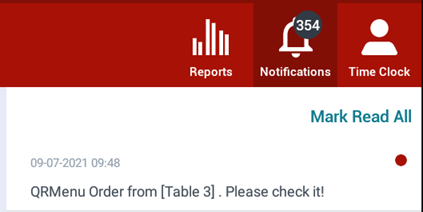
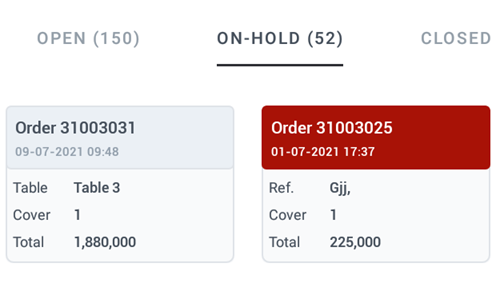
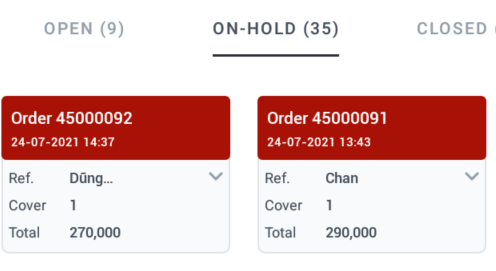
  1. The order will be transmitted to the POS device (with notification) to the On-Hold section, the order taker need to go back to the table for confirmation.

  2. Oder taker send order to kitchen

  3. Do as normal FNB SOP

Remarks

1. If using Android operating system, some models (phone/tablet) will need 3rd app to scan QR code

2. View order: Only view last order (in case of closing app, can not view the last order)

3. All orders by QR Code can not send directly to kitchen

4. Orders which had been placed cannot be edited by guest

5. When the order has been placed, the table number will be linked to the order

3. QRMENU - ROOMSERVICE

Manage QR Code

Open Link

Log in – Food & Beverage – Menu - Custom Menus

Summary

  1. QR Menu- Room service

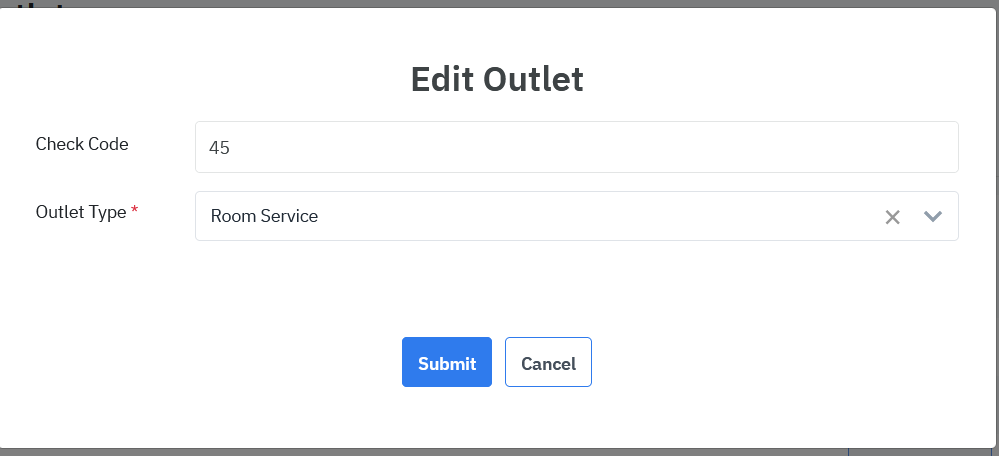
    • 1. Configuration- Select Room service - outlet

    • 2. Edit - Select “Outlet Type” = Room Service

    • 3. Submit

  2. Click Menu - Edit Menu “Room Service”

    • 1. Select Display On Other Apps = QR Menu

    • 2. Update

  3. Create a QR code in Configuration- QR Generator as usual.

  4. Guest use QR Code - Room Service located in room as at outlet but room number and phone number are requirement fields for confirmation.

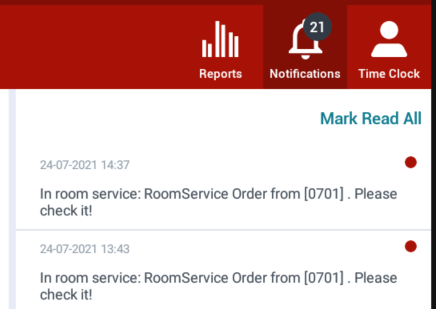
  5. The order will be transmitted to the POS device (with notification) to the On-Hold section, the SC/Receptionist/FO/RS need to confirm and the notification displays as picture below:

    • 1. SC/Receptionist/FO/RS need to confirm the order and payment detail for preparation.

    • 2. Send order to kitchen

    • 3. Serve as normal

Remarks

  • Display On Other Apps: You can select where the QR codes displays (FnB POS, QR Code, Hotel app)

  • Only apply for properties available room service

JavaScript errors detected

Please note, these errors can depend on your browser setup.

If this problem persists, please contact our support.