Skip table of contents

[Eng] Create E-invoice

Screen Name

Create E-invoice

Log in – Ticket Office – E-Invoice – Create E-Invoice

Summary

Create a new e-invoice for transactions that have not been invoiced yet
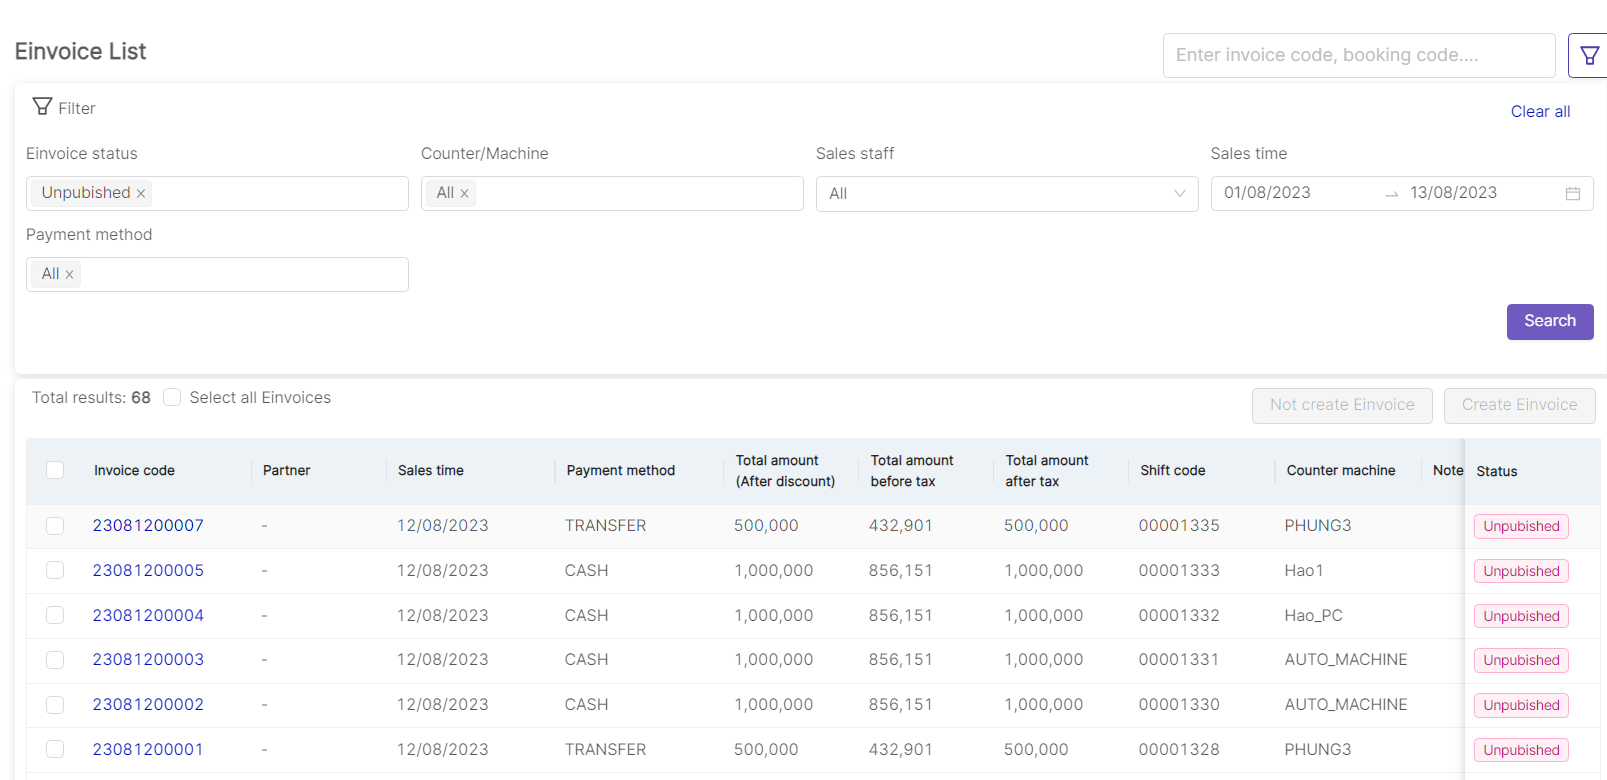
Screen

Fields Description

[Search and Filter E-Invoice List]

  • Search: enter invoice code or booking code to search

  • Filter: Click on the icon :lọc: to display the invoice list filtering screen

    • E-Invoice status: Select the e-invoice status to search

    • Counter/Machine: Search for the invoice list by counter/machine

    • Sales staff: Select to search for the invoice list by sales staff information

    • Sales time: Select the time range to search for the invoice list

    • Payment method: Select to search for the invoice list by payment method

  • Select “Clear all” to remove all selected filter

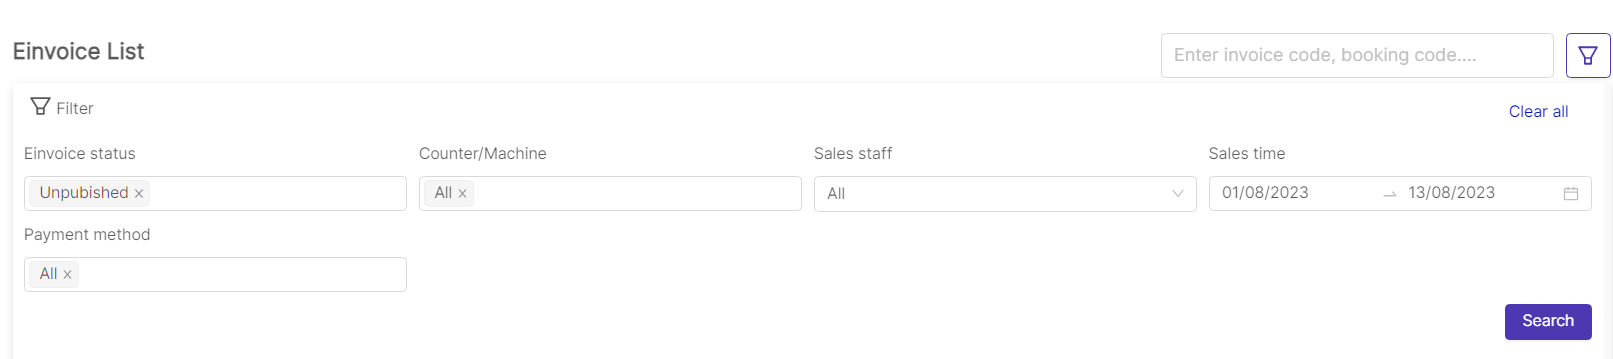
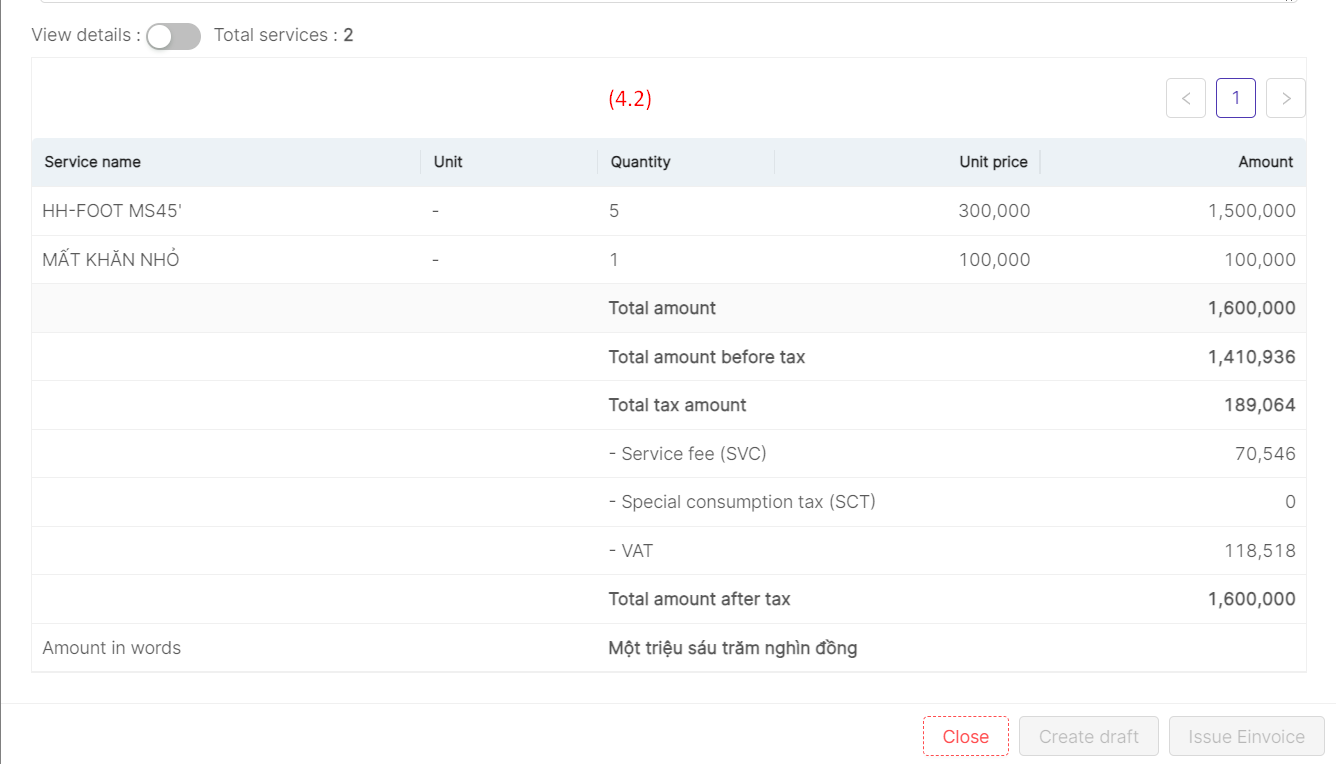
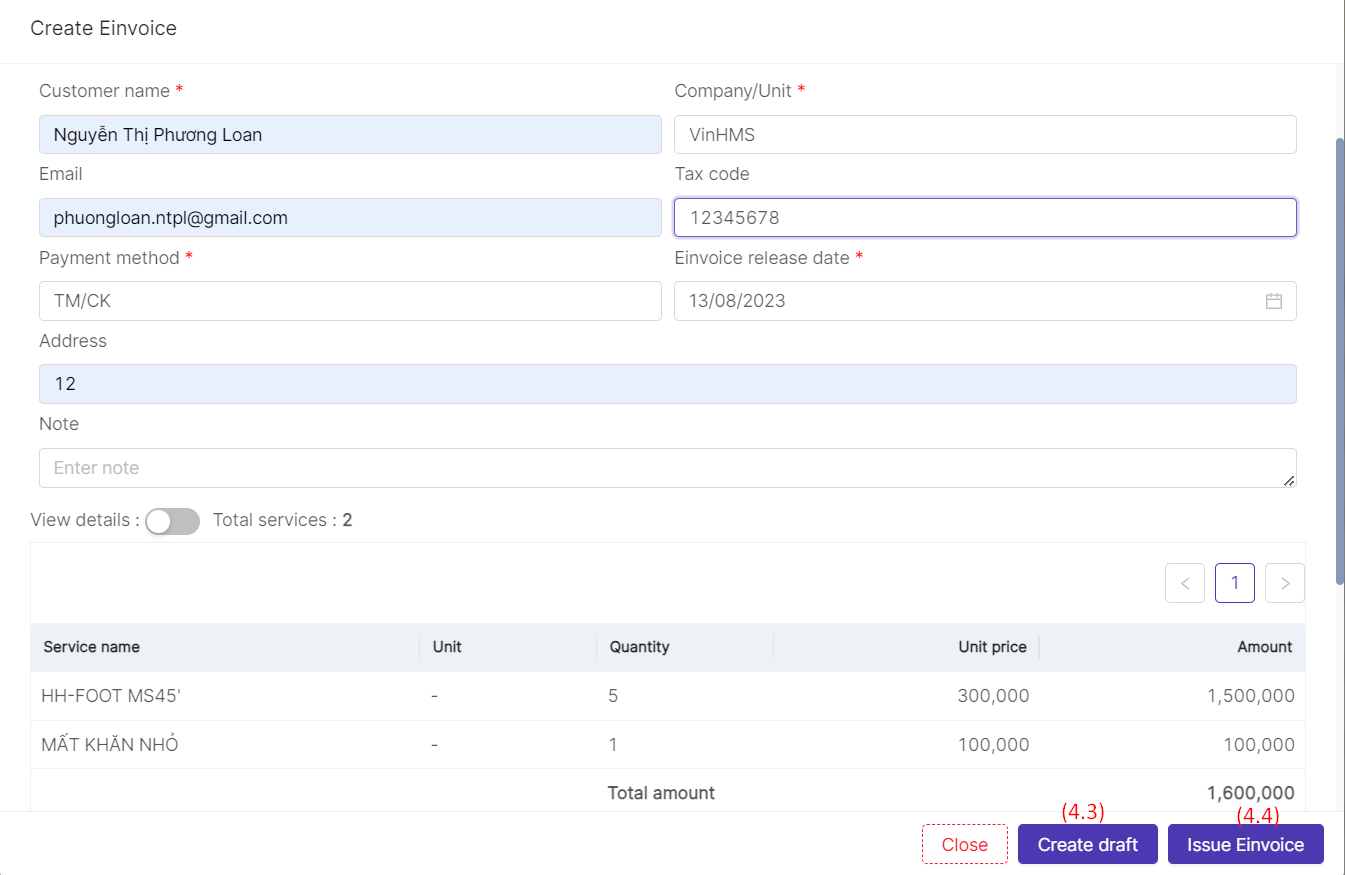
[To create E-Invoice, follow these steps]

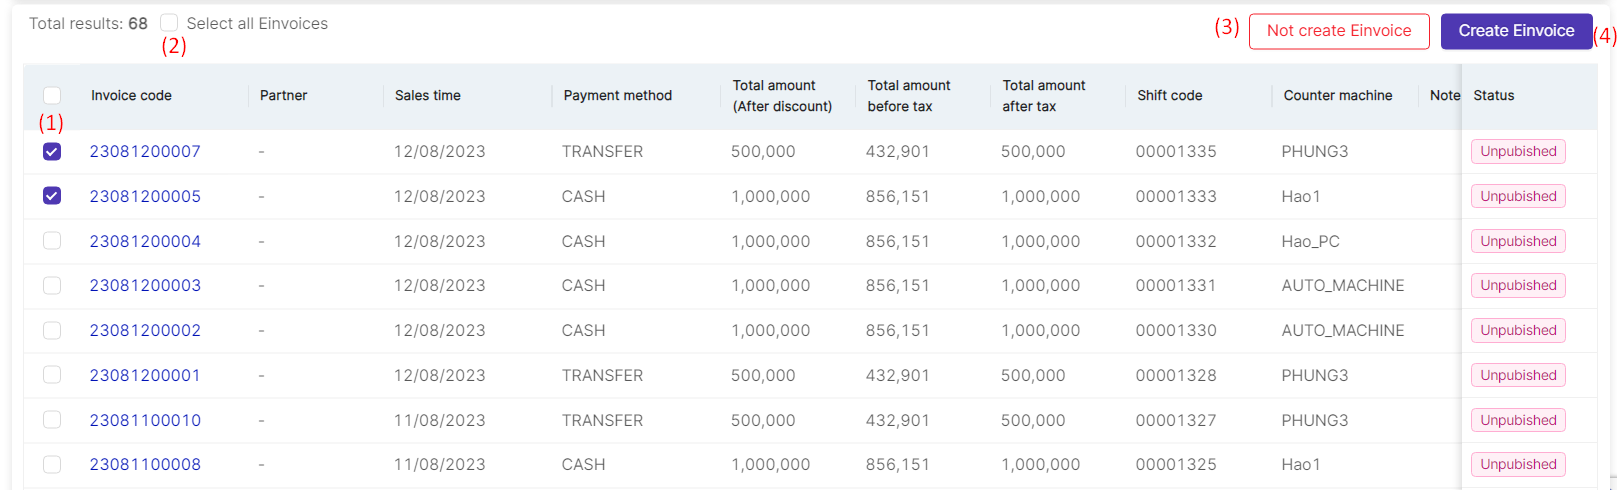
To select invoices for create on the list of invoices not yet issued:

(1) Tick the box :ô_vuông: to select the invoices to be created

(2) Or tick the box "Select all invoices" in case the user needs to create all invoices at once

(3) After selecting the information in section (1) or (2), if the user does not want to create e-invoices for these invoices, click on "Not create e-invoice" → the system will display a confirmation message to hide the invoices, the user clicks "OK" to confirm hiding these invoices.

(4) After selecting the information in section (1) or (2), if the user needs to create e-invoices for these invoices, select "Create e-invoice" to export the invoices. The system will display detailed information on the created invoices as follows:
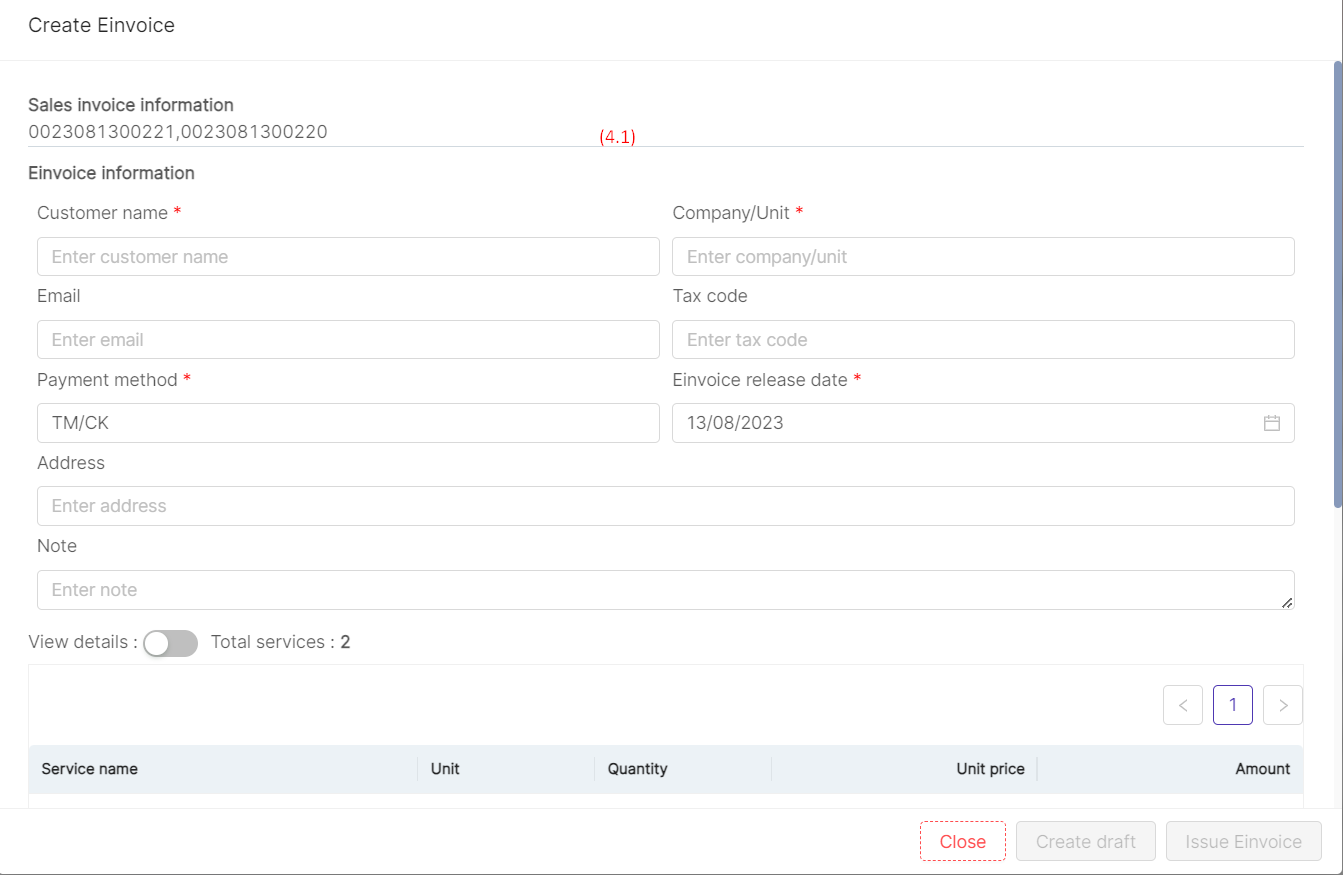
  • (4.1) The detailed information of the invoice to be created: Users need to enter all required fields marked with an asterisk

  • (4.2) The detailed information of the services to be included in the invoice, including the following information: Service name, Unit, Quantity, Unit price and Amount.

    • To view the details of the number of services in the invoice, turn on/off the "View details" button.

  • After entering all the required information, the system will allow the user to perform "Create draft" or "Issue e-invoice".

  • (4.3) Select "Create draft" to preview the invoice before issuing it. The user can make any necessary adjustments to the draft invoice. Once the user clicks "Create draft," the invoice will appear in the e-invoice list with the “E-invoice Draft” status.

  • (4.4) Select "Issue e-invoice" in case the user has confirmed the correct information and services to be included in the customer's invoice. After clicking "Issue e-invoice," the invoice will appear in the e-invoice list with the “published” status.

Remarks

N/A

JavaScript errors detected

Please note, these errors can depend on your browser setup.

If this problem persists, please contact our support.