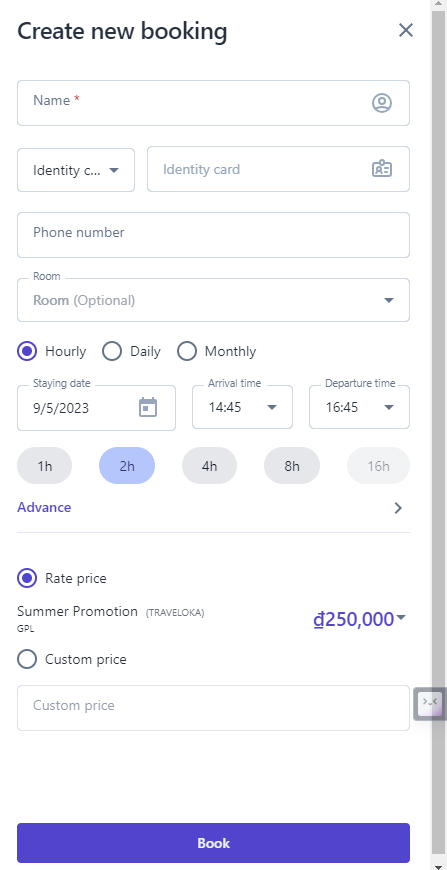
[ENG] Create a new booking
Screen Name |
Create a reservation |
Open Link |
Login – Reservation – Create a new bookingLogin – Room Plan – :tạo_mới:Create a new booking |
Summary |
The screen allows users to create a booking or a group of bookings |
Screen |
 |
Fields Description |
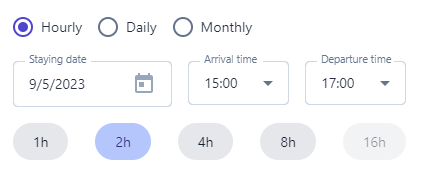
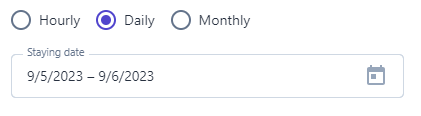
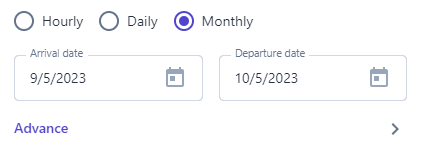
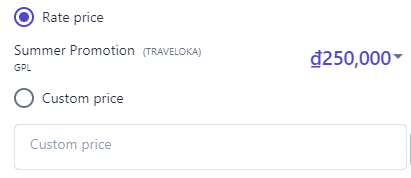
I. Do following steps to create a new booking: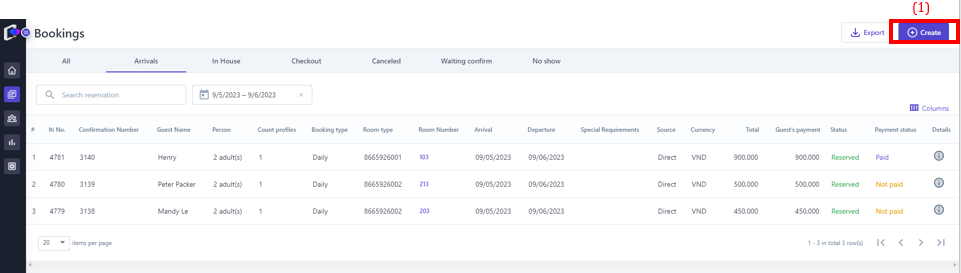

II. Details of reservation:
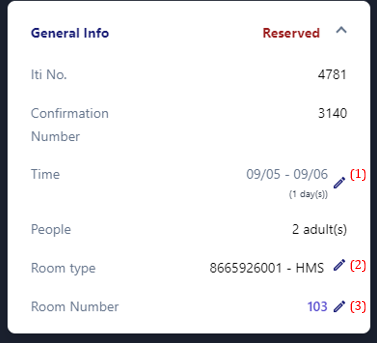
 2. Main Guest Infor 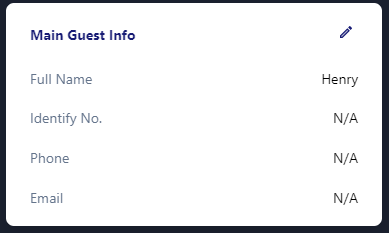
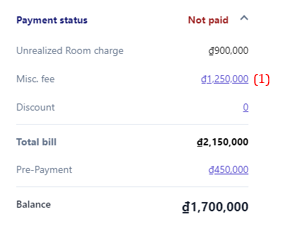
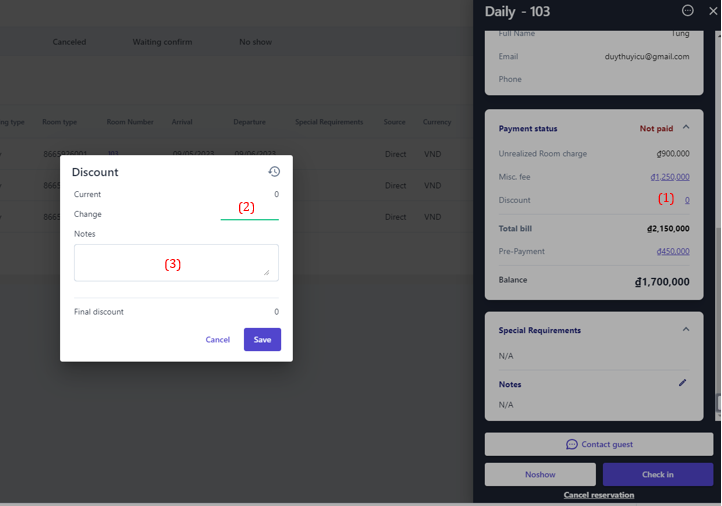
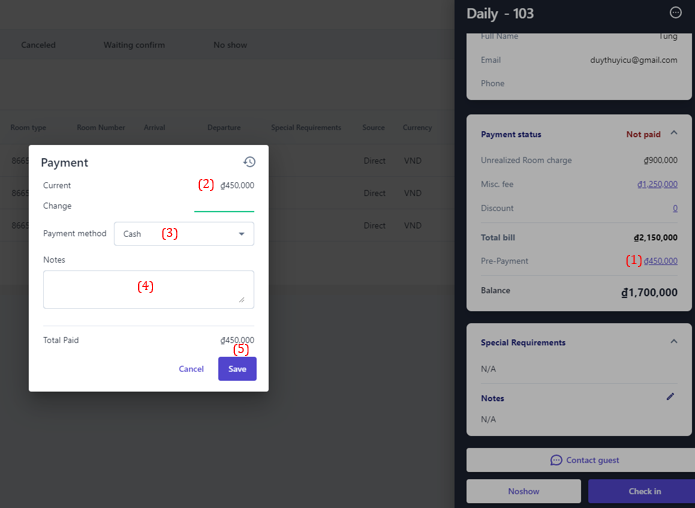
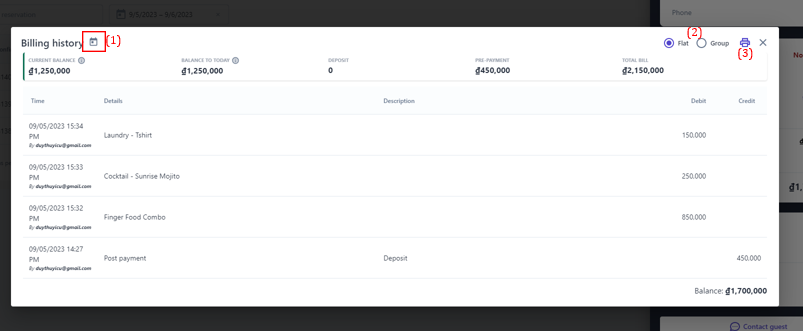
3. Booker Information: The system will display the name, email, and phone number of the person who made the booking 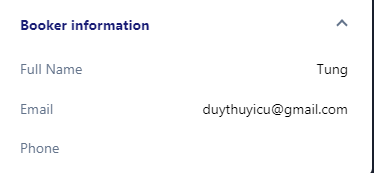 4. Payment Status: 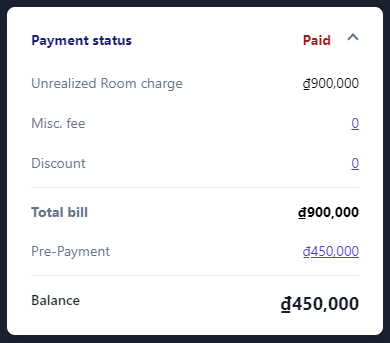
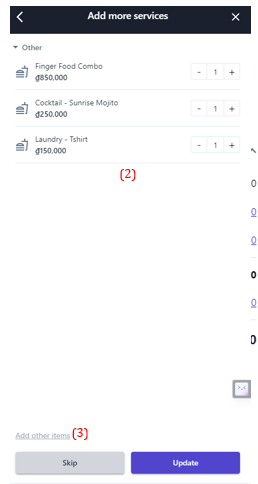
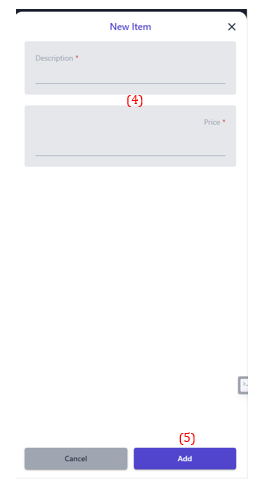
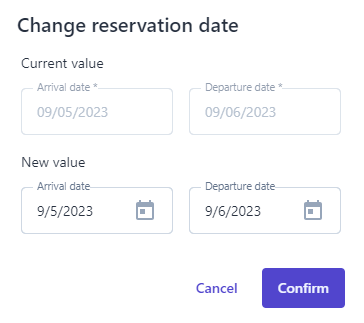
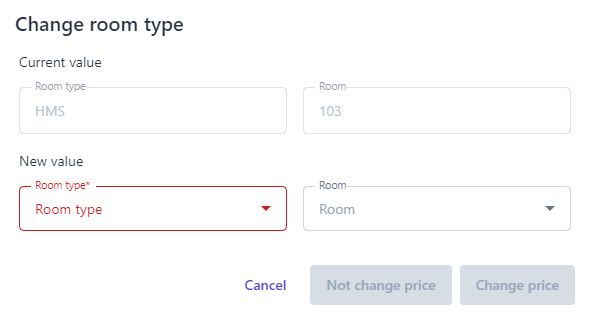
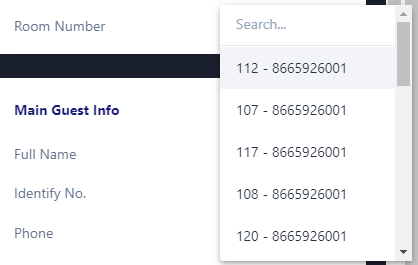
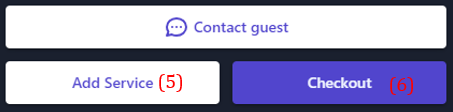
5. Special requirements: Click on the icon :edit: to enter notes. 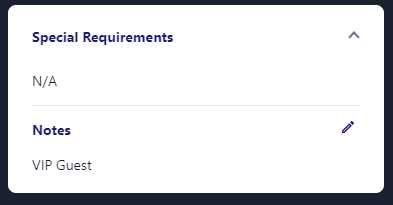 6. Other Functions: 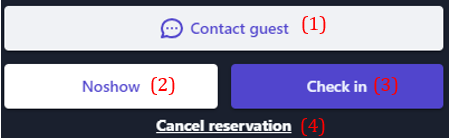
|
Remarks |
N/A |