Skip table of contents

[Eng] Printers

Screen Name

Printers

Log in – Configurations - Printers

Summary

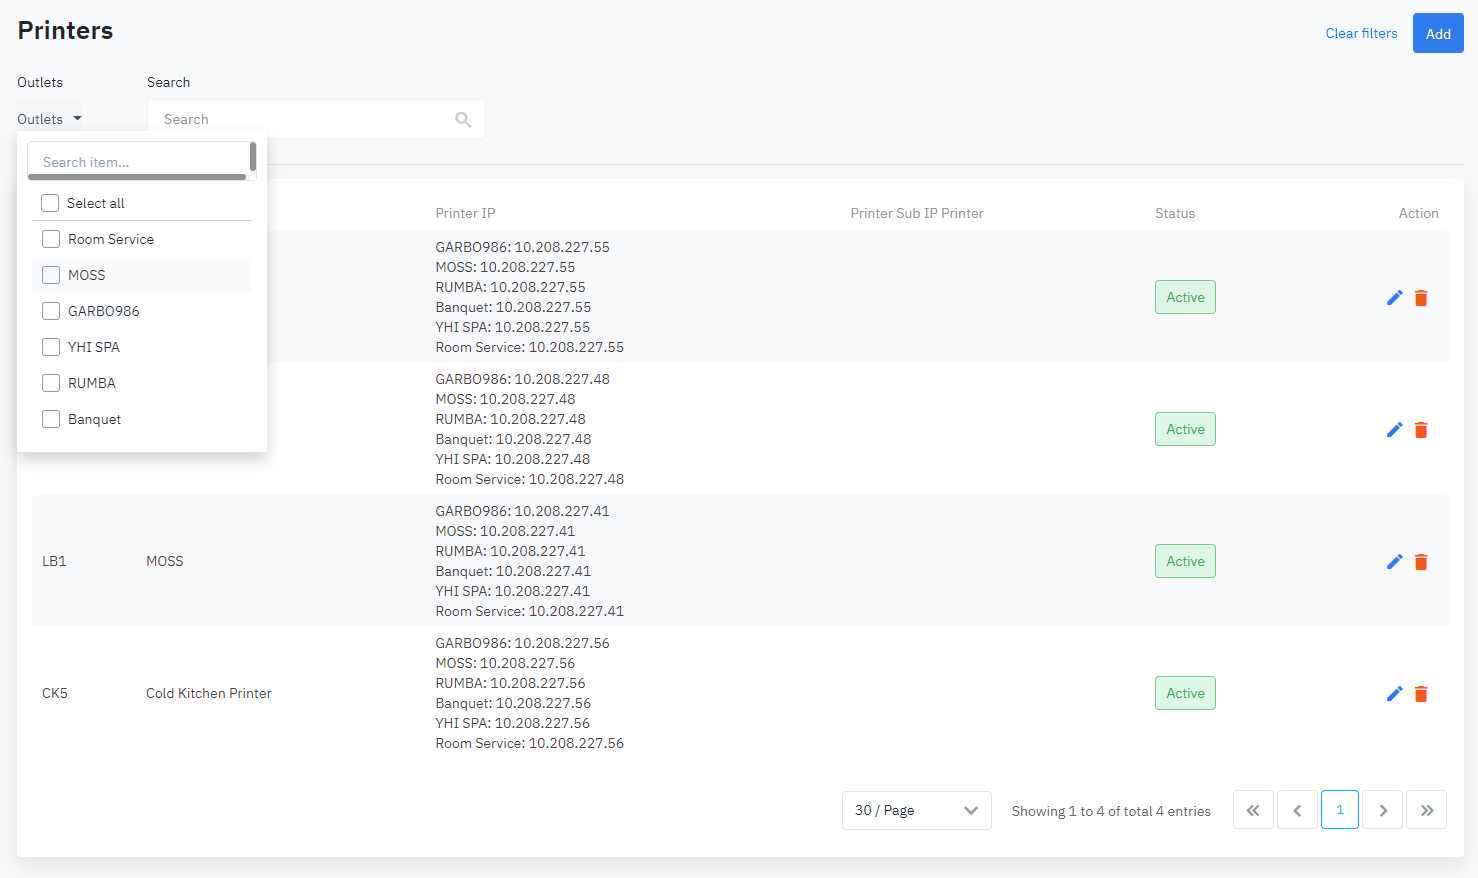
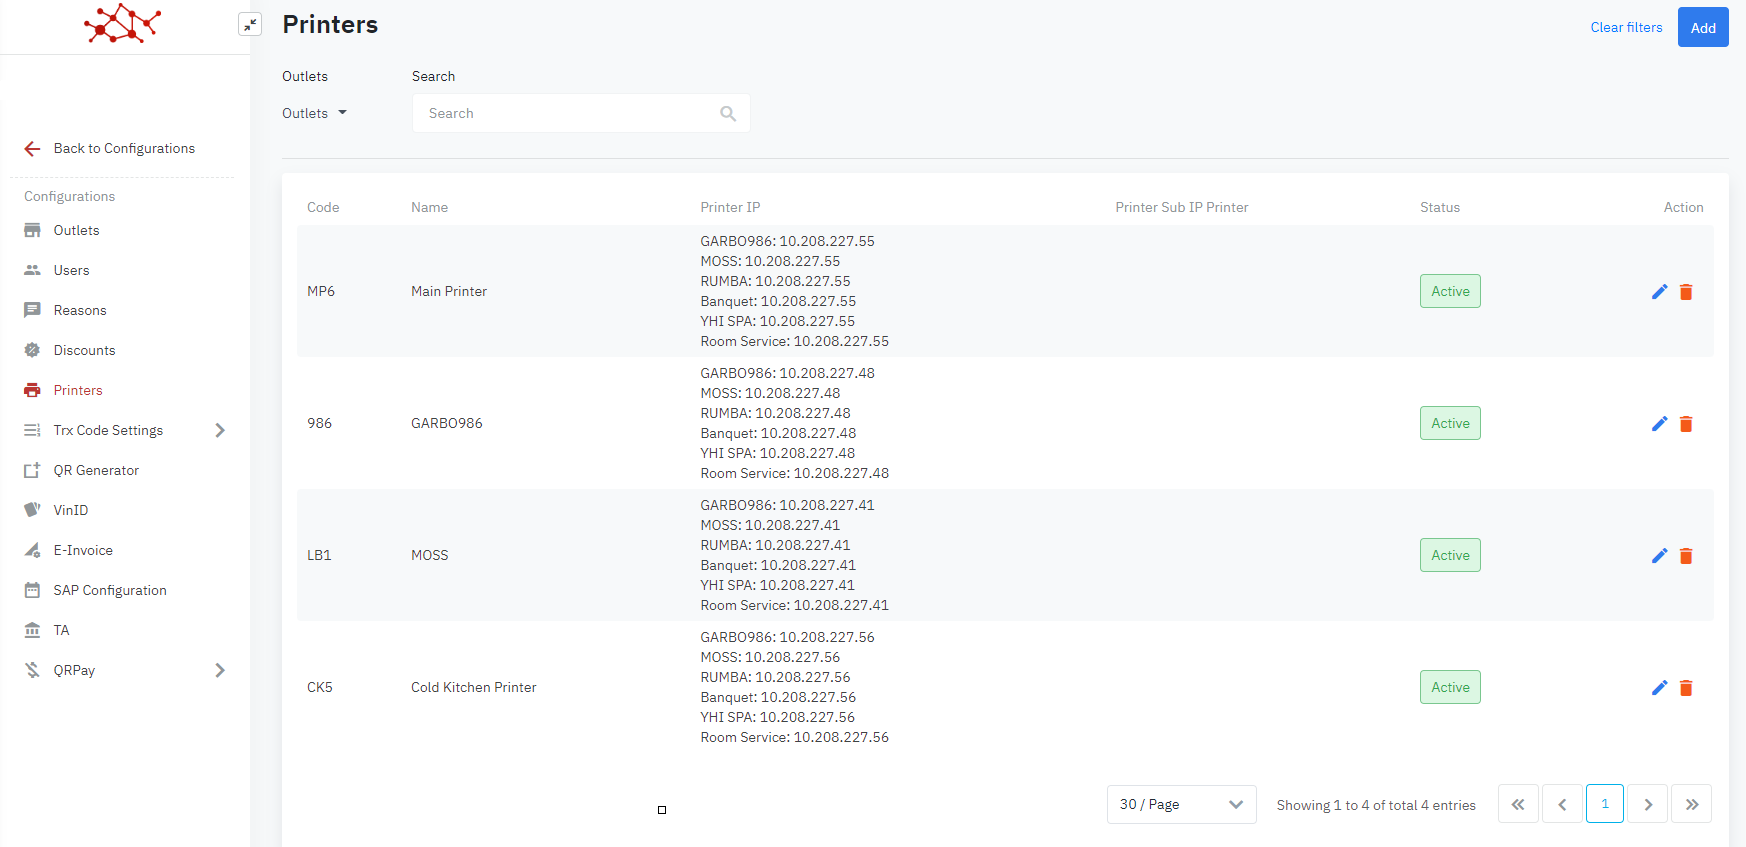
The screen allows to manage list of kitchen/bar printers by LAN connection

Screen

Fields Description

List of kitchen/bar printers:

  • Code: Printer code

  • Name: Printer name/printer group

    • it will be named after the type of printer such as Asian Kitchen, European Kitchen, Cake Kitchen, Bar,...

    • The printer name will be displayed in the lower right corner of the printed captain.

  • Main Printer IP:

    • IP information will be displayed by outlet.

    • Items connected to the declared printer will be printed at the device with the corresponding IP for the Outlet that is recording the item.

  • Sub Printer IP:

    • In the event that the captain is unable to print to the main printer, it will be forwarded to the corresponding secondary printer (sub-printer) if declared.

  • Status: Active/ Inactive

  • Action

    • Edit: Click to perform a printer's edit

    • Delete: Click to remove a printer

    • Can filter by Outlet to see printers of the same IP being used for Outlet

    • Searchable by code or printer name

The relationship between menu items and printers

  • Many outlets use the same menu (a menu structure consists of many group menus, each group menu consists of many menu items).

  • Each menu item is linked to 1 or more Printer Groups.

  • Each Printer Group at each outlet will be map with the IP of the corresponding physical printer.

  • In case the main printer fails, it will switch to printing at the backup printer.

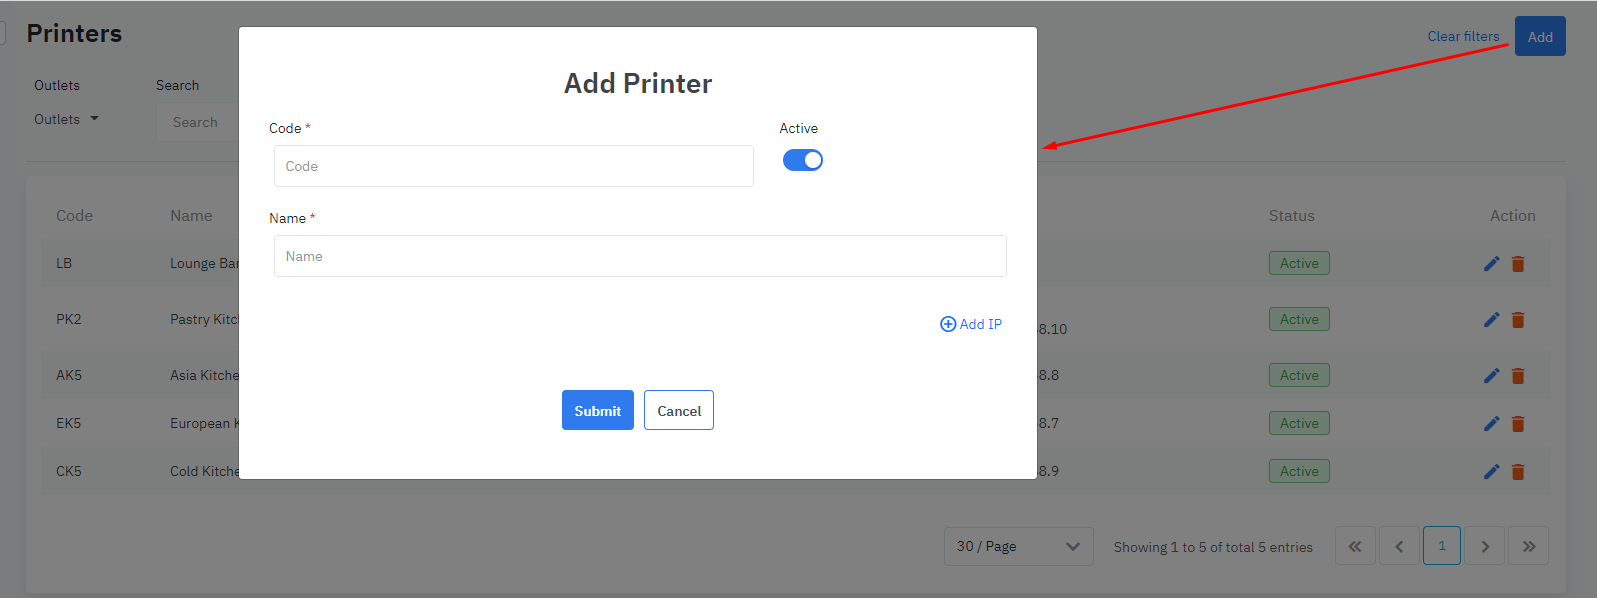
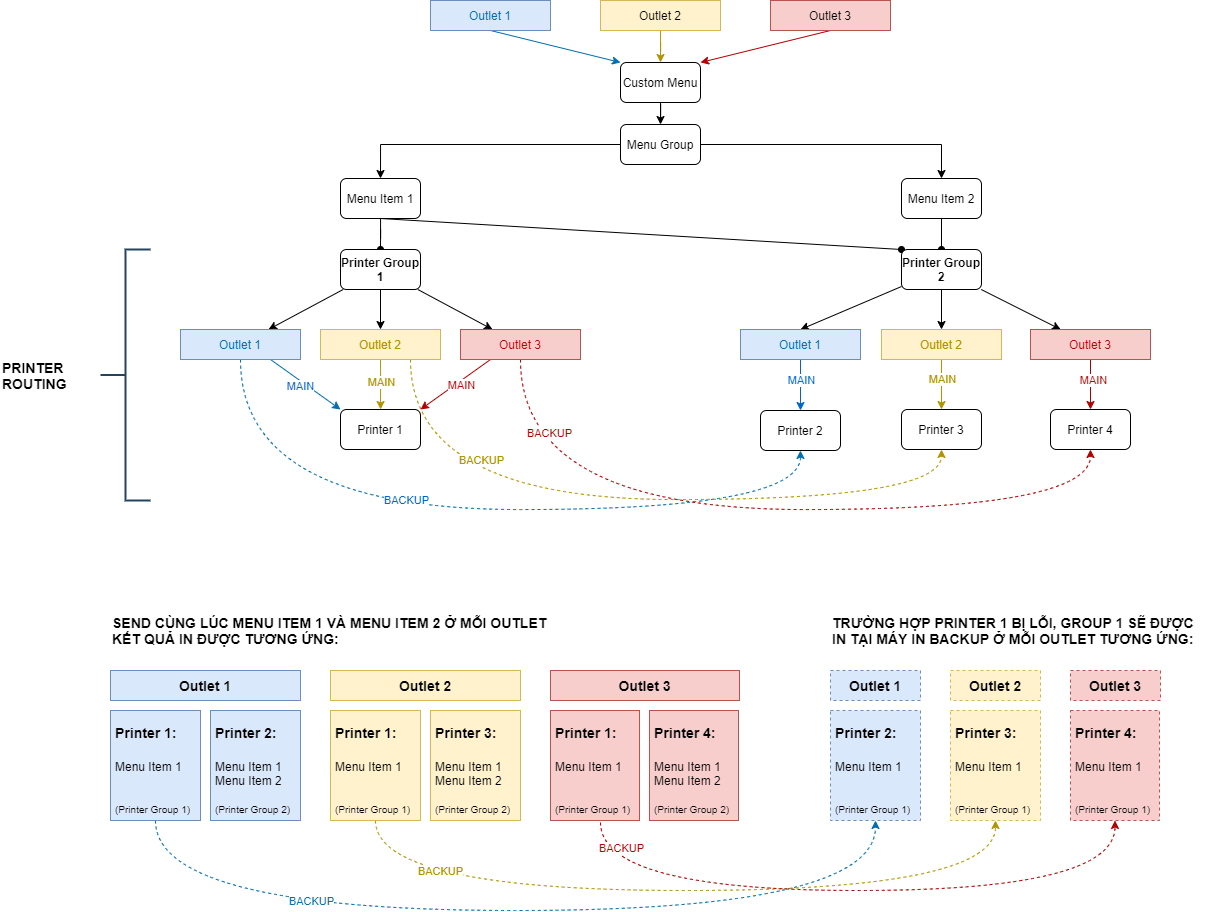
Do following steps to add new printer captain:

Step 1: FBM/Chef determines which groups of printers the dishes will be moved to, example:

  • Restaurant 1 and Room Service share an a la carte menu,

  • The bars share the same Drink List menu and are declared as follows:

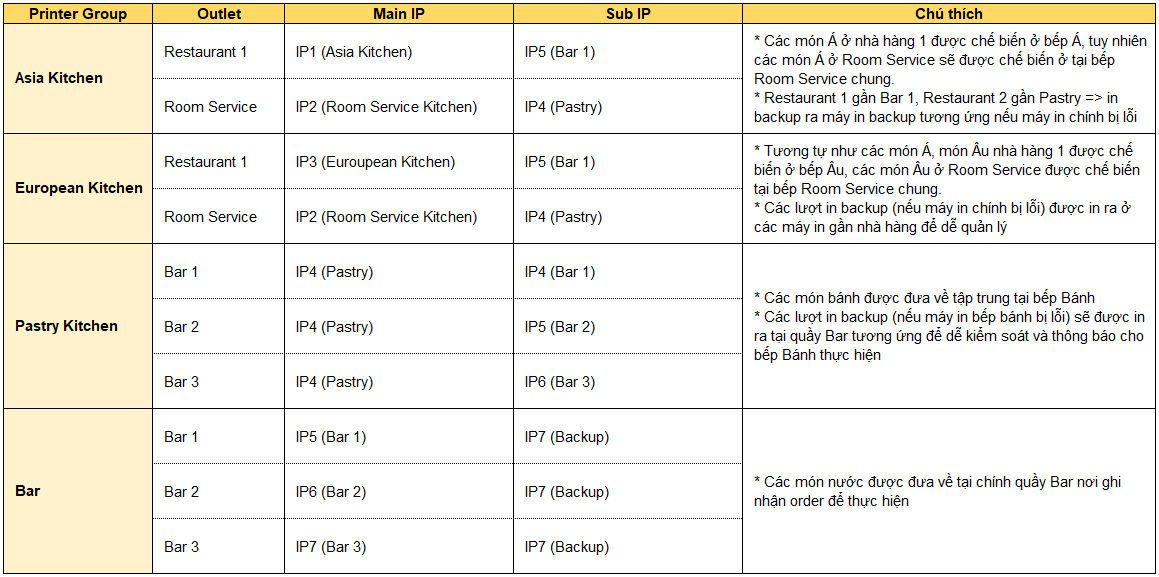
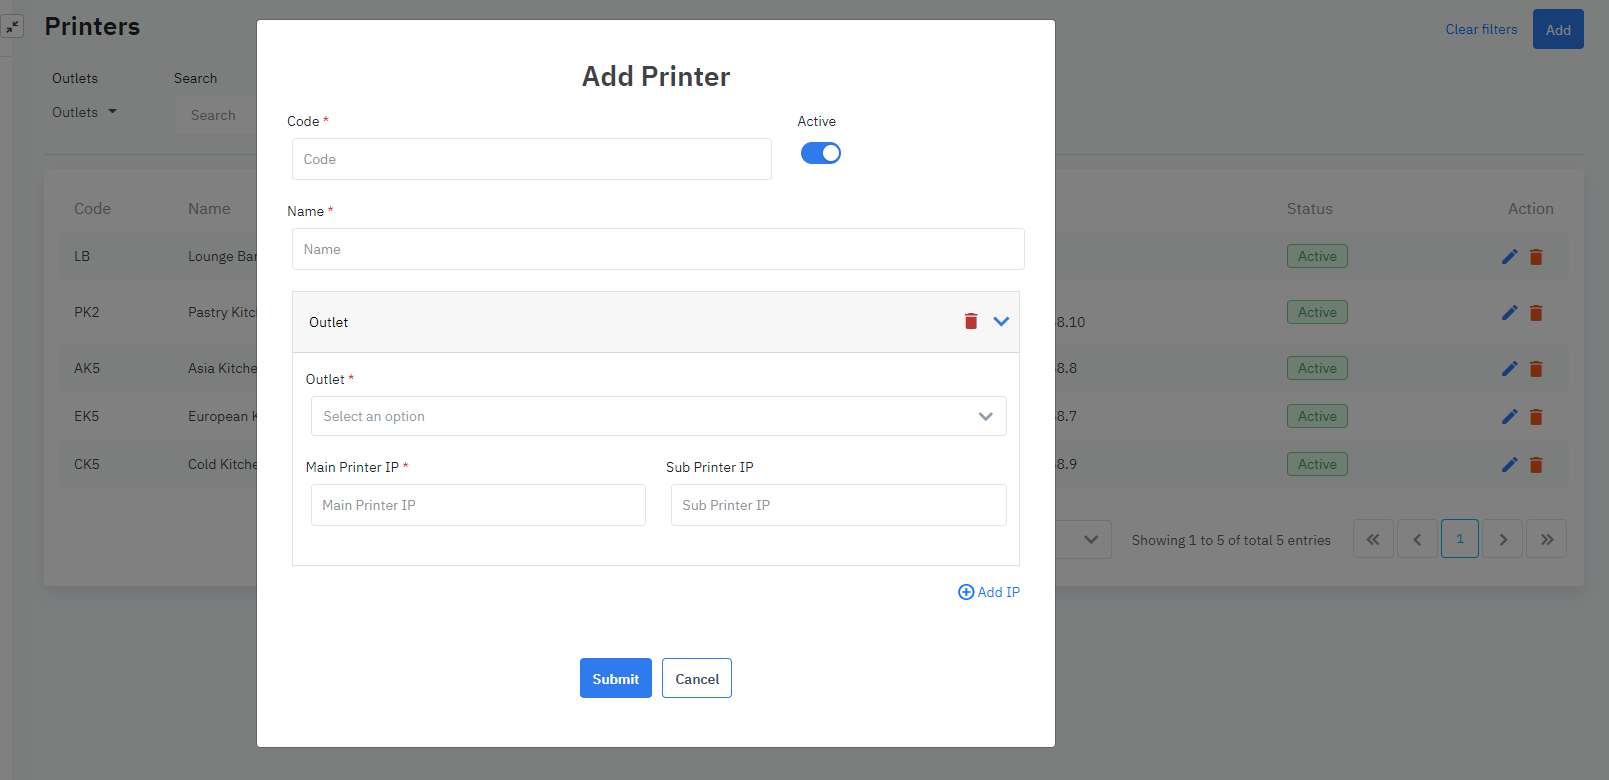
Step 2: IT identifies existing physical printers at the property, along with the corresponding IPs.

Step 3: FBM/ Chef and IT base make information declaration of printers into the system with the structure below:

  • The printer group name that was identified in step 1

  • Outlets with items belonging to this group of printers

  • The IP of the physical printers (both primary and secondary) corresponds to each group at each outlet

  • Specifically from the example in step 1:

    • Determine that there are 7 physical printers corresponding to 7 IPs

    • Perform the corresponding IP declaration for the 4 groups of printers listed in step 1 for each outlet

Action on system:

  • Click Add and enter the following information:

    • Code

    • Name

    • Status

    • Click Add IP to add Outlet and corresponding IP information

  • More function buttons in the add printer screen:

    • Collapse/ Expand

    • Delete

Remarks

  • Groups of printers will be mapped to each product in the menu of the respective outlets.

  • At each outlet, when recording the customer's dish (by performing the send command on the tablet / POS), the item will be printed to the correct printer with the IP declared to that outlet.

JavaScript errors detected

Please note, these errors can depend on your browser setup.

If this problem persists, please contact our support.