[Eng] Setup Inventory (Item, Unit)
Item Management |
|---|
The feature allows you to create and manage the category of items in the warehouse. An item can be grouped into various categories and each category can have many items. We can have diverse levels of categories. Note
|
Description |
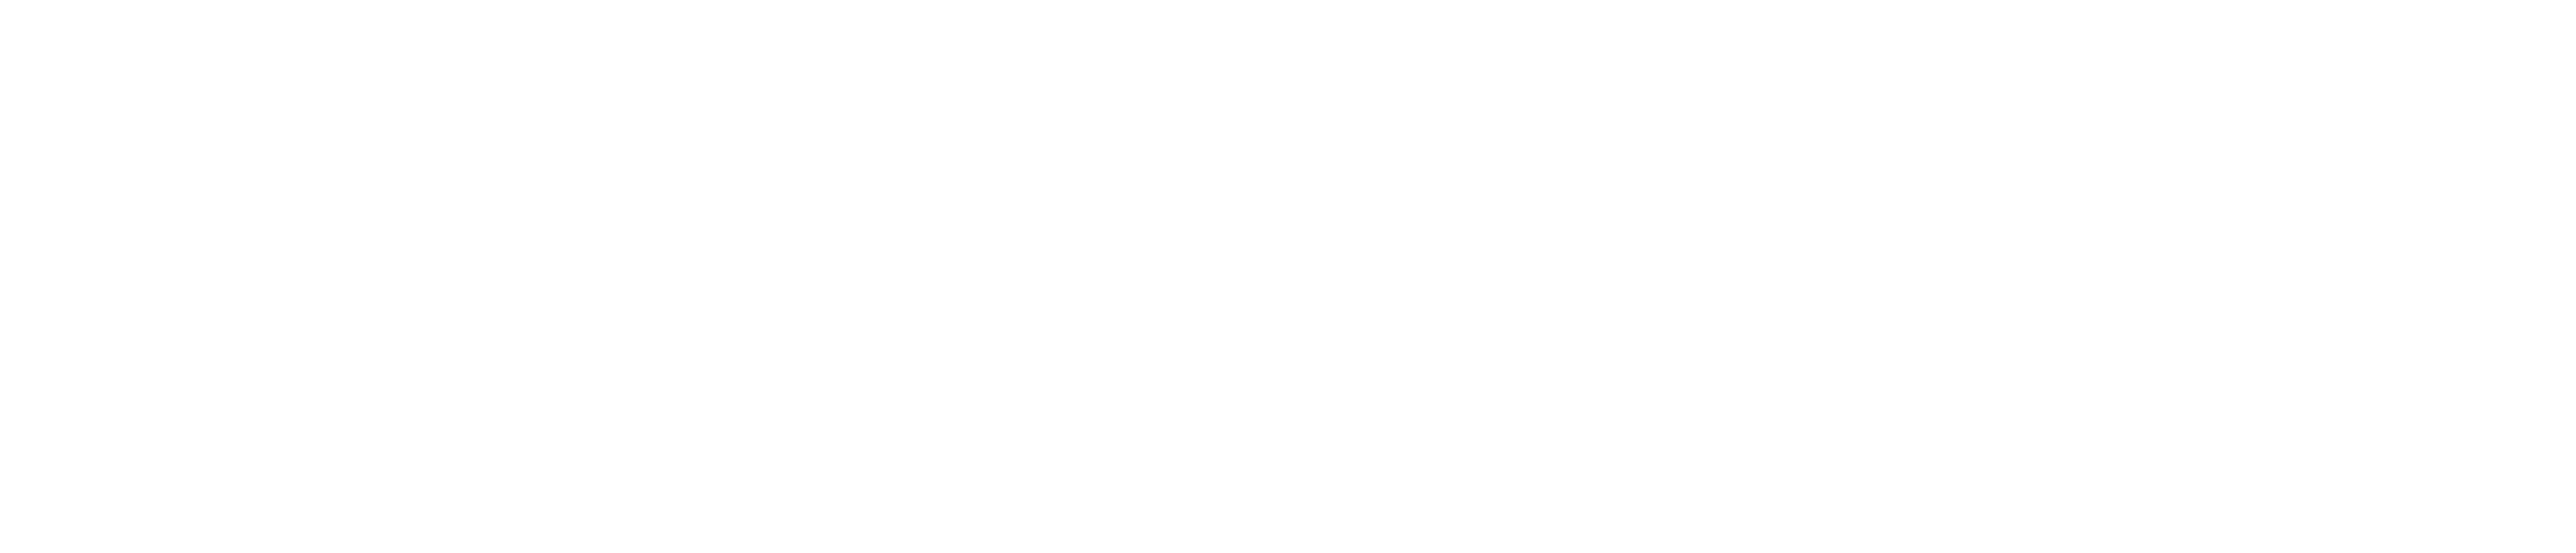
1. Set up an item
 2. Add a new item
 Note:
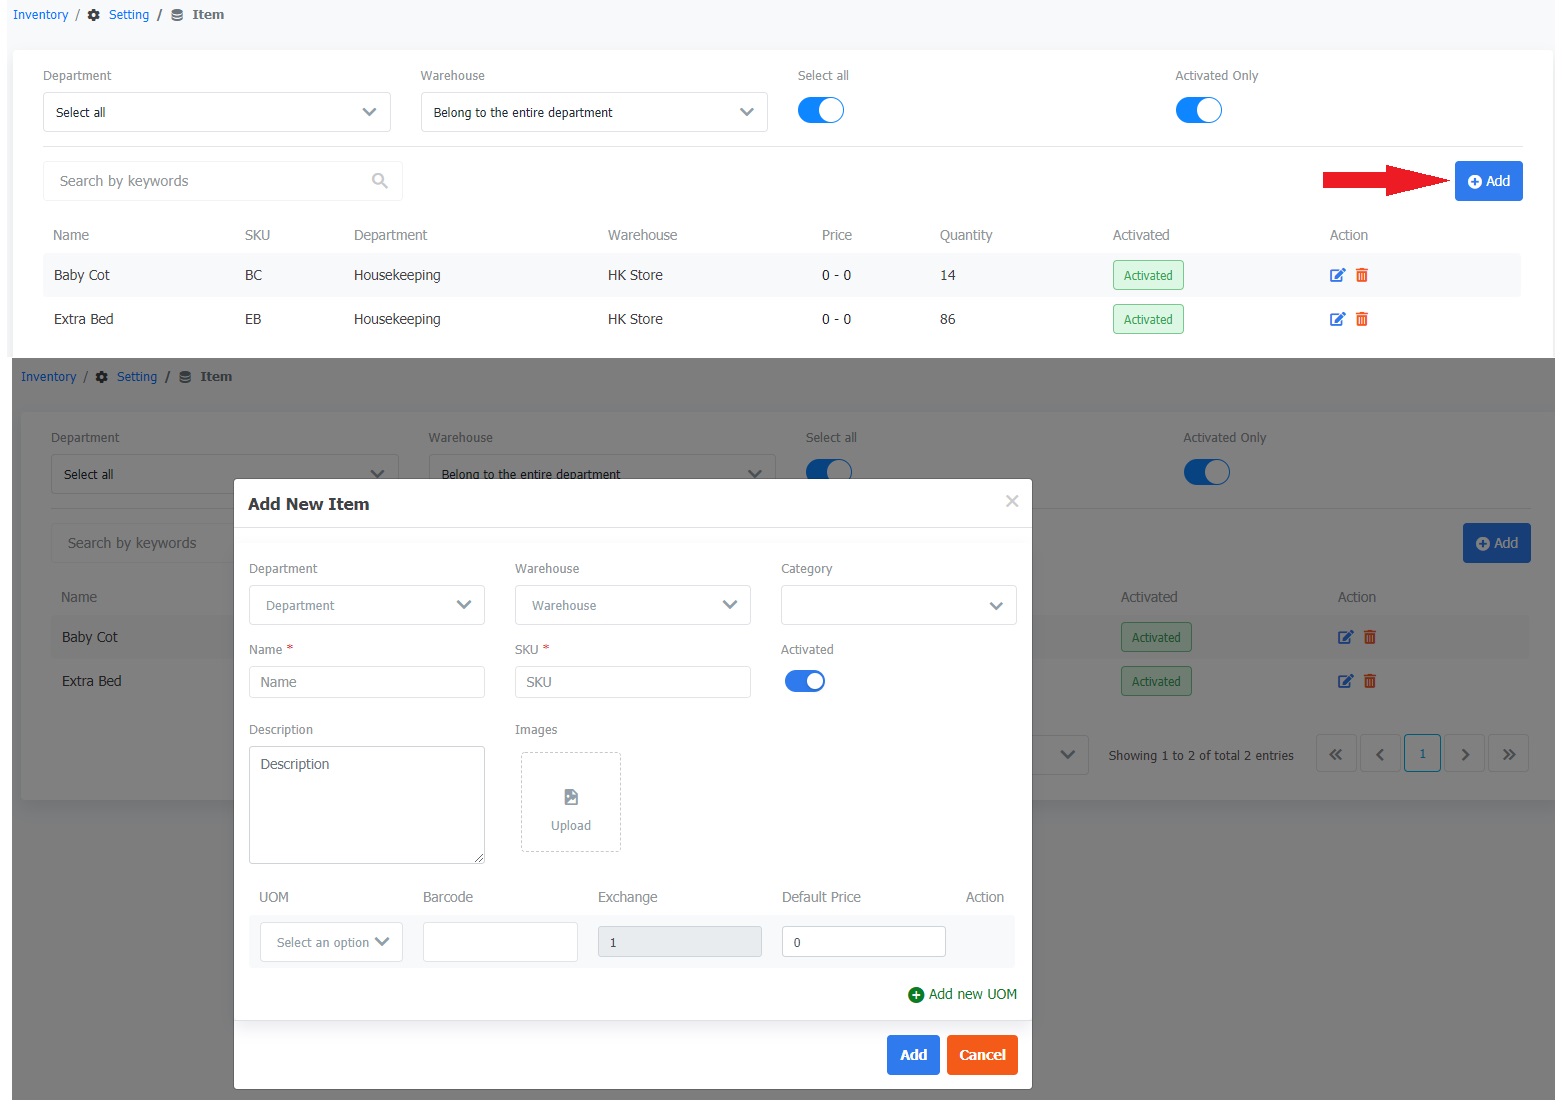
3. Edit an item
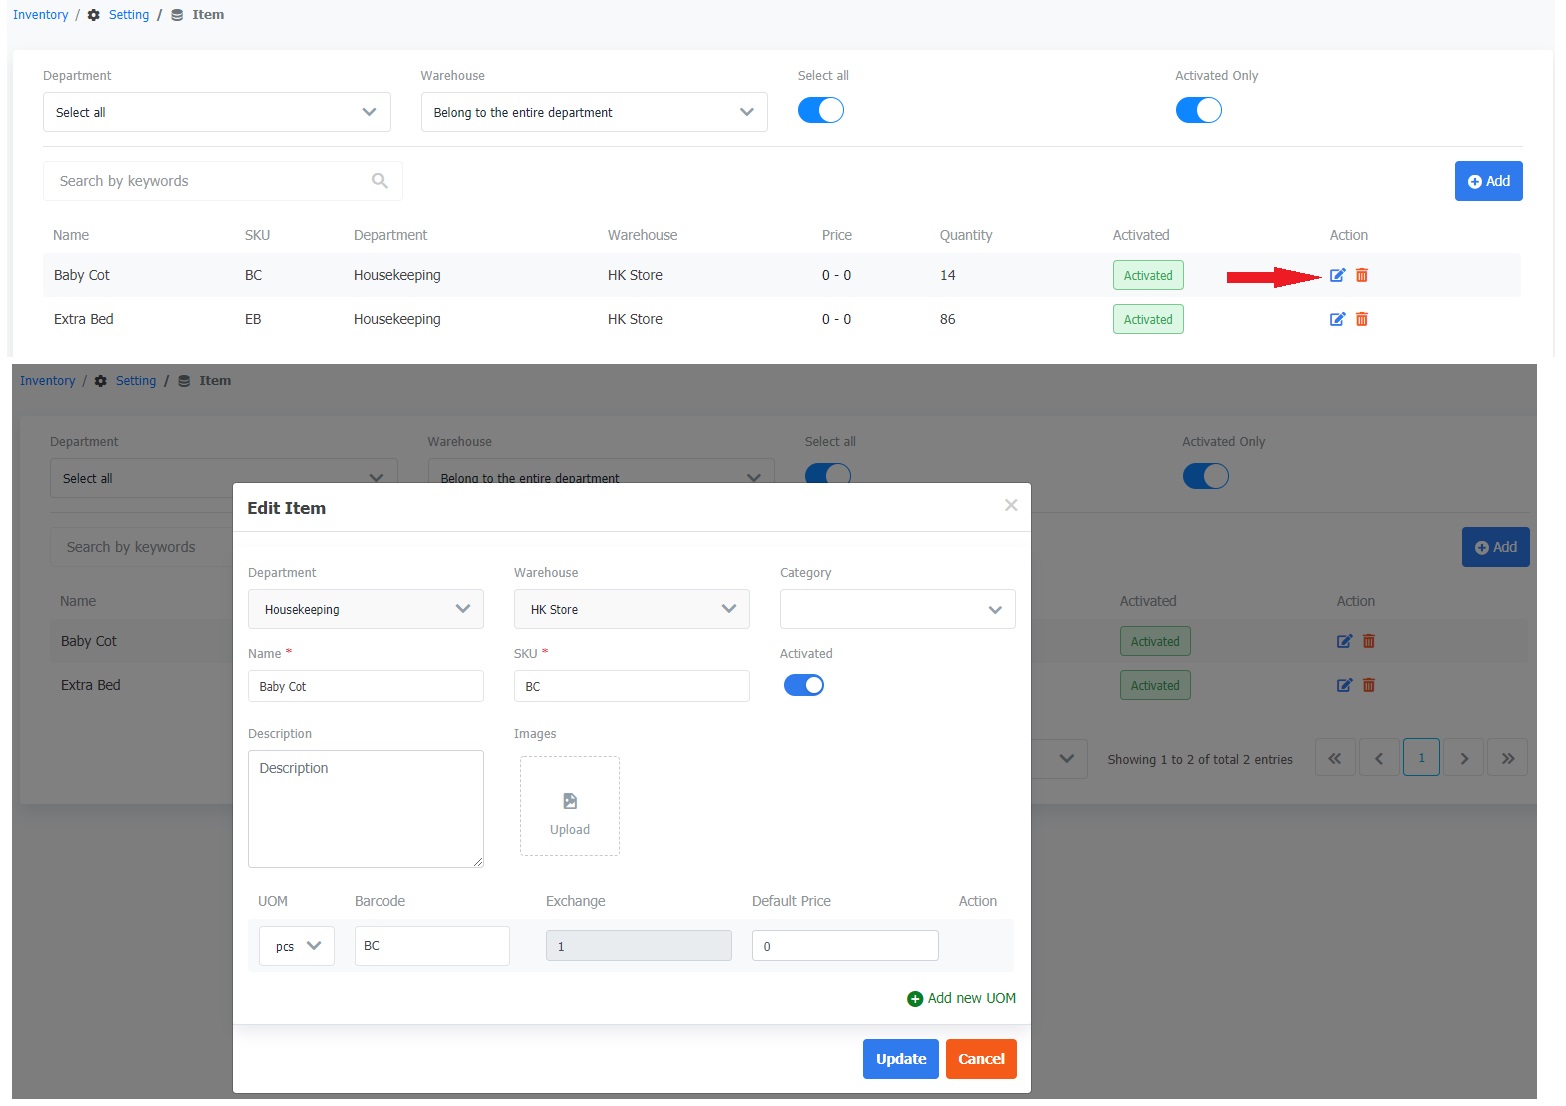 4. Delete an item
 |
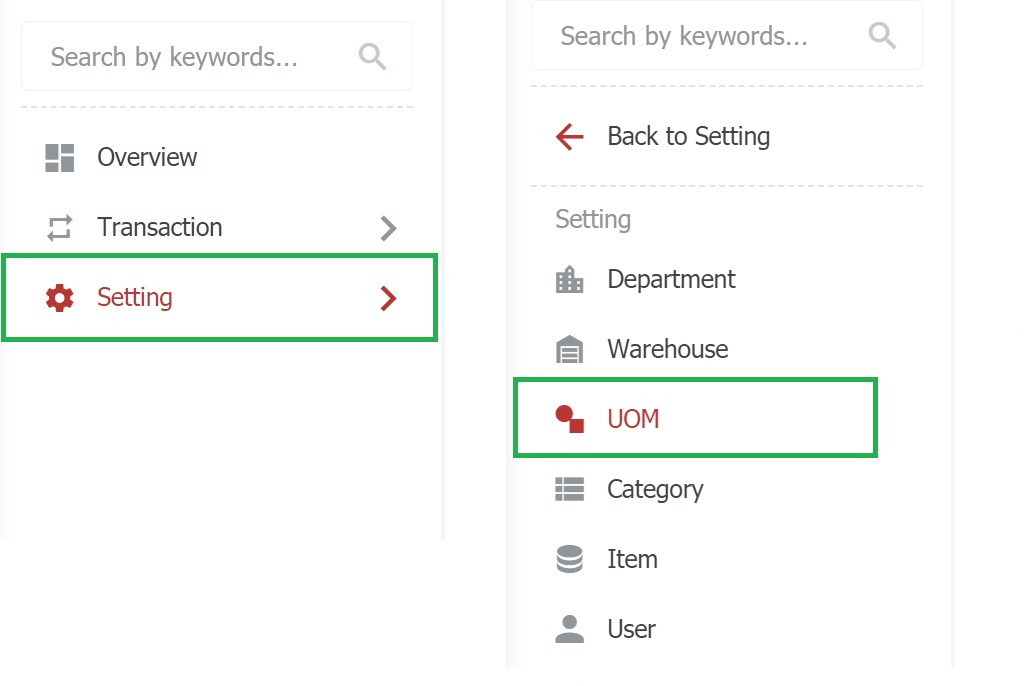
Unit Management (UOM) |
The unit can be declared at various levels:
|
Description |
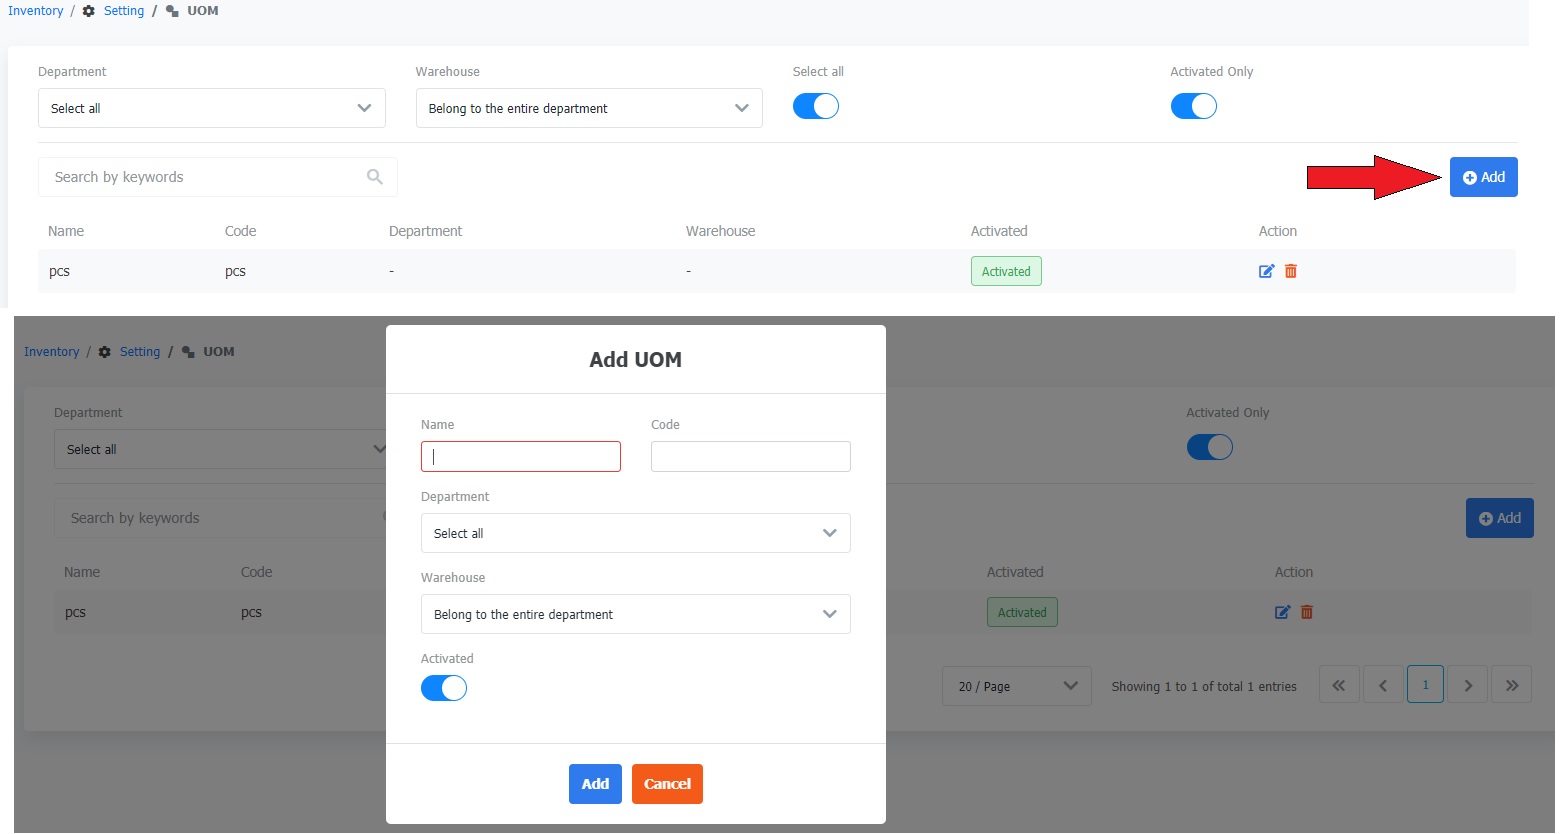
1. Set up a UOM
 2. Add a new UOM
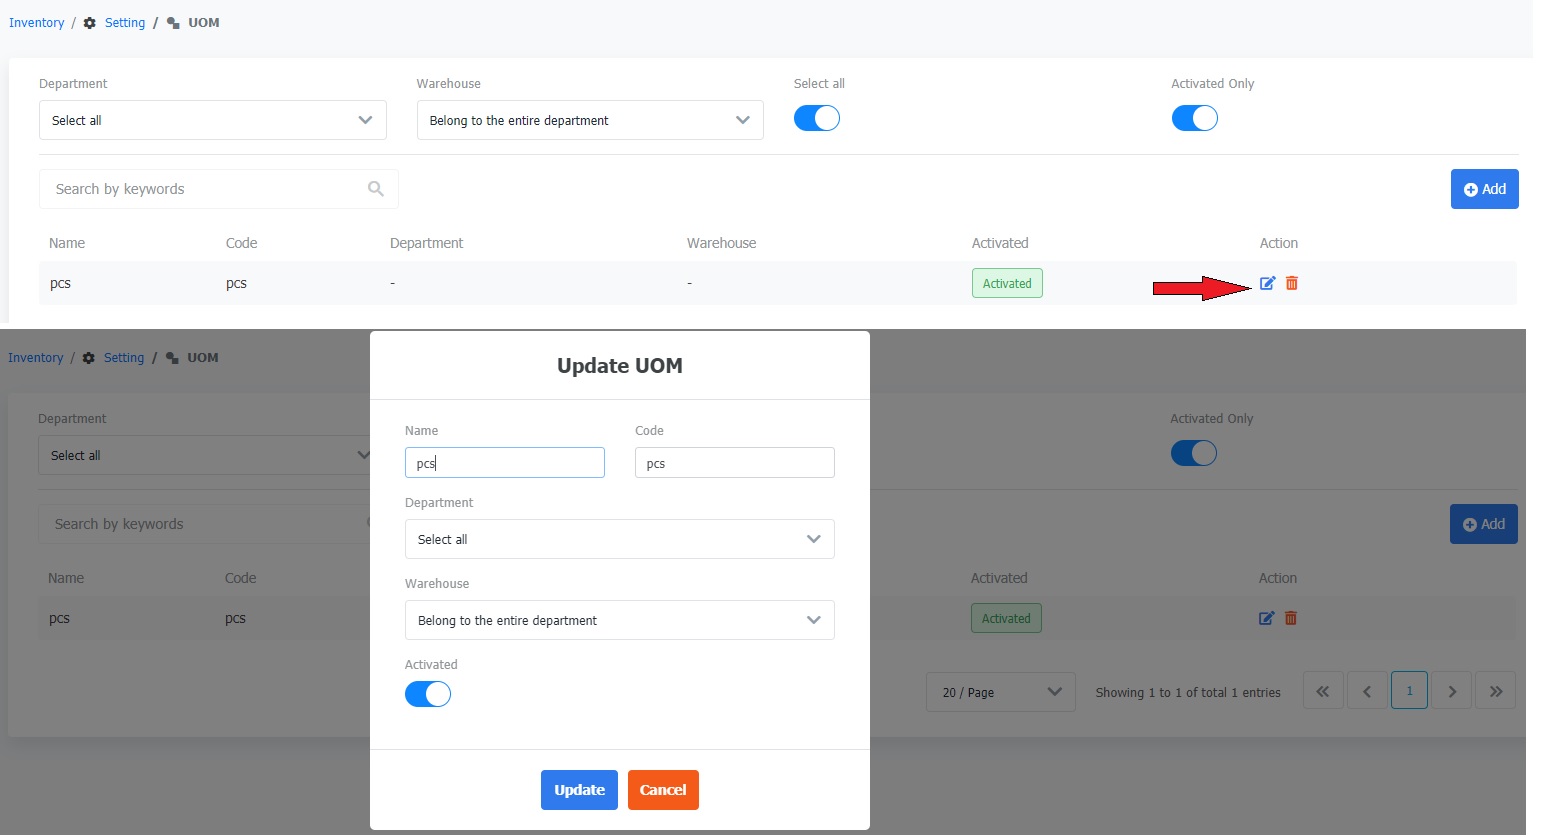
 3 - Edit a UOM
 Note
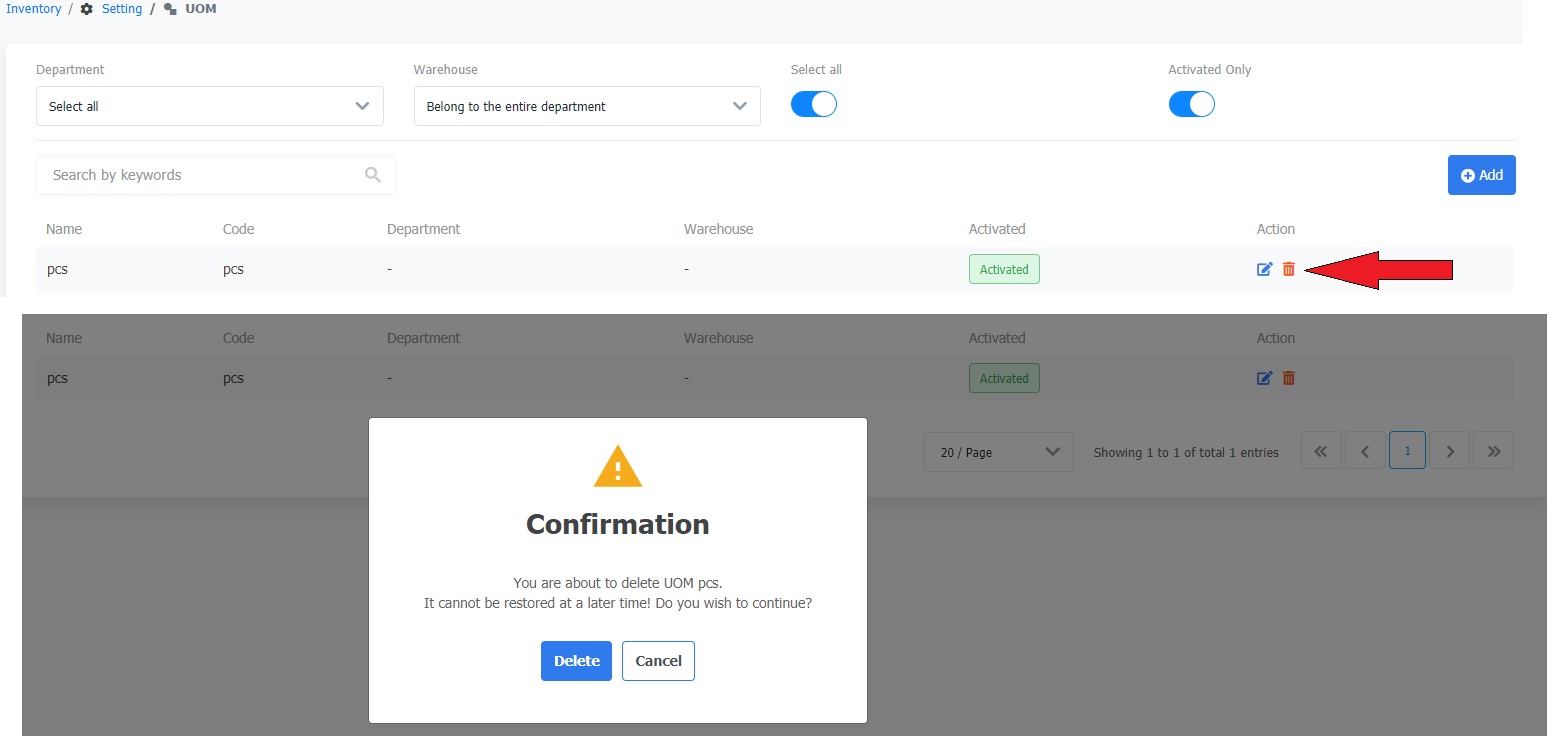
4. Delete an UOM
 |